

DIY Furniture Polish: Is your beloved furniture looking a little dull? Are you tired of spending a fortune on commercial polishes filled with questionable chemicals? I get it! There’s something incredibly satisfying about breathing new life into your cherished pieces, and that’s exactly what we’re going to do today.
For centuries, people have sought ways to protect and beautify their wooden furniture. From ancient beeswax recipes to modern concoctions, the desire to preserve these heirlooms has remained constant. Think about it – furniture isn’t just functional; it’s often a repository of memories, passed down through generations. But the store-bought stuff can be expensive and full of ingredients you can’t even pronounce! That’s where the magic of DIY comes in.
This article is your ultimate guide to creating your very own DIY Furniture Polish, using simple, natural ingredients you probably already have in your pantry. Not only will you save money, but you’ll also have complete control over what you’re putting on your furniture, ensuring a safe and healthy environment for your family. Plus, it’s incredibly rewarding to know you’ve crafted something beautiful and useful with your own two hands. So, let’s dive in and discover the secrets to a gleaming, revitalized home!
DIY Furniture Polish: Revive Your Wood with Natural Ingredients!
Hey there, fellow DIY enthusiasts! Are your wooden furniture pieces looking a little dull? Don’t rush out to buy expensive, chemical-laden polishes. I’m going to show you how to whip up your own fantastic furniture polish using simple, natural ingredients you probably already have in your kitchen. This is not only cost-effective but also much gentler on your furniture and the environment. Let’s get started!
What You’ll Need: Gathering Your Supplies
Before we dive in, let’s make sure you have everything you need. This will save you time and frustration later. Here’s your checklist:
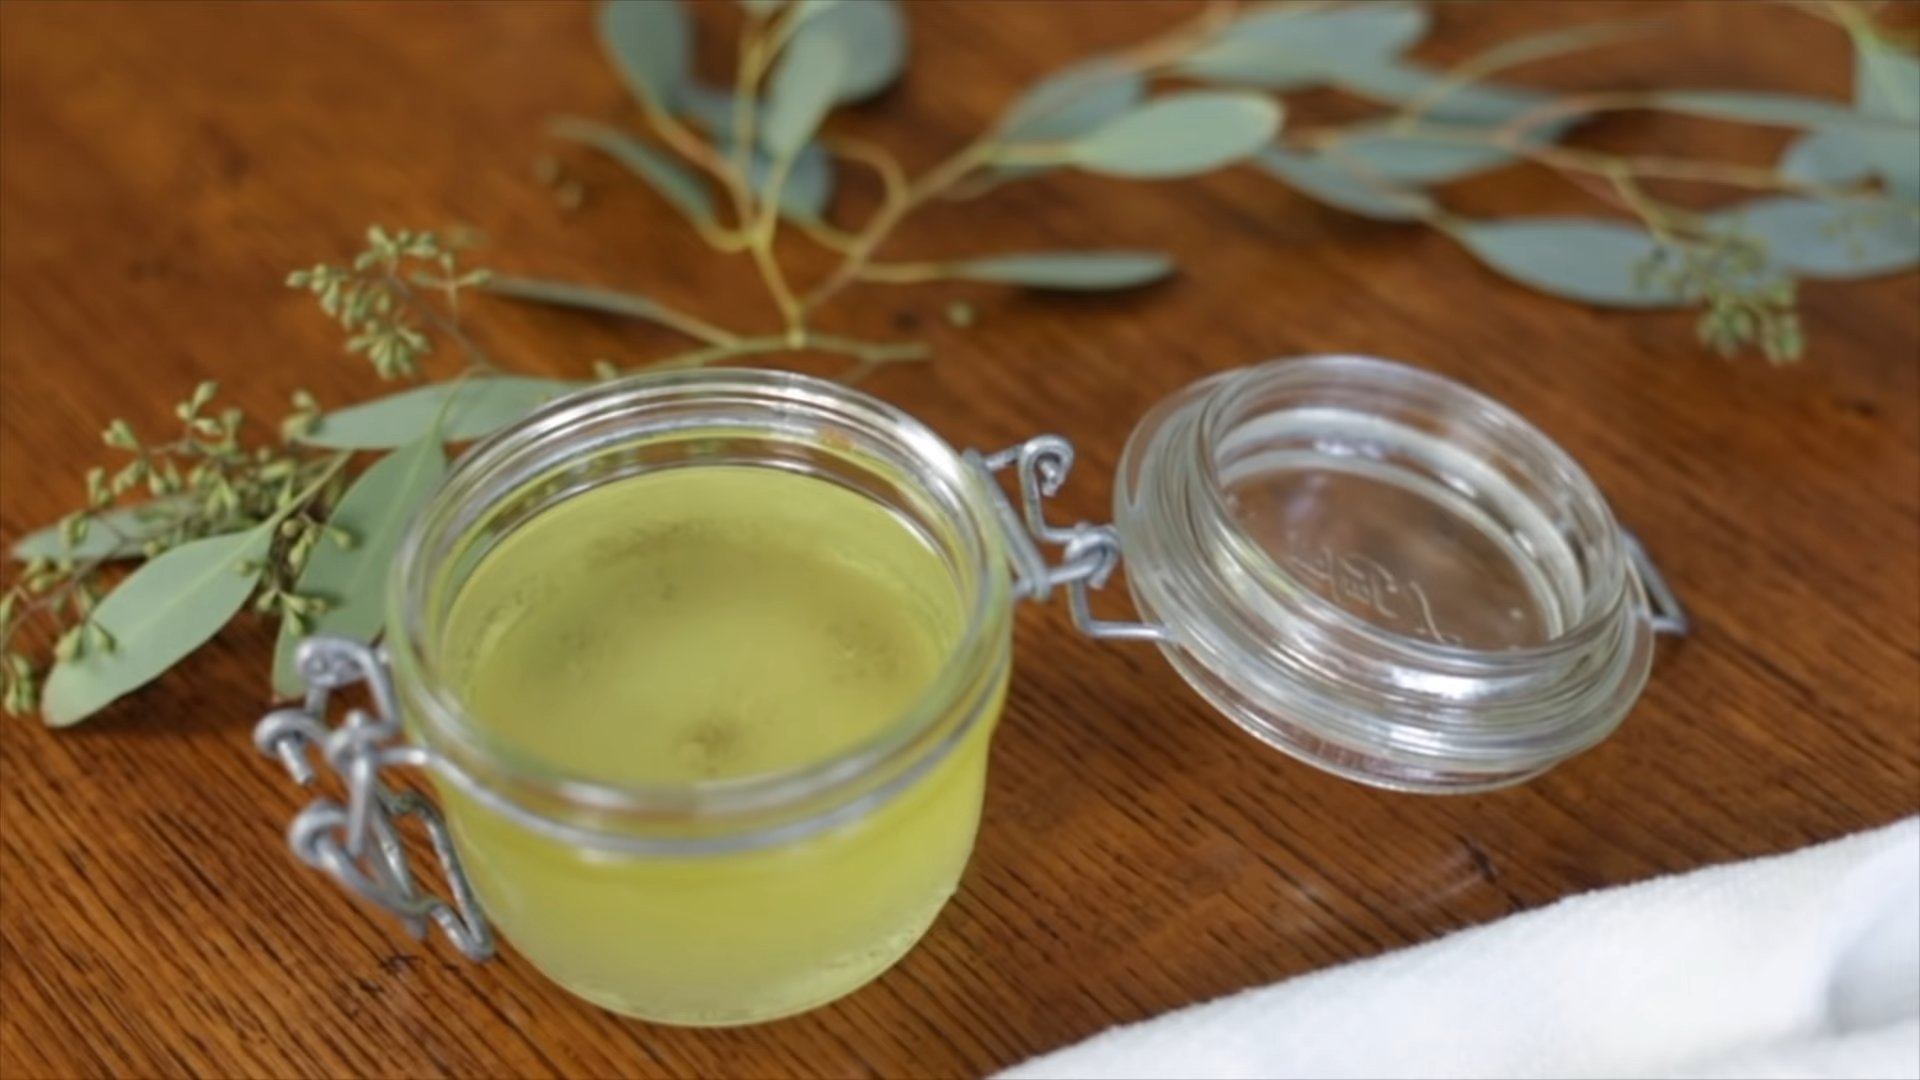
* **Olive Oil:** This is the base of our polish, providing moisture and shine. Extra virgin olive oil works great, but any kind will do.
* **Lemon Juice (or White Vinegar):** This acts as a cleaner and helps to cut through any grime or buildup on your furniture. Lemon juice also adds a lovely fresh scent.
* **Essential Oil (Optional):** If you want to add a specific fragrance, a few drops of your favorite essential oil will do the trick. Lavender, orange, or cedarwood are excellent choices for wood furniture.
* **Spray Bottle:** A clean, empty spray bottle is essential for easy application.
* **Soft Cloths (Microfiber Recommended):** You’ll need at least two soft cloths – one for applying the polish and one for buffing. Microfiber cloths are ideal because they won’t scratch the wood.
* **Measuring Spoons or Cups:** For accurate measurements.
* **Bowl (Optional):** If you prefer to mix the ingredients in a bowl before transferring them to the spray bottle.
Mixing Your Homemade Furniture Polish: The Recipe
Now for the fun part! This recipe is super simple and easy to adjust to your liking. I’ll give you the basic proportions, and you can tweak them based on your furniture’s needs.
1. **Combine the Ingredients:** In your spray bottle (or bowl, if you’re using one), combine the following:
* 1/2 cup olive oil
* 1/4 cup lemon juice (or white vinegar)
* 10-15 drops of essential oil (optional)
2. **Mix Well:** If you’re using a bowl, whisk the ingredients together thoroughly. If you’re mixing directly in the spray bottle, close the lid tightly and shake vigorously for at least 30 seconds to ensure everything is well combined.
3. **Test on an Inconspicuous Area:** Before applying the polish to your entire piece of furniture, it’s always a good idea to test it on a small, hidden area first. This will allow you to see how the polish reacts with the wood and ensure that it doesn’t cause any discoloration or damage. Apply a small amount of the polish to the test area, let it sit for a few minutes, and then wipe it off with a clean cloth. Check the area for any adverse reactions before proceeding.
Applying the Polish: Bringing Back the Shine
Okay, you’ve got your polish ready, and you’ve done your test spot. Now it’s time to bring that furniture back to life!
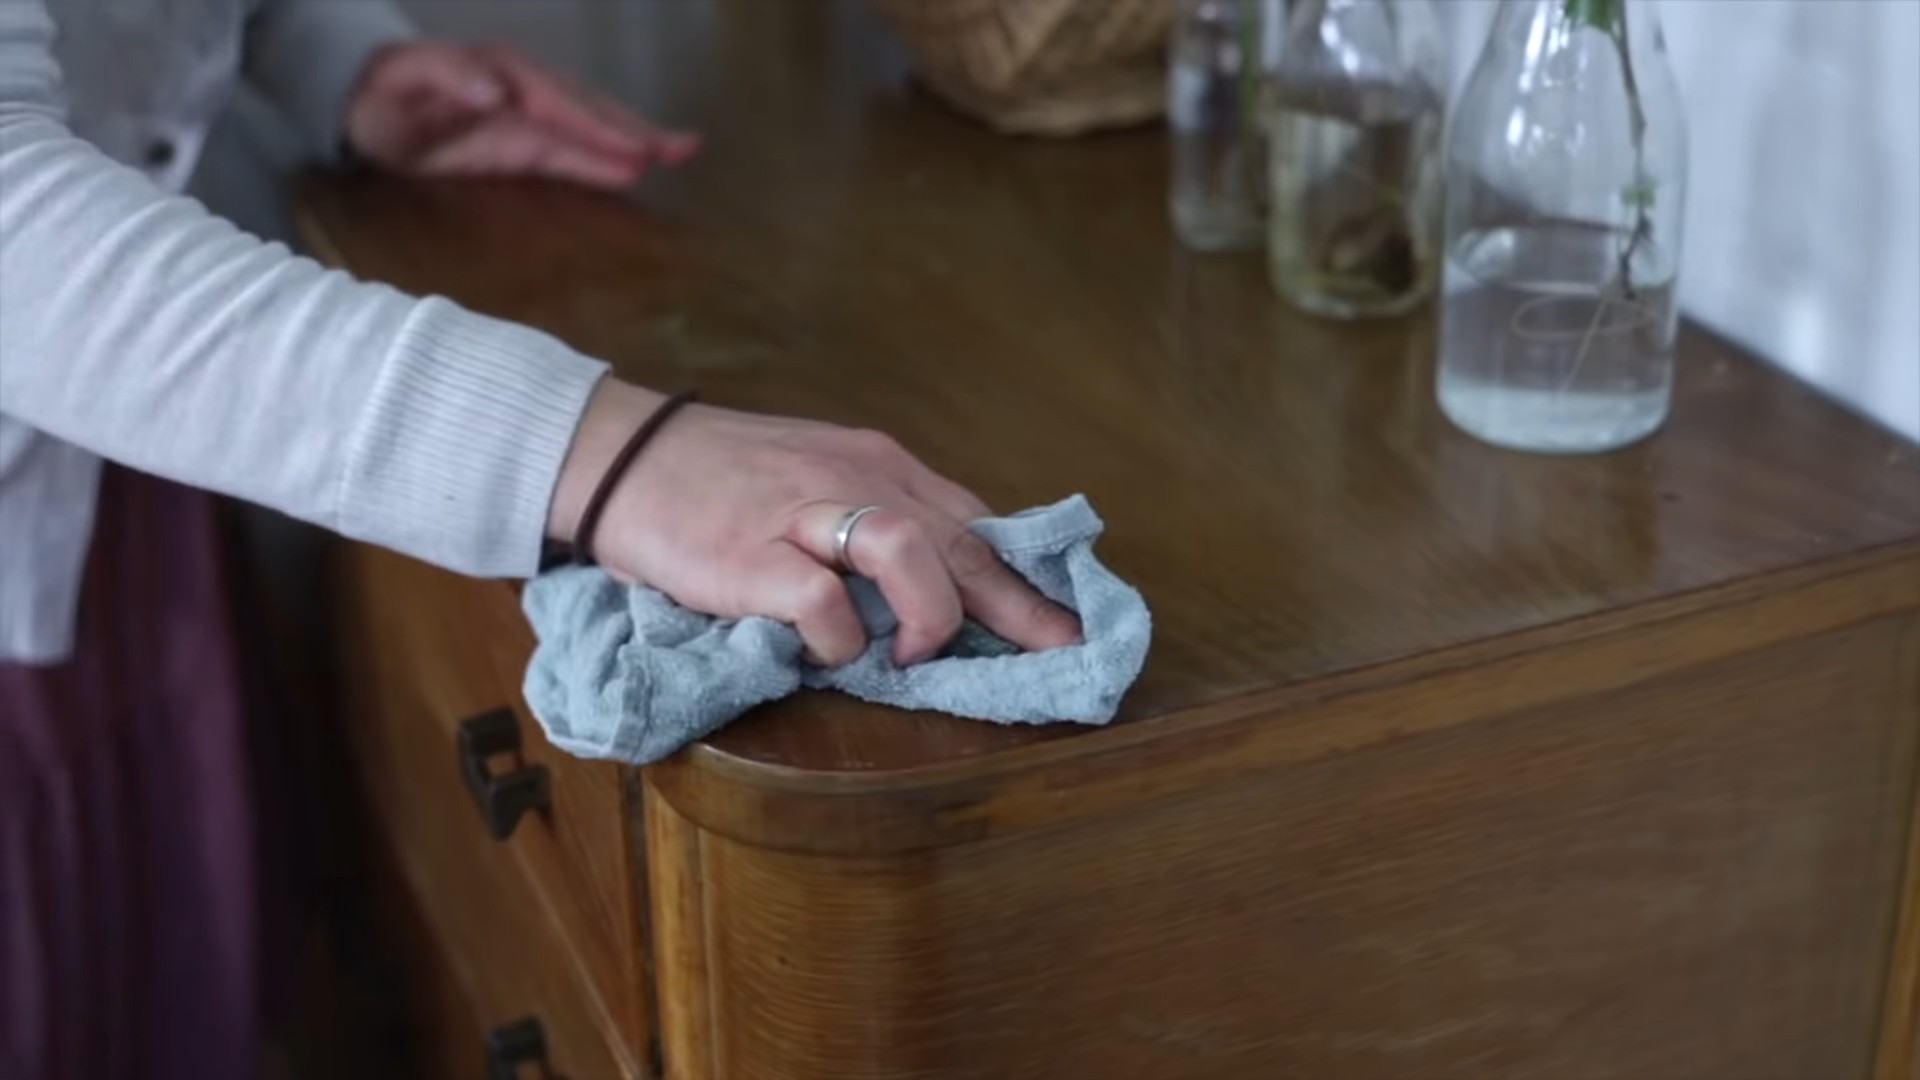
1. **Dust the Furniture:** Before applying any polish, it’s crucial to remove any dust or debris from the surface of your furniture. Use a clean, dry cloth or a duster to thoroughly clean the entire piece. This will prevent the polish from trapping dust and creating a sticky residue.
2. **Spray Lightly:** Lightly spray the furniture polish onto a small section of the furniture. Avoid spraying too much at once, as this can lead to a buildup of polish and make it difficult to buff.
3. **Wipe with a Soft Cloth:** Immediately after spraying, use a clean, soft cloth to wipe the polish into the wood in a circular motion. Be sure to cover the entire surface evenly.
4. **Buff to a Shine:** After wiping the polish into the wood, use a clean, dry cloth to buff the surface until it shines. This will remove any excess polish and leave your furniture looking beautiful and glossy.
5. **Repeat as Needed:** Continue spraying, wiping, and buffing in small sections until you’ve polished the entire piece of furniture.
Tips and Tricks for Best Results: Getting the Most Out of Your Polish
Here are a few extra tips to help you achieve the best possible results with your homemade furniture polish:
* **Use Sparingly:** A little goes a long way! Over-applying the polish can lead to a sticky or greasy residue.
* **Buff Thoroughly:** Buffing is key to achieving a beautiful shine. Don’t skip this step!
* **Reapply as Needed:** Depending on the condition of your furniture, you may need to reapply the polish every few weeks or months.
* **Avoid Using on Unsealed Wood:** This polish is best suited for sealed or finished wood surfaces. Avoid using it on raw or unsealed wood, as it may absorb too much of the oil and become sticky.
* **Store Properly:** Store your homemade furniture polish in a cool, dark place. It should last for several months.
* **Adjust the Recipe:** Feel free to experiment with the recipe to find the perfect balance for your furniture. If you find that the polish is too oily, add a little more lemon juice or vinegar. If it’s too drying, add a little more olive oil.
* Always test on an inconspicuous area first! I can’t stress this enough. Different woods react differently.
* Don’t use on antique furniture without consulting an expert. Some antique finishes are delicate and may be damaged by even natural polishes.
* For stubborn stains, try a paste of baking soda and water before polishing. Gently rub the paste onto the stain, let it sit for a few minutes, and then wipe it off with a damp cloth.
* Regular dusting is key to maintaining your furniture’s shine. Dust your furniture at least once a week to prevent buildup and keep it looking its best.
Troubleshooting: Addressing Common Issues
Sometimes, things don’t go exactly as planned. Here are a few common issues you might encounter and how to fix them:
* **Sticky Residue:** If your furniture feels sticky after polishing, you’ve probably used too much polish. Try buffing the surface again with a clean, dry cloth. If that doesn’t work, you can try wiping the surface with a damp cloth and then buffing it dry.
* **Dull Finish:** If your furniture doesn’t shine after polishing, you may not have buffed it enough. Try buffing the surface again with a clean, dry cloth, using a little more pressure.
* **Discoloration:** If you notice any discoloration after applying the polish, stop using it immediately. This could be a sign that the polish is reacting negatively with the wood. Consult with a furniture refinishing expert for advice.
* Smell is too strong: If the smell of the lemon juice or vinegar is too strong, reduce the amount in the recipe next time. You can also try adding more essential oil to mask the scent.
* Polish separates: This is normal, especially if the polish sits for a while. Just shake the bottle well before each use to re-emulsify the ingredients.
Choosing the Right Essential Oil: Scent and Benefits
While essential oils are optional, they can add a lovely fragrance and even provide some beneficial properties to your furniture polish. Here are a few of my favorite essential oils for wood furniture:
* **Lavender:** Lavender oil has a calming and relaxing scent. It also has antiseptic properties, which can help to protect your furniture from bacteria.
* **Orange:** Orange oil has a bright and uplifting scent. It also has degreasing properties, which can help to remove stubborn stains.
* **Cedarwood:** Cedarwood oil has a warm and woody scent. It also has insect-repellent properties, which can help to protect your furniture from pests.
* **Lemon:** Lemon oil has a fresh and clean scent. It also has antibacterial properties and can help to brighten the wood.
* **Tea Tree:** Tea tree oil has antiseptic and antifungal properties, making it a good choice for furniture that is exposed to moisture or humidity.
When choosing an essential oil, be sure to select a high-quality, pure oil. Avoid using synthetic fragrances, as they can be harmful to your furniture and your health.
Alternative Recipes: Exploring Different Options
While the olive oil and lemon juice recipe is my go-to, there are other variations you can try. Here are a couple of alternatives:
* **Beeswax Polish:** Melt 1/4 cup of beeswax with 1 cup of olive oil. Let it cool and solidify. Apply a small amount to your furniture and buff to a shine. This creates a more protective layer.
* **Coconut Oil Polish:** Substitute coconut oil for olive oil in the original recipe. Coconut oil has a pleasant scent and can also help to moisturize the wood. However, be careful not to use too much, as it can be quite greasy.
Remember to always test any new recipe on an inconspicuous area first!
Safety Precautions:
Conclusion
So, there you have it! Ditching the store-bought stuff and embracing this DIY furniture polish is more than just a cost-effective move; it’s a step towards a healthier home and a more sustainable lifestyle. Think about it: no more harsh chemicals lingering in the air, no more mysterious ingredients you can’t pronounce. Just the gentle, nourishing power of natural oils and a touch of lemon to bring out the natural beauty of your wood furniture.
This isn’t just about saving money, although that’s certainly a perk. It’s about knowing exactly what you’re putting on your furniture and into your home environment. It’s about creating a polish that’s gentle enough for even your most cherished antique pieces, yet effective enough to tackle everyday dust and grime.
But the best part? The versatility! Feel free to experiment with different essential oils to create a scent that truly speaks to you. Lavender for a calming aroma, orange for a burst of energy, or cedarwood for a classic, woodsy fragrance – the possibilities are endless. You can also adjust the ratio of olive oil to vinegar depending on the specific needs of your furniture. For drier wood, you might want to increase the olive oil content for extra hydration. For furniture prone to fingerprints, a slightly higher vinegar content can help cut through grease.
And don’t limit yourself to just furniture! This DIY furniture polish works wonders on wood trim, doors, and even some types of wood flooring (always test in an inconspicuous area first!). It’s a truly multi-purpose solution for keeping your home looking its best.
We understand that trying something new can sometimes feel daunting, but trust us, this is one DIY project that’s incredibly simple and rewarding. The satisfaction of creating your own effective and eco-friendly cleaning product is truly unmatched.
So, we wholeheartedly encourage you to give this DIY furniture polish a try. Gather your ingredients, mix them up, and prepare to be amazed by the results. Your furniture will thank you, your home will smell divine, and you’ll feel good knowing you’re making a conscious choice for a healthier and more sustainable lifestyle.
Once you’ve given it a whirl, we’d absolutely love to hear about your experience! Share your photos, tips, and variations in the comments below. Let’s build a community of DIY enthusiasts who are passionate about creating beautiful and healthy homes, one piece of furniture at a time. What essential oil blend did you try? Did you adjust the recipe to suit your specific needs? We’re eager to learn from your experiences and share them with others. Let’s make this the go-to resource for all things DIY furniture care!
Frequently Asked Questions (FAQ)
What kind of oil should I use for my DIY furniture polish?
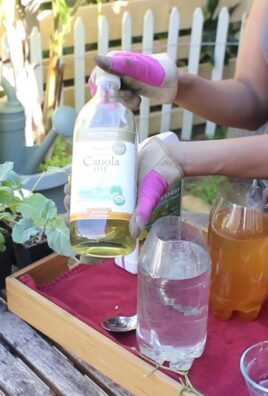
We recommend using olive oil as the base for your DIY furniture polish. It’s readily available, affordable, and provides excellent moisturizing properties for wood. However, you can also experiment with other oils like almond oil, jojoba oil, or even coconut oil (melted). Keep in mind that some oils, like coconut oil, may solidify at cooler temperatures, so you might need to adjust the recipe accordingly. Avoid using vegetable oil, as it can leave a sticky residue over time.
Can I use this DIY furniture polish on all types of wood?
While this DIY furniture polish is generally safe for most types of wood, it’s always a good idea to test it in an inconspicuous area first, especially on antique or delicate pieces. Avoid using it on unfinished wood, as the oil can stain it. Also, be cautious when using it on furniture with a very high gloss finish, as the vinegar could potentially dull the shine. If you’re unsure, consult with a furniture restoration professional.
How often should I use this DIY furniture polish?
The frequency of polishing depends on the type of furniture and how often it’s used. For furniture that gets a lot of wear and tear, you might want to polish it every few weeks. For less frequently used pieces, polishing every few months should suffice. Always dust your furniture before polishing to remove any loose dirt or debris.
What if my furniture has a build-up of old polish?
If your furniture has a build-up of old polish, you’ll need to remove it before applying your DIY furniture polish. You can do this by gently wiping the furniture with a soft cloth dampened with mineral spirits or a commercial furniture cleaner designed to remove old polish. Always follow the manufacturer’s instructions and test in an inconspicuous area first. Once the old polish is removed, allow the furniture to dry completely before applying your DIY polish.
Can I use this DIY furniture polish on leather furniture?
No, this DIY furniture polish is specifically formulated for wood furniture and is not suitable for leather. Leather requires specialized cleaning and conditioning products to maintain its suppleness and prevent cracking. Using this polish on leather could damage the surface.
How long will the DIY furniture polish last?
When stored in an airtight container in a cool, dark place, your DIY furniture polish should last for several months. However, it’s always a good idea to check for any signs of spoilage, such as a rancid smell or discoloration, before using it. If you notice any of these signs, discard the polish and make a fresh batch.
What if I don’t have essential oils? Can I still make the polish?
Yes, you can absolutely make the polish without essential oils. The essential oils are primarily for fragrance and can be omitted without affecting the cleaning and polishing properties of the mixture. The olive oil and vinegar will still effectively clean and moisturize your furniture.
My furniture is very dirty. Will this DIY polish be effective?
For heavily soiled furniture, you might need to pre-clean it before applying the DIY polish. You can do this by wiping it down with a damp cloth and a mild soap solution. Be sure to rinse the furniture thoroughly and allow it to dry completely before polishing. For stubborn stains, you might need to use a specialized furniture cleaner.
How do I apply the DIY furniture polish?
To apply the DIY furniture polish, simply dampen a soft cloth with a small amount of the polish and gently rub it onto the furniture in a circular motion. Be sure to work in small sections and avoid applying too much polish at once. Once you’ve polished the entire piece of furniture, use a clean, dry cloth to buff it to a shine.
Is vinegar safe for wood furniture?
Yes, vinegar is safe for wood furniture when used in a diluted form, as in this DIY furniture polish recipe. The vinegar helps to cut through grease and grime, leaving your furniture clean and shiny. However, it’s important to use it sparingly and to always dilute it with olive oil. Avoid using undiluted vinegar on wood furniture, as it can damage the finish.

Leave a Comment