

Grow Mustard Greens, and unlock a world of peppery flavor right in your backyard! Have you ever dreamed of snipping fresh, vibrant greens just moments before adding them to your salad or stir-fry? Well, dream no more! This DIY guide is your passport to cultivating these delicious and nutritious leafy vegetables with ease.
Mustard greens have a rich history, dating back thousands of years. Originating in the Himalayan region, they’ve been a staple in Asian, African, and Southern American cuisines. They were even brought to America by European settlers! For centuries, these greens have been valued not only for their distinctive taste but also for their impressive health benefits, packed with vitamins and antioxidants.
But why should you bother to grow mustard greens yourself? In today’s world, where fresh, organic produce can be expensive and sometimes hard to find, having your own supply is a game-changer. Plus, growing your own food is incredibly rewarding! Imagine the satisfaction of nurturing a tiny seed into a thriving plant, knowing exactly where your food comes from and that it’s free from harmful chemicals. This DIY guide will provide you with simple, effective tricks and hacks to ensure a bountiful harvest, even if you’re a complete beginner. Let’s get started and transform your garden (or even your windowsill!) into a mustard green paradise!
Growing Mustard Greens: A DIY Guide for a Spicy Harvest
Mustard greens! I absolutely love adding these peppery leaves to my salads, stir-fries, and even smoothies (don’t knock it ’til you try it!). And the best part? They’re super easy to grow yourself, even if you don’t have a huge garden. This guide will walk you through everything you need to know to cultivate your own delicious mustard greens.
Choosing Your Mustard Green Variety
Before we get our hands dirty, let’s talk about the different types of mustard greens. There’s a whole world beyond the standard variety!
* Southern Giant Curled: This is a classic, reliable choice. It’s known for its large, frilly leaves and robust flavor.
* Florida Broadleaf: A milder option, perfect if you’re not a fan of intense spiciness. It has smooth, broad leaves.
* Red Giant: Adds a pop of color to your garden and your plate! It has a slightly milder flavor than Southern Giant Curled.
* Osaka Purple: Another visually stunning variety with deep purple leaves and a slightly sweet, peppery taste.
* Mizuna: While technically a Japanese mustard green, it’s often included in mustard green mixes. It has a delicate, slightly peppery flavor and feathery leaves.
I personally love growing a mix of varieties for a diverse flavor profile. Experiment and see which ones you like best!
Materials You’ll Need
Okay, let’s gather our supplies. Here’s what you’ll need to get started:
* Mustard Green Seeds: Choose your favorite variety (or varieties!).
* Potting Soil (if growing in containers): A well-draining potting mix is essential.
* Garden Soil (if growing in the ground): Amend your soil with compost or other organic matter to improve drainage and fertility.
* Containers (optional): If you’re growing in containers, choose pots that are at least 6 inches deep.
* Watering Can or Hose: For keeping your plants hydrated.
* Fertilizer (optional): A balanced fertilizer can help boost growth.
* Gardening Gloves (optional): To keep your hands clean.
* Trowel or Hand Rake: For planting and preparing the soil.
* Row Covers (optional): To protect your plants from pests and frost.
Planting Your Mustard Greens
Now for the fun part! Let’s get those seeds in the ground.
1. Choose Your Planting Location: Mustard greens prefer full sun (at least 6 hours of sunlight per day), but they can tolerate partial shade, especially in hotter climates. Make sure the location has well-draining soil.
2. Prepare the Soil: Whether you’re planting in containers or in the ground, it’s important to prepare the soil properly.
* In Containers: Fill your containers with a good quality potting mix.
* In the Ground: Remove any weeds, rocks, or debris from the planting area. Amend the soil with compost or other organic matter to improve drainage and fertility. Rake the soil smooth.
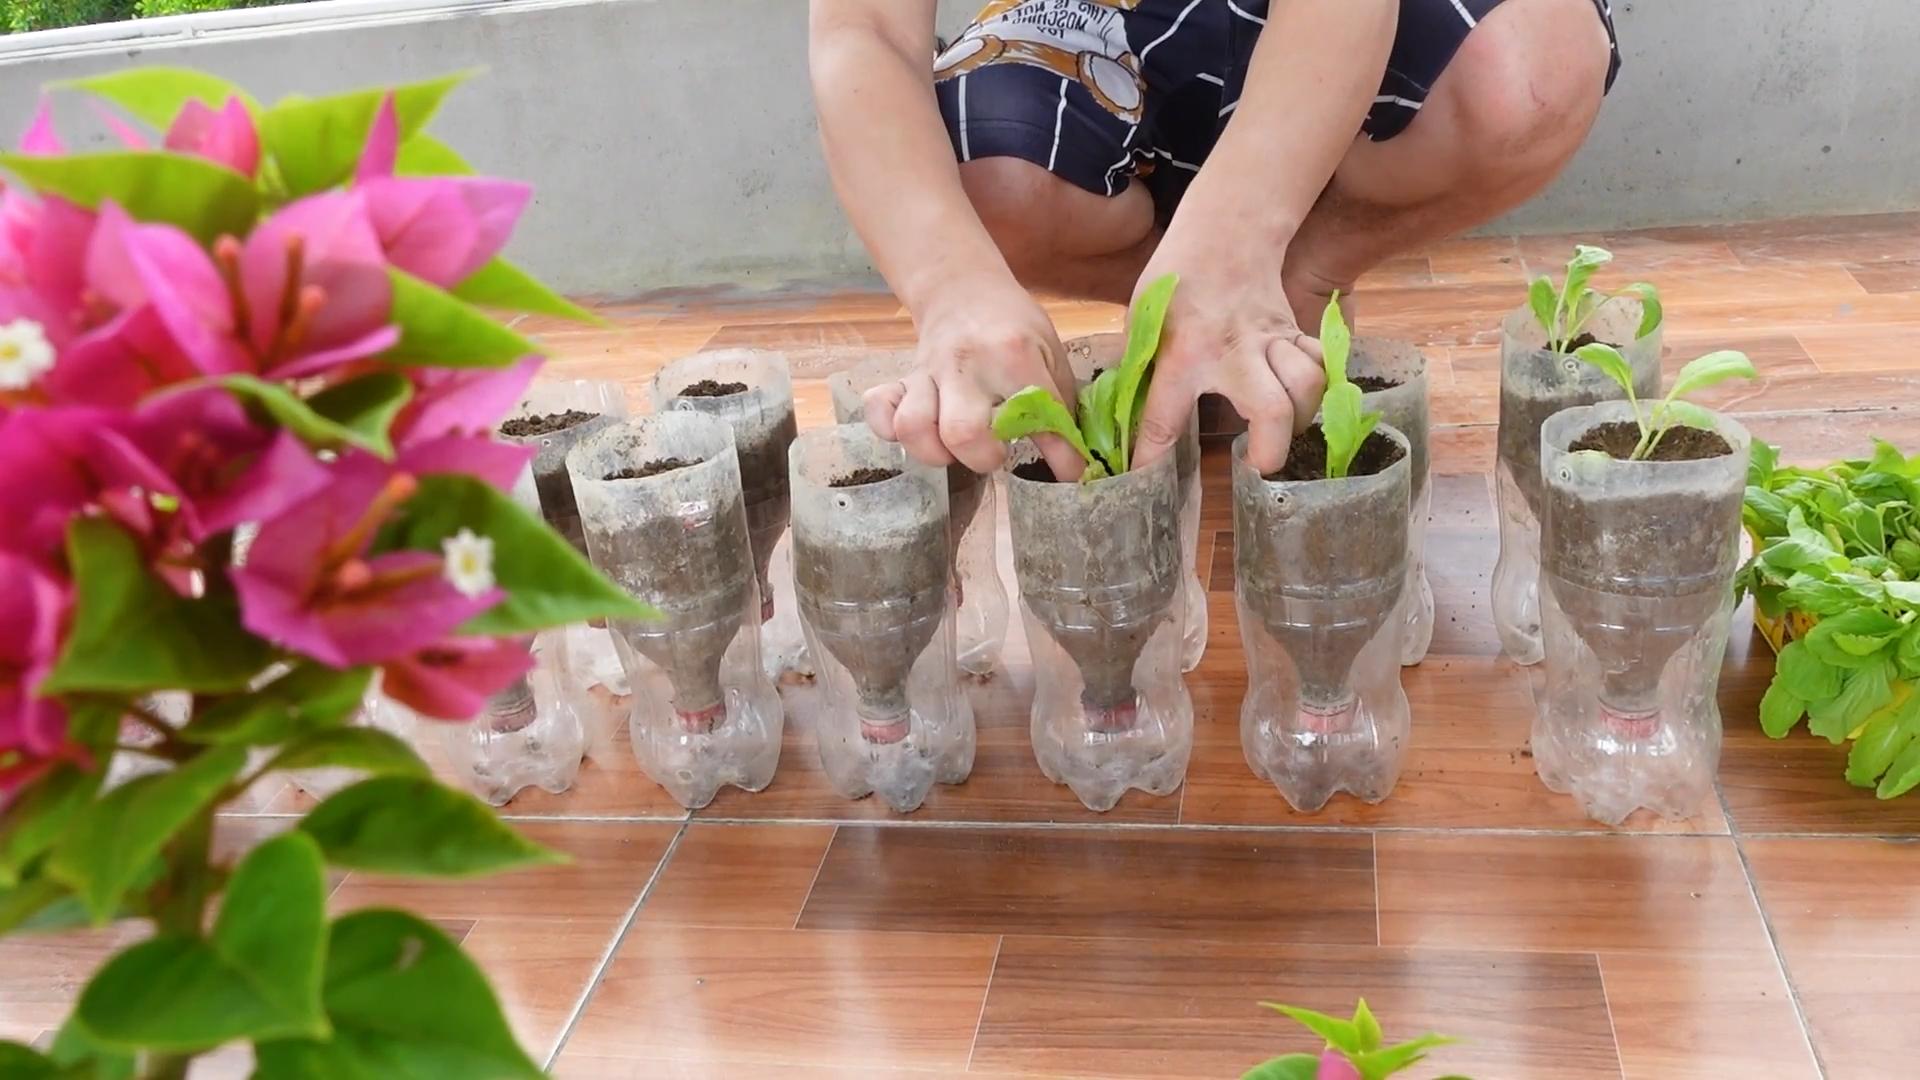
3. Sow the Seeds: Mustard greens can be direct-sown (planted directly in the ground) or started indoors. I usually direct-sow because it’s easier.
* Direct Sowing: Sow the seeds about 1/4 to 1/2 inch deep and 1 inch apart. You can sow them in rows or broadcast them over a wider area. If sowing in rows, space the rows about 12 inches apart.
* Starting Indoors (Optional): If you want to get a head start, you can start the seeds indoors 4-6 weeks before the last expected frost. Sow the seeds in seed trays or small pots filled with potting mix. Keep the soil moist and provide plenty of light. Transplant the seedlings outdoors after the last frost, spacing them about 6 inches apart.
4. Water Gently: After sowing the seeds, water the soil gently to avoid washing them away. Keep the soil consistently moist until the seeds germinate.
5. Thin Seedlings (If Necessary): Once the seedlings emerge, thin them to about 6 inches apart. This will give them enough space to grow and prevent overcrowding. You can eat the thinned seedlings as microgreens!
Caring for Your Mustard Greens
Once your mustard greens are planted, it’s important to provide them with the care they need to thrive.
1. Water Regularly: Mustard greens need consistent moisture, especially during hot weather. Water deeply whenever the top inch of soil feels dry. Avoid overwatering, which can lead to root rot.
2. Fertilize (Optional): If your soil is poor, you can fertilize your mustard greens with a balanced fertilizer every few weeks. Follow the instructions on the fertilizer package. I often use a liquid seaweed fertilizer, which is a great organic option.
3. Weed Regularly: Keep the planting area free of weeds, which can compete with your mustard greens for nutrients and water. Hand-pull weeds or use a hoe to remove them.
4. Protect from Pests: Mustard greens can be susceptible to pests such as aphids, flea beetles, and cabbage worms.
* Aphids: These tiny insects suck the sap from plants. You can control them by spraying them with a strong stream of water or by using insecticidal soap.
* Flea Beetles: These small beetles chew tiny holes in the leaves. You can control them by covering your plants with row covers or by using insecticidal soap.
* Cabbage Worms: These caterpillars eat the leaves of mustard greens. You can control them by hand-picking them off the plants or by using Bacillus thuringiensis (Bt), a natural insecticide.
5. Protect from Frost: Mustard greens are relatively cold-hardy, but they can be damaged by hard frosts. If a frost is predicted, cover your plants with row covers or blankets.
Harvesting Your Mustard Greens
The best part! Harvesting your own fresh mustard greens is so rewarding.
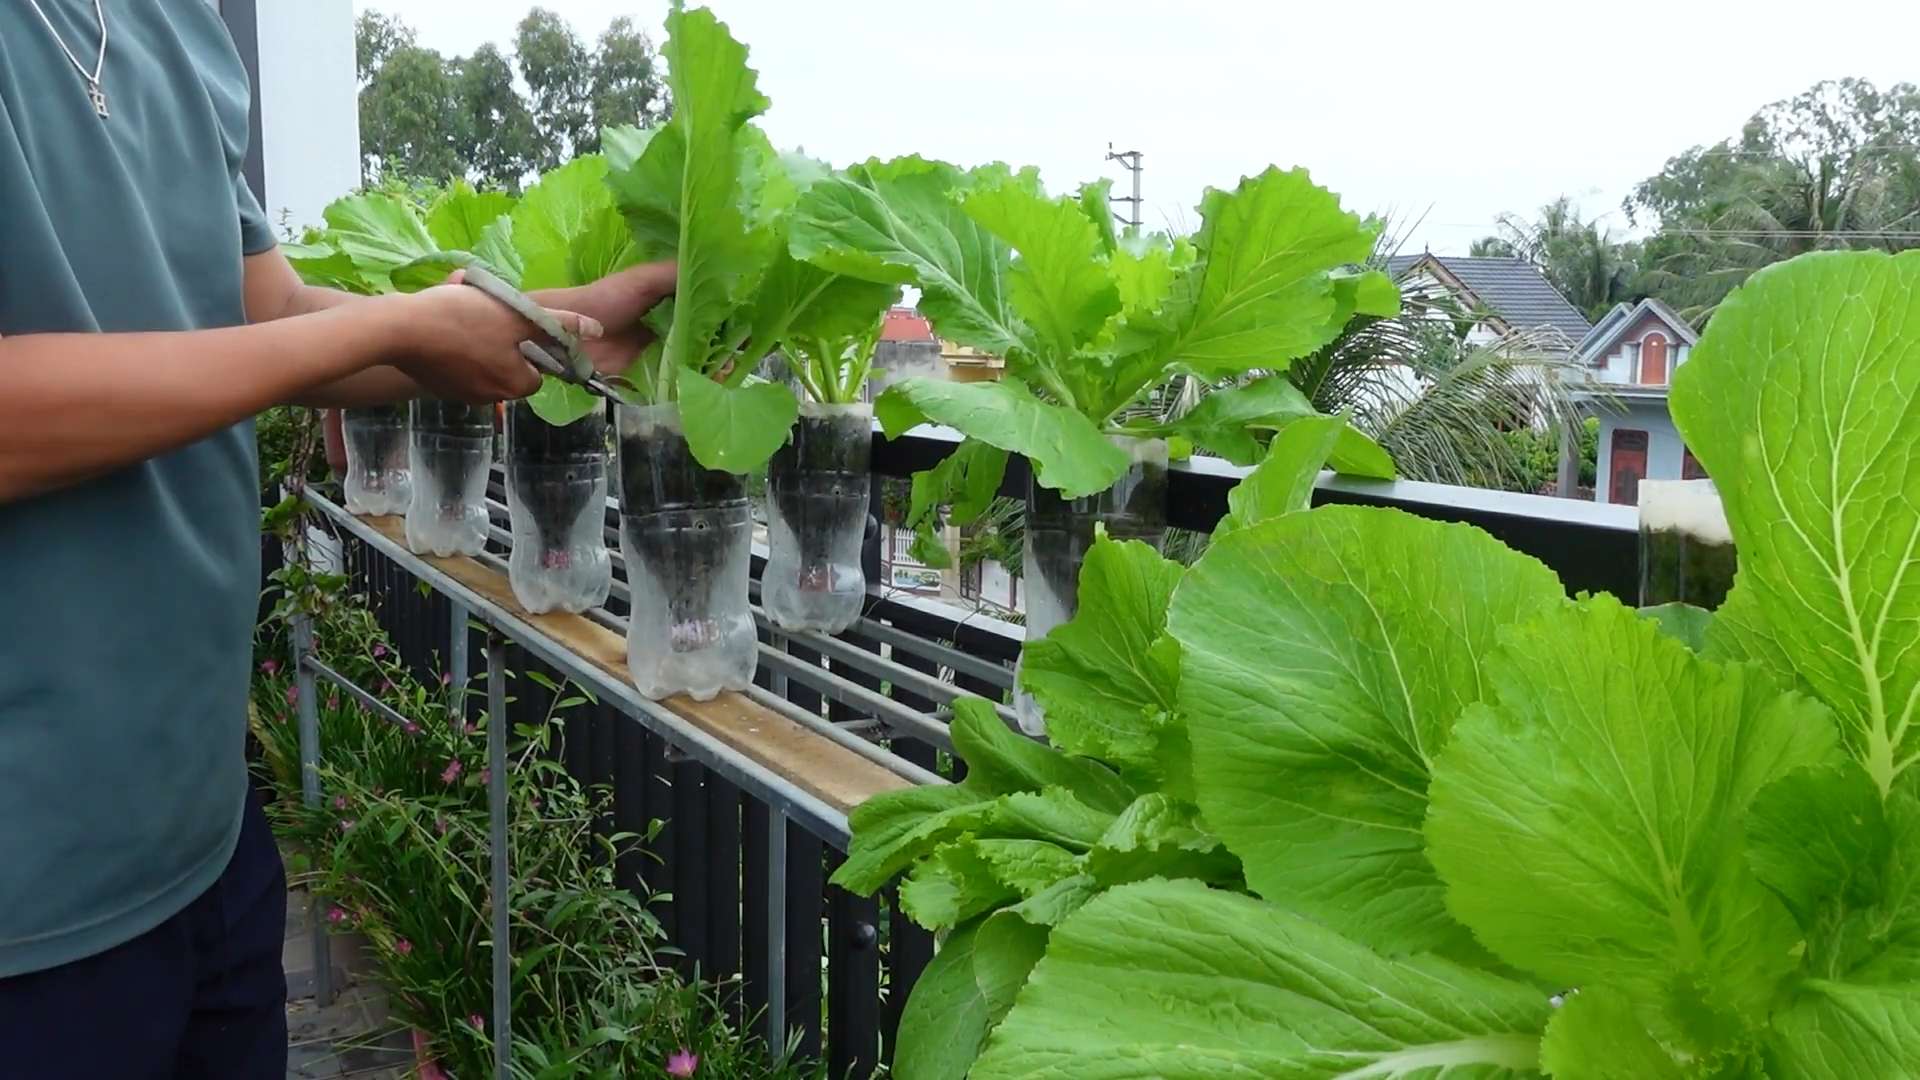
1. When to Harvest: You can start harvesting mustard greens about 4-6 weeks after planting, when the leaves are about 6-8 inches long.
2. How to Harvest: You can harvest the entire plant at once or harvest individual leaves as needed.
* Harvesting the Entire Plant: Cut the plant off at the base, leaving about an inch of stem.
* Harvesting Individual Leaves: Harvest the outer leaves first, leaving the inner leaves to continue growing. This will allow you to harvest multiple times from the same plant.
3. Wash and Store: After harvesting, wash the mustard greens thoroughly to remove any dirt or debris. Store them in a plastic bag in the refrigerator for up to a week.
Troubleshooting
Even with the best care, you might encounter some problems while growing mustard greens. Here are a few common issues and how to address them:
* Yellowing Leaves: This can be caused by overwatering, underwatering, nutrient deficiencies, or pests. Check the soil moisture and adjust your watering accordingly. Fertilize if necessary. Inspect the plants for pests and treat them as needed.
* Holes in Leaves: This is usually caused by flea beetles or cabbage worms. Cover your plants with row covers or use insecticidal soap or Bt to control these pests.
* Bolting: Bolting is when the plant starts to produce flowers and seeds. This can happen when the weather gets too hot or when the plant is stressed. Once a plant bolts, the leaves become bitter. To prevent bolting, plant your mustard greens in the spring or fall, and provide them with plenty of water and shade during hot weather. You can also choose bolt-resistant varieties.
Enjoying Your Harvest
Now that you’ve harvested your delicious mustard greens, it’s time to enjoy them! Here are a few ideas:
* Salads: Add mustard greens to your salads for a peppery kick.
* Stir-fries: Stir-fry mustard greens with garlic, ginger, and soy sauce.
* Soups: Add mustard greens to soups for a boost of flavor and nutrients.
* Smoothies: Blend mustard greens into your smoothies for a healthy green boost.
* Sautéed: Sauté mustard greens with olive oil, garlic, and a pinch of salt.
* Pickled: Pickle mustard greens for a tangy and flavorful condiment.
Growing mustard greens is a rewarding experience that will provide you with fresh, delicious, and nutritious greens for your meals. With a little bit of care and attention, you can enjoy a bountiful harvest of these peppery leaves. Happy gardening!
Conclusion
So, there you have it! Growing your own mustard greens is not only surprisingly simple, but it’s also an incredibly rewarding experience that puts fresh, flavorful, and nutritious greens right at your fingertips. Forget those wilted, overpriced bunches at the grocery store. With a little effort and our easy-to-follow guide, you can enjoy a constant supply of vibrant mustard greens, ready to elevate your salads, stir-fries, and side dishes.
Why is this DIY trick a must-try? Because it empowers you to take control of your food source, ensuring you’re consuming the freshest, most wholesome ingredients possible. You know exactly what goes into your greens – no mystery pesticides or questionable growing practices. Plus, the taste difference is undeniable. Homegrown mustard greens boast a bolder, more peppery flavor than their commercially grown counterparts, adding a delightful kick to any meal.
But the benefits don’t stop there. Growing your own mustard greens is also a fantastic way to connect with nature, relieve stress, and even save money. It’s a sustainable practice that reduces your carbon footprint and promotes a healthier lifestyle. And let’s be honest, there’s something incredibly satisfying about nurturing a plant from seed to harvest.
Looking for variations? Absolutely! Experiment with different varieties of mustard greens to discover your favorite flavor profile. Some popular options include ‘Florida Broadleaf,’ known for its mild flavor, ‘Red Giant,’ which adds a beautiful color to your dishes, and ‘Osaka Purple,’ which offers a slightly sweeter taste. You can also try growing your mustard greens in containers if you have limited space, or even indoors with the help of grow lights. Consider companion planting with other vegetables like radishes or carrots to deter pests and improve soil health.
Don’t be intimidated if you’re a beginner gardener. Mustard greens are incredibly forgiving and easy to grow, making them the perfect choice for novice gardeners. Just follow our simple steps, provide them with the right conditions, and watch them flourish.
We’re confident that once you try growing your own mustard greens, you’ll be hooked. It’s a simple, sustainable, and incredibly rewarding way to add fresh, flavorful greens to your diet. So, grab some seeds, get your hands dirty, and experience the joy of homegrown goodness.
We encourage you to embark on this green adventure and share your experiences with us! Let us know how your mustard greens are growing, what varieties you’re trying, and any tips or tricks you’ve discovered along the way. Share your photos and stories on our social media channels using #HomegrownMustardGreens. We can’t wait to see your thriving gardens!
Frequently Asked Questions (FAQ)
What is the best time of year to plant mustard greens?
Mustard greens are a cool-season crop, meaning they thrive in cooler temperatures. The best time to plant them is in early spring or late summer/early fall. For a spring crop, sow seeds 4-6 weeks before the last expected frost. For a fall crop, sow seeds 6-8 weeks before the first expected frost. Avoid planting during the hottest months of summer, as the heat can cause the greens to bolt (go to seed) and become bitter.
How much sunlight do mustard greens need?
Mustard greens prefer full sun, which means at least 6 hours of direct sunlight per day. However, they can also tolerate partial shade, especially in hotter climates. If you’re growing them indoors, make sure to provide them with adequate light using grow lights. Insufficient sunlight can result in leggy growth and reduced flavor.
What kind of soil is best for growing mustard greens?
Mustard greens prefer well-drained, fertile soil with a pH between 6.0 and 7.5. Amend your soil with compost or other organic matter before planting to improve drainage and fertility. If your soil is heavy clay, consider growing your mustard greens in raised beds or containers. A soil test can help you determine the pH and nutrient levels of your soil.
How often should I water my mustard greens?
Keep the soil consistently moist, but not waterlogged. Water deeply whenever the top inch of soil feels dry to the touch. Avoid overhead watering, as this can promote fungal diseases. Use a soaker hose or drip irrigation to water at the base of the plants. During hot, dry weather, you may need to water more frequently.
How do I fertilize my mustard greens?
Mustard greens are heavy feeders, so they benefit from regular fertilization. Apply a balanced fertilizer (e.g., 10-10-10) at planting time, and then side-dress with a nitrogen-rich fertilizer every 2-3 weeks. Alternatively, you can use a liquid fertilizer, such as fish emulsion or seaweed extract, diluted according to the package instructions. Avoid over-fertilizing, as this can lead to excessive leaf growth and reduced flavor.
What are some common pests and diseases that affect mustard greens?
Common pests that can affect mustard greens include aphids, flea beetles, cabbage worms, and slugs. To control these pests, you can use insecticidal soap, neem oil, or handpick them off the plants. Common diseases include downy mildew, white rust, and leaf spot. To prevent these diseases, ensure good air circulation, avoid overhead watering, and remove any infected leaves promptly. Crop rotation can also help prevent soilborne diseases.
When and how should I harvest my mustard greens?
You can start harvesting mustard greens when the leaves are about 4-6 inches long. Harvest the outer leaves first, leaving the inner leaves to continue growing. This is known as a “cut-and-come-again” harvesting method. You can also harvest the entire plant at once. To harvest, simply cut the leaves or the entire plant at the base with a sharp knife or scissors.
How do I store mustard greens after harvesting?
Wash the mustard greens thoroughly and pat them dry. Store them in a plastic bag or container in the refrigerator for up to a week. For longer storage, you can blanch the greens for 2-3 minutes, then freeze them in freezer bags.
Can I eat the stems of mustard greens?
Yes, the stems of mustard greens are edible, but they can be a bit tough. To make them more tender, you can chop them finely and cook them for a longer time than the leaves.
Are mustard greens nutritious?
Yes, mustard greens are packed with nutrients, including vitamins A, C, and K, as well as folate, calcium, and fiber. They are also a good source of antioxidants. Incorporating mustard greens into your diet can help boost your immune system, improve bone health, and protect against chronic diseases.
Can I grow mustard greens indoors?
Yes, you can grow mustard greens indoors, especially if you have limited outdoor space. Choose a sunny location or use grow lights to provide adequate light. Use a well-draining potting mix and water regularly. You may need to fertilize more frequently when growing indoors.
What are some creative ways to use mustard greens in cooking?
Mustard greens are incredibly versatile and can be used in a variety of dishes. Try adding them to salads, stir-fries, soups, stews, and omelets. You can also sauté them with garlic and olive oil, or use them as a topping for pizza or pasta. For a unique twist, try pickling or fermenting your mustard greens. The possibilities are endless!


Leave a Comment