

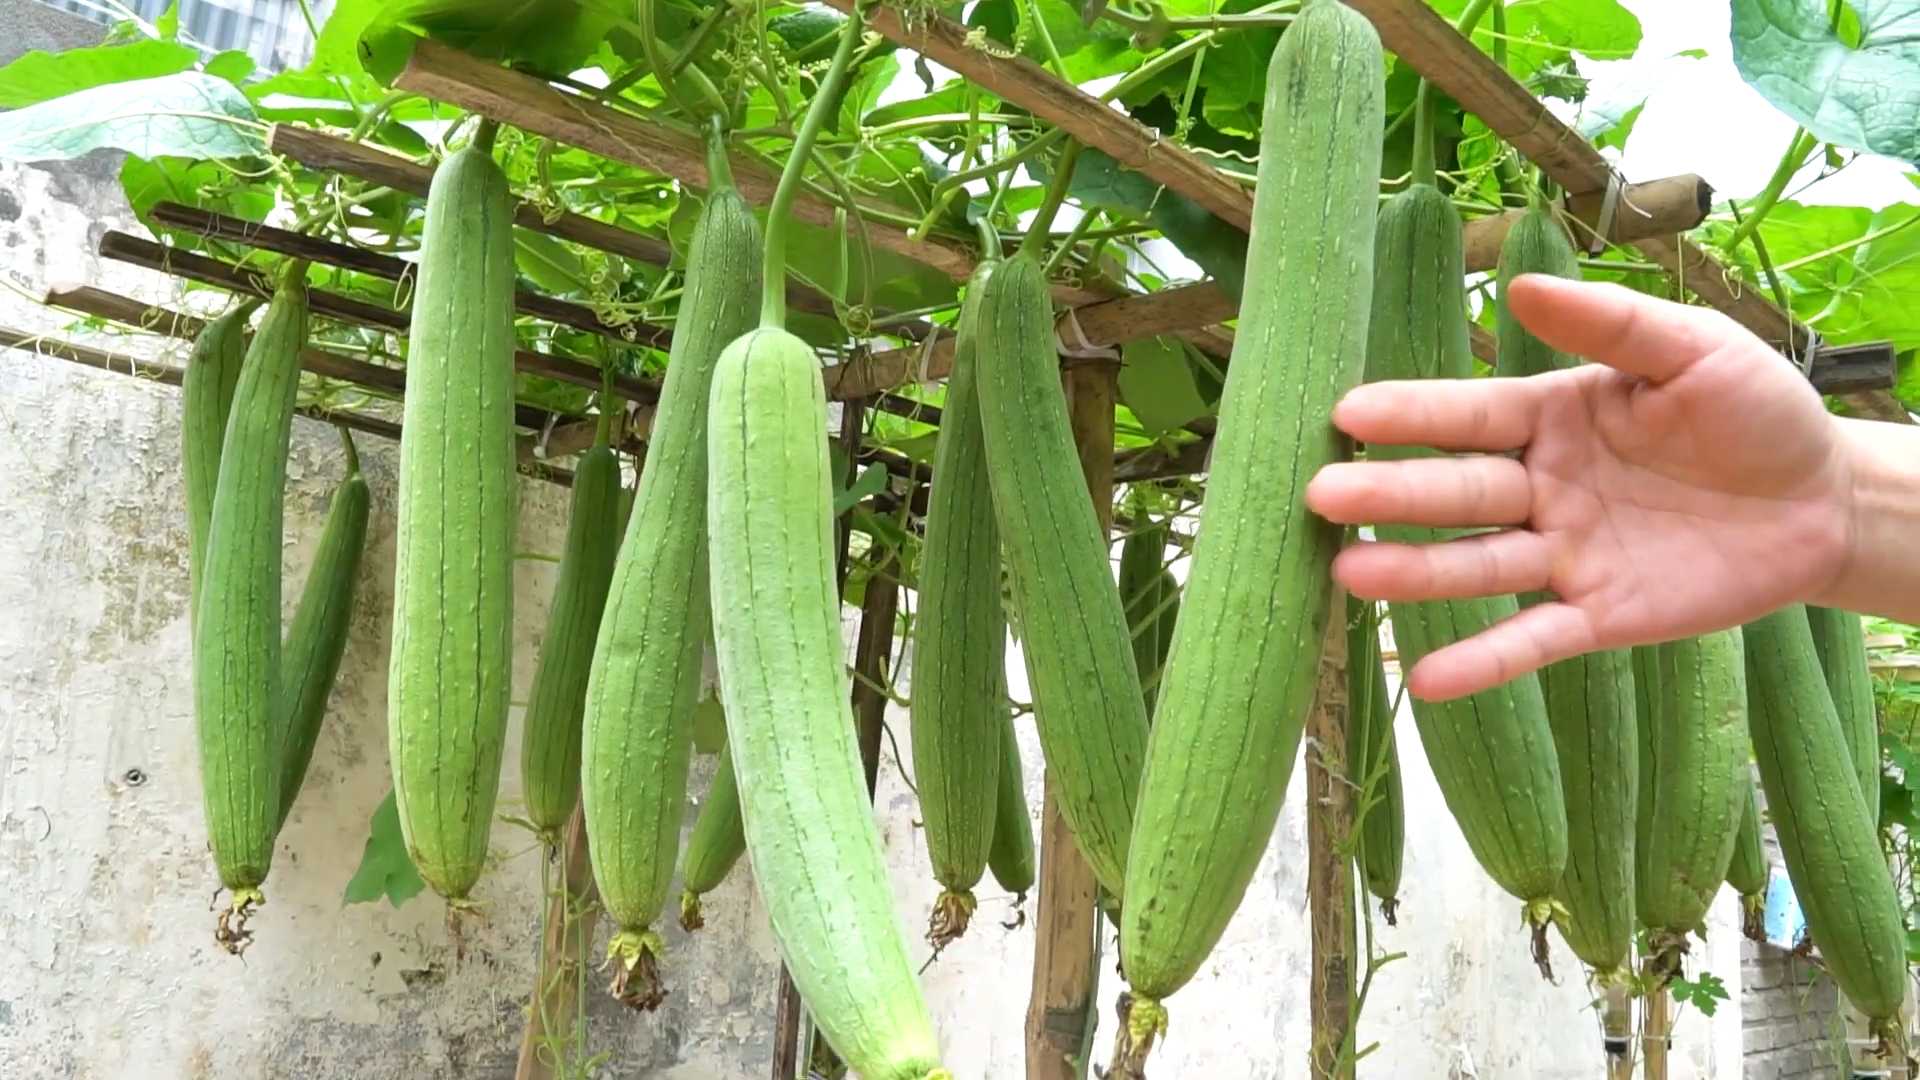
Grow Sponge Gourd at Home? Absolutely! Imagine stepping into your backyard and harvesting fresh, vibrant sponge gourds, ready to be transformed into delicious meals or even natural bath sponges. Sounds dreamy, right? Well, it’s more achievable than you think! This DIY guide is packed with simple yet effective tricks to help you cultivate these fascinating vegetables right in your own garden.
The sponge gourd, also known as loofah, has a rich history, particularly in Asian cultures where it’s been cultivated for centuries. Beyond its culinary uses, it’s traditionally been valued for its fibrous skeleton, used for everything from scrubbing tools to medicinal applications. I’ve always been fascinated by its versatility!
But why should you learn to grow sponge gourd at home? In today’s world, where we’re increasingly conscious of sustainability and healthy eating, growing your own produce is a fantastic way to connect with nature and control what you consume. Plus, store-bought sponge gourds can sometimes be expensive or difficult to find. This DIY project not only saves you money but also provides a rewarding experience. I’m excited to share my tried-and-true methods for successful sponge gourd cultivation, ensuring you’ll be enjoying a bountiful harvest in no time!
Grow Your Own Delicious Sponge Gourds: A DIY Guide
Hey there, fellow gardening enthusiasts! I’m so excited to share my experience and guide you through growing your own sponge gourds at home. It’s a rewarding process, and nothing beats the taste of fresh, homegrown veggies. Plus, you get a natural sponge at the end! Let’s dive in!
Choosing the Right Variety and Starting Seeds
First things first, let’s talk about choosing the right sponge gourd variety. There are a few different types, varying in size and shape. I personally prefer the long, cylindrical varieties for ease of use as sponges, but feel free to experiment!
Here’s a breakdown of the initial steps:
* Variety Selection: Research different sponge gourd varieties available in your region. Consider factors like climate suitability, space requirements, and desired fruit size.
* Seed Starting Time: Sponge gourds need a long growing season (around 150-180 days). Start your seeds indoors 6-8 weeks before the last expected frost in your area. This gives them a head start.
* Seed Starting Medium: Use a well-draining seed starting mix. I like to use a mix of peat moss, vermiculite, and perlite.
* Seed Starting Containers: Opt for individual pots or seed trays with ample drainage. This prevents root disturbance during transplanting.
Now, let’s get those seeds germinating!
1. Soaking the Seeds: Before planting, soak the sponge gourd seeds in warm water for 24-48 hours. This helps soften the hard seed coat and promotes faster germination. I usually put them in a small bowl on my kitchen counter.
2. Planting the Seeds: Fill your seed starting containers with the seed starting mix. Make a small hole (about 1 inch deep) in the center of each container. Place one or two seeds in each hole and gently cover them with the mix.
3. Watering the Seeds: Water the seeds gently using a spray bottle or watering can with a fine rose. Keep the soil consistently moist but not waterlogged.
4. Providing Warmth: Sponge gourd seeds need warmth to germinate. Maintain a soil temperature of around 70-80°F (21-27°C). You can use a heat mat under the seed trays to provide consistent warmth.
5. Providing Light: Once the seedlings emerge (usually within 7-14 days), provide them with plenty of light. Place them under grow lights or in a sunny window that receives at least 6-8 hours of direct sunlight per day. Rotate the pots regularly to ensure even growth.
Preparing the Garden Bed and Transplanting Seedlings
Once your seedlings have developed a few sets of true leaves and the weather has warmed up, it’s time to transplant them into the garden. This is a crucial step, so let’s make sure we do it right!
* Choosing the Right Location: Sponge gourds need a sunny location with well-draining soil. Choose a spot that receives at least 6-8 hours of direct sunlight per day.
* Soil Preparation: Amend the soil with plenty of organic matter, such as compost or well-rotted manure. This will improve drainage, fertility, and water retention. Sponge gourds are heavy feeders, so rich soil is essential.
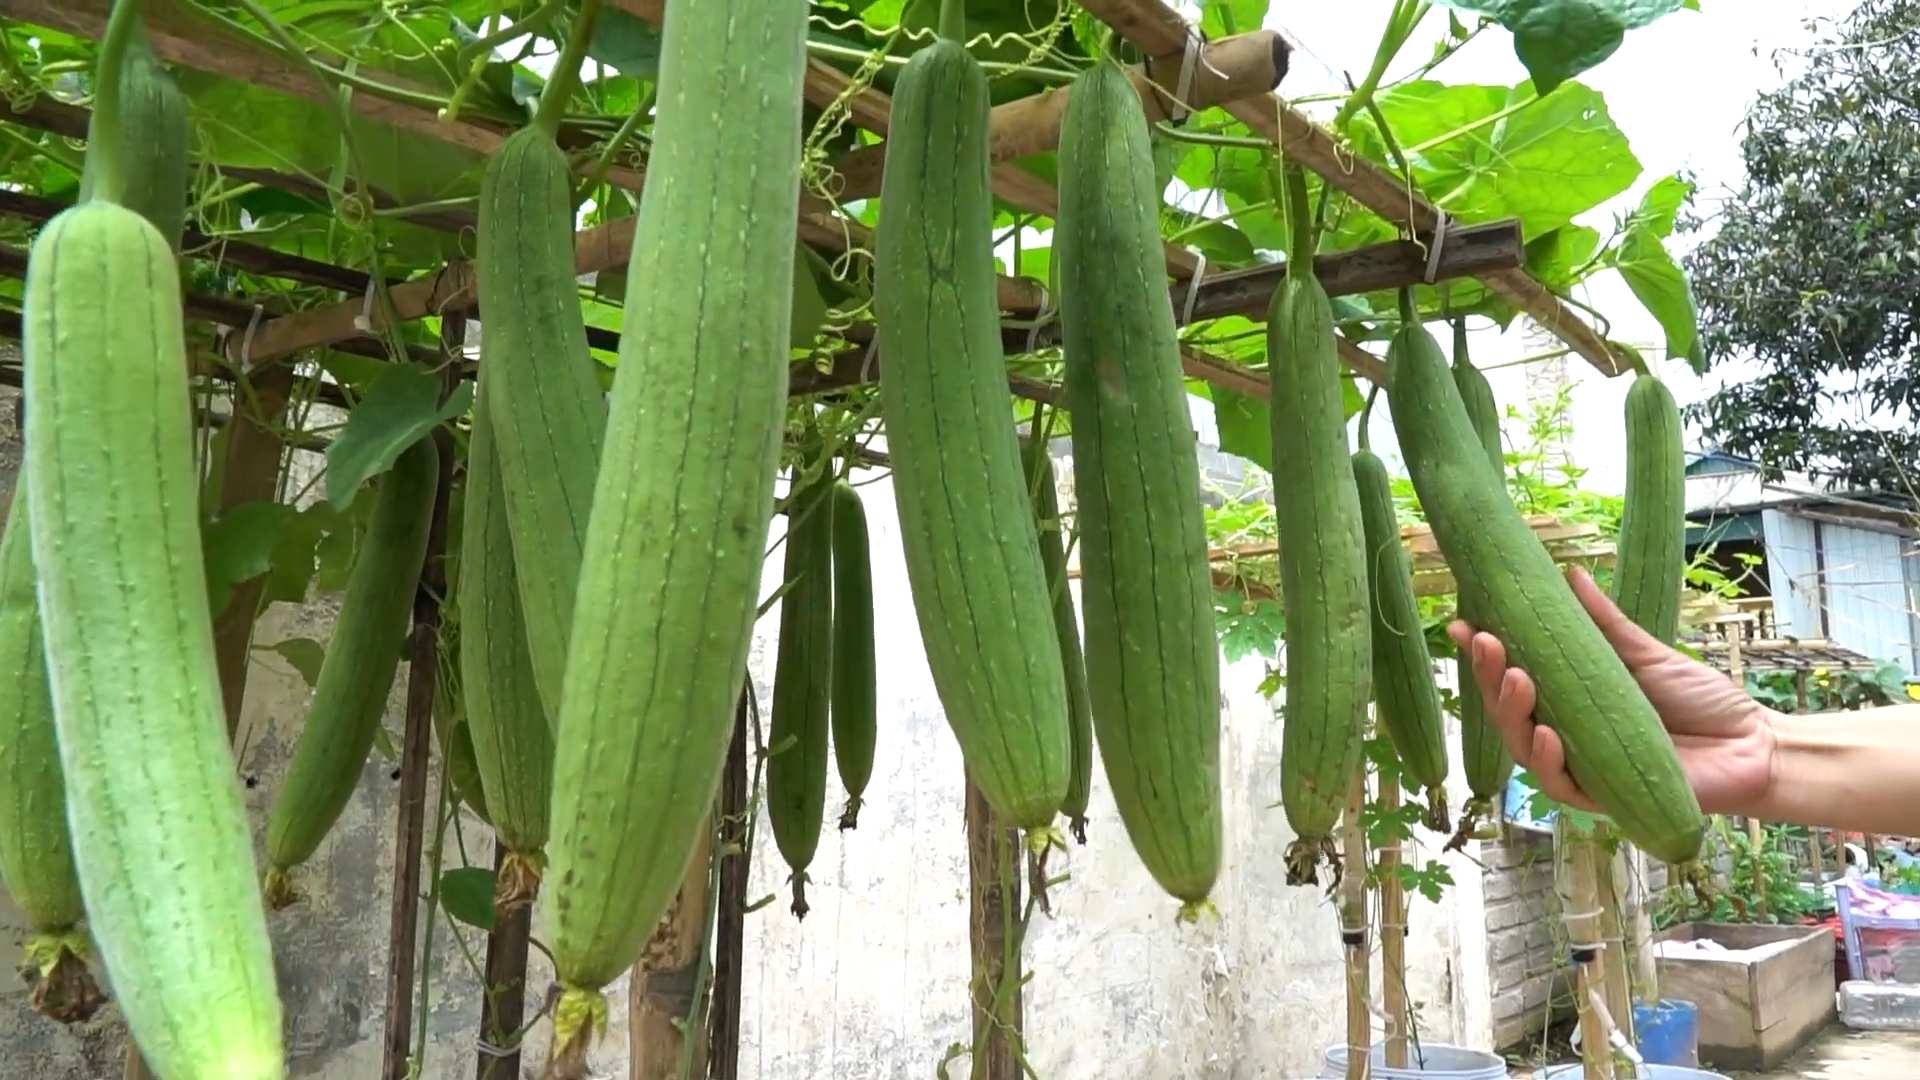
* Building a Strong Trellis: Sponge gourds are vigorous climbers and need a sturdy trellis to support their weight. You can use a wooden trellis, a metal fence, or even a strong netting. Make sure the trellis is at least 6-8 feet tall. I’ve even seen people use old ladders!
* Spacing: Space the seedlings about 3-4 feet apart along the trellis. This will allow them plenty of room to grow and spread.
Let’s get those seedlings in the ground!
1. Hardening Off the Seedlings: Before transplanting, harden off the seedlings by gradually exposing them to outdoor conditions. Start by placing them outside for a few hours each day, gradually increasing the amount of time they spend outdoors over a week or two. This will help them adjust to the sun, wind, and temperature changes.
2. Digging the Holes: Dig holes that are slightly larger than the root balls of the seedlings.
3. Transplanting the Seedlings: Gently remove the seedlings from their containers, being careful not to damage the roots. Place each seedling in a hole and backfill with soil. Gently firm the soil around the base of the plant.
4. Watering the Seedlings: Water the seedlings thoroughly after transplanting. This will help settle the soil and encourage root growth.
5. Mulching: Apply a layer of mulch around the base of the plants to help retain moisture, suppress weeds, and regulate soil temperature. I like to use straw or wood chips.
Caring for Your Sponge Gourd Plants
Now that your sponge gourd plants are in the ground, it’s time to provide them with the care they need to thrive. This includes watering, fertilizing, pruning, and pest control.
* Watering: Water your sponge gourd plants regularly, especially during hot, dry weather. Aim to keep the soil consistently moist but not waterlogged. Water deeply and less frequently, rather than shallowly and often.
* Fertilizing: Sponge gourds are heavy feeders and benefit from regular fertilization. Use a balanced fertilizer (e.g., 10-10-10) every 2-3 weeks. You can also supplement with compost tea or fish emulsion.
* Pruning: Prune your sponge gourd plants to encourage branching and fruit production. Remove any dead or diseased leaves and stems. You can also pinch off the tips of the vines to encourage lateral growth.
* Pollination: Sponge gourds produce separate male and female flowers. The female flowers have a small fruit at the base. If pollination is poor, you can hand-pollinate the flowers by transferring pollen from the male flowers to the female flowers using a small brush. I usually do this in the early morning.
* Pest and Disease Control: Keep an eye out for pests and diseases, such as squash bugs, squash vine borers, and powdery mildew. Use organic pest control methods, such as insecticidal soap or neem oil, to control pests. Ensure good air circulation to prevent fungal diseases.
Here’s a more detailed look at some key aspects:
1. Consistent Watering is Key: Sponge gourds are thirsty plants, especially during the fruiting stage. I aim to water them deeply at least 2-3 times a week, depending on the weather. A good rule of thumb is to check the soil moisture – if the top inch feels dry, it’s time to water.
2. Fertilizing for Abundant Fruit: As mentioned earlier, sponge gourds are heavy feeders. I like to use a balanced fertilizer every few weeks, but I also supplement with organic options like compost tea and fish emulsion. These provide essential nutrients and promote healthy growth.
3. Training Your Vines: Since sponge gourds are climbers, it’s important to train them to grow along the trellis. Gently guide the vines and secure them to the trellis using twine or plant clips. This will help support the weight of the fruits and prevent them from dragging on the ground.
4. Hand-Pollination: A Helping Hand: Sometimes, natural pollination isn’t enough, especially if you have a limited number of pollinators in your garden. Hand-pollination is a simple process that can significantly increase your fruit yield. Simply use a small brush to transfer pollen from the male flowers (which have a long, thin stem) to the female flowers (which have a small fruit at the base).
5. Watch Out for Pests and Diseases: Like all plants, sponge gourds are susceptible to pests and diseases. Keep an eye out for common problems like squash bugs, squash vine borers, and powdery mildew. Early detection and treatment are crucial. I prefer to use organic pest control methods whenever possible, such as insecticidal soap, neem oil, and companion planting.
Harvesting and Processing Your Sponge Gourds
The moment you’ve been waiting for! Harvesting and processing your sponge gourds is the final step in this rewarding journey.
* Harvesting for Consumption: If you want to eat your sponge gourds, harvest them when they are young and tender, about 6-8 inches long. The skin should be smooth and green.
* Harvesting for Sponges: If you want to use your sponge gourds as sponges, let them mature on the vine until the skin turns brown and dry. The fruits will become lightweight and the seeds will rattle inside.
* Processing for Sponges: Once the sponge gourds are fully mature, harvest them and soak them in water for several days to soften the skin. Then, peel off the skin and remove the seeds and pulp. Rinse the sponge thoroughly and let it dry completely.
Let’s break down the harvesting process:
1. Knowing When to Harvest for Eating: For culinary purposes, harvest sponge gourds when they are young and tender, typically
Conclusion
So, there you have it! Growing sponge gourd at home isn’t just a gardening project; it’s an investment in fresh, healthy produce, a sustainable lifestyle, and a rewarding connection with nature. We’ve walked you through the process, from seed to harvest, highlighting the key steps and offering practical tips to ensure your success.
Why is this DIY trick a must-try? Because store-bought sponge gourds simply can’t compare to the vibrant flavor and satisfying texture of those you’ve nurtured yourself. You control the growing conditions, ensuring they’re free from harmful pesticides and bursting with natural goodness. Plus, the sheer joy of harvesting your own food is an experience that’s hard to beat. Imagine the pride you’ll feel serving a delicious sponge gourd dish made entirely from your own garden!
But the benefits extend beyond just taste and health. Growing your own sponge gourd is an environmentally friendly choice. You’re reducing your carbon footprint by eliminating transportation costs and supporting sustainable practices. It’s a small step that can make a big difference.
Looking for variations? Absolutely! Consider these ideas to personalize your sponge gourd growing experience:
* **Vertical Gardening:** If you’re short on space, train your sponge gourd vines to climb a trellis or fence. This not only saves space but also adds a beautiful vertical element to your garden.
* **Companion Planting:** Plant basil, marigolds, or nasturtiums near your sponge gourds to deter pests and attract beneficial insects.
* **Different Varieties:** Explore different varieties of sponge gourd, such as the angled luffa or the smooth luffa, to discover your favorite flavor and texture.
* **Seed Saving:** Once you’ve successfully grown your sponge gourds, save the seeds from the best fruits to plant next year. This ensures a continuous supply of your favorite variety and helps you adapt the plants to your local climate.
* **Grafting:** For more advanced gardeners, consider grafting your sponge gourd onto a more vigorous rootstock for increased disease resistance and yield.
We’re confident that with a little effort and the guidance provided in this article, you can successfully grow sponge gourd at home. It’s a rewarding experience that will bring you closer to nature and provide you with a delicious and healthy harvest.
Now, it’s your turn! We encourage you to give this DIY trick a try. Start small, be patient, and don’t be afraid to experiment. And most importantly, share your experience with us! We’d love to hear about your successes, challenges, and any tips you’ve discovered along the way. Post photos of your sponge gourd plants, share your favorite recipes, and let us know how this guide has helped you. Together, we can create a community of passionate home gardeners who are dedicated to growing their own food and living a more sustainable lifestyle. So, grab your seeds, get your hands dirty, and start growing your own delicious sponge gourd today! You won’t regret it.
Frequently Asked Questions (FAQ)
What is the best time of year to plant sponge gourd seeds?
The best time to plant sponge gourd seeds is in the late spring or early summer, after the last frost has passed and the soil has warmed up to at least 65°F (18°C). Sponge gourds are warm-season crops and require plenty of sunshine and warm temperatures to thrive. In warmer climates, you may be able to start seeds indoors earlier and transplant them outdoors once the weather permits. Check your local frost dates to determine the optimal planting time for your region.
How much sunlight does sponge gourd need?
Sponge gourds require at least 6-8 hours of direct sunlight per day to grow and produce fruit. Choose a planting location that receives full sun throughout the day. If you live in a particularly hot climate, some afternoon shade may be beneficial to prevent the plants from overheating. Insufficient sunlight can result in stunted growth, reduced fruit production, and increased susceptibility to pests and diseases.
What kind of soil is best for growing sponge gourd?
Sponge gourds prefer well-drained, fertile soil that is rich in organic matter. Amend your soil with compost, aged manure, or other organic materials before planting to improve its drainage, fertility, and water-holding capacity. A slightly acidic to neutral soil pH of 6.0 to 7.0 is ideal. Avoid planting in heavy clay soil, as this can lead to root rot. If you have clay soil, consider growing your sponge gourds in raised beds or containers.
How often should I water my sponge gourd plants?
Sponge gourds need consistent moisture, especially during hot weather and fruit development. Water deeply and regularly, aiming to keep the soil consistently moist but not waterlogged. Water at the base of the plants to avoid wetting the foliage, which can increase the risk of fungal diseases. Mulching around the plants can help to retain moisture in the soil and suppress weed growth. Check the soil moisture regularly and adjust your watering schedule accordingly.
How do I know when my sponge gourd is ready to harvest?
The harvesting time for sponge gourd depends on how you intend to use it. For culinary purposes, harvest the gourds when they are young and tender, typically around 6-8 inches long. The skin should be smooth and green, and the flesh should be firm and white. To harvest for sponges, allow the gourds to mature fully on the vine until the skin turns brown and hard. The gourd will become lighter in weight as it dries. Once the gourd is completely dry, you can harvest it and remove the skin and seeds to reveal the sponge.
What are some common pests and diseases that affect sponge gourd?
Sponge gourds can be susceptible to various pests and diseases, including squash bugs, squash vine borers, aphids, powdery mildew, and downy mildew. Regularly inspect your plants for signs of pests or diseases and take action promptly to prevent them from spreading. Use organic pest control methods, such as insecticidal soap, neem oil, or handpicking, to control pests. Ensure good air circulation around the plants to prevent fungal diseases. Remove any infected leaves or fruits immediately.
Can I grow sponge gourd in a container?
Yes, you can grow sponge gourd in a container, but you will need a large container that is at least 24 inches in diameter and 18 inches deep. Choose a container with good drainage holes. Fill the container with a high-quality potting mix that is rich in organic matter. Provide a trellis or other support for the vines to climb. Water and fertilize regularly, as container-grown plants tend to dry out and deplete nutrients more quickly than those grown in the ground.
How do I save seeds from my sponge gourd?
To save seeds from your sponge gourd, allow the gourd to mature fully on the vine until the skin turns brown and hard. Harvest the gourd and allow it to dry completely. Cut open the gourd and remove the seeds. Wash the seeds thoroughly and spread them out on a paper towel to dry completely. Store the dried seeds in an airtight container in a cool, dark, and dry place. The seeds should remain viable for several years.
What are some ways to use sponge gourd in cooking?
Sponge gourd is a versatile vegetable that can be used in a variety of dishes. It can be stir-fried, steamed, boiled, or added to soups and stews. It has a mild, slightly sweet flavor that pairs well with other vegetables, meats, and spices. In some cultures, the young leaves and shoots of the sponge gourd plant are also eaten. The mature, fibrous sponge can be used for scrubbing and cleaning.
Is sponge gourd good for my health?
Yes, sponge gourd is a nutritious vegetable that is low in calories and high in fiber, vitamins, and minerals. It is a good source of vitamin C, vitamin A, potassium, and manganese. It also contains antioxidants that can help protect against cell damage. Eating sponge gourd can help to improve digestion, boost the immune system, and promote overall health.


Leave a Comment