

Clean Fridge Coils Vacuum: The unsung hero of a cool kitchen! Let’s be honest, when was the last time you even thought about the coils on the back (or bottom!) of your refrigerator? Probably never, right? But these dusty loops are secretly costing you money and shortening the lifespan of your trusty food preserver. Think of it like this: your fridge is working overtime, sweating to keep your groceries fresh, and those coils are its lungs. If they’re clogged with dust and debris, it’s like trying to run a marathon with a bad cold!
While cleaning fridge coils might not have the same historical significance as, say, the invention of refrigeration itself (thank you, Carl von Linde!), it’s a practice rooted in good old-fashioned resourcefulness. Our grandparents knew the value of maintaining appliances to make them last, and this simple DIY trick is a direct descendant of that thrifty wisdom. Plus, it’s incredibly satisfying to know you’re saving energy and money with just a few minutes of effort.
Why is this DIY hack so crucial? Because a fridge struggling to breathe uses more electricity. And more electricity means a higher bill. Nobody wants that! By learning how to clean fridge coils vacuum style, you’re not just being a responsible homeowner; you’re also giving your wallet a break. I’m going to show you the easiest, most effective way to tackle this often-overlooked chore, so you can keep your fridge running smoothly and your food perfectly chilled. Let’s get started!
DIY: Breathe New Life into Your Fridge by Cleaning the Coils!
Okay, let’s be honest. When was the last time you thought about the back of your fridge? Probably never, right? Well, those dusty coils back there are silently working overtime, and if they’re caked in grime, your fridge is struggling to keep your food cold and your energy bill is skyrocketing. Don’t worry, though! Cleaning them is a super easy DIY project that can save you money and extend the life of your refrigerator. I’m going to walk you through it step-by-step.
Why Clean Your Fridge Coils?
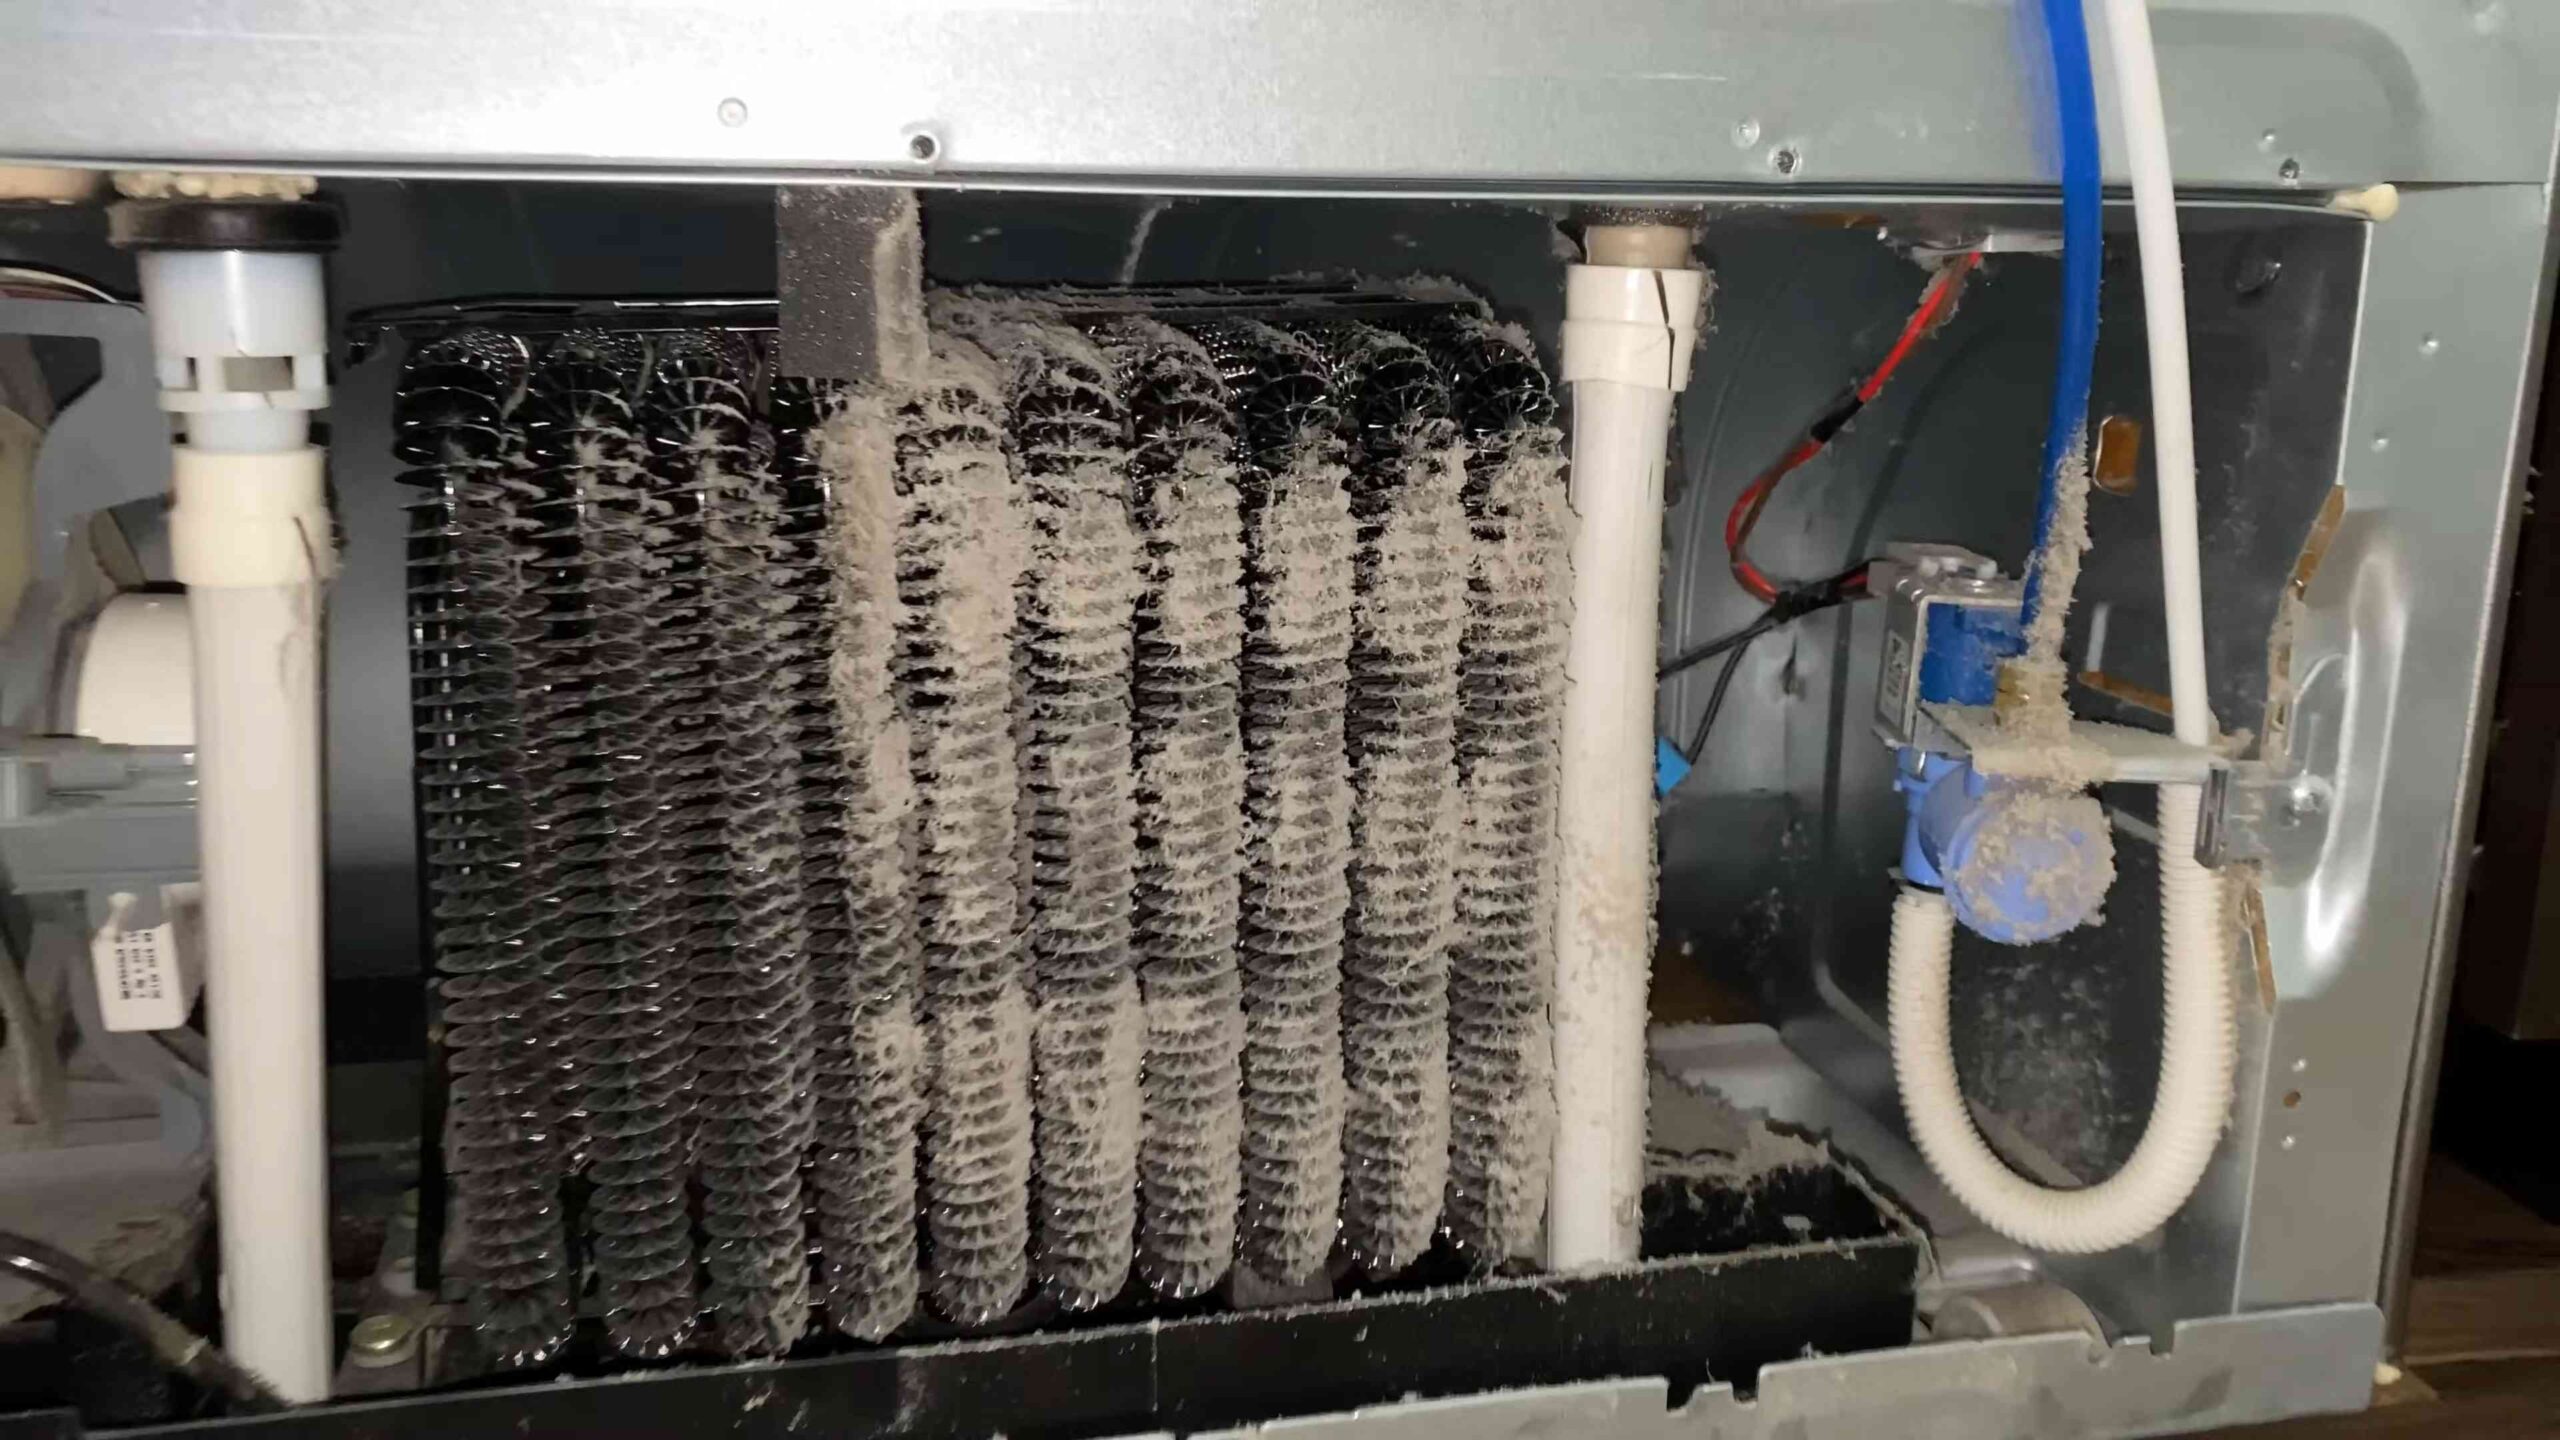
Before we dive in, let’s quickly understand why this is so important. Fridge coils are responsible for releasing heat. When they’re covered in dust and debris, they can’t do their job efficiently. This forces your fridge to work harder, using more energy and potentially leading to premature failure. Think of it like trying to run a marathon while wearing a heavy coat – not fun!
Benefits of Clean Coils:
* Lower Energy Bills: A fridge that doesn’t have to work as hard uses less electricity.
* Longer Fridge Lifespan: Reducing the strain on the compressor can extend the life of your appliance.
* Improved Cooling Efficiency: Your food will stay colder and fresher for longer.
* Reduced Noise: A struggling fridge can be noisy. Cleaning the coils can quiet things down.
What You’ll Need
Here’s a list of everything you’ll need to tackle this project. Don’t worry, most of it you probably already have!
* Vacuum Cleaner with Hose Attachment: A standard vacuum cleaner with a hose and brush attachment is perfect.
* Soft Brush Attachment (Optional): If your vacuum has a soft brush attachment, use it! It’s gentler on the coils.
* Coil Cleaning Brush (Recommended): These are specifically designed for cleaning fridge coils and can reach tight spaces. You can find them at most hardware stores or online.
* Screwdriver (Possibly): You might need a screwdriver to remove a back panel, depending on your fridge model.
* Work Gloves (Optional): To keep your hands clean and protected.
* Flashlight or Headlamp: To see what you’re doing in those dark corners.
* Cleaning Cloth or Paper Towels: For wiping down surfaces.
* Appliance Dolly or Help (Optional): If your fridge is difficult to move.
Safety First!
Before we start, let’s talk safety.
* Unplug the Fridge: This is the most important step! Always unplug your fridge before cleaning the coils to avoid electric shock.
* Be Gentle: Fridge coils are delicate. Avoid bending or damaging them.
* Read Your Fridge’s Manual: Your manual might have specific instructions for cleaning the coils on your model.
Step-by-Step Guide to Cleaning Your Fridge Coils
Alright, let’s get to the nitty-gritty! Here’s how to clean those dusty coils and give your fridge a new lease on life.
1. Unplug the Fridge: Seriously, don’t skip this step! Unplug the fridge from the wall outlet. This is crucial for your safety.
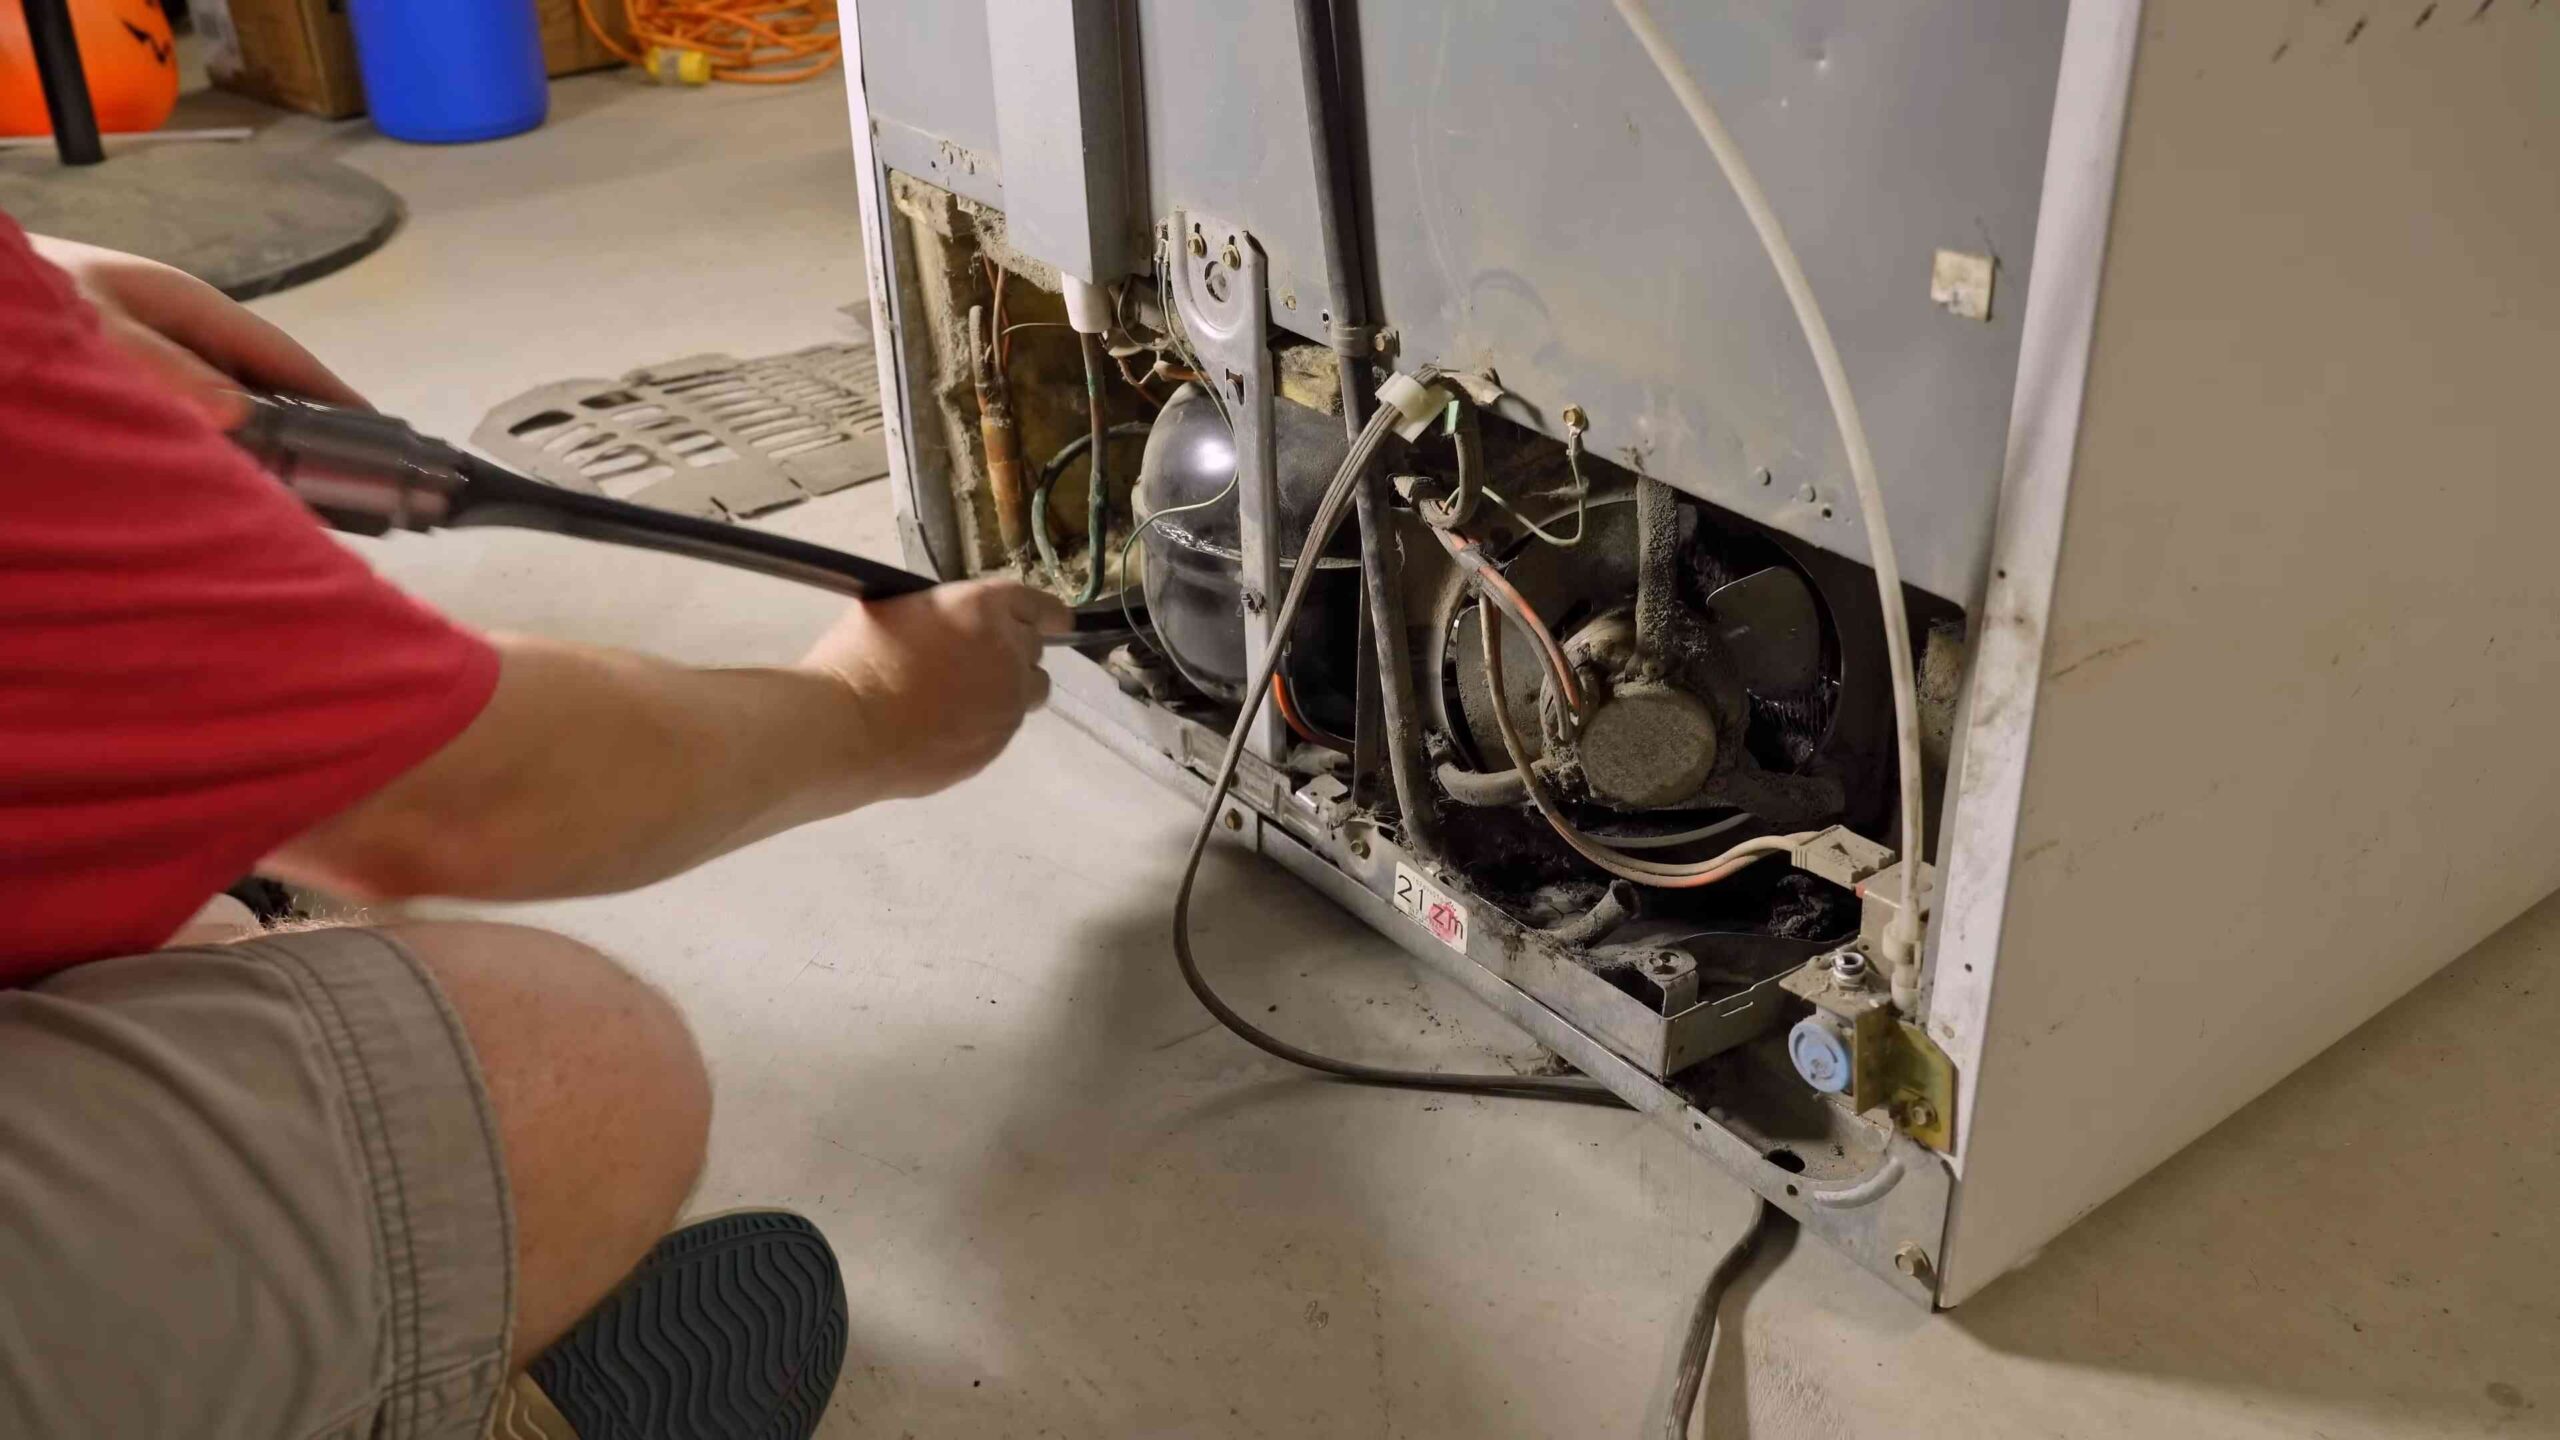
2. Locate the Coils: The location of the coils varies depending on your fridge model.
* Back of the Fridge: Most refrigerators have the coils on the back. You’ll usually see a black panel covering them.
* Bottom Front: Some refrigerators have the coils located behind a grill at the bottom front.
* Top Back: Less common, but some models have the coils at the top back.
3. Prepare the Area: Clear the area around the fridge so you have plenty of room to work. If your fridge is difficult to move, consider using an appliance dolly or asking someone for help.
4. Remove the Access Panel (If Necessary): If the coils are located on the back of the fridge and covered by a panel, you’ll need to remove it. Use a screwdriver to remove the screws holding the panel in place. Carefully set the panel aside.
5. Vacuum the Coils: This is where the vacuum cleaner comes in. Attach the hose and brush attachment (if you have one) to your vacuum. Gently vacuum the coils, moving the nozzle slowly and carefully. Pay close attention to areas with heavy dust buildup. Use your flashlight to see into the crevices and make sure you’re getting everything.
6. Use a Coil Cleaning Brush (Recommended): For stubborn dust and debris, a coil cleaning brush is your best friend. These brushes are long and flexible, allowing you to reach between the coils. Gently slide the brush between the coils, working it back and forth to loosen the dust. Then, vacuum up the loosened dust.
7. Repeat as Needed: You might need to repeat steps 5 and 6 several times to get the coils completely clean. Be patient and thorough.
8. Clean the Fan (If Accessible): While you’re back there, take a look at the fan. If it’s dusty, gently wipe it down with a cleaning cloth or paper towel. A clean fan will help improve airflow and cooling efficiency.
9. Wipe Down the Surrounding Area: Use a damp cloth to wipe down the area around the coils, including the back of the fridge and the floor. This will help prevent dust from accumulating again quickly.
10. Reattach the Access Panel (If Removed): If you removed a panel to access the coils, carefully reattach it using the screws you removed earlier.
11. Plug the Fridge Back In: Once everything is clean and dry, plug the fridge back into the wall outlet.
12. Monitor the Fridge: After plugging the fridge back in, monitor it for a few hours to make sure it’s cooling properly. You should notice a difference in the temperature and the amount of noise the fridge makes.
Tips and Tricks for Sparkling Clean Coils
Here are a few extra tips to help you get the best results:
* Clean Regularly: Aim to clean your fridge coils every 6 months to a year. This will prevent excessive dust buildup and keep your fridge running efficiently.
* Use a Soft Brush: Avoid using stiff brushes that could damage the delicate coils.
* Don’t Use Water: Avoid using water or other liquids to clean the coils, as this could damage the electrical components.
* Check the Condenser Drain: While you’re cleaning the coils, take a look at the condenser drain. This is a small tube that drains water from the fridge. If it’s clogged, it can cause water to leak inside the fridge. You can usually clear the drain with a pipe cleaner or a small brush.
* Consider a Professional: If you’re not comfortable cleaning the coils yourself, or if you have a particularly difficult fridge model, you can always hire a professional appliance repair technician.
Troubleshooting
Here are a few common issues you might encounter and how to deal with them:
* Can’t Find the Coils: If you’re having trouble locating the coils, consult your fridge’s manual or search online for your specific model.
* Panel Screws are Stripped: If the screws holding the access panel are stripped, try using a rubber band or steel wool between the screwdriver and the screw to get a better grip.
* Coils are Frozen: If the coils are frozen, unplug the fridge and let it defrost completely before cleaning them.
* Fridge Still Not Cooling Properly: If your fridge is still not cooling properly after cleaning the coils, there may be another issue, such as a faulty compressor or thermostat. In this case, it’s best to consult a professional.
Preventative Measures
Once you’ve cleaned your fridge coils, you’ll want to keep them clean! Here are a few tips:
* Keep the Area Around the Fridge Clean: Regularly sweep or vacuum the floor around the fridge to prevent dust from accumulating.
* Use a Fridge Coaster: Place a fridge coaster under the fridge to catch spills and prevent them from dripping onto the coils.
* Consider an Air Purifier: An air purifier can help reduce the amount of dust in your home, which will also help keep your fridge coils clean.
Final Thoughts
Cleaning your fridge coils is a simple but effective way to improve your fridge’s performance, save money on your energy bill, and extend its lifespan. It’s a DIY project that anyone can do with a few basic tools and a little bit of elbow grease. So, what are you waiting for? Go give your fridge some love! You (and your wallet) will be glad you did. Remember to always prioritize safety by unplugging the fridge before you start. Happy cleaning!
Conclusion
So, there you have it! Mastering the art of cleaning your fridge coils with a vacuum is not just a chore; it’s an investment in the longevity and efficiency of your refrigerator. We’ve walked you through the simple steps to achieve a cleaner, cooler, and more energy-efficient fridge. By regularly removing the dust and debris that accumulate on those coils, you’re not only preventing your fridge from working harder than it needs to, but you’re also saving money on your energy bill and extending the lifespan of a vital appliance.
Think of it this way: your fridge works tirelessly to keep your food fresh and safe. Showing it a little love by cleaning its coils is a small gesture that yields significant returns. It’s a simple DIY trick that anyone can do, regardless of their handyman skills. And the best part? You likely already have the necessary tool – a vacuum cleaner!
But don’t just take our word for it. We encourage you to try this simple yet effective method for yourself. You might be surprised at the amount of dust and grime lurking behind your fridge. And once you’ve experienced the difference a clean set of coils can make, you’ll wonder why you didn’t start doing this sooner.
Ready to take your fridge maintenance to the next level? Consider these variations to personalize your cleaning routine:
* The Brush Attachment Boost: If your vacuum has a brush attachment, use it! The bristles can help loosen stubborn dust and debris, making the vacuuming process even more effective.
* The Deep Clean Approach: For a more thorough cleaning, unplug your refrigerator and carefully pull it away from the wall. This will give you better access to the coils and allow you to vacuum more effectively. Just remember to be careful when moving your fridge to avoid damaging your floors or the appliance itself.
* The Frequency Factor: How often should you clean your fridge coils? It depends on your environment. If you have pets or live in a dusty area, you might need to clean them every three to six months. Otherwise, once or twice a year should suffice.
* The Compressed Air Assist: For those hard-to-reach spots, a can of compressed air can be a game-changer. Use it to blow out any remaining dust after vacuuming. Be sure to wear eye protection when using compressed air.
We’re confident that this DIY trick will make a noticeable difference in your fridge’s performance. But we also want to hear from you! Share your experiences with cleaning your fridge coils using a vacuum in the comments below. Did you notice a difference in your fridge’s cooling ability? Did you save money on your energy bill? Your feedback will not only help other readers but also inspire them to take action and improve their own fridge maintenance routines. Let’s create a community of fridge-cleaning enthusiasts! So, grab your vacuum, roll up your sleeves, and get ready to give your fridge the TLC it deserves. You’ll be amazed at the results!
Frequently Asked Questions (FAQs)
Why is it so important to clean my fridge coils?
Cleaning your fridge coils is crucial for several reasons. First and foremost, dirty coils force your refrigerator to work harder to maintain the desired temperature. This increased workload translates directly into higher energy consumption and, consequently, higher electricity bills. Secondly, overworked coils can lead to premature wear and tear on your refrigerator’s components, shortening its lifespan and potentially leading to costly repairs or even replacement. Finally, a fridge struggling to cool efficiently can compromise the freshness and safety of your food, increasing the risk of spoilage and foodborne illnesses. By regularly cleaning your fridge coils, you ensure optimal performance, energy efficiency, and food safety.
How often should I clean my fridge coils?
The frequency of cleaning your fridge coils depends on several factors, including your environment and lifestyle. If you have pets, especially those that shed a lot, or if you live in a dusty area, you should aim to clean your coils every three to six months. In less dusty environments, cleaning them once or twice a year may be sufficient. A good rule of thumb is to check your coils every few months. If you notice a significant buildup of dust and debris, it’s time for a cleaning. Also, if you notice your fridge running more frequently or feeling warmer than usual, it’s a sign that the coils may be dirty and need attention.
What type of vacuum cleaner is best for cleaning fridge coils?
Ideally, a vacuum cleaner with a hose attachment and a brush attachment is best suited for cleaning fridge coils. The hose allows you to reach the coils, which are often located in a hard-to-access area at the back or bottom of the refrigerator. The brush attachment helps to loosen and remove stubborn dust and debris without damaging the coils. A handheld vacuum cleaner can also be effective, especially if it has a narrow nozzle attachment. Avoid using a vacuum cleaner with excessive suction, as this could potentially damage the delicate coils. If your vacuum has adjustable suction settings, use the lowest setting possible.
Can I use a damp cloth to clean the coils instead of a vacuum?
While a damp cloth can be used to wipe down the coils, it’s generally not as effective as a vacuum cleaner. A vacuum cleaner removes the dust and debris completely, whereas a damp cloth may simply smear it around or leave behind moisture, which can attract more dust in the future. If you choose to use a damp cloth, make sure it’s only slightly damp and not dripping wet. Also, be extremely careful not to get any water on the electrical components of the refrigerator. Always unplug the fridge before using a damp cloth to clean the coils. For best results, use a vacuum cleaner first to remove the bulk of the dust and debris, then follow up with a slightly damp cloth to wipe down any remaining residue.
Is it safe to use compressed air to clean fridge coils?
Yes, compressed air can be a helpful tool for cleaning fridge coils, especially for reaching hard-to-access areas. However, it’s essential to use it safely and responsibly. Always wear eye protection when using compressed air to prevent dust and debris from getting into your eyes. Also, be careful not to damage the coils with the force of the air. Use short bursts of air and avoid holding the nozzle too close to the coils. Before using compressed air, unplug your refrigerator to minimize the risk of electrical shock. After using compressed air, vacuum up any remaining dust and debris that has been dislodged.
What if I can’t reach the coils behind my fridge?
If you have difficulty reaching the coils behind your fridge, try using a vacuum cleaner with a long hose attachment or a flexible crevice tool. These tools can help you access tight spaces and remove dust and debris from hard-to-reach areas. If you’re still unable to reach the coils, consider carefully pulling your refrigerator away from the wall. Before doing so, unplug the fridge and ensure that you have enough space to move it safely. Be careful not to damage your floors or the appliance itself. Once you’ve pulled the fridge away from the wall, you’ll have much better access to the coils and can clean them more effectively. If you’re uncomfortable moving your fridge, consider asking a friend or family member for assistance.
Will cleaning my fridge coils really save me money?
Yes, cleaning your fridge coils can indeed save you money on your energy bill. When the coils are covered in dust and debris, your refrigerator has to work harder to maintain the desired temperature. This increased workload translates directly into higher energy consumption. By cleaning the coils, you allow your fridge to operate more efficiently, reducing its energy consumption and lowering your electricity bill. The amount of money you save will depend on several factors, including the age and efficiency of your refrigerator, the amount of dust and debris on the coils, and your local electricity rates. However, even a small reduction in energy consumption can add up over time, making cleaning your fridge coils a worthwhile investment.


Leave a Comment