

Deep Clean Fridge Tips: Is your refrigerator starting to resemble a science experiment gone wrong? Don’t worry, you’re not alone! We’ve all been there, staring into the abyss of forgotten leftovers and questionable condiments. But fear not, because I’m about to share some game-changing deep clean fridge tips that will transform your refrigerator from a biohazard zone into a sparkling sanctuary for your food.
Refrigerators, in their modern form, have only been around for a little over a century, but the desire to keep food cold dates back to ancient civilizations using ice and snow. Today, they’re an indispensable part of our lives, preserving our groceries and preventing spoilage. However, a neglected fridge can become a breeding ground for bacteria, leading to unpleasant odors and potentially even foodborne illnesses.
That’s why mastering the art of a deep clean is so crucial. Imagine opening your fridge to find neatly organized shelves, fresh-smelling air, and perfectly preserved ingredients. No more mystery smells, no more wasted food, and no more frantic searches for that jar of pickles hiding behind a mountain of containers. This DIY guide will provide you with simple, effective strategies to tackle even the most stubborn fridge grime, ensuring your food stays fresh and your kitchen remains a healthy and happy space. Let’s get started!
Deep Cleaning Your Fridge: A Sparkling Sanctuary for Food!
Okay, let’s be honest, cleaning the fridge isn’t exactly anyone’s favorite chore. But a clean fridge isn’t just about aesthetics; it’s about food safety, preventing funky smells, and making your groceries last longer. So, grab your gloves, put on some tunes, and let’s dive into this deep clean! I promise, it’s not as daunting as it seems.
What You’ll Need: Your Cleaning Arsenal
Before we even think about unplugging anything, let’s gather our supplies. Having everything ready will make the process so much smoother. Here’s my go-to list:
* Cleaning cloths or microfiber towels: You’ll need a few!
* Warm water: The base of our cleaning solution.
* Baking soda: A natural deodorizer and gentle abrasive.
* White vinegar: Cuts through grease and grime like a champ.
* Dish soap: For extra stubborn messes.
* Spray bottle: For easy application of your cleaning solutions.
* Old toothbrush: Perfect for scrubbing those hard-to-reach spots.
* Trash bags: For disposing of old food.
* Cooler or insulated bag: To keep perishable items cold while you clean.
* Rubber gloves: To protect your hands.
* Optional: Essential oils (lemon, tea tree): For a fresh, clean scent.
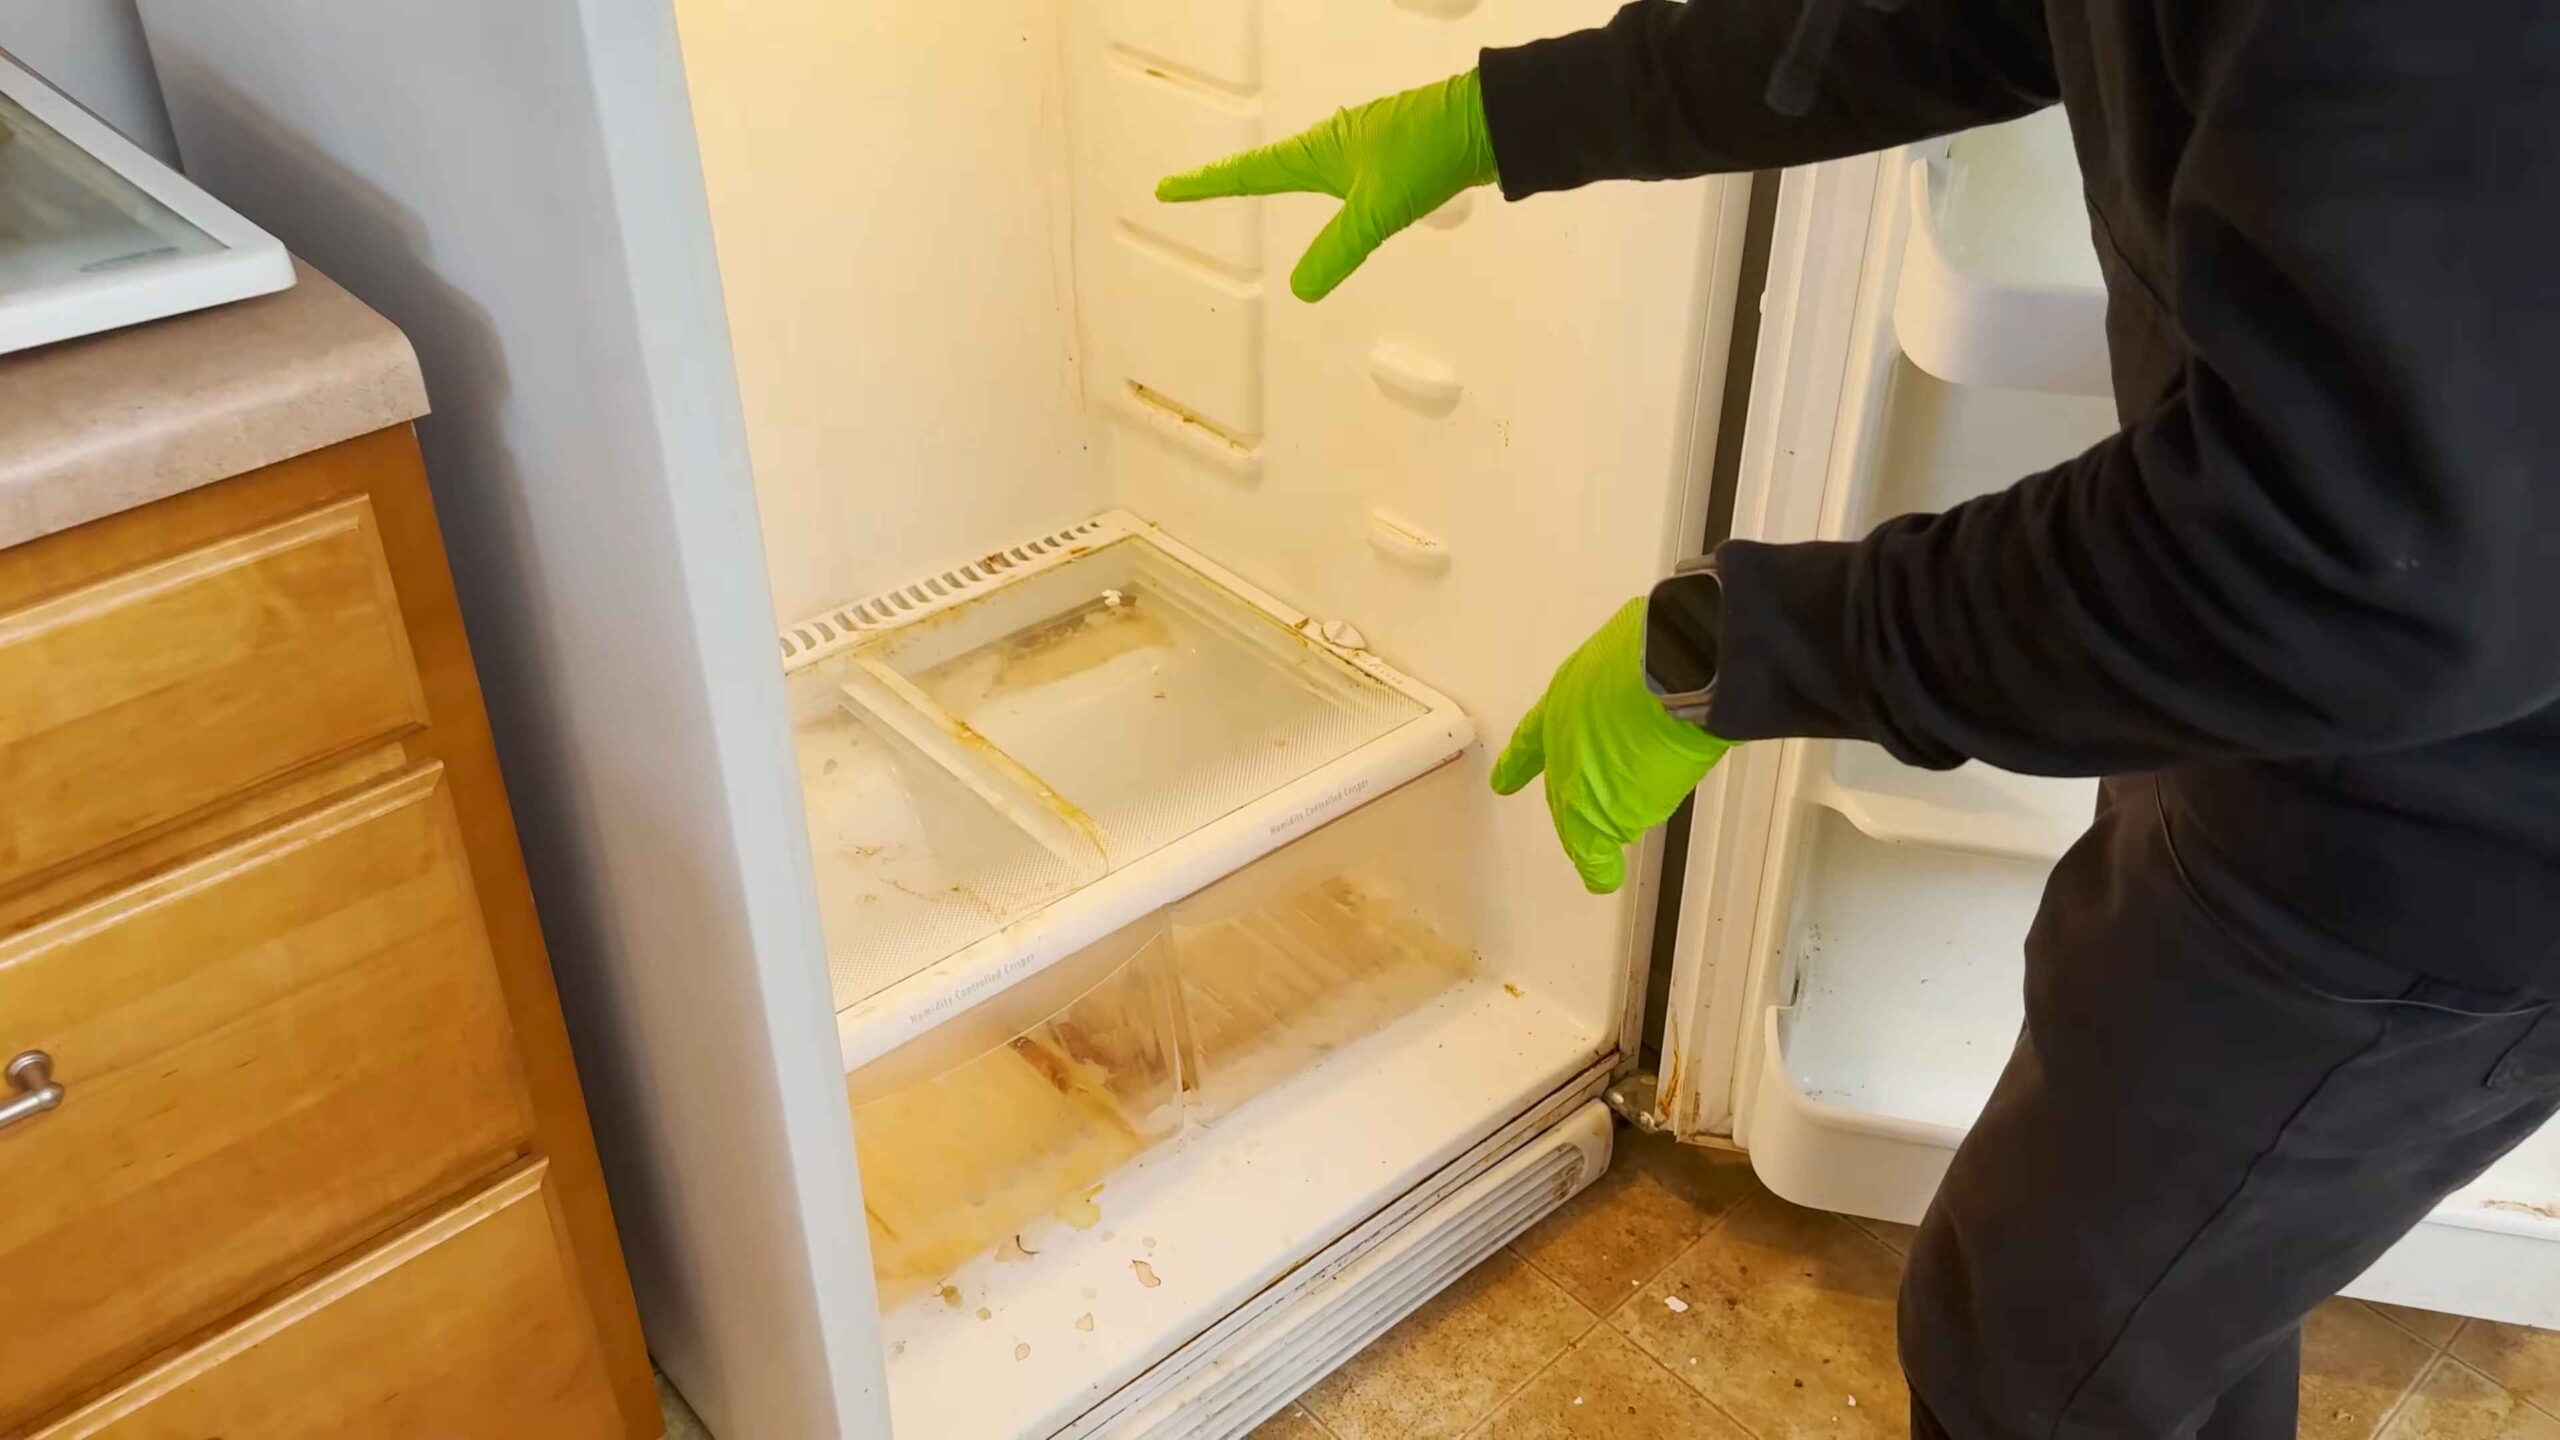
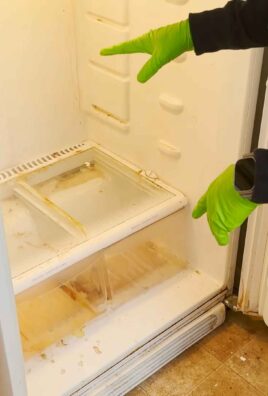
Phase 1: Emptying and Assessing the Situation
This is where we face the music. It’s time to confront those forgotten leftovers and mystery containers.
1. Unplug the Fridge: Safety first! Unplug your refrigerator from the power outlet. This prevents any accidental shocks and allows the fridge to warm up slightly, making it easier to remove stuck-on food.
2. Remove All Food: Take everything out of the fridge, including condiments, drawers, and shelves. This is the most crucial step. As you remove items, check expiration dates and toss anything that’s past its prime or looks questionable. Be honest with yourself!
3. Sort and Organize: As you remove food, sort it into categories: items to keep, items to toss, and items that need to be eaten soon. Place the items you’re keeping in your cooler or insulated bag with ice packs to maintain their temperature. This is especially important for dairy, meat, and other perishable goods.
4. Remove Shelves and Drawers: Take out all removable shelves, drawers, and bins. This will allow you to clean them thoroughly and reach every nook and cranny inside the fridge.
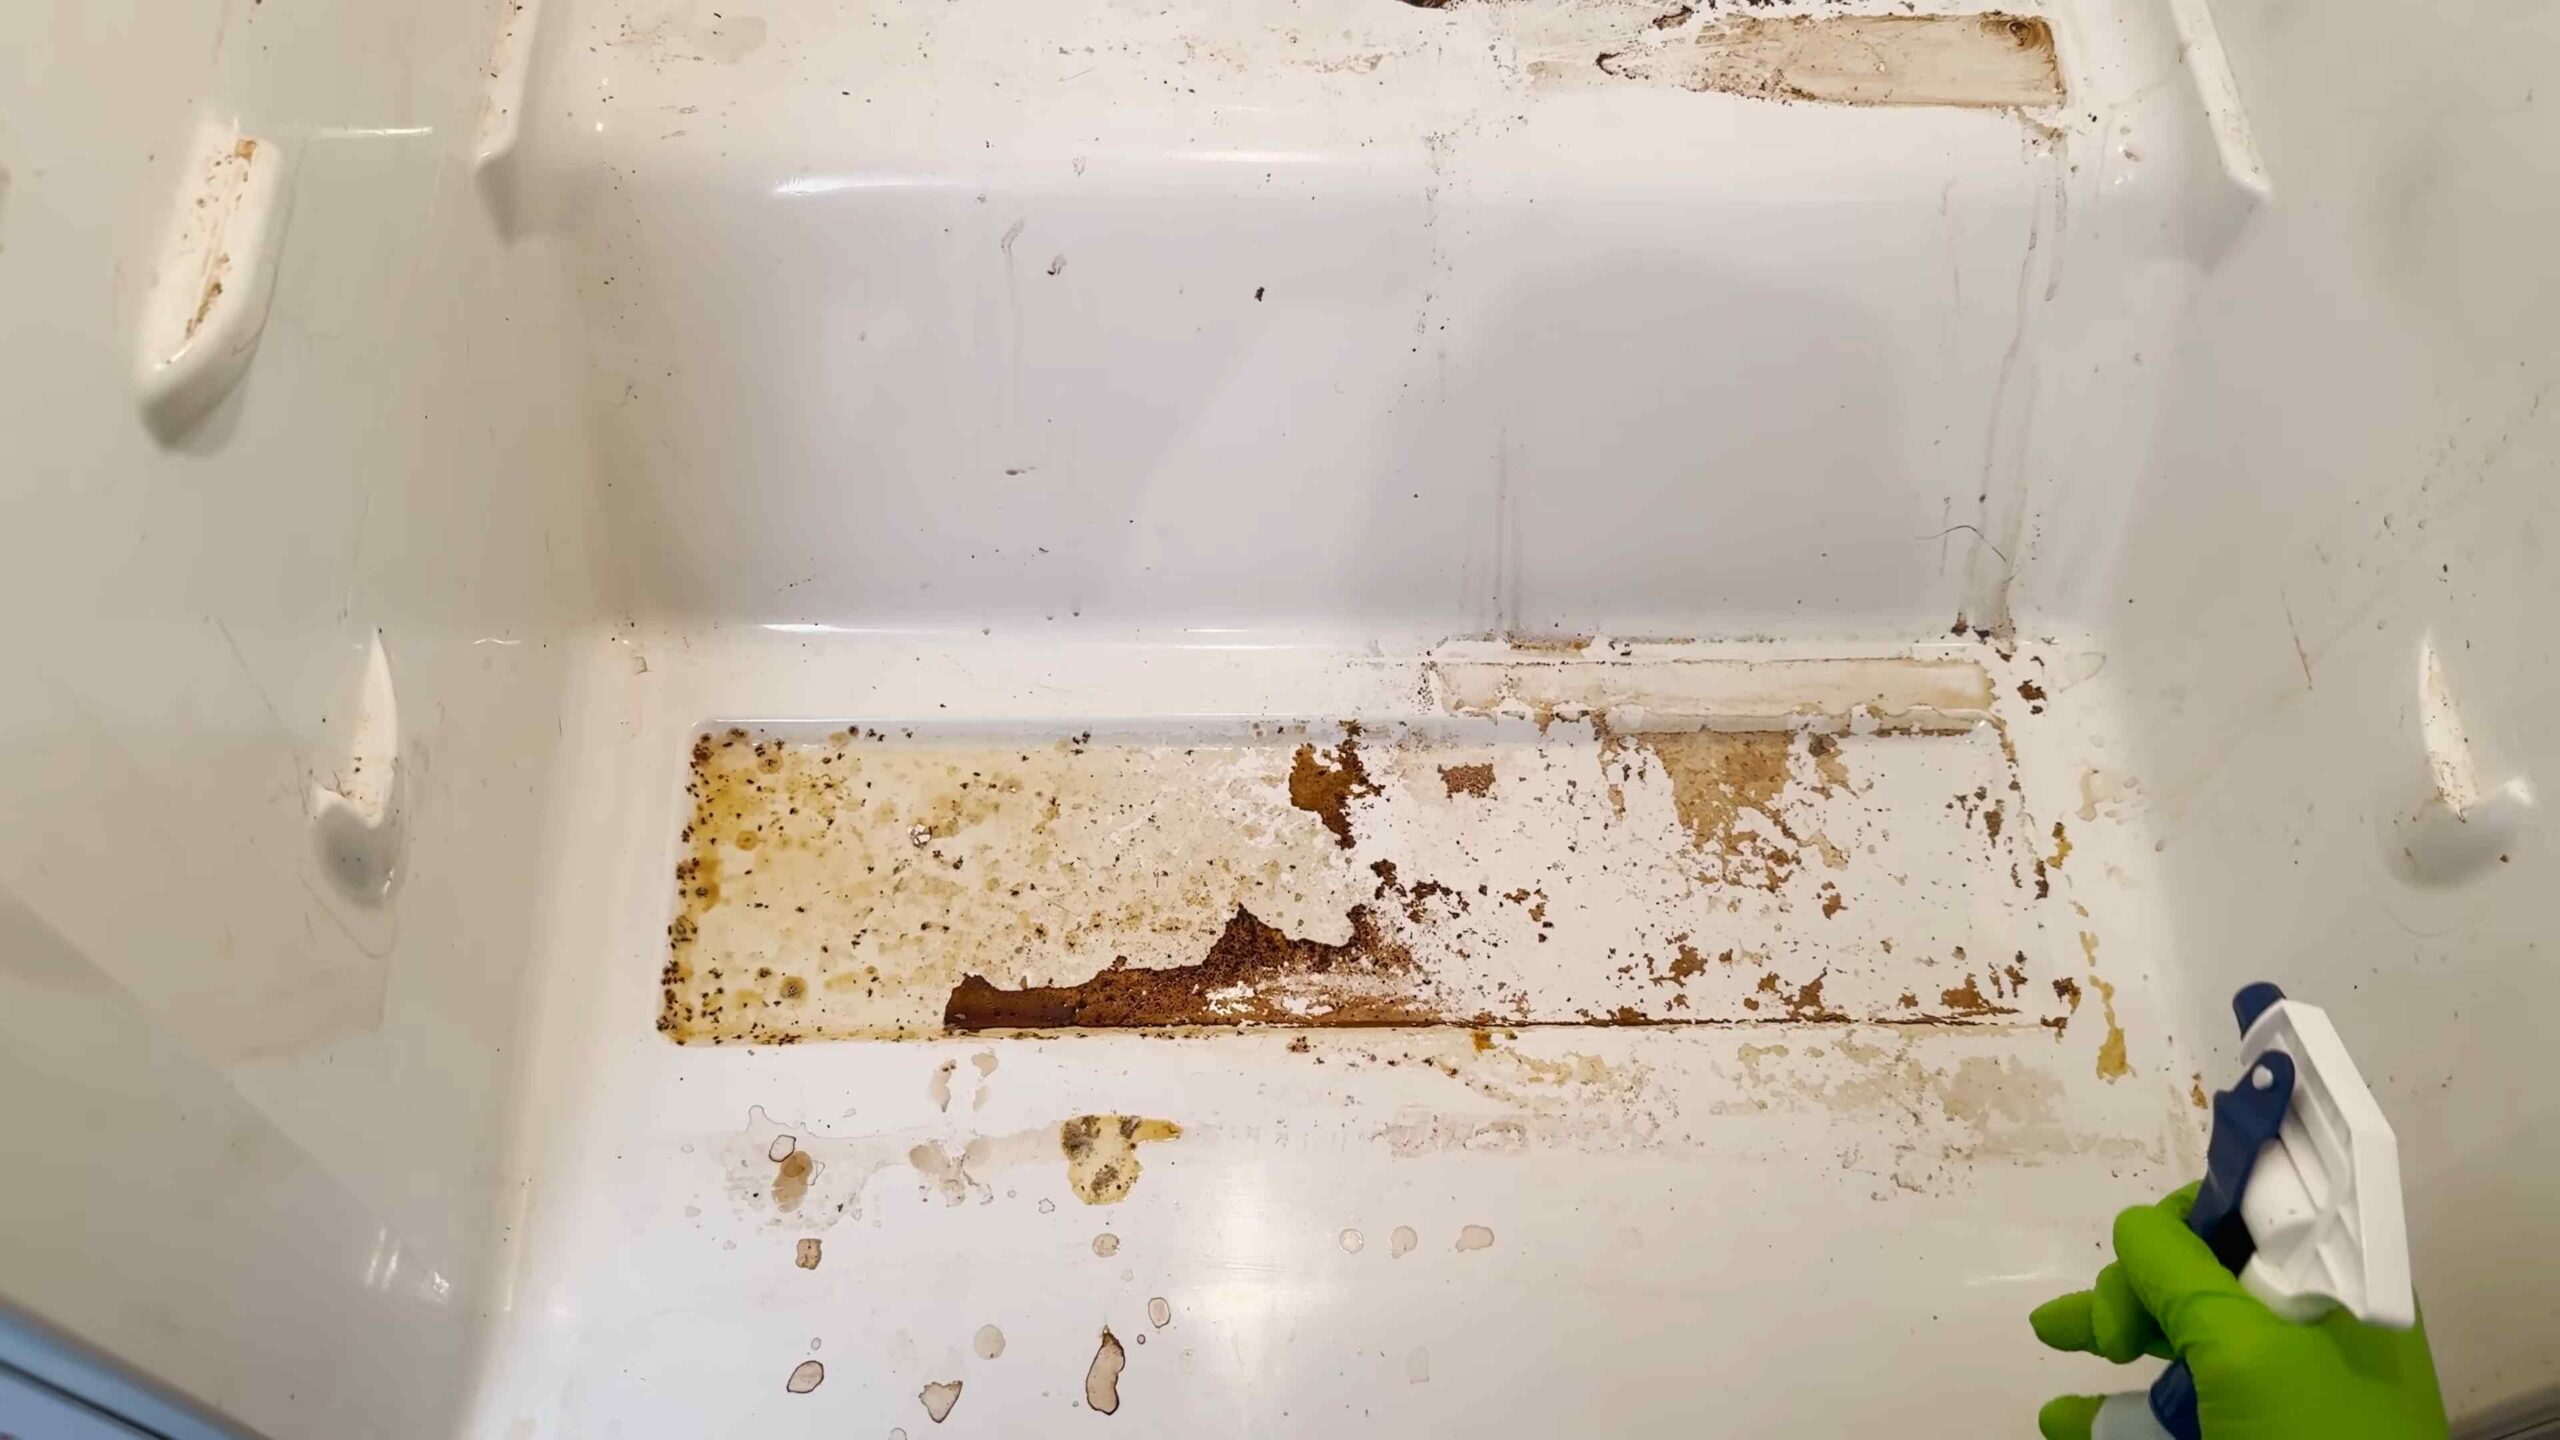
5. Assess the Damage: Take a good look at the inside of your fridge. Identify any problem areas, such as spills, stains, or mold. This will help you determine which cleaning solutions and techniques you’ll need to use.
Phase 2: Cleaning the Interior
Now for the fun part (okay, maybe not fun, but definitely satisfying!). We’re going to tackle the inside of the fridge, banishing grime and odors.
1. Prepare Your Cleaning Solutions:
* Baking Soda Paste: Mix baking soda with a small amount of water to create a paste. This is great for scrubbing stubborn stains.
* Vinegar Solution: Mix equal parts white vinegar and warm water in a spray bottle. This is your all-purpose cleaner.
* Dish Soap Solution: Mix a few drops of dish soap with warm water in a bowl. This is for extra greasy areas.
2. Start with the Walls and Ceiling: Spray the interior walls and ceiling of the fridge with the vinegar solution. Let it sit for a few minutes to loosen any grime. Then, wipe down with a clean cloth. For stubborn stains, use the baking soda paste and scrub gently with a soft cloth or sponge.
3. Tackle the Shelves and Drawers: Wash the shelves and drawers in the sink with warm, soapy water. Use a sponge or cloth to scrub away any food residue. Rinse thoroughly with clean water and dry completely before putting them back in the fridge. If you have a dishwasher, you can often put the shelves and drawers in the dishwasher on a gentle cycle. Check your refrigerator’s manual to be sure.
4. Clean the Door: Don’t forget the door! Wipe down the door shelves and compartments with the vinegar solution. Pay special attention to areas where spills are common, such as the milk and juice containers.
5. Address Problem Areas:
* Mold: If you find mold, mix a solution of one part bleach to ten parts water. Wear gloves and eye protection. Apply the solution to the moldy areas and let it sit for a few minutes. Then, scrub with a brush and rinse thoroughly with clean water. Make sure to dry the area completely to prevent the mold from returning.
* Sticky Spills: For sticky spills, soak a cloth in warm water and place it over the spill for a few minutes to soften the residue. Then, wipe away with a clean cloth.
* Lingering Odors: To combat lingering odors, place an open box of baking soda in the fridge. You can also place a cotton ball soaked in vanilla extract or lemon juice in the fridge for a few hours.
6. Rinse and Dry: After cleaning all surfaces, rinse the interior of the fridge with a clean, damp cloth to remove any remaining cleaning solution. Dry thoroughly with a clean towel. This is important to prevent mold growth.
Phase 3: Cleaning the Exterior and Details
We’re not just cleaning the inside! The outside needs some love too.
1. Wipe Down the Exterior: Use a damp cloth to wipe down the exterior of the fridge, including the door, sides, and top. Pay attention to the handles, which can accumulate fingerprints and grime.
2. Clean the Door Seals: The door seals are often overlooked, but they can accumulate dirt and grime, which can prevent the door from sealing properly. Use a damp cloth or toothbrush to clean the seals.
3. Clean the Drip Tray: Most refrigerators have a drip tray located at the bottom of the fridge. Remove the drip tray and empty any water that has accumulated. Wash the tray with warm, soapy water and dry thoroughly before replacing it.
4. Clean the Condenser Coils (Optional): The condenser coils are located on the back or bottom of the fridge. Cleaning them can improve the fridge’s efficiency. Unplug the fridge and use a vacuum cleaner with a brush attachment to remove dust and debris from the coils. Be careful not to damage the coils.
Phase 4: Reassembling and Restocking
Almost there! Time to put everything back in its place.
1. Replace Shelves and Drawers: Once the interior of the fridge is completely dry, replace the shelves and drawers.
2. Restock the Fridge: Put the food back into the fridge, organizing it in a way that makes sense for you. Place items that need to be eaten soon in the front, and items with longer expiration dates in the back.
3. Organize for Efficiency:
* Meat and Dairy: Store meat and dairy products on the bottom shelf, where it’s coldest.
* Fruits and Vegetables: Store fruits and vegetables in the crisper drawers.
* Condiments: Store condiments in the door shelves.
* Leftovers: Store leftovers in airtight containers on a shelf where you’ll see them and remember to eat them.
4. Plug the Fridge Back In: Plug the refrigerator back into the power outlet.
5. Monitor the Temperature: Check the temperature of the fridge to make sure it’s set to the correct level (typically between 35-38°F or 1-3°C). It may take a few hours for the fridge to reach the desired temperature.
Maintenance Tips for a Continuously Clean Fridge
Okay, you’ve done the deep clean! Now, let’s keep it that way with these simple maintenance tips:
* Wipe up spills immediately: Don’t let spills sit and harden. Clean them up as soon as they happen.
* Check expiration dates regularly: Get rid of expired food before it starts to smell or spoil.
* Use airtight containers: Store leftovers and open food in airtight containers to prevent odors and spills.
* Clean the fridge weekly: Do a quick wipe-down of the interior of the fridge each week to prevent grime from building up.
* Keep a box of baking soda in the fridge: Baking soda absorbs odors and helps keep the fridge smelling fresh. Replace the box every few months.
And there you have it! A sparkling clean fridge that’s ready to keep your food fresh and your kitchen smelling great. Happy cleaning!
Conclusion
So, there you have it! Mastering the art of a deep clean fridge isn’t just about aesthetics; it’s about food safety, efficiency, and ultimately, saving you money. A sparkling clean refrigerator not only makes you feel good every time you open it, but it also extends the life of your groceries, prevents unpleasant odors, and ensures your family is consuming food stored in a hygienic environment.
This DIY deep cleaning method, using readily available household ingredients, is a game-changer. Forget harsh chemicals and expensive cleaning products. With a little elbow grease and our simple steps, you can achieve professional-level results without breaking the bank or exposing your family to potentially harmful substances.
Why is this DIY deep clean fridge method a must-try? Because it’s effective, affordable, eco-friendly, and customizable! You control the ingredients, ensuring they align with your preferences and sensitivities. Plus, the satisfaction of knowing you’ve created a clean and healthy space for your food is incredibly rewarding.
Looking for variations? Consider adding a few drops of your favorite essential oil (lemon, tea tree, or lavender are excellent choices) to your cleaning solution for an extra boost of freshness and antibacterial properties. For stubborn stains, create a paste of baking soda and water and let it sit on the affected area for a few minutes before scrubbing. You can also use old toothbrushes to get into those hard-to-reach crevices. Another variation is to use vinegar and water solution to wipe down the fridge.
Don’t just take our word for it – try this deep clean fridge method yourself! We’re confident you’ll be amazed by the results. The process is straightforward, the ingredients are accessible, and the benefits are undeniable. Imagine opening your refrigerator to a spotless, organized space filled with fresh, healthy food. That’s the power of a deep clean fridge!
We encourage you to embark on this cleaning adventure and share your experiences with us. Did you discover any particularly stubborn stains? Did you find a unique way to organize your fridge after the deep clean? What essential oil blend did you use? We’re eager to hear your tips, tricks, and success stories. Share your photos and comments on our social media channels using #DeepCleanFridgeDIY. Let’s create a community of clean fridge enthusiasts!
A clean fridge is a happy fridge, and a happy fridge means a happy and healthy you. So, roll up your sleeves, gather your supplies, and get ready to transform your refrigerator into a sparkling sanctuary for your food. You won’t regret it!
Frequently Asked Questions (FAQ)
1. How often should I deep clean my fridge?
The frequency of deep cleaning depends on your usage and lifestyle. However, a good rule of thumb is to deep clean your fridge every 3-6 months. This helps prevent the buildup of bacteria, mold, and unpleasant odors. In between deep cleans, aim to wipe up spills immediately and discard expired food regularly. A quick weekly wipe-down of shelves and drawers can also help maintain cleanliness. If you notice persistent odors or frequent spills, you might need to deep clean more often.
2. What’s the best way to prevent food from spoiling in the fridge?
Proper food storage is key to preventing spoilage. Here are some tips:
* Store food in airtight containers: This prevents cross-contamination and keeps food fresher for longer.
* Keep your fridge at the correct temperature: The ideal temperature is between 37°F (3°C) and 40°F (4°C). Use a refrigerator thermometer to monitor the temperature.
* Organize your fridge strategically: Place items that spoil quickly (like milk and eggs) on the coldest shelves, usually the top shelves. Store fruits and vegetables in the crisper drawers.
* Don’t overcrowd your fridge: Overcrowding restricts airflow, which can lead to uneven cooling and faster spoilage.
* Use the FIFO (First In, First Out) method: When stocking your fridge, place newer items behind older ones to ensure you use the older items first.
3. Can I use bleach to clean my fridge?
While bleach is a powerful disinfectant, it’s generally not recommended for cleaning your fridge due to its strong odor and potential for chemical residue. If you choose to use bleach, dilute it heavily with water (1 tablespoon of bleach per gallon of water) and rinse thoroughly with clean water afterward. Ensure the fridge is well-ventilated to avoid inhaling fumes. However, safer and more natural alternatives like vinegar and baking soda are just as effective and pose less risk.
4. How do I get rid of stubborn odors in my fridge?
Stubborn odors can be challenging, but here are a few effective methods:
* Baking soda: Place an open box of baking soda in your fridge to absorb odors. Replace it every month or two.
* Activated charcoal: Similar to baking soda, activated charcoal is excellent at absorbing odors. You can find activated charcoal filters specifically designed for refrigerators.
* Coffee grounds: Place a bowl of dry, unused coffee grounds in your fridge to neutralize odors.
* Vinegar: Leave a bowl of white vinegar in your fridge overnight to absorb odors.
* Lemon: Place a few lemon halves in your fridge to freshen the air.
5. What’s the best way to clean the ice maker and water dispenser in my fridge?
Cleaning your ice maker and water dispenser is crucial for maintaining water quality. Here’s how:
* Ice maker: Empty the ice bin and discard any old ice. Clean the ice bin with warm, soapy water and rinse thoroughly. For the ice maker itself, consult your refrigerator’s manual for specific cleaning instructions. Some models have a self-cleaning cycle. You can also use a solution of vinegar and water to clean the ice maker components.
* Water dispenser: Wipe down the dispenser nozzle with a clean cloth. To clean the internal water line, consult your refrigerator’s manual. Some models have a filter that needs to be replaced regularly. You can also flush the water line with a solution of vinegar and water.
6. How can I prevent mold from growing in my fridge?
Mold thrives in damp environments, so keeping your fridge dry is essential. Here are some tips:
* Wipe up spills immediately: Don’t let spills sit and fester.
* Ensure proper ventilation: Avoid overcrowding your fridge to allow for proper airflow.
* Regularly check for leaks: Inspect the seals around the doors and drawers for any signs of damage or leaks.
* Use moisture absorbers: Place moisture absorbers, like baking soda or silica gel packets, in your fridge to help absorb excess moisture.
* Clean regularly: Regular cleaning helps prevent the buildup of mold spores.
7. What tools do I need for a deep clean fridge?
Having the right tools makes the job easier and more efficient. Here’s a list of essential tools:
* Microfiber cloths: These are excellent for wiping down surfaces without leaving streaks.
* Spray bottle: For your cleaning solution.
* Soft-bristled brush or sponge: For scrubbing stubborn stains.
* Old toothbrush: For cleaning hard-to-reach crevices.
* Bucket or sink: For washing removable parts.
* Refrigerator thermometer: To monitor the temperature.
* Trash bags: For discarding expired food.
* Gloves: To protect your hands.
8. Is it necessary to unplug my fridge before deep cleaning?
While it’s not always necessary, unplugging your fridge before deep cleaning is recommended for safety reasons. This eliminates the risk of electric shock and allows you to clean the interior more thoroughly without worrying about damaging any electrical components. If you choose not to unplug your fridge, be extra careful when cleaning around electrical parts.
9. How long does it take to deep clean a fridge?
The time it takes to deep clean a fridge depends on its size and condition. However, you can typically expect to spend 1-2 hours on the task. This includes removing all the food, disassembling the shelves and drawers, cleaning the interior and exterior, and reassembling everything.
10. What should I do with the food while I’m cleaning the fridge?
To keep your food safe while you’re cleaning, store it in a cooler with ice packs. This will help maintain the temperature and prevent spoilage. If you’re cleaning your fridge for an extended period, you may need to transfer the food to a refrigerator or freezer.


Leave a Comment