

Growing Peppers Backyard can be incredibly rewarding! Imagine stepping outside your back door and harvesting vibrant, flavorful peppers, ready to spice up your next meal. Forget those bland, overpriced peppers from the grocery store; with a few simple tricks and a little DIY spirit, you can cultivate a thriving pepper patch right in your own backyard.
For centuries, peppers have been cherished across cultures, from the fiery chilies of South America, where they originated, to the sweet bell peppers gracing salads worldwide. Their journey is a testament to their versatility and adaptability. But let’s be honest, sometimes getting those peppers to flourish can feel like a challenge. That’s where these DIY hacks come in!
I’ve been there, struggling with stunted growth, pest infestations, and disappointing harvests. That’s why I’m so excited to share these tried-and-true methods that have transformed my pepper-growing game. Whether you’re a seasoned gardener or just starting out, these tips will help you maximize your yield and enjoy a bountiful harvest of delicious peppers. So, let’s dive in and unlock the secrets to successfully growing peppers backyard, one DIY trick at a time!
Growing Peppers Like a Pro: My Backyard Pepper Paradise Guide
Hey fellow gardeners! I’m so excited to share my tried-and-true method for growing a bumper crop of peppers right in your own backyard. Forget those bland, store-bought peppers – we’re talking vibrant colors, intense flavors, and bragging rights galore! This guide is packed with everything I’ve learned over the years, from seed starting to harvesting, so you can create your own pepper paradise.
Choosing Your Pepper Varieties
Before we get our hands dirty, let’s talk about pepper varieties. The possibilities are endless, and choosing the right ones for your taste and climate is crucial.
* Sweet Peppers: These are your bell peppers (red, yellow, orange, green), banana peppers, and pimientos. They’re mild, versatile, and perfect for stuffing, salads, or snacking.
* Hot Peppers: This category includes everything from jalapeños and serranos to habaneros and ghost peppers. Consider your heat tolerance and how you plan to use them.
* Consider your climate: Some peppers need a longer growing season than others. If you live in a cooler climate, opt for varieties that mature quickly.
* Think about your space: Some pepper plants grow tall and bushy, while others are more compact. Choose varieties that fit your garden space.
Starting Your Pepper Seeds Indoors
Starting your pepper seeds indoors gives them a head start, especially if you live in a region with a shorter growing season. I usually start mine about 6-8 weeks before the last expected frost.
1. Gather your supplies: You’ll need seed starting trays or small pots, seed starting mix (not regular potting soil!), pepper seeds, a spray bottle, and a heat mat (optional but recommended).
2. Prepare your seed starting mix: Moisten the seed starting mix with water until it’s damp but not soggy.
3. Sow your seeds: Fill your seed starting trays or pots with the moistened mix. Make a small indentation (about 1/4 inch deep) in the center of each cell or pot. Place 2-3 pepper seeds in each indentation and gently cover them with the mix.
4. Water gently: Use a spray bottle to mist the surface of the soil. Avoid overwatering, as this can lead to damping off (a fungal disease that kills seedlings).
5. Provide warmth: Pepper seeds need warmth to germinate. Place your seed starting trays or pots on a heat mat or in a warm location (around 80-85°F).
6. Maintain moisture: Keep the soil consistently moist but not soggy. Check the moisture level daily and mist with water as needed.
7. Provide light: Once the seedlings emerge (usually within 7-14 days), they’ll need plenty of light. Place them under grow lights or in a sunny window. If using a window, rotate the trays or pots regularly to prevent the seedlings from leaning towards the light.
8. Thin your seedlings: Once the seedlings have their first true leaves (the second set of leaves that appear after the cotyledons), thin them to one seedling per cell or pot. Choose the strongest, healthiest seedling and snip off the others at the soil line.
Transplanting Your Pepper Seedlings Outdoors
Once the danger of frost has passed and the soil has warmed up, it’s time to transplant your pepper seedlings outdoors.
1. Harden off your seedlings: Before transplanting, you’ll need to harden off your seedlings to acclimate them to outdoor conditions. This involves gradually exposing them to sunlight, wind, and cooler temperatures over a period of 7-10 days. Start by placing them outdoors in a sheltered location for a few hours each day, gradually increasing the amount of time they spend outdoors.
2. Prepare your garden bed: Choose a sunny location with well-drained soil. Peppers need at least 6-8 hours of sunlight per day. Amend the soil with compost or other organic matter to improve its fertility and drainage.
3. Space your plants: Space your pepper plants 18-24 inches apart, depending on the variety. Taller varieties may need more space.
4. Dig your holes: Dig holes that are slightly larger than the root balls of your seedlings.
5. Transplant your seedlings: Gently remove the seedlings from their trays or pots. Loosen the roots slightly and place the seedlings in the holes. Backfill with soil and gently firm around the base of the plants.
6. Water thoroughly: Water the newly transplanted seedlings thoroughly to help them settle in.
7. Mulch: Apply a layer of mulch around the base of the plants to help retain moisture, suppress weeds, and regulate soil temperature. I like to use straw or shredded leaves.
Caring for Your Pepper Plants
Once your pepper plants are in the ground, they’ll need regular care to thrive.
* Watering: Water your pepper plants deeply and regularly, especially during hot, dry weather. Aim to keep the soil consistently moist but not soggy. Water at the base of the plants to avoid wetting the foliage, which can lead to fungal diseases.
* Fertilizing: Peppers are heavy feeders and benefit from regular fertilization. Use a balanced fertilizer (e.g., 10-10-10) or a fertilizer specifically formulated for vegetables. Follow the instructions on the fertilizer label. I like to side-dress my pepper plants with compost every few weeks to provide them with a steady supply of nutrients.
* Pruning: Pruning can help improve air circulation and encourage bushier growth. Remove any suckers (small shoots that grow from the base of the plant) and any yellowing or diseased leaves.
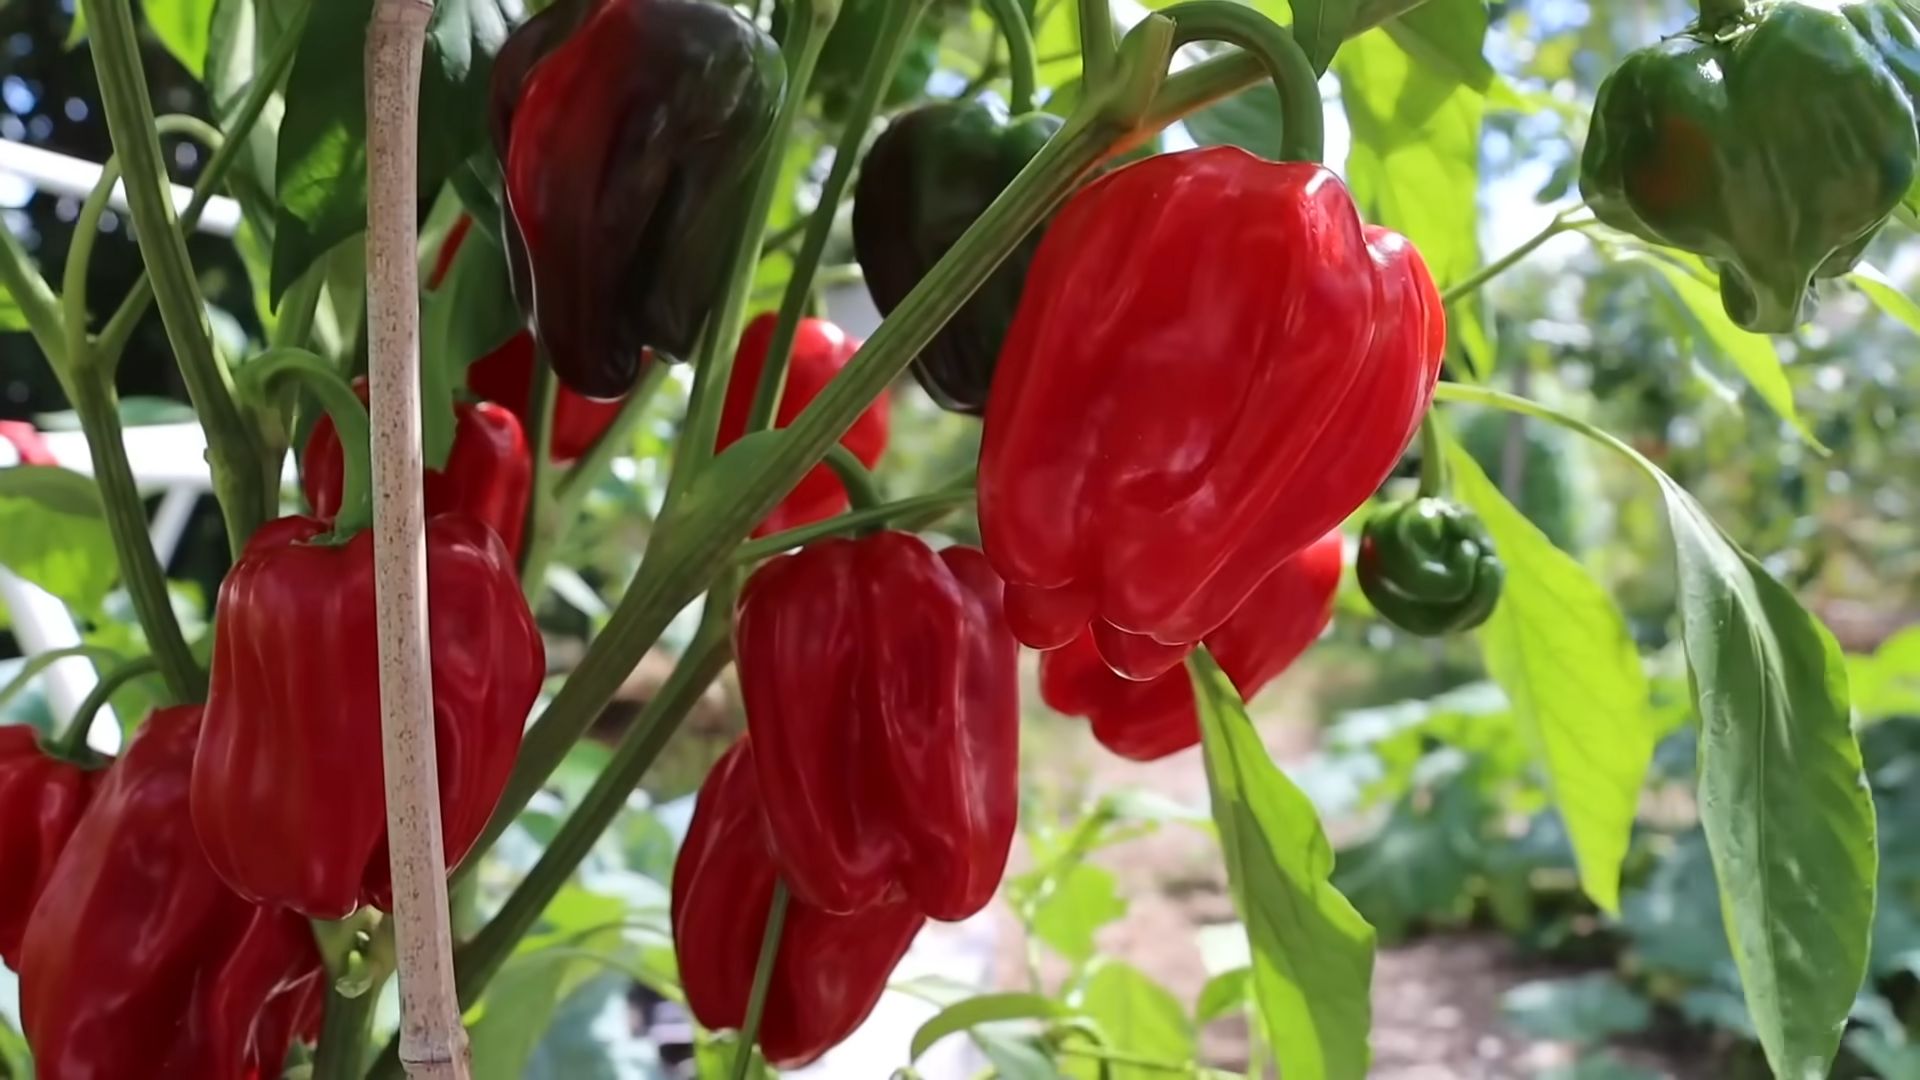
* Staking or caging: Taller pepper varieties may need staking or caging to support their heavy fruit. This will prevent the plants from falling over and breaking.
* Pest and disease control: Keep an eye out for pests and diseases. Common pepper pests include aphids, flea beetles, and pepper weevils. Common diseases include blossom end rot, bacterial leaf spot, and fungal diseases. Treat any problems promptly with organic pest control methods or fungicides.
Dealing with Common Pepper Problems
Even with the best care, you might encounter some problems while growing peppers. Here are a few common issues and how to address them:
* Blossom End Rot: This is a common problem caused by calcium deficiency. The bottom of the pepper turns brown and leathery. To prevent blossom end rot, ensure your soil is rich in calcium and water your plants consistently. You can also add calcium to the soil by mixing in crushed eggshells or bone meal.
* Aphids: These tiny pests suck the sap from pepper plants, causing them to weaken and yellow. You can control aphids by spraying them with a strong stream of water, using insecticidal soap, or introducing beneficial insects like ladybugs.
* Flea Beetles: These small, jumping beetles chew tiny holes in the leaves of pepper plants. You can control flea beetles by using row covers, applying diatomaceous earth, or spraying with neem oil.
* Sunscald: This occurs when peppers are exposed to too much direct sunlight, causing them to develop white or yellow patches. To prevent sunscald, provide some shade for your pepper plants during the hottest part of the day.
* Lack of Pollination: Sometimes, pepper flowers will drop off without producing fruit. This can be due to a lack of pollination. You can hand-pollinate your pepper flowers by gently shaking the plants or using a small paintbrush to transfer pollen from one flower to another.
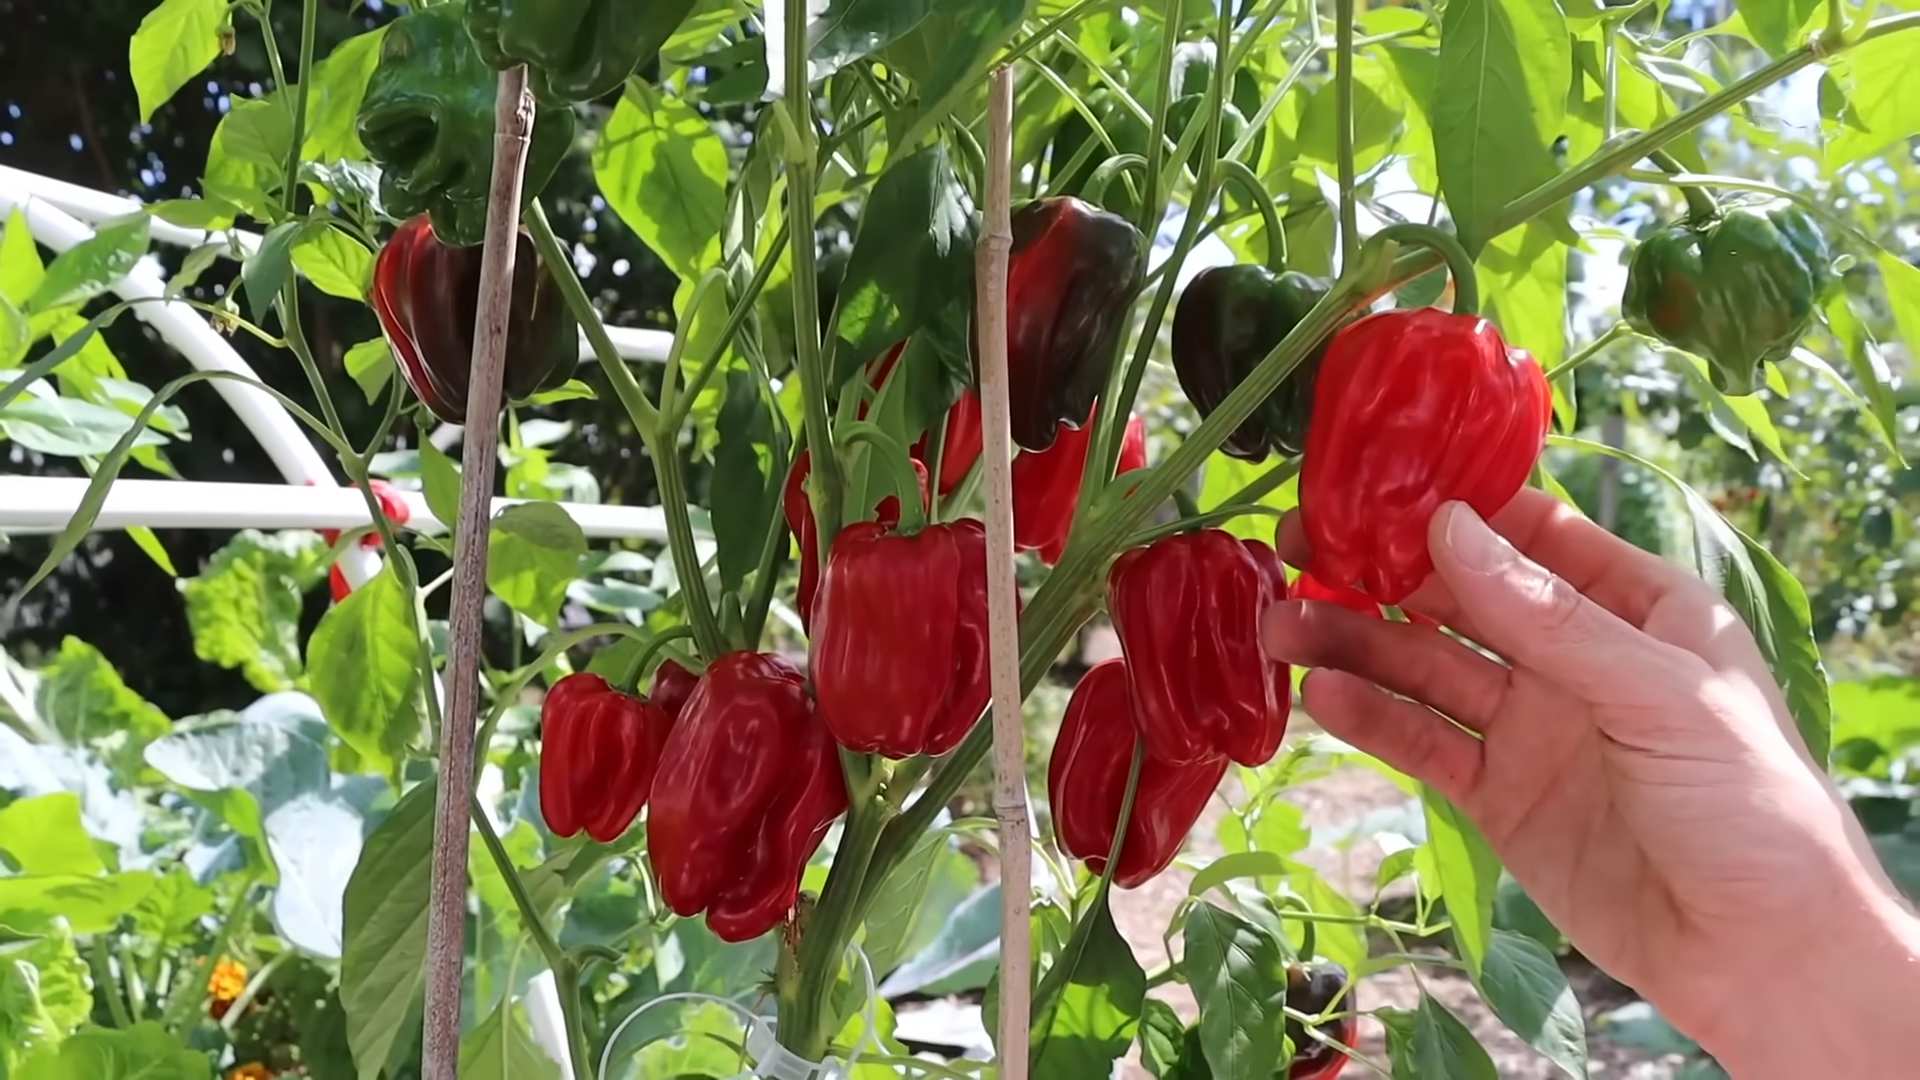
Harvesting Your Peppers
The moment you’ve been waiting for! Harvesting your peppers is the most rewarding part of the process.
1. Know when to harvest: The timing of your harvest will depend on the pepper variety and your personal preference. Sweet peppers are typically harvested when they’re fully colored and firm. Hot peppers can be harvested when they’re green or when they’ve turned their mature color (red, orange, yellow, etc.).
2. Use pruning shears or a knife: Cut the peppers from the plant using pruning shears or a sharp knife. Leave a small stem attached to the pepper.
3. Handle with care: Peppers are delicate and can bruise easily. Handle them with care to avoid damaging them.
4. Store your peppers: Store your peppers in the refrigerator for up to a week. You can also freeze, dry, or pickle them for longer storage.
Enjoying Your Homegrown Peppers
Now that you’ve harvested your peppers, it’s time to enjoy them! There are endless ways to use your homegrown peppers.
* Eat them fresh: Slice them up and add them to salads, sandwiches, or wraps.
* Cook them: Grill, roast, sauté, or stir-fry them.
* Stuff them: Fill them with rice, meat, or vegetables and bake them.
* Make salsa or hot sauce: Use them to create your own homemade salsa or hot sauce.
* Pickle
Conclusion
So, there you have it! Growing peppers in your backyard doesn’t have to be a daunting task. With a little planning, preparation, and the right techniques, you can transform your outdoor space into a vibrant and productive pepper paradise. This DIY approach, focusing on maximizing yield and minimizing common problems, is a must-try for any home gardener, whether you’re a seasoned pro or just starting out.
Why is this method so compelling? Because it empowers you to take control of your pepper production, from seed to harvest. You’ll know exactly what’s going into your plants, avoiding harmful chemicals and ensuring the freshest, most flavorful peppers imaginable. Plus, there’s an undeniable satisfaction in nurturing your own food from the ground up.
But don’t stop there! Experiment with different pepper varieties to discover your favorites. Try growing sweet bell peppers alongside fiery habaneros for a diverse harvest. Consider companion planting with herbs like basil and rosemary to deter pests and enhance flavor. You can even explore different soil amendments and fertilization techniques to fine-tune your growing process and optimize your yields.
Growing peppers backyard is not just about producing food; it’s about connecting with nature, learning new skills, and enjoying the fruits (or vegetables!) of your labor. It’s a rewarding experience that can bring joy and satisfaction to your life.
We encourage you to give this DIY trick a try. Start small, learn as you go, and don’t be afraid to experiment. And most importantly, share your experiences with us! We’d love to hear about your successes, your challenges, and any tips or tricks you’ve discovered along the way. Post photos of your pepper plants, share your favorite recipes, and let’s build a community of passionate pepper growers. Happy gardening!
Frequently Asked Questions (FAQs)
What is the best time to start growing peppers backyard?
The timing depends on your climate. In general, you should start pepper seeds indoors 6-8 weeks before the last expected frost. This allows the seedlings to develop a strong root system before being transplanted outdoors. If you live in a warmer climate with a longer growing season, you can start seeds directly in the ground after the last frost. However, starting indoors provides a head start and ensures a more consistent growing environment. Consider using a heat mat to improve germination rates, especially for hotter pepper varieties.
What kind of soil is best for growing peppers backyard?
Peppers thrive in well-draining, fertile soil with a slightly acidic pH (around 6.0-6.8). Amend your garden soil with compost or other organic matter to improve drainage and nutrient content. Avoid heavy clay soils, as they can become waterlogged and inhibit root growth. Raised beds or containers are excellent options for growing peppers, as they provide better drainage and allow you to control the soil composition. You can also add perlite or vermiculite to the soil mix to further improve drainage and aeration.
How much sunlight do peppers need?
Peppers require at least 6-8 hours of direct sunlight per day to produce a bountiful harvest. Choose a sunny location in your backyard that receives ample sunlight throughout the day. If you live in a particularly hot climate, some afternoon shade may be beneficial to prevent the plants from overheating. Insufficient sunlight can lead to leggy growth, reduced flowering, and smaller pepper yields.
How often should I water my pepper plants?
Water pepper plants deeply and regularly, especially during hot, dry weather. Aim to keep the soil consistently moist but not waterlogged. Overwatering can lead to root rot, while underwatering can stress the plants and reduce yields. Check the soil moisture regularly by sticking your finger into the soil about an inch deep. If the soil feels dry, it’s time to water. Consider using a soaker hose or drip irrigation system to deliver water directly to the roots and minimize water loss through evaporation.
What are some common pests and diseases that affect pepper plants?
Common pests that affect pepper plants include aphids, spider mites, whiteflies, and pepper weevils. Diseases include blossom-end rot, fungal leaf spots, and viral diseases. Regularly inspect your plants for signs of pests or diseases. Use organic pest control methods, such as insecticidal soap or neem oil, to control infestations. Ensure good air circulation around the plants to prevent fungal diseases. Blossom-end rot is caused by calcium deficiency, so amend your soil with calcium-rich amendments or use a calcium spray.
How do I prevent blossom-end rot?
Blossom-end rot is a common problem in peppers, characterized by a dark, sunken spot on the blossom end of the fruit. It’s caused by a calcium deficiency, which can be exacerbated by inconsistent watering. To prevent blossom-end rot, ensure your soil is rich in calcium and maintain consistent soil moisture. You can add lime or bone meal to the soil before planting to increase calcium levels. Water deeply and regularly, especially during hot, dry weather. Avoid over-fertilizing with nitrogen, as this can interfere with calcium uptake.
When should I harvest my peppers?
The timing of harvest depends on the pepper variety and your desired level of ripeness. Sweet bell peppers are typically harvested when they are fully colored and firm to the touch. Hot peppers can be harvested at various stages of ripeness, depending on your preference for heat level. The longer they stay on the plant, the hotter they will become. Use pruning shears or a sharp knife to cut the peppers from the plant, leaving a small stem attached.
Can I grow peppers in containers?
Yes, peppers grow very well in containers. Choose a container that is at least 12 inches in diameter and has drainage holes. Use a well-draining potting mix and provide regular watering and fertilization. Container-grown peppers may require more frequent watering than those grown in the ground, as the soil in containers tends to dry out more quickly. Place the container in a sunny location that receives at least 6-8 hours of direct sunlight per day.
What are some good companion plants for peppers?
Companion planting can help deter pests, attract beneficial insects, and improve the overall health of your pepper plants. Good companion plants for peppers include basil, rosemary, marigolds, and onions. Basil repels aphids and whiteflies, while rosemary deters cabbage moths and bean beetles. Marigolds attract beneficial insects, such as ladybugs and hoverflies, which prey on aphids. Onions repel many common pests, including aphids and spider mites.
How do I fertilize my pepper plants?
Fertilize pepper plants regularly with a balanced fertilizer, such as a 10-10-10 or 5-10-5. Apply fertilizer according to the package directions. Avoid over-fertilizing, as this can lead to excessive foliage growth and reduced fruit production. You can also use organic fertilizers, such as compost tea or fish emulsion. Side-dress the plants with compost or aged manure every few weeks to provide a slow-release source of nutrients.
How can I increase pepper production?
To increase pepper production, ensure your plants receive adequate sunlight, water, and nutrients. Prune the plants to encourage branching and flowering. Pinch off the first few flowers to encourage the plant to focus on vegetative growth before fruiting. Use a blossom set spray to improve fruit set, especially during hot weather. Provide support for the plants with stakes or cages to prevent them from falling over under the weight of the fruit. Regularly harvest the peppers to encourage the plant to produce more.
Leave a Comment