

Eggshell Bioplastic Bowl DIY: Ever wondered if you could turn your breakfast leftovers into something beautiful and functional? I know I have! For centuries, humans have sought ways to repurpose materials, driven by both necessity and ingenuity. From ancient pottery shards finding new life in mosaics to today’s upcycling craze, the spirit of resourcefulness is deeply ingrained in our culture.
But what if I told you that those humble eggshells you’re tossing in the compost bin hold the potential for creating a surprisingly durable and eco-friendly bioplastic? That’s right! This Eggshell Bioplastic Bowl DIY project isn’t just a fun craft; it’s a step towards sustainable living. In a world grappling with plastic waste, finding alternatives is more crucial than ever. This project offers a tangible way to reduce your environmental footprint while unleashing your creativity.
I’m going to guide you through a simple, step-by-step process to transform discarded eggshells into a charming and surprisingly sturdy bowl. Imagine the satisfaction of crafting something beautiful and useful from what was once considered waste. So, gather your eggshells, and let’s embark on this exciting DIY adventure together! You’ll be amazed at what you can create.
“`html
DIY Eggshell Bioplastic Bowl: A Sustainable Project
Hey there, fellow DIY enthusiasts! Today, I’m super excited to share a project that’s not only fun and creative but also eco-friendly: making a bioplastic bowl from eggshells! Yes, you read that right – eggshells! This project is a fantastic way to repurpose kitchen waste and create something beautiful and functional. Plus, it’s a great conversation starter. Let’s dive in!
Materials You’ll Need
Before we get started, let’s gather all the necessary materials. Trust me, having everything ready will make the process much smoother.
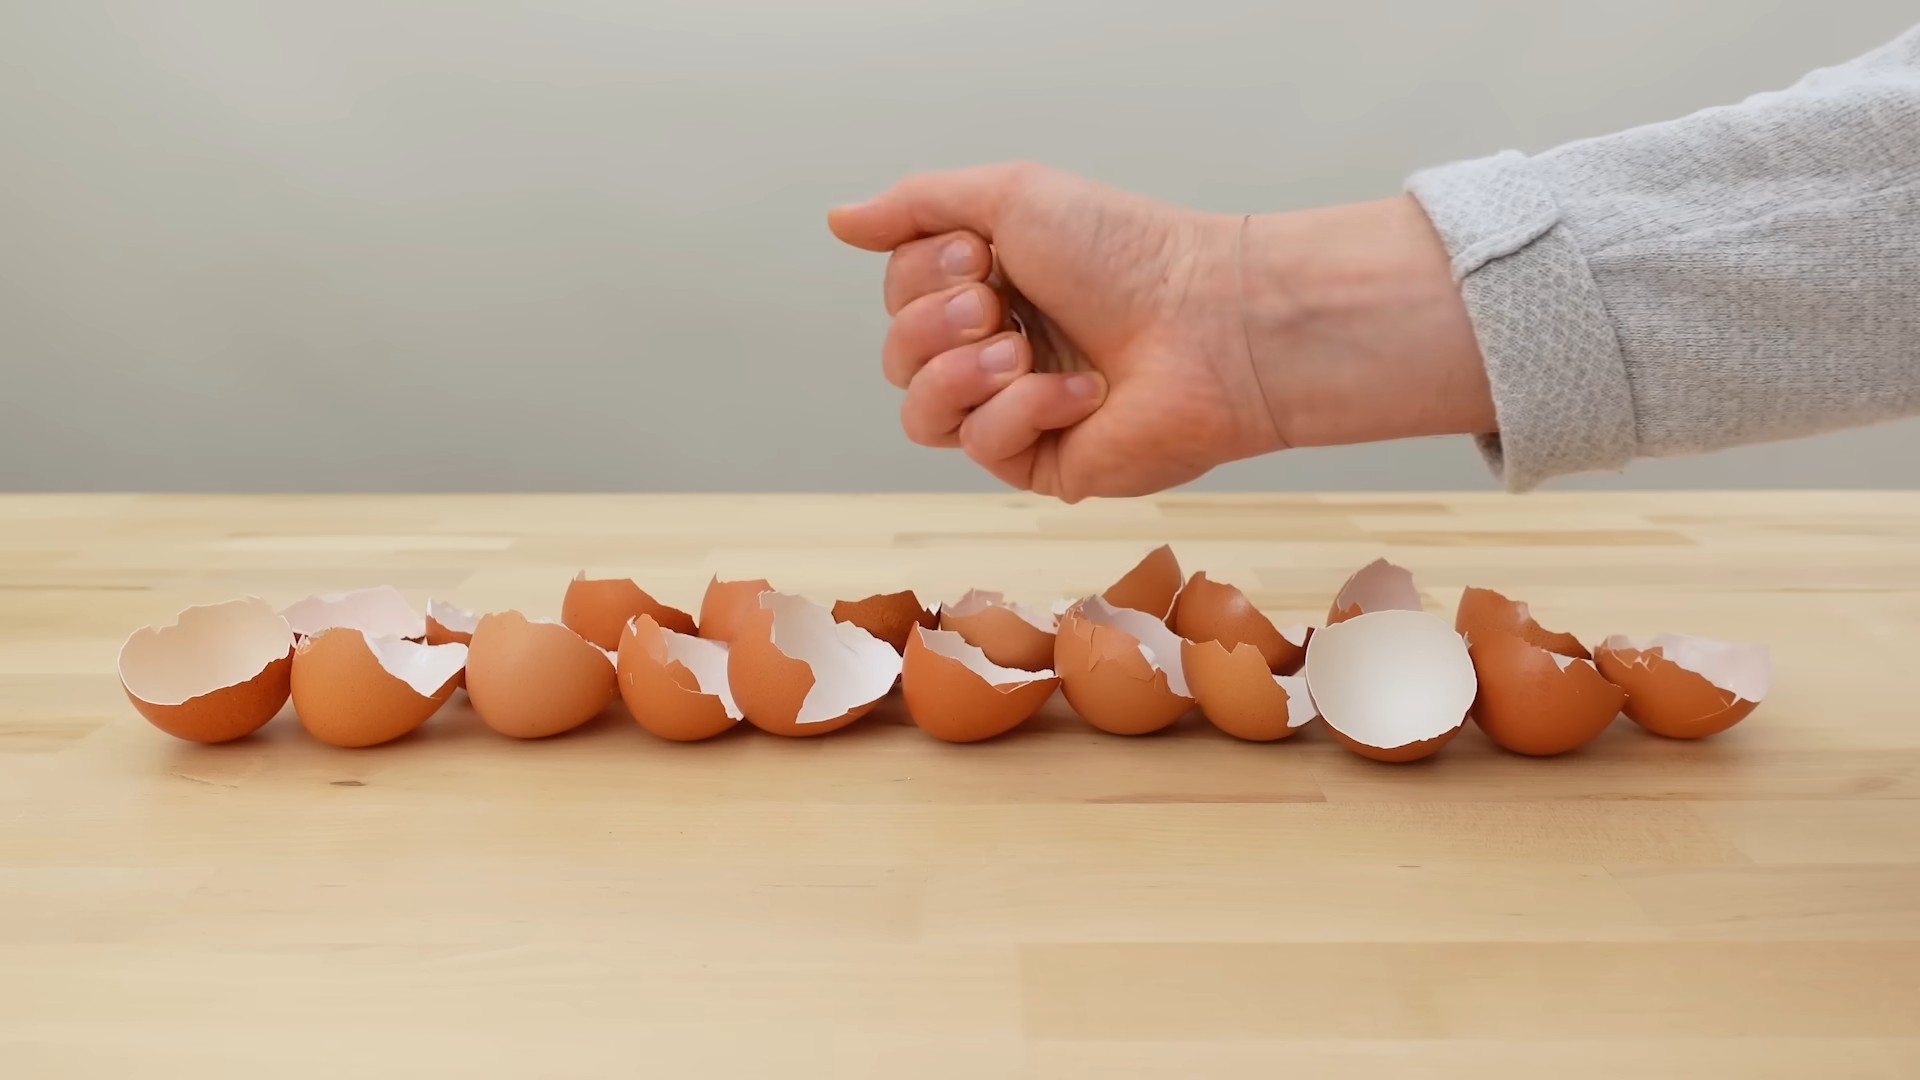
* Eggshells: Lots of them! Aim for at least 20-30 eggshells, depending on the size of the bowl you want to create. The more, the merrier!
* White Vinegar: This is crucial for cleaning and preparing the eggshells.
* Glycerin: This acts as a plasticizer, making the bioplastic more flexible and less brittle. You can find it at most pharmacies or online.
* Cornstarch: This is the main binding agent for our bioplastic.
* Water: For mixing and creating the bioplastic slurry.
* Food Coloring (Optional): If you want to add a pop of color to your bowl, grab your favorite food coloring.
* Mixing Bowls: You’ll need a couple of bowls for different stages of the process.
* Blender or Food Processor: This will help grind the eggshells into a fine powder.
* Sieve or Fine-Mesh Strainer: For sifting the eggshell powder.
* Non-Stick Pan: For cooking the bioplastic mixture.
* Silicone Bowl or Mold: This will be the mold for shaping your bioplastic bowl. Make sure it’s heat-resistant!
* Spatula: For stirring and scraping the bioplastic mixture.
* Oven: For drying and hardening the bowl.
* Sandpaper (Optional): For smoothing any rough edges after drying.
* Protective Gloves: To protect your hands during the process.
* Dust Mask: To avoid inhaling eggshell dust.
Preparing the Eggshells
This is a crucial step to ensure a clean and durable bioplastic. We need to remove any lingering organic matter and sanitize the shells.
1. Rinse the Eggshells: After cracking your eggs, rinse the shells thoroughly with water. Remove any remaining egg white or yolk.
2. Soak in Vinegar: Place the rinsed eggshells in a bowl and cover them with white vinegar. Let them soak for at least 24 hours. This will help dissolve any remaining organic matter and sanitize the shells. The vinegar smell might be a bit strong, so make sure to do this in a well-ventilated area.
3. Rinse Again: After soaking, rinse the eggshells thoroughly with water to remove any traces of vinegar.
4. Dry the Eggshells: Spread the rinsed eggshells on a baking sheet and let them air dry completely. You can also speed up the process by placing them in a low-temperature oven (around 200°F or 93°C) for about 30 minutes. Make sure they are completely dry before moving on to the next step.
Grinding the Eggshells
Now, we need to transform the dried eggshells into a fine powder. This will be the base of our bioplastic.
1. Grind the Eggshells: Place the dried eggshells in a blender or food processor. Pulse until they are ground into a fine powder. This might take a few minutes, so be patient. Wear a dust mask during this step to avoid inhaling the eggshell dust.
2. Sift the Powder: Use a sieve or fine-mesh strainer to sift the eggshell powder. This will remove any larger pieces and ensure a smooth texture for the bioplastic. Discard any large pieces that don’t pass through the sieve.
3. Store the Powder: Store the sifted eggshell powder in an airtight container until you’re ready to use it.
Making the Bioplastic Mixture
This is where the magic happens! We’ll combine the eggshell powder with other ingredients to create the bioplastic slurry.
1. Combine Dry Ingredients: In a mixing bowl, combine 1 cup of sifted eggshell powder and 1/4 cup of cornstarch. Mix well to ensure the ingredients are evenly distributed.
2. Add Water and Glycerin: In a separate bowl, mix 1/2 cup of water and 2 tablespoons of glycerin. Stir well until the glycerin is fully dissolved.
3. Combine Wet and Dry Ingredients: Gradually add the wet ingredients to the dry ingredients, mixing continuously with a spatula. Make sure there are no lumps. The mixture should have a smooth, creamy consistency.
4. Add Food Coloring (Optional): If you want to add color to your bowl, add a few drops of food coloring to the mixture and stir well until the color is evenly distributed.
5. Cook the Mixture: Pour the bioplastic mixture into a non-stick pan. Cook over medium heat, stirring constantly with a spatula. The mixture will start to thicken and become translucent. Continue cooking until it reaches a thick, pudding-like consistency. This should take about 5-10 minutes. Be careful not to burn the mixture.
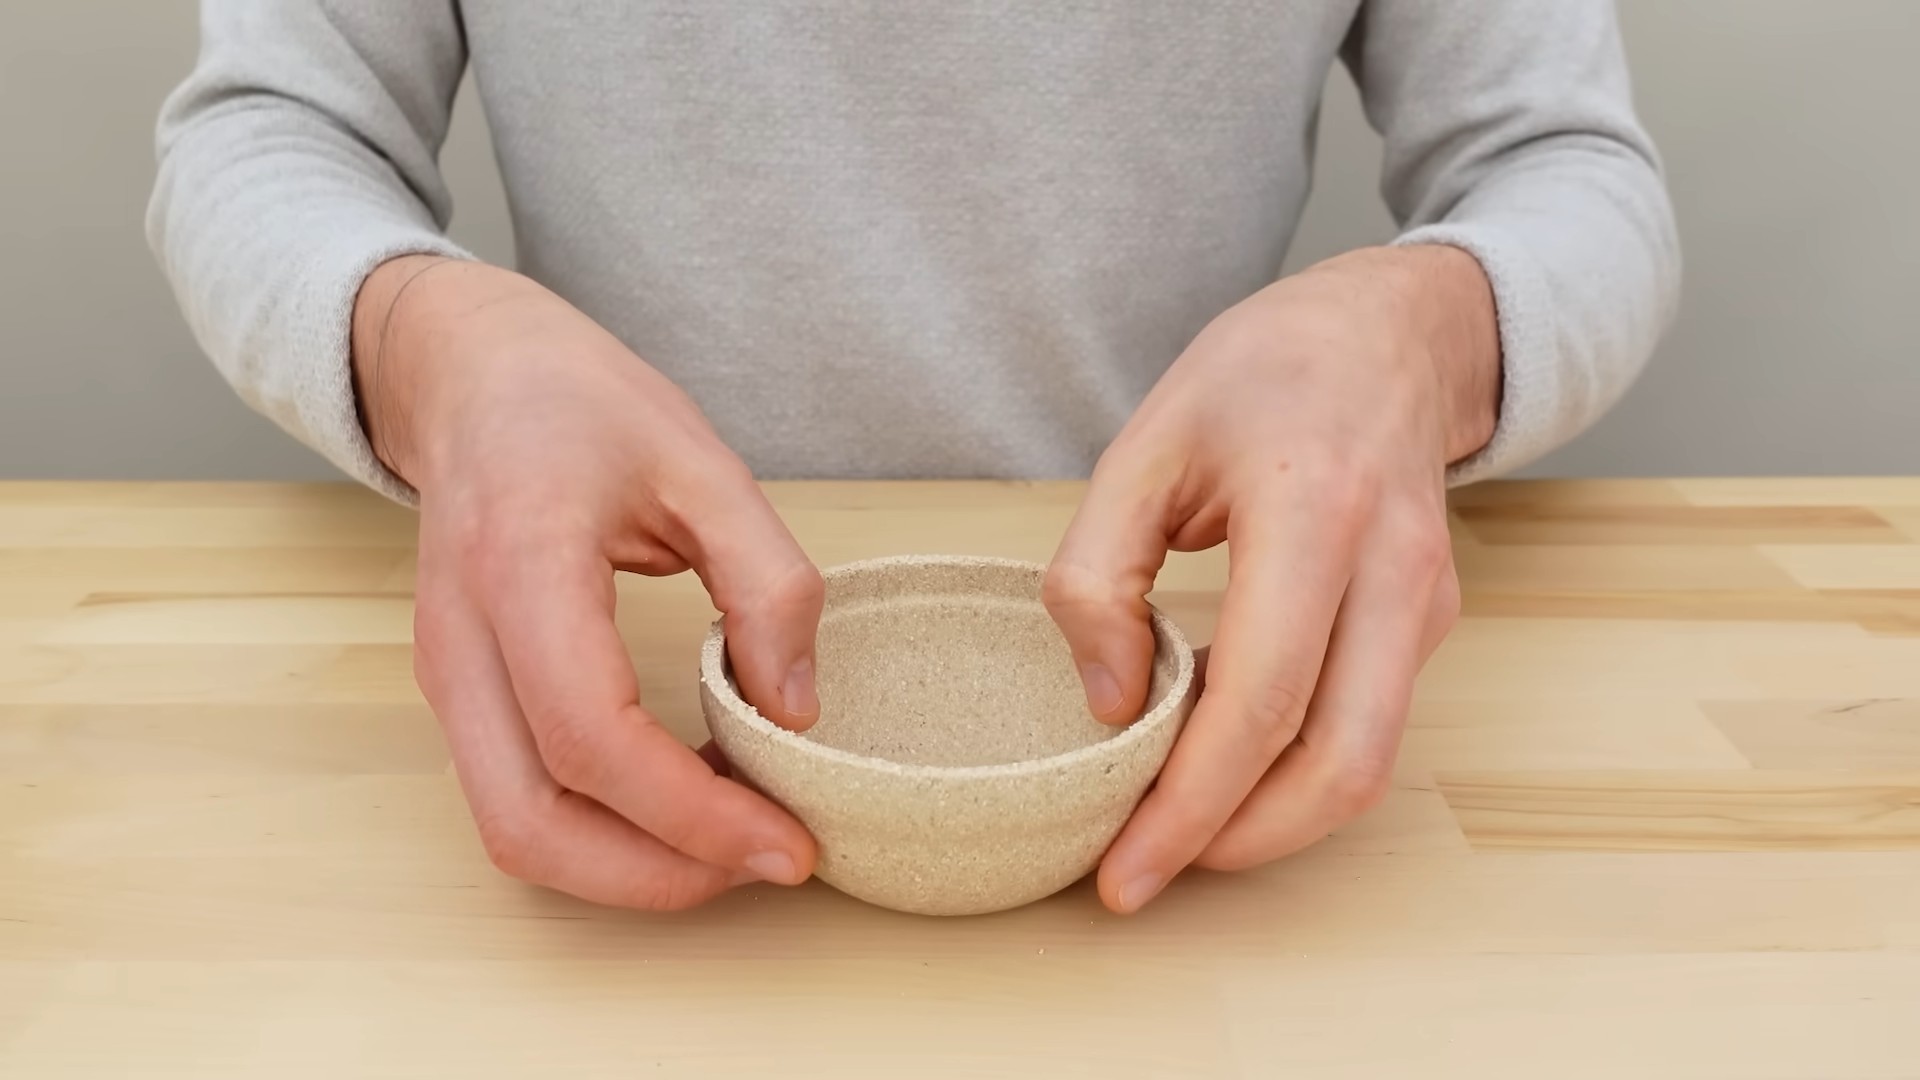
Shaping the Bowl
Now it’s time to give our bioplastic its final form!
1. Prepare the Mold: Lightly grease the inside of your silicone bowl or mold with a bit of oil. This will prevent the bioplastic from sticking.
2. Pour the Mixture into the Mold: Carefully pour the hot bioplastic mixture into the prepared mold. Use a spatula to spread the mixture evenly and ensure it reaches all the edges.
3. Remove Air Bubbles: Gently tap the mold on a flat surface to release any trapped air bubbles.
4. Let it Cool Slightly: Allow the bioplastic mixture to cool slightly in the mold for about 15-20 minutes. This will help it set and prevent it from shrinking too much during drying.
Drying and Hardening the Bowl
This is the final step to create a durable and long-lasting bioplastic bowl.
1. Oven Drying: Preheat your oven to a low temperature (around 170°F or 77°C). Place the mold with the bioplastic bowl in the oven and let it dry for several hours, or even overnight. The drying time will depend on the thickness of the bowl and the humidity in your environment. Check the bowl periodically to make sure it’s not cracking or warping.
2. Air Drying (Alternative): If you prefer, you can also air dry the bowl. This will take longer, but it can help prevent cracking. Place the mold in a well-ventilated area and let it dry for several days, or even a week.
3. Remove from Mold: Once the bowl is completely dry and hardened, carefully remove it from the mold.
4. Sanding (Optional): If there are any rough edges or imperfections, you can gently sand them down with fine-grit sandpaper.
5. Finishing Touches (Optional): You can add a sealant or varnish to the bowl to make it more water-resistant and durable. Make sure to use a food-safe sealant if you plan to use the bowl for food.
Tips and Tricks for Success
* Experiment with Colors: Don’t be afraid to experiment with different food coloring to create unique and vibrant bowls.
* Add Texture: You can add texture to the bowl by pressing objects like leaves, flowers, or shells into the bioplastic mixture before it dries.
* Use Different Molds: Try using different molds to create bowls of various shapes and sizes.
* Be Patient: The drying process can take a while, so be patient and don’t rush it.
* Adjust the Recipe: If the bioplastic is too brittle, add more glycerin. If it’s too soft, add more cornstarch.
* Clean Up: Clean your equipment immediately after use, as the bioplastic mixture can be difficult to remove once it dries.
* Storage: Store your bioplastic bowl in a cool, dry place. Avoid exposing it to extreme temperatures or humidity.
Troubleshooting
* Cracking: If your bowl cracks during drying, it could be due to the temperature being too high or the mixture drying too quickly. Try lowering the oven temperature or air drying the bowl instead.
* Warping: If your bowl warps during drying, it could be due to uneven drying. Try rotating the mold periodically during drying.
* Sticky Texture: If your bowl has a sticky texture after drying, it could be due to too much glycerin. Try reducing the amount of glycerin in the recipe.
* Brittle Texture: If
Conclusion
So, there you have it! Transforming humble eggshells into a surprisingly durable and beautiful bioplastic bowl is not just a fun craft project; it’s a small step towards a more sustainable lifestyle. We’ve walked you through the process, demystifying each step and highlighting the key considerations for success. But why should you actually try this?
First and foremost, this Eggshell Bioplastic Bowl DIY project is incredibly rewarding. There’s a unique satisfaction in taking something typically discarded – eggshells – and giving it a new, functional, and aesthetically pleasing life. It’s a tangible demonstration of resourcefulness and creativity.
Beyond the personal satisfaction, this project offers a fantastic opportunity to educate yourself and others about bioplastics and sustainable practices. It’s a conversation starter, a way to introduce the concept of circular economy to friends and family, and a hands-on learning experience for kids (with adult supervision, of course!).
But the benefits don’t stop there. The resulting bioplastic bowl is surprisingly versatile. While we don’t recommend using it for hot liquids or heavy items, it’s perfect for holding dry snacks, jewelry, keys, or even small plants. It adds a touch of rustic charm to any space and serves as a constant reminder of your commitment to sustainability.
Now, let’s talk about variations. Feel free to experiment with different natural dyes to color your eggshells. Beet juice, turmeric, spinach juice, and red cabbage juice can all create stunning hues. You can also incorporate small pieces of dried flowers, herbs, or even glitter into the mixture for added visual interest. Consider using different molds to create bowls of varying shapes and sizes. A silicone muffin tin, a small ramekin, or even a creatively shaped cookie cutter can all serve as molds.
For a smoother finish, you can try sanding the bowl lightly after it has fully cured. Be sure to use fine-grit sandpaper and work gently to avoid damaging the bioplastic. You can also apply a thin coat of beeswax or carnauba wax to add a subtle sheen and protect the surface.
We understand that venturing into DIY projects can sometimes feel daunting, but trust us, this one is worth the effort. The process is relatively simple, the materials are readily available, and the results are truly impressive.
So, what are you waiting for? Gather your eggshells, grab your supplies, and embark on this exciting Eggshell Bioplastic Bowl DIY adventure. We’re confident that you’ll be amazed by what you can create.
And most importantly, we want to hear about your experience! Share your creations with us on social media using #EggshellBioplasticBowlDIY. We can’t wait to see your unique designs and learn from your successes (and even your challenges!). Let’s inspire each other to embrace sustainable practices and create a more beautiful and environmentally conscious world, one eggshell bowl at a time. Don’t be afraid to experiment, get creative, and most of all, have fun!
Frequently Asked Questions (FAQ)
What exactly is bioplastic, and is this bowl truly biodegradable?
Bioplastic refers to plastics made from renewable biomass sources, such as vegetable fats and oils, corn starch, or in this case, eggshells. While the eggshell component is certainly biodegradable, the PVA glue used in this recipe is not necessarily fully biodegradable depending on the specific type of PVA glue used. Some PVA glues are designed to break down more readily than others. Therefore, while this project utilizes a natural waste product, the overall biodegradability of the final bowl depends on the glue. It’s a step in the right direction towards sustainable crafting, but it’s important to be aware of the limitations. Researching more eco-friendly glue alternatives could further enhance the project’s sustainability.
How strong and durable is the eggshell bioplastic bowl? What can I use it for?
The strength and durability of the eggshell bioplastic bowl will vary depending on the ratio of eggshells to glue, the thoroughness of the mixing process, and the curing time. Generally, it’s moderately durable but not as strong as conventional plastic. It’s best suited for holding lightweight, dry items such as jewelry, keys, small craft supplies, potpourri, or even as a decorative piece. Avoid using it for liquids, especially hot liquids, as it may soften or deform. Also, refrain from placing heavy objects in it, as it could crack or break. Think of it as a decorative and functional piece, but not a heavy-duty storage solution.
What type of glue is best to use for this project? Can I use other types of glue besides PVA?
PVA glue (polyvinyl acetate glue), also known as white glue or school glue, is generally recommended for this project because it’s readily available, relatively non-toxic, and provides a good bond with the eggshells. While other types of glue might work, PVA glue offers a good balance of strength, flexibility, and ease of use. If you’re concerned about the biodegradability of PVA glue, you could research more eco-friendly alternatives, such as casein glue (made from milk protein) or starch-based glues. However, these alternatives may require some experimentation to achieve the desired results. Always ensure the glue is non-toxic, especially if children are involved in the project.
How do I prepare the eggshells properly? Do they need to be completely clean and dry?
Proper preparation of the eggshells is crucial for the success of this project. After using the eggs, rinse the shells thoroughly with warm water to remove any remaining egg residue. You can use a mild dish soap if necessary. Be sure to remove the thin membrane lining the inside of the shell, as this can interfere with the bonding process. Once cleaned, spread the eggshells out on a baking sheet and allow them to air dry completely. You can also dry them in a low-temperature oven (around 200°F or 93°C) for about 15-20 minutes to ensure they are completely dry. Crushing the eggshells into a fine powder is also important. A food processor, blender, or even a mortar and pestle can be used for this purpose. The finer the powder, the smoother the final bioplastic will be.
How long does it take for the bioplastic bowl to fully cure and harden?
The curing time for the eggshell bioplastic bowl can vary depending on the humidity and temperature of your environment, as well as the thickness of the bowl. Generally, it takes at least 24-48 hours for the bowl to fully cure and harden. To ensure proper curing, place the bowl in a well-ventilated area and avoid direct sunlight or heat. You can test the hardness by gently pressing on the surface of the bowl. If it feels soft or pliable, it needs more time to cure. Patience is key! Rushing the curing process can result in a weak and brittle bowl.
Can I add color or decorations to the eggshell bioplastic bowl?
Absolutely! Adding color and decorations is a great way to personalize your eggshell bioplastic bowl. You can add natural dyes to the eggshell powder before mixing it with the glue. Beet juice, turmeric, spinach juice, and red cabbage juice can all create beautiful hues. You can also incorporate small pieces of dried flowers, herbs, glitter, or even small beads into the mixture for added visual interest. Just be sure to distribute the decorations evenly throughout the mixture to avoid creating weak spots in the bioplastic. After the bowl has cured, you can also paint it with acrylic paints or decorate it with markers.
Is this project safe for children? What precautions should I take?
While this project can be a fun and educational activity for children, adult supervision is essential. The main concern is the use of glue, which should be non-toxic. Ensure that children do not ingest the glue or eggshell mixture. Also, be careful when crushing the eggshells, as small pieces can be sharp. It’s a good idea to wear safety glasses or goggles to protect your eyes. If using a food processor or blender to crush the eggshells, ensure that children are supervised and that the appliance is used safely. Finally, wash hands thoroughly after handling the eggshell mixture.
How can I make the bowl waterproof or more resistant to moisture?
While the eggshell bioplastic bowl is not naturally waterproof, you can take steps to make it more resistant to moisture. Applying a sealant, such as beeswax or carnauba wax, can help to protect the surface and prevent water from seeping in. You can also use a waterproof varnish or lacquer, but be sure to choose a non-toxic option. Apply the sealant or varnish in thin, even coats, allowing each coat to dry completely before applying the next. Keep in mind that even with these precautions, the bowl is not completely waterproof and should not be used to hold liquids for extended periods.
What if my bowl cracks or breaks? Can it be repaired?
If your eggshell bioplastic bowl cracks or breaks, it may be possible to repair it. You can use a small amount of PVA glue to reattach the broken pieces. Apply the glue to the broken edges and press them together firmly. Hold the pieces in place with tape or clamps until the glue has dried completely. For larger cracks, you can create a paste of eggshell powder and glue and use it to fill the crack. Allow the paste to dry completely before sanding it smooth. While repairs may not be invisible, they can help to extend the life of your

Leave a Comment