

DIY Bolster Pillow from Fabric: Ever dreamt of adding a touch of elegance and comfort to your living space without breaking the bank? I know I have! There’s something incredibly satisfying about creating something beautiful and functional with your own two hands. Bolster pillows, with their cylindrical shape and plush feel, have been gracing homes for centuries, adding a touch of sophistication and providing excellent support. From ancient Egyptian royalty using them for headrests to Victorian-era parlors showcasing them as decorative accents, bolster pillows have a rich history of comfort and style.
But let’s be honest, buying a high-quality bolster pillow can be surprisingly expensive. That’s where the magic of DIY comes in! In this article, I’m going to guide you through a simple and fun project: creating your very own DIY bolster pillow from fabric scraps you might already have lying around. Not only will you save money, but you’ll also have the satisfaction of knowing you crafted a unique piece that perfectly complements your personal style. Plus, it’s a fantastic way to reduce textile waste and embrace a more sustainable lifestyle. So, grab your sewing machine (or needle and thread!), gather your favorite fabrics, and let’s get started on this rewarding DIY adventure!
DIY Bolster Pillow: A Cozy Project for Any Skill Level
Hey there, fellow crafters! Ever wanted to add a touch of elegance and comfort to your living space without breaking the bank? Well, I’ve got just the project for you: a DIY bolster pillow! These cylindrical cushions are perfect for adding lumbar support to your sofa, sprucing up your bed, or simply providing a comfy spot to rest your head. And the best part? You can customize them to perfectly match your decor. Let’s dive in!
Materials You’ll Need
Before we get started, let’s gather all the necessary supplies. This will make the process much smoother and prevent any frustrating mid-project trips to the store.
* Fabric: Choose a fabric that complements your existing decor and is durable enough to withstand regular use. I recommend upholstery fabric, heavy cotton, linen, or even velvet for a luxurious touch. The amount of fabric you’ll need depends on the desired size of your bolster pillow. A good rule of thumb is to measure the desired length and circumference of your pillow, then add a few extra inches for seam allowances. For a standard bolster pillow (approximately 24 inches long and 8 inches in diameter), you’ll need about 1 yard of fabric.
* Sewing Machine: A sewing machine will make the process much faster and easier, but you can also hand-sew the pillow if you’re feeling ambitious.
* Thread: Choose a thread that matches your fabric color.
* Scissors or Rotary Cutter: Sharp scissors or a rotary cutter and cutting mat are essential for precise fabric cutting.
* Measuring Tape or Ruler: Accuracy is key when cutting fabric, so a measuring tape or ruler is a must-have.
* Pins: Pins will help hold the fabric pieces together while you sew.
* Pencil or Fabric Marker: Use a pencil or fabric marker to mark cutting lines and seam allowances on your fabric.
* Stuffing: You’ll need stuffing to fill your bolster pillow. Polyester fiberfill is a popular and affordable option. You can also use down feathers or shredded foam for a different feel.
* Optional: Zipper or Buttons: If you want to be able to remove the pillow cover for washing, you can add a zipper or button closure.
* Optional: Piping or Trim: For a more decorative touch, you can add piping or trim to the edges of your bolster pillow.
Cutting the Fabric
Okay, now that we have everything ready, let’s start cutting the fabric. This is a crucial step, so take your time and be precise.
1. Measure and Cut the Main Body Fabric: First, determine the desired length and circumference of your bolster pillow. Add 1 inch to the length for seam allowances (1/2 inch on each end). To calculate the width of the fabric, add 1 inch to the circumference for the seam allowance. For example, if you want a pillow that is 24 inches long and has a circumference of 25 inches, you’ll need to cut a rectangle of fabric that is 25 inches long and 26 inches wide.
2. Measure and Cut the End Circles: Next, you’ll need to cut two circles for the ends of the bolster pillow. The diameter of these circles should be equal to the desired diameter of your pillow plus 1 inch for seam allowances (1/2 inch all around). For example, if you want a pillow with a diameter of 8 inches, you’ll need to cut two circles with a diameter of 9 inches. You can use a compass, a plate, or any other circular object to trace the circles onto your fabric.
3. Optional: Cut Fabric for Zipper or Button Closure: If you’re adding a zipper or button closure, you’ll need to cut two strips of fabric for the placket. The length of these strips should be equal to the length of the zipper or the desired length of the button placket. The width of the strips should be about 2 inches.
4. Optional: Cut Piping or Trim: If you’re adding piping or trim, measure the circumference of the end circles and cut the piping or trim to that length. Add a few extra inches for overlapping the ends.
Sewing the Pillow Cover
Alright, with all the fabric cut, we can finally start sewing! This is where the magic happens, and your bolster pillow begins to take shape.
1. Sew the Main Body Seam: Fold the rectangle of fabric in half lengthwise, with the right sides facing each other. Pin the long edges together and sew along the edge with a 1/2-inch seam allowance. This will create a tube.
2. Optional: Add Zipper or Button Closure: If you’re adding a zipper or button closure, now is the time to do it. Follow the instructions that came with your zipper or buttons to attach them to the placket strips. Then, sew the placket strips to the open edge of the tube, creating a closure.
3. Attach the End Circles: Pin one of the end circles to one end of the tube, with the right sides facing each other. Make sure the circle is evenly distributed around the opening of the tube. Sew around the circle with a 1/2-inch seam allowance. Repeat this process for the other end circle.
4. Optional: Add Piping or Trim: If you’re adding piping or trim, pin it around the edge of one of the end circles, with the raw edge of the piping or trim facing outward. Sew it in place with a 1/2-inch seam allowance. Then, attach the end circle to the tube as described above.
5. Turn the Pillow Cover Right Side Out: Carefully turn the pillow cover right side out. Use a point turner or a blunt object to push out the corners and create a smooth, rounded shape.
Stuffing the Pillow
We’re almost there! Now it’s time to stuff the pillow and bring it to life.
1. Stuff the Pillow: Start stuffing the pillow with your chosen filling material. Use your hands to distribute the filling evenly throughout the pillow. Add more filling until the pillow is firm and plump, but not overstuffed. You want it to be comfortable and supportive, not rock hard.
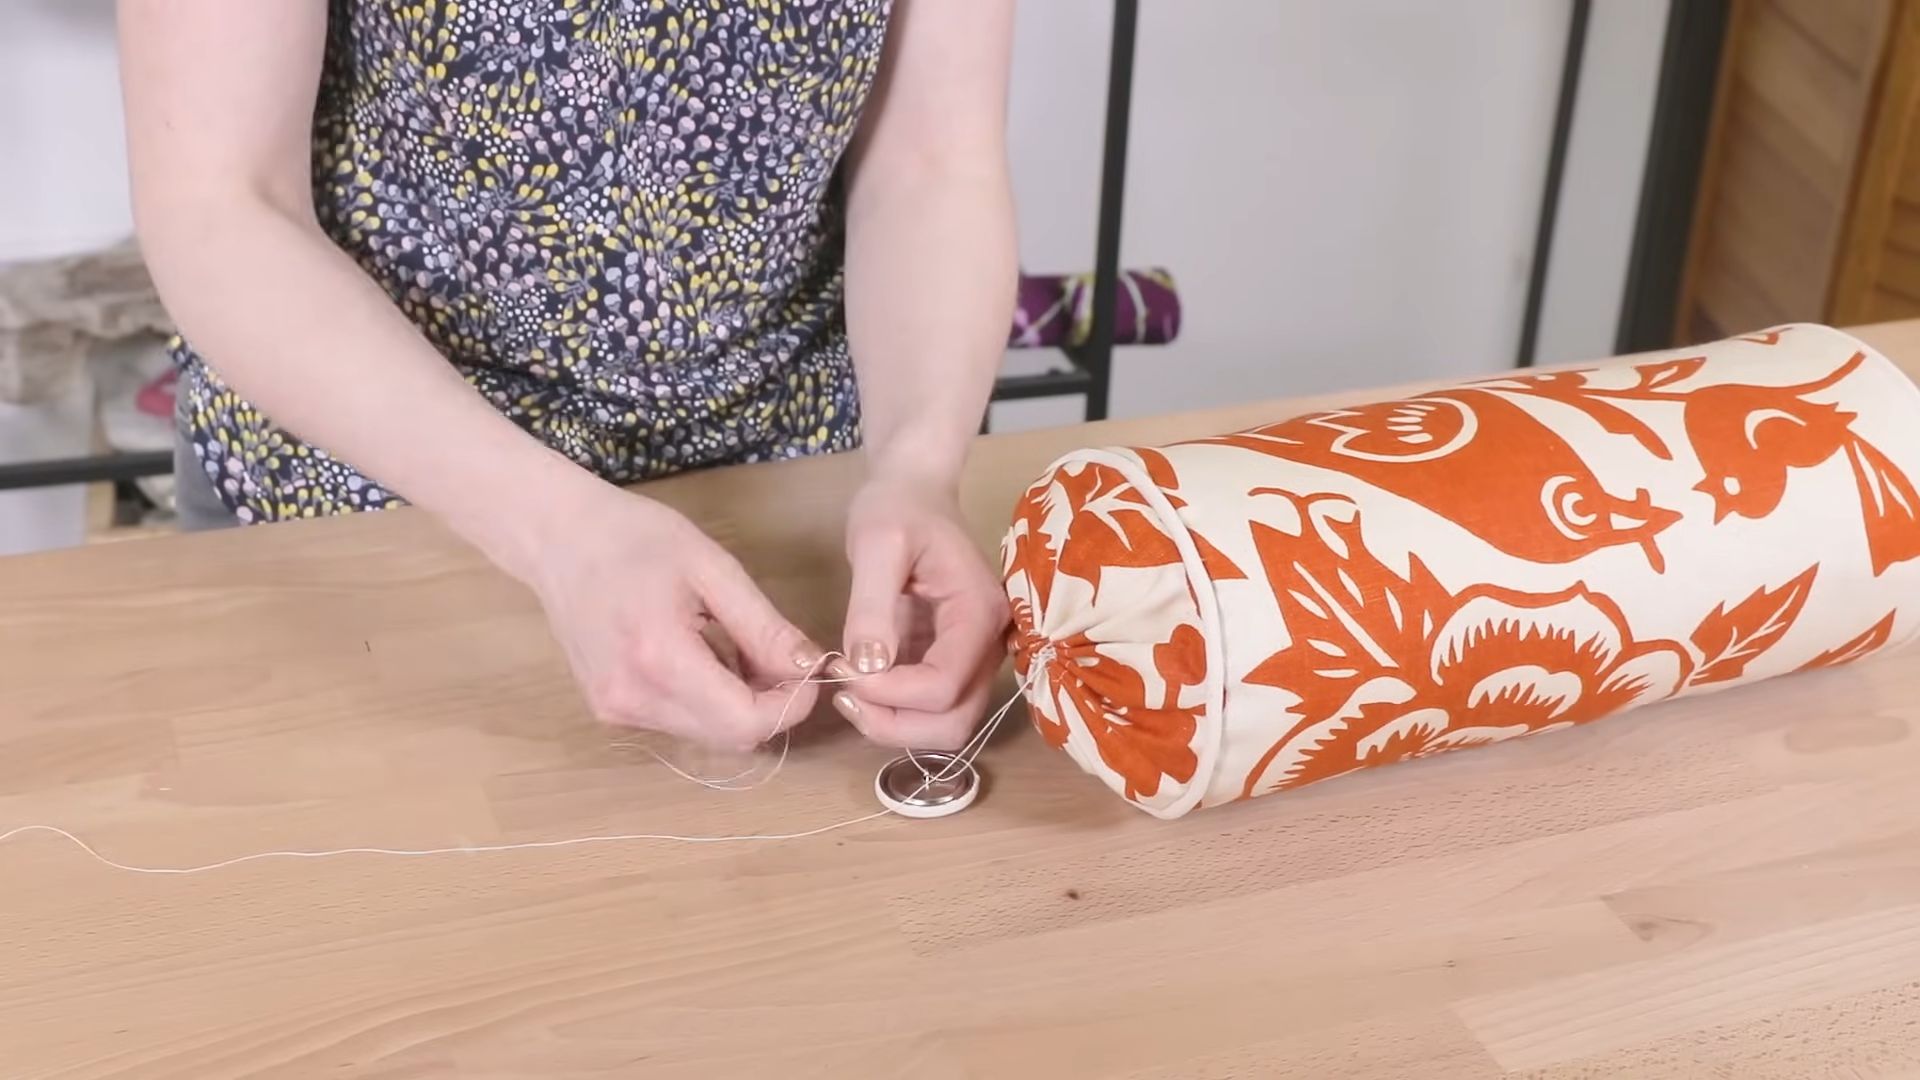
2. Close the Opening: If you didn’t add a zipper or button closure, you’ll need to hand-sew the opening closed. Fold the raw edges of the fabric inward and pin them together. Use a slip stitch or a ladder stitch to sew the opening closed. This will create an invisible seam.
Finishing Touches
Congratulations! You’ve successfully created your own DIY bolster pillow. Now, let’s add some finishing touches to make it even more special.
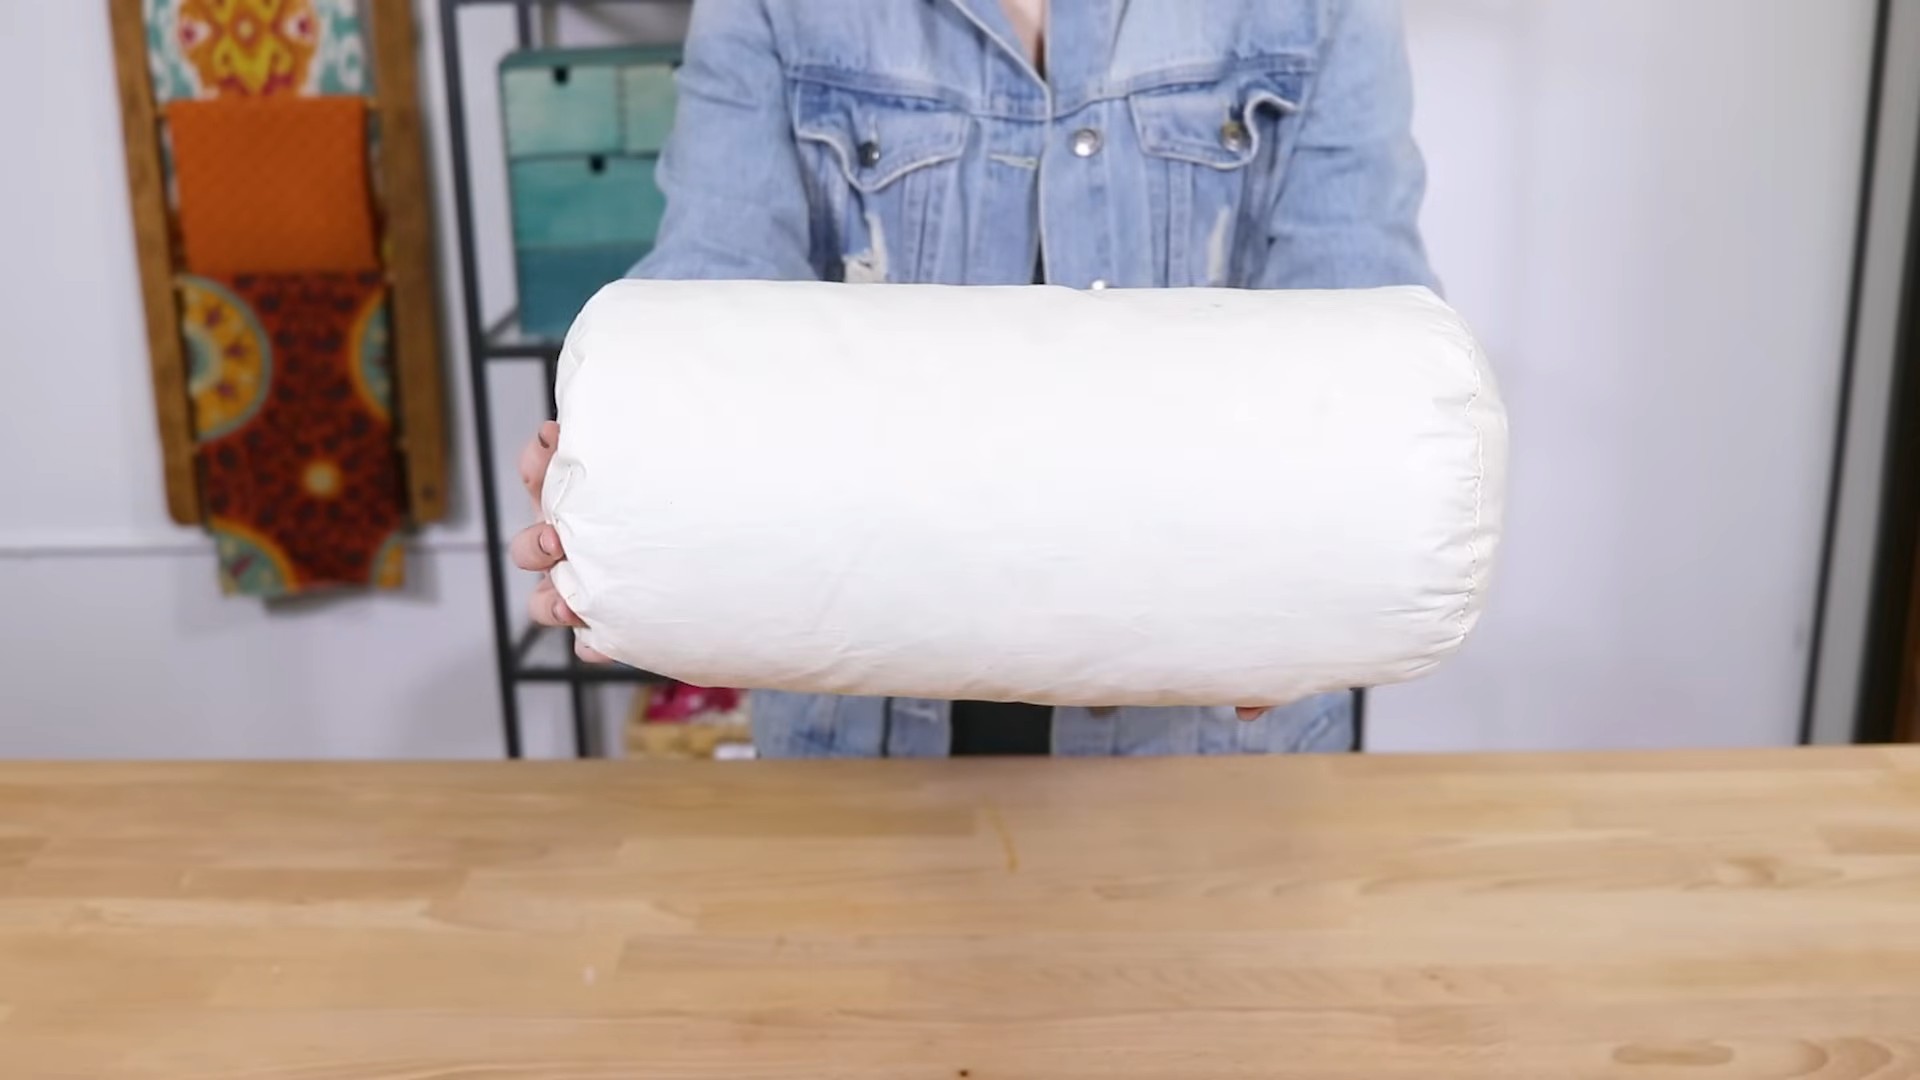
* Fluff and Shape: Give your pillow a good fluff and shape it to your liking. You can roll it between your hands to smooth out any lumps or bumps.
* Add Decorative Accents: Consider adding decorative accents to your pillow, such as tassels, buttons, or embroidery. This is a great way to personalize your pillow and make it truly unique.
* Enjoy Your New Pillow: Place your new bolster pillow on your sofa, bed, or favorite chair and enjoy the added comfort and style it brings to your space!
Tips and Tricks
Here are a few extra tips and tricks to help you create the perfect DIY bolster pillow:
* Choose the Right Fabric: The fabric you choose will have a big impact on the look and feel of your pillow. Consider the durability, texture, and color of the fabric when making your selection.
* Use a Template: If you’re having trouble cutting perfect circles, use a template. You can find templates online or create your own using a compass and cardboard.
* Pin Carefully: Pinning the fabric pieces together before sewing will help prevent them from shifting and ensure a more accurate seam.
* Use a Walking Foot: If you’re sewing with thick or slippery fabrics, consider using a walking foot on your sewing machine. This will help feed the fabric evenly and prevent puckering.
* Don’t Overstuff: Overstuffing your pillow can make it uncomfortable and difficult to shape. Add filling gradually until you achieve the desired firmness.
* Experiment with Different Shapes and Sizes: Don’t be afraid to experiment with different shapes and sizes for your bolster pillow. You can create long, thin pillows for lumbar support or short, round pillows for decorative accents.
* Get Creative with Embellishments: Add your own personal touch to your pillow with embellishments such as tassels, buttons, embroidery, or appliques.
Variations and Ideas
The possibilities are endless when it comes to DIY bolster pillows! Here are a few variations and ideas to inspire you:
* Cylindrical Bolster Pillow: This is the classic bolster pillow shape. It’s perfect for adding lumbar support to your sofa or bed.
* Neck Roll Pillow: A smaller, cylindrical pillow that’s designed to support your neck. It’s great for travel or for relaxing at home.
*
Conclusion
So, there you have it! Crafting your own bolster pillow from fabric isn’t just a fun afternoon project; it’s a gateway to personalized comfort and style within your home. Forget those generic, mass-produced pillows that lack character. With this DIY bolster pillow method, you’re in complete control, from the fabric’s texture and pattern to the exact dimensions that perfectly complement your sofa, bed, or favorite reading nook.
Why is this DIY trick a must-try? Because it empowers you to create something truly unique and tailored to your specific needs and aesthetic preferences. Imagine sinking into a custom-made bolster pillow that perfectly matches your bedroom decor, providing the ideal support for your back while you read, or adding a touch of elegance to your living room with a bolster pillow crafted from luxurious velvet. The possibilities are endless!
Beyond the aesthetic appeal, this project is incredibly budget-friendly. By repurposing fabric scraps or choosing affordable materials, you can save a significant amount of money compared to purchasing a ready-made bolster pillow. Plus, the satisfaction of creating something with your own hands is priceless.
Looking for variations? Consider adding decorative elements like tassels, piping, or embroidery to further personalize your bolster pillow. Experiment with different fabric combinations to create a bold and eye-catching design. For a more luxurious feel, use a high-quality filling like down or feathers. If you’re feeling adventurous, try creating a bolster pillow with a removable cover for easy cleaning. You could even add ties to the ends of the bolster to give it a more rustic or bohemian vibe. Think about using different shapes too! While this guide focuses on a cylindrical bolster, you could adapt the technique to create a rectangular or even a triangular bolster pillow.
Don’t be intimidated if you’re new to sewing. This project is relatively simple and requires only basic sewing skills. With a little patience and attention to detail, you can create a beautiful and functional bolster pillow that you’ll be proud to display in your home.
We wholeheartedly encourage you to give this DIY bolster pillow project a try. It’s a rewarding and creative way to add a personal touch to your home decor while saving money and reducing waste. Once you’ve completed your masterpiece, we’d love to see it! Share your creations with us on social media using #DIYBolsterPillow and tell us about your experience. What fabrics did you use? What challenges did you encounter? What tips do you have for other DIY enthusiasts? We can’t wait to see what you come up with! Embrace your inner crafter and transform your living space with a custom-made bolster pillow that reflects your unique style and personality. This is your chance to truly master the art of the **DIY bolster pillow**!
Frequently Asked Questions (FAQ)
What type of fabric is best for a bolster pillow?
The best fabric for a bolster pillow depends on your personal preferences and the intended use of the pillow. For a durable and easy-to-clean option, consider cotton canvas, denim, or linen. These fabrics are also relatively inexpensive and come in a wide variety of colors and patterns. For a more luxurious feel, opt for velvet, silk, or brocade. These fabrics are softer and more elegant, but they may require more delicate care. If you’re planning to use the bolster pillow outdoors, choose a weather-resistant fabric like outdoor canvas or Sunbrella. Consider the weight of the fabric as well. A heavier fabric will provide more structure and support, while a lighter fabric will be more flexible and comfortable. Ultimately, the best fabric is one that you love and that suits your needs.
How much fabric do I need to make a bolster pillow?
The amount of fabric you need will depend on the size of the bolster pillow you want to make. As a general rule, you’ll need enough fabric to cover the circumference of the pillow plus seam allowances, and enough fabric to cover the length of the pillow plus seam allowances for both ends. Measure the diameter and length of your desired bolster pillow form. To calculate the fabric needed for the main body, use the formula: (Diameter x 3.14) + seam allowance x Length + seam allowance. Remember to add extra fabric for seam allowances (usually about 1/2 inch on all sides) and for any decorative elements you plan to add. It’s always better to have a little extra fabric than not enough.
What kind of filling should I use for my bolster pillow?
There are several options for filling your bolster pillow, each with its own advantages and disadvantages. Polyester fiberfill is a popular choice because it’s affordable, hypoallergenic, and easy to find. It’s also machine washable and dryable. However, polyester fiberfill can flatten over time and may not provide as much support as other fillings. Down or feathers are a luxurious option that provides excellent support and comfort. However, down and feathers can be expensive and may require special cleaning. Buckwheat hulls are a natural and eco-friendly option that provides firm support and conforms to the shape of your body. However, buckwheat hulls can be heavy and may make noise when you move. Shredded memory foam is another option that provides good support and conforms to the shape of your body. However, shredded memory foam can be expensive and may retain heat. Consider your budget, comfort preferences, and any allergies when choosing a filling for your bolster pillow.
Can I make a bolster pillow without a sewing machine?
Yes, you can definitely make a bolster pillow without a sewing machine! While a sewing machine will make the process faster and easier, you can easily hand-sew a bolster pillow using a basic running stitch or back stitch. Hand-sewing will take more time and effort, but it’s a great option if you don’t have access to a sewing machine or if you prefer the look of hand-stitched seams. Be sure to use a strong thread and take your time to ensure that the seams are secure.
How do I clean my DIY bolster pillow?
The cleaning method for your DIY bolster pillow will depend on the fabric and filling you used. If you used a washable fabric like cotton or linen and a washable filling like polyester fiberfill, you can machine wash and dry the entire pillow. However, it’s always best to check the care instructions for the specific fabric and filling you used. If you used a delicate fabric like velvet or silk, or a filling that cannot be machine washed, you’ll need to spot clean the pillow with a mild detergent and water. Avoid soaking the pillow and allow it to air dry completely. If your bolster pillow has a removable cover, you can wash the cover separately according to the fabric’s care instructions. Regularly fluffing your bolster pillow will help to maintain its shape and prevent the filling from clumping.
How can I make my bolster pillow more firm?
If you prefer a firmer bolster pillow, there are several things you can do. First, use a denser filling material, such as buckwheat hulls or shredded memory foam. These materials provide more support than polyester fiberfill. Second, pack the filling tightly into the pillow form. The more filling you use, the firmer the pillow will be. Third, use a heavier fabric for the pillow cover. A heavier fabric will provide more structure and support. Finally, consider adding an inner lining to the pillow cover. The lining will help to prevent the filling from shifting and will provide additional support.
What if I don’t have a bolster pillow form?
No problem! You can easily create your own bolster pillow form. One option is to roll up a thick blanket or several towels into a cylindrical shape and secure them with tape or string. Another option is to stuff a large sock or stocking with filling material. You can also purchase pre-made bolster pillow forms online or at craft stores. If you’re making your own form, be sure to measure it accurately so that you can cut the fabric for the pillow cover to the correct size.
Can I add a zipper to my bolster pillow cover?
Yes, adding a zipper to your bolster pillow cover is a great way to make it removable and washable. To add a zipper, you’ll need to cut the fabric for the pillow cover slightly larger than the pillow form. Then, sew the zipper along one of the seams, leaving an opening large enough to insert the pillow form. Be sure to use a zipper foot on your sewing machine for best results.
How do I prevent my bolster pillow from rolling away?
If you’re using your bolster pillow on a bed or sofa, you may find that it tends to roll away. To prevent this, you can add ties to the ends of the pillow cover. Simply sew fabric ties to the ends of the cover and tie them around the bedposts or sofa arms. Another option is to use a non-slip fabric on the bottom of the pillow cover. This will help to keep the pillow in place. You can also try placing the bolster pillow against a wall or other support to prevent it from rolling.

Leave a Comment