

Grow Cauliflower at Home? Absolutely! Imagine harvesting your own crisp, creamy cauliflower, bursting with flavor, right from your backyard. Forget those bland, overpriced heads at the grocery store. This isn’t just about saving money; it’s about connecting with nature and enjoying the unparalleled taste of homegrown goodness.
For centuries, cauliflower has been a culinary staple, tracing its roots back to the Mediterranean region. It was cultivated in the Middle East and then spread to Europe in the 15th century. Now, you can bring this rich history to your own garden! But let’s be honest, growing cauliflower can seem intimidating. It has a reputation for being finicky, prone to pests, and demanding specific conditions. That’s where these DIY tricks and hacks come in.
I’m here to tell you that with a few simple strategies, you can successfully grow cauliflower at home, even if you’re a beginner gardener. We’ll demystify the process, share insider tips to combat common problems, and guide you every step of the way. Get ready to transform your garden into a cauliflower haven and impress your friends and family with your homegrown harvest!
Grow Your Own Delicious Cauliflower: A DIY Guide
Hey there, fellow gardening enthusiasts! I’m so excited to share my tried-and-true method for growing cauliflower right in your own backyard. It might seem intimidating at first, but trust me, with a little patience and these simple steps, you’ll be harvesting beautiful, creamy cauliflower heads in no time. Let’s get started!
Choosing the Right Cauliflower Variety
Before we even think about planting, it’s crucial to pick the right cauliflower variety for your climate and growing season. Different varieties mature at different times, so selecting one that suits your local conditions is key to success.
* Consider your climate: If you live in a warmer climate, opt for heat-tolerant varieties like ‘Snow Crown’ or ‘Cheddar’. For cooler climates, ‘Snowball Y Improved’ or ‘Early White Vienna’ are excellent choices.
* Think about your growing season: Early-maturing varieties are ideal if you have a shorter growing season. Late-maturing varieties can be grown if you have a longer, milder season.
* Explore different colors: Cauliflower isn’t just white! You can find varieties in vibrant shades of orange, purple, and green, adding a pop of color to your garden and your plate. ‘Graffiti’ (purple) and ‘Cheddar’ (orange) are fun options to try.
Preparing the Soil: The Foundation for Success
Cauliflower is a heavy feeder, meaning it needs nutrient-rich soil to thrive. Proper soil preparation is essential for healthy growth and abundant yields.
* Soil Testing: Before you do anything, test your soil’s pH. Cauliflower prefers a slightly acidic to neutral pH of 6.0 to 7.0. You can purchase a soil testing kit at most garden centers.
* Amend the Soil: Based on your soil test results, amend the soil accordingly. If your soil is too acidic, add lime to raise the pH. If it’s too alkaline, add sulfur to lower the pH.
* Add Organic Matter: Incorporate plenty of organic matter, such as compost, well-rotted manure, or leaf mold, into the soil. This will improve drainage, aeration, and nutrient content. I usually add a generous layer (about 4-6 inches) of compost to my garden bed.
* Fertilize: Apply a balanced fertilizer, such as 10-10-10, according to the package instructions. This will provide the cauliflower plants with the essential nutrients they need to get off to a strong start.
Starting Cauliflower Seeds: Indoors or Outdoors?
You can start cauliflower seeds either indoors or directly in the garden, depending on your climate and preferences.
* Starting Seeds Indoors: This is my preferred method, especially if you live in a colder climate. Starting seeds indoors gives you a head start on the growing season.
1. Sow the Seeds: About 6-8 weeks before the last expected frost, sow the seeds in seed trays or small pots filled with seed-starting mix. Plant the seeds about 1/4 inch deep.
2. Provide Warmth and Light: Keep the soil moist and warm (around 70-75°F) until the seeds germinate. Once the seedlings emerge, provide them with plenty of light. A sunny windowsill or grow lights will work well.
3. Harden Off the Seedlings: Before transplanting the seedlings outdoors, you’ll need to harden them off. This process gradually acclimates the plants to outdoor conditions. Start by placing the seedlings outdoors for a few hours each day, gradually increasing the amount of time they spend outside over the course of a week.
* Direct Sowing: If you live in a warmer climate with a long growing season, you can direct sow cauliflower seeds in the garden.
1. Prepare the Soil: Follow the soil preparation steps outlined above.
2. Sow the Seeds: Sow the seeds about 1/2 inch deep and 18-24 inches apart.
3. Keep the Soil Moist: Water the seeds regularly to keep the soil moist until they germinate.
4. Thin the Seedlings: Once the seedlings emerge, thin them to 18-24 inches apart.
Transplanting Cauliflower Seedlings: Giving Them Room to Grow
Once your cauliflower seedlings are ready, it’s time to transplant them into the garden.
1. Choose a Sunny Location: Cauliflower needs at least 6 hours of sunlight per day.
2. Prepare the Planting Holes: Dig holes that are slightly larger than the root balls of the seedlings. Space the holes 18-24 inches apart.
3. Transplant the Seedlings: Gently remove the seedlings from their containers and place them in the planting holes. Make sure the top of the root ball is level with the soil surface.
4. Water Thoroughly: Water the seedlings thoroughly after transplanting.
5. Mulch: Apply a layer of mulch around the plants to help retain moisture, suppress weeds, and regulate soil temperature. I like to use straw or shredded leaves.
Caring for Your Cauliflower Plants: Watering, Fertilizing, and Pest Control
Proper care is essential for healthy cauliflower growth and development.
* Watering: Cauliflower needs consistent moisture, especially during head formation. Water deeply and regularly, aiming for about 1-2 inches of water per week. Avoid overhead watering, as this can lead to fungal diseases.
* Fertilizing: Side-dress the plants with a nitrogen-rich fertilizer every 2-3 weeks. This will help promote leafy growth and head development. I use fish emulsion or compost tea.
* Pest Control: Cauliflower is susceptible to several pests, including cabbage worms, aphids, and flea beetles.
* Cabbage Worms: These green caterpillars can quickly devour cauliflower leaves. Handpick them off the plants or use a biological insecticide like Bacillus thuringiensis (Bt).
* Aphids: These tiny insects suck sap from the plants, weakening them. Spray the plants with insecticidal soap or neem oil.
* Flea Beetles: These small, jumping beetles can create tiny holes in the leaves. Cover the plants with row covers to prevent flea beetles from reaching them.
* Weed Control: Keep the garden bed free of weeds, as they can compete with the cauliflower plants for nutrients and water. Hand-pull weeds regularly or use a hoe.
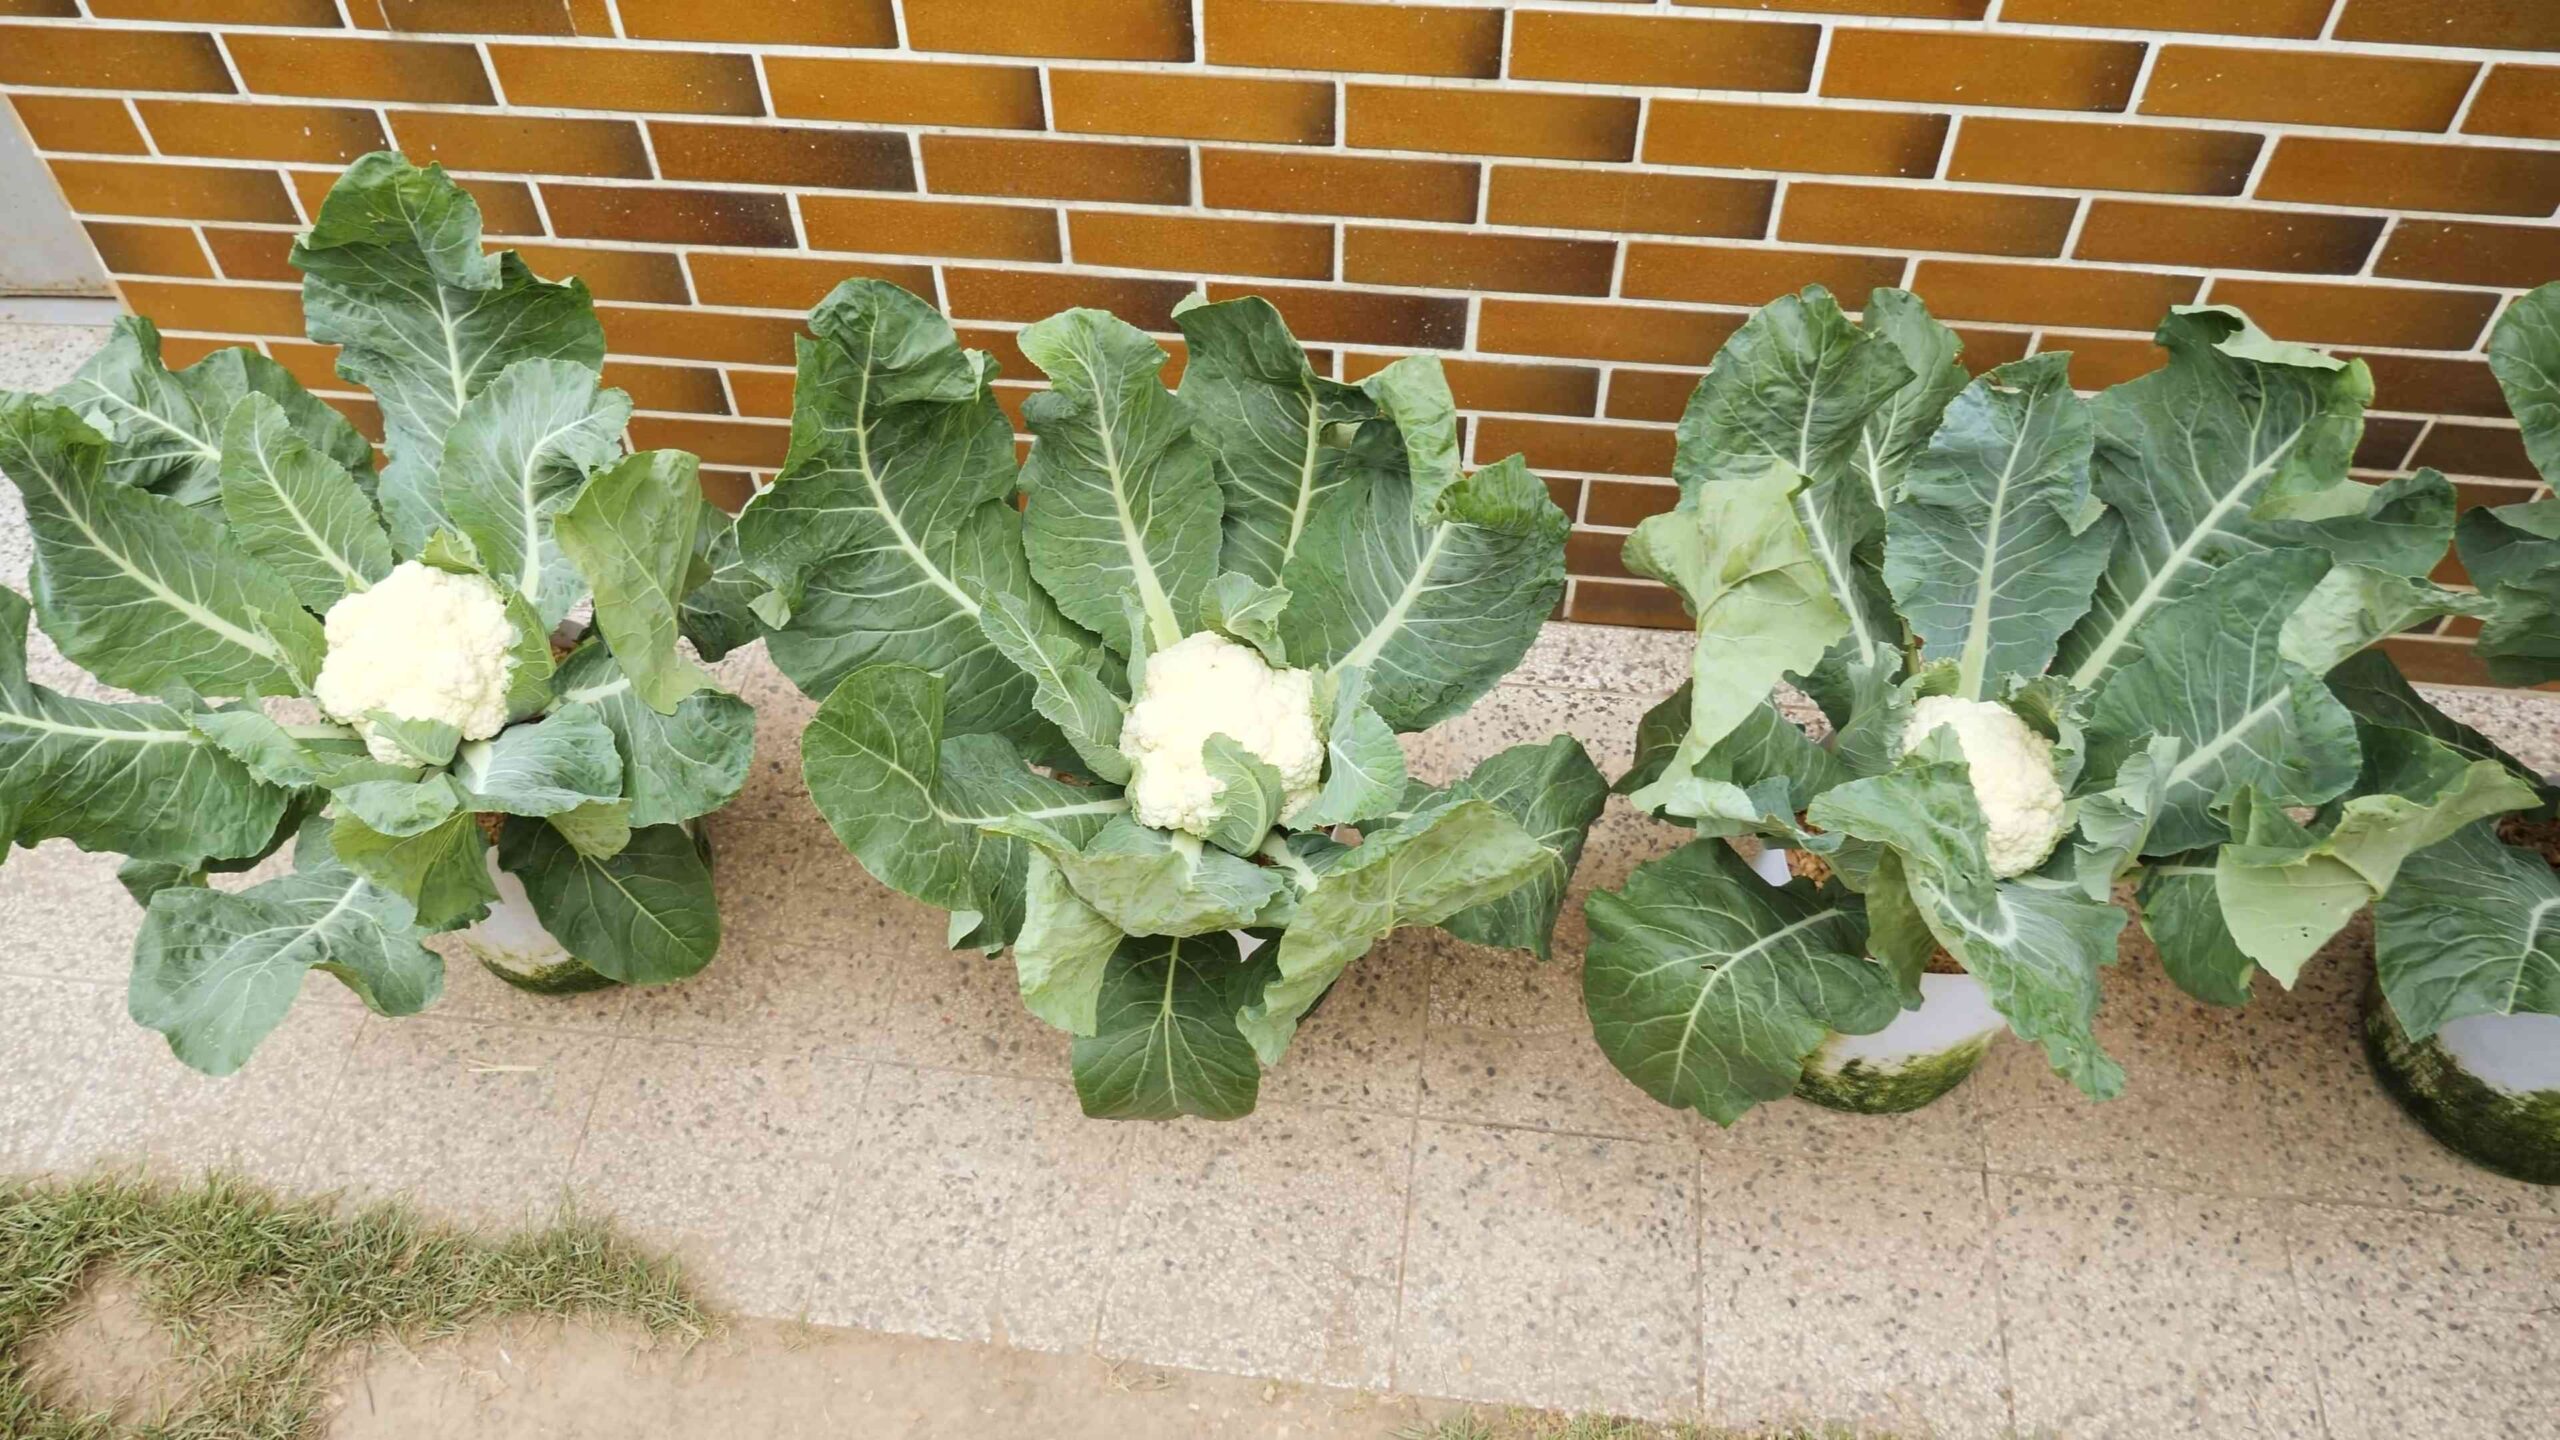
Blanching Cauliflower Heads: Achieving That Perfect White Color
Blanching is the process of covering the cauliflower head to prevent it from turning yellow or brown. While not strictly necessary, blanching produces a whiter, more appealing head.
1. When to Blanch: When the cauliflower head is about 2-3 inches in diameter, it’s time to blanch it.
2. How to Blanch: Gently pull the large outer leaves over the head and secure them with twine, rubber bands, or clothespins. You can also use a specialized blanching clip.
3. Check Regularly: Check the head regularly to make sure it’s not rotting or becoming discolored.
4. Harvest Time: The cauliflower head should be ready to harvest about 7-12 days after blanching.
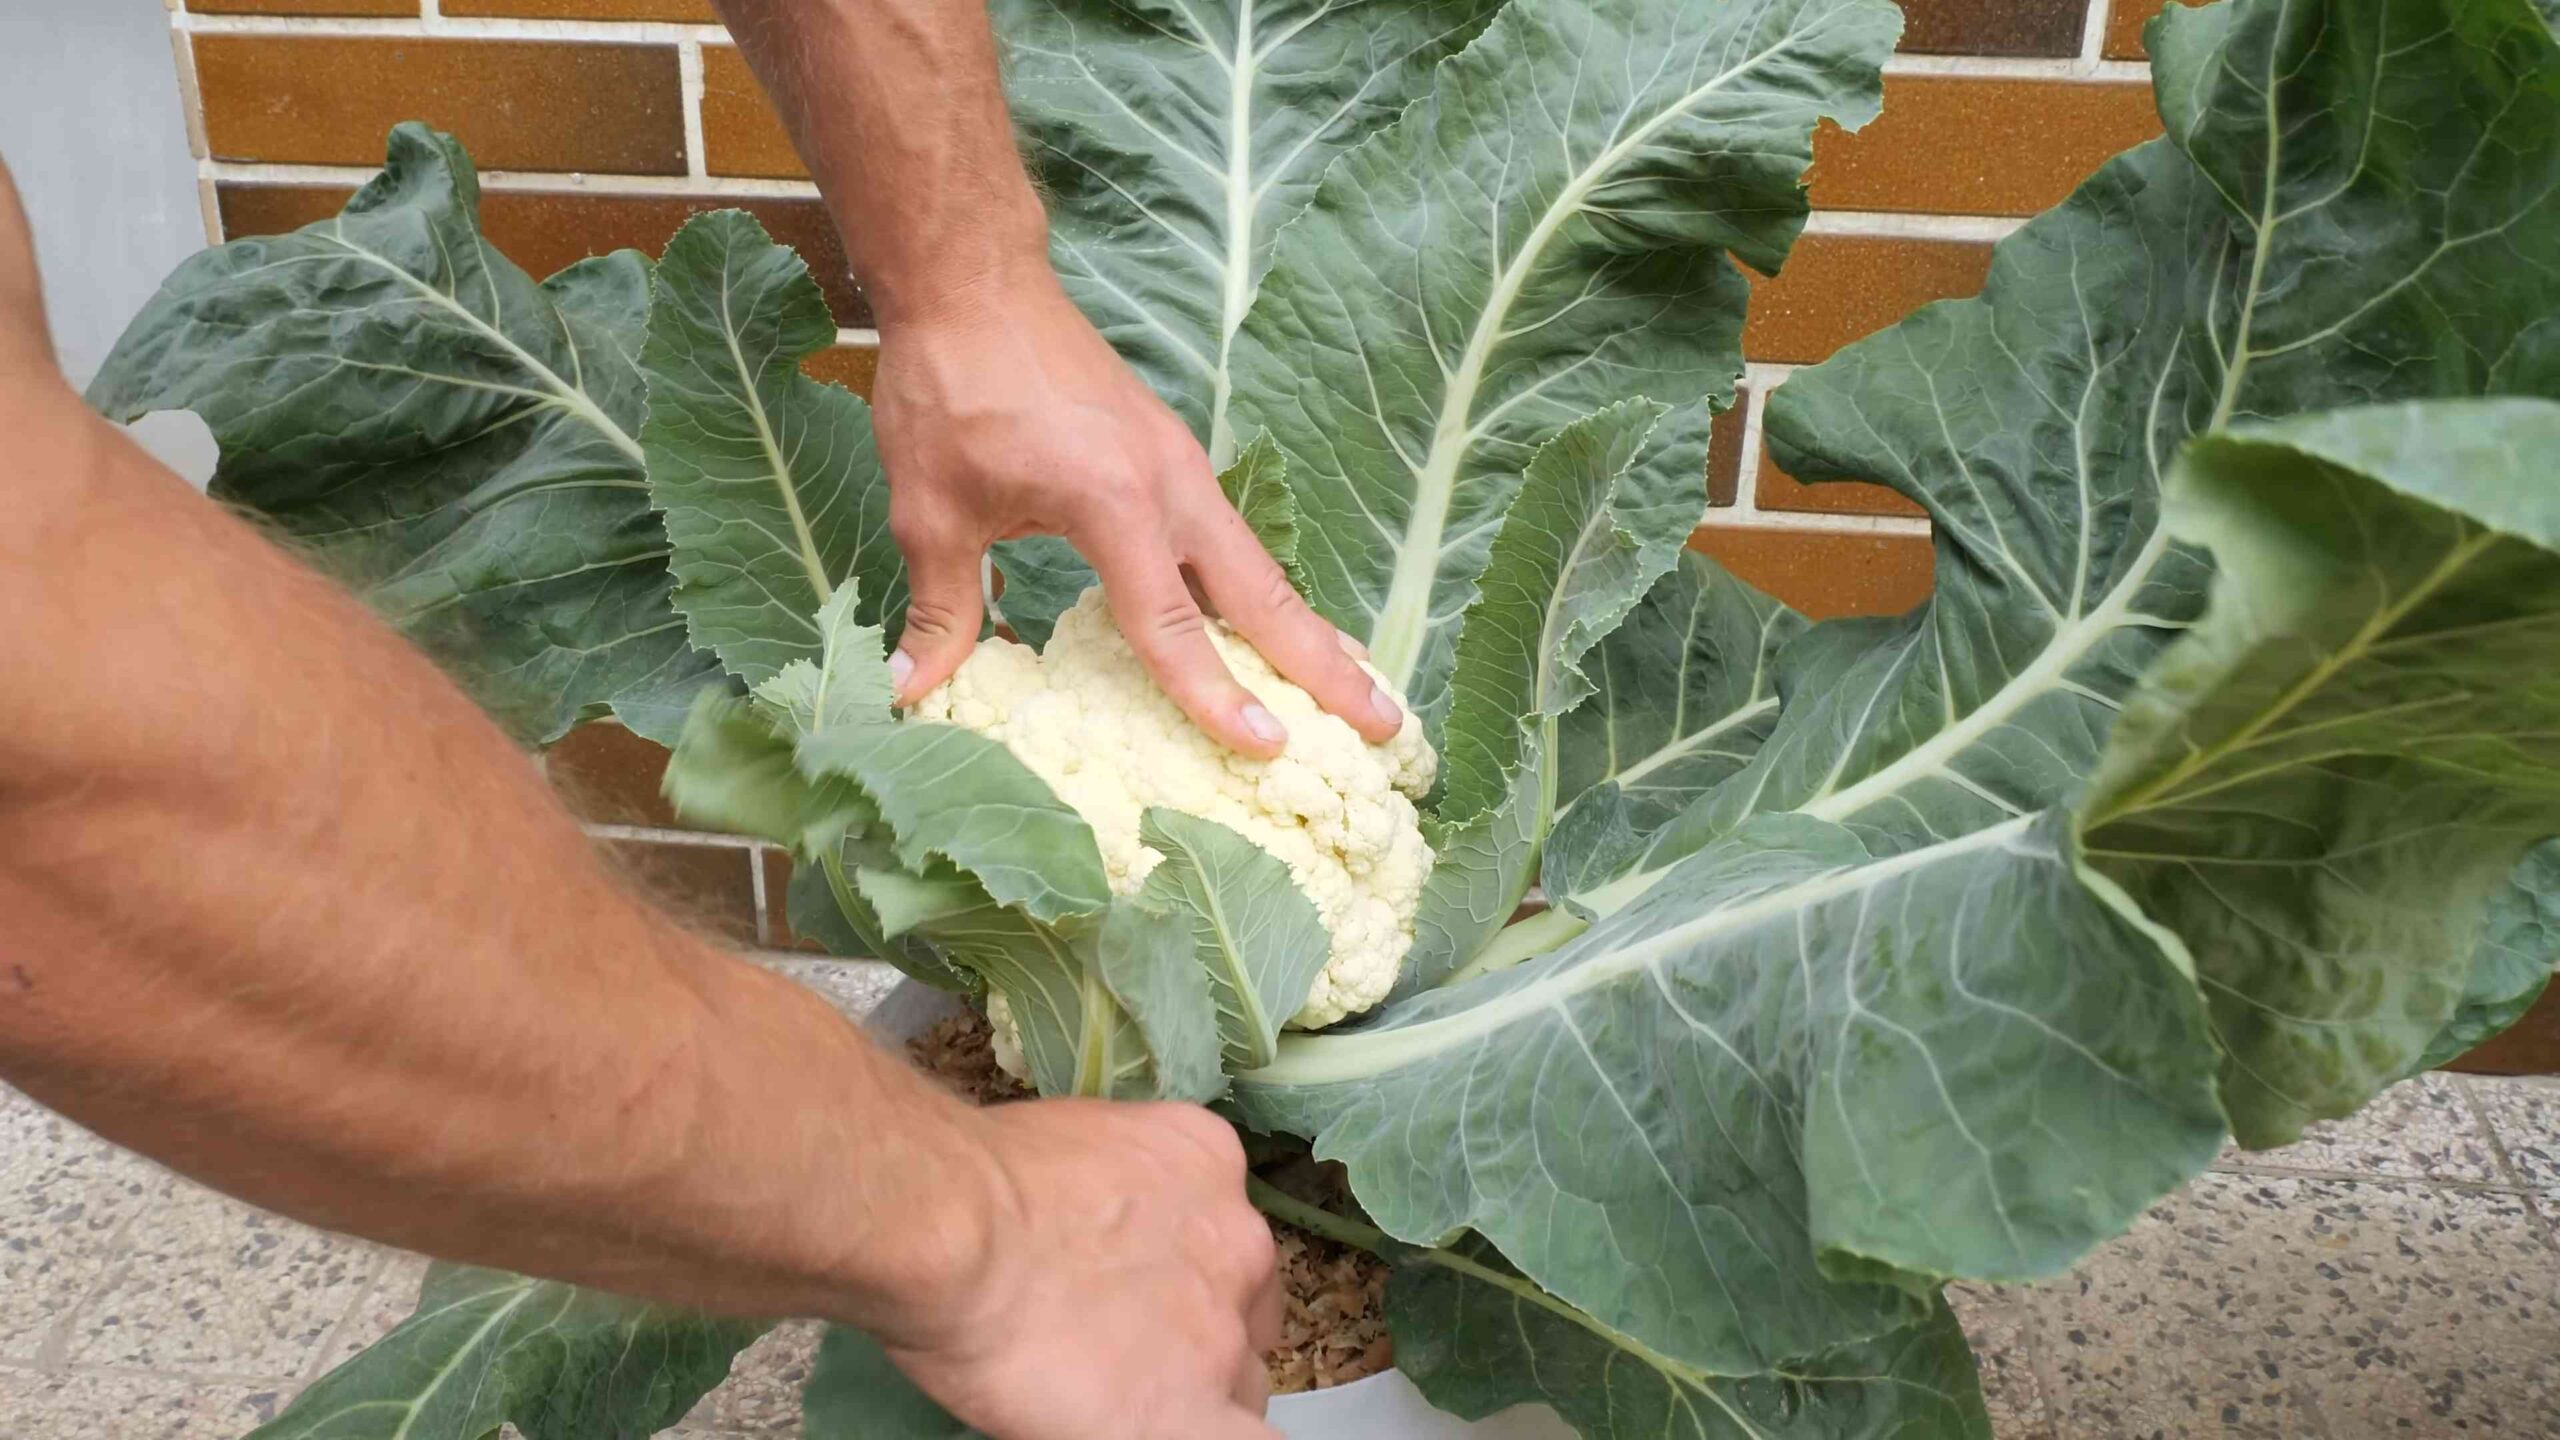
Harvesting Cauliflower: The Moment of Truth
Knowing when to harvest cauliflower is crucial for getting the best flavor and texture.
1. Check the Head Size: The cauliflower head should be firm, compact, and about 6-8 inches in diameter.
2. Check the Curd: The curd (the white part of the head) should be tight and smooth, without any signs of discoloration or separation.
3. Cut the Head: Use a sharp knife to cut the head from the plant, leaving a few inches of stem attached.
4. Harvest in the Morning: Harvest cauliflower in the morning, when the temperatures are cooler.
5. Store Properly: Store the cauliflower head in the refrigerator for up to a week.
Troubleshooting Common Cauliflower Problems
Even with the best care, you might encounter some problems while growing cauliflower. Here are a few common issues and how to address them:
* Buttoning: This occurs when the cauliflower head forms prematurely and remains small. It’s often caused by stress, such as lack of water or nutrients. Make sure to water and fertilize your plants regularly.
* Ricey Curd: This is when the curd becomes loose and grainy. It’s often caused by hot weather or inconsistent watering. Try to provide shade for the plants during the hottest part of the day and water them regularly.
* Yellowing Heads: This is usually caused by lack of blanching or exposure to sunlight. Blanch the heads as described above to prevent yellowing.
* Clubroot: This fungal disease causes swollen, distorted roots and stunted growth. Prevent clubroot by practicing crop rotation and maintaining a soil pH of 7.0 or higher.
Conclusion
So, there you have it! Growing cauliflower at home, while it might seem daunting at first, is an incredibly rewarding experience that brings the freshest, most flavorful produce right to your kitchen. We’ve walked you through the essential steps, from selecting the right variety and preparing your soil to nurturing your plants and harvesting your beautiful heads of cauliflower.
But why should you bother with all this effort when you can simply buy cauliflower at the store? The answer lies in the unparalleled freshness and flavor. Store-bought cauliflower often travels long distances and sits on shelves, losing its vibrancy and developing a slightly bitter taste. Homegrown cauliflower, on the other hand, is harvested at its peak ripeness, bursting with sweetness and a delicate, nutty flavor that you just can’t find anywhere else. Plus, you have complete control over the growing process, ensuring that your cauliflower is free from harmful pesticides and chemicals.
Beyond the superior taste and quality, growing your own cauliflower is also a fantastic way to connect with nature, learn new skills, and enjoy the satisfaction of nurturing something from seed to table. It’s a truly fulfilling experience that can bring joy and a sense of accomplishment to your life.
Don’t be afraid to experiment with different varieties of cauliflower to find your favorites. Consider trying purple cauliflower for its vibrant color and slightly sweeter taste, or Romanesco cauliflower for its stunning fractal patterns and unique flavor. You can also try succession planting, sowing seeds every few weeks, to ensure a continuous harvest throughout the growing season. If space is limited, explore container gardening options using dwarf varieties specifically bred for pots.
And remember, growing cauliflower at home is a journey, not a destination. There will be challenges along the way, but don’t let them discourage you. Learn from your mistakes, adapt your techniques, and celebrate your successes. The rewards are well worth the effort.
We encourage you to take the plunge and try growing cauliflower at home. It’s a fantastic way to enjoy fresh, delicious produce, connect with nature, and learn new skills. Share your experiences with us in the comments below! We’d love to hear about your successes, your challenges, and any tips or tricks you’ve discovered along the way. Let’s build a community of home gardeners who are passionate about growing their own food. Happy gardening!
Frequently Asked Questions (FAQs)
Q: What is the best time of year to start growing cauliflower?
A: The best time to start growing cauliflower depends on your climate. Cauliflower is a cool-season crop, so it thrives in temperatures between 60°F and 70°F (15°C and 21°C). In areas with mild winters, you can plant cauliflower in the fall for a winter or early spring harvest. In colder climates, start seeds indoors 6-8 weeks before the last expected frost and transplant them outdoors in the spring after the danger of frost has passed. For a fall harvest in colder climates, start seeds indoors in late spring or early summer.
Q: What kind of soil does cauliflower need?
A: Cauliflower needs well-drained, fertile soil that is rich in organic matter. The ideal soil pH is between 6.0 and 7.0. Before planting, amend your soil with compost, well-rotted manure, or other organic matter to improve drainage, fertility, and water retention. A soil test can help you determine if your soil is lacking any essential nutrients.
Q: How much sunlight does cauliflower need?
A: Cauliflower needs at least 6 hours of direct sunlight per day to thrive. Choose a sunny location in your garden where your plants will receive plenty of sunlight throughout the day. If you live in a very hot climate, some afternoon shade can be beneficial to prevent the plants from overheating.
Q: How often should I water cauliflower?
A: Cauliflower needs consistent moisture to grow properly. Water your plants deeply and regularly, especially during dry periods. Aim to keep the soil consistently moist but not waterlogged. Mulching around your plants can help to retain moisture and suppress weeds.
Q: What are some common pests and diseases that affect cauliflower?
A: Cauliflower can be susceptible to a variety of pests and diseases, including cabbage worms, aphids, flea beetles, clubroot, and black rot. Regularly inspect your plants for signs of pests or diseases and take appropriate action to control them. Companion planting with herbs like rosemary and thyme can help to deter pests. Crop rotation can also help to prevent soilborne diseases.
Q: How do I prevent cauliflower heads from turning yellow?
A: Cauliflower heads can turn yellow if they are exposed to too much sunlight. To prevent this, blanch the heads by tying the outer leaves together over the developing head when it reaches about 2-3 inches in diameter. This will protect the head from the sun and keep it white.
Q: How do I know when cauliflower is ready to harvest?
A: Cauliflower is ready to harvest when the head is firm, compact, and reaches the desired size. The size of the head will vary depending on the variety, but most varieties are ready to harvest when the head is 6-8 inches in diameter. Use a sharp knife to cut the head from the plant, leaving a few leaves attached to protect the head.
Q: Can I grow cauliflower in containers?
A: Yes, you can grow cauliflower in containers, but you will need to choose a large container that is at least 12 inches in diameter and 12 inches deep. Use a high-quality potting mix and make sure the container has good drainage. Dwarf varieties of cauliflower are best suited for container gardening.
Q: What are some good companion plants for cauliflower?
A: Good companion plants for cauliflower include herbs like rosemary, thyme, and sage, which can help to deter pests. Other beneficial companion plants include beans, peas, and onions. Avoid planting cauliflower near strawberries or tomatoes, as they can inhibit its growth.
Q: Can I freeze cauliflower?
A: Yes, you can freeze cauliflower. To freeze cauliflower, cut it into florets and blanch them in boiling water for 3 minutes. Then, transfer the florets to an ice bath to stop the cooking process. Drain the florets thoroughly and spread them out on a baking sheet to freeze individually. Once frozen, transfer the florets to a freezer bag or container. Frozen cauliflower can be stored in the freezer for up to 12 months.
Leave a Comment