

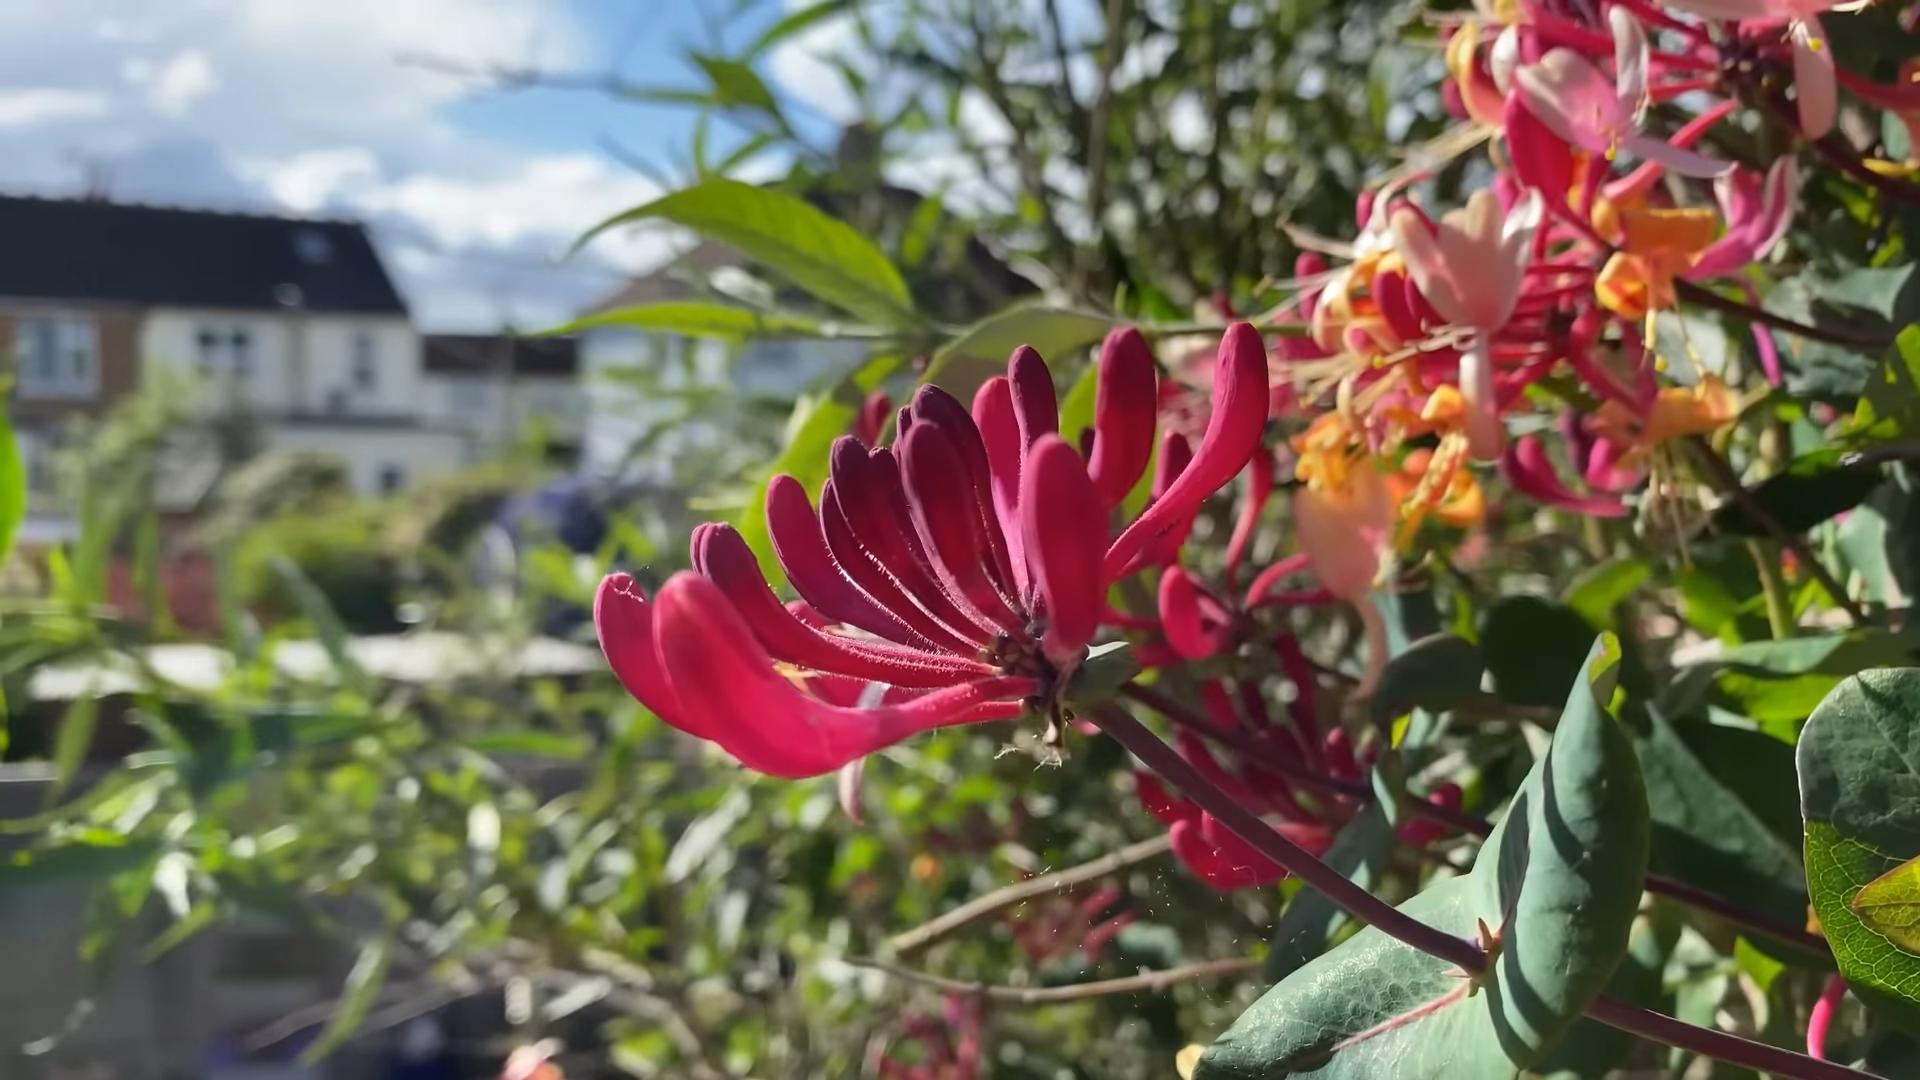
Honeysuckle trellis growing tips are your secret weapon to transforming a dull garden space into a fragrant, vibrant haven! Imagine strolling through your backyard, enveloped by the sweet, intoxicating scent of honeysuckle, its delicate blossoms cascading down a beautifully crafted trellis. Sounds dreamy, right? Well, it’s absolutely achievable, and I’m here to guide you every step of the way with some easy and effective DIY tricks.
For centuries, honeysuckle has been cherished not only for its beauty but also for its medicinal properties and symbolic significance. In many cultures, it represents love, devotion, and sweetness. Now, you can bring that rich history and symbolism into your own garden. But let’s be honest, sometimes getting these climbing beauties to thrive can be a bit tricky. That’s where these honeysuckle trellis growing tips come in handy!
Many gardeners struggle with supporting their honeysuckle vines, leading to tangled messes or stunted growth. A well-designed trellis provides the necessary structure for your honeysuckle to flourish, maximizing its blooming potential and creating a stunning focal point in your garden. I’ll share some simple, budget-friendly DIY trellis ideas and essential growing tips that will ensure your honeysuckle thrives, bringing joy and beauty to your outdoor space for years to come. Let’s get started!
DIY Honeysuckle Trellis: A Sweet-Smelling Project for Your Garden
Okay, so you want to build a trellis for your honeysuckle? Awesome! Honeysuckle is such a beautiful and fragrant addition to any garden, but it needs a little support to really thrive. I’m going to walk you through building a sturdy and attractive trellis that your honeysuckle will love. This project is totally doable for beginners, and I promise, the sweet-smelling reward is worth the effort.
Materials You’ll Need:
Before we dive in, let’s gather our supplies. Trust me, having everything ready beforehand will make the whole process much smoother.
* Untreated Lumber: I recommend using cedar or redwood because they’re naturally rot-resistant. You’ll need:
* Two 8-foot long 4×4 posts (for the main uprights)
* Four 4-foot long 2x4s (for the horizontal supports)
* Enough 1×2 or 1×3 lumber to create the lattice (the amount will depend on the size of your trellis and how dense you want the lattice to be). I usually get about 20-30 feet.
* Fasteners:
* Exterior wood screws (3-inch and 1 1/4-inch)
* Galvanized nails (for attaching the lattice strips)
* Tools:
* Measuring tape
* Pencil
* Circular saw or hand saw
* Drill with drill bits (including a countersinking bit)
* Level
* Hammer
* Staple gun (optional, for attaching the lattice)
* Post hole digger or shovel
* Safety glasses
* Work gloves
* Optional:
* Wood stain or paint (for finishing the trellis)
* Concrete mix (for setting the posts in the ground)
Planning Your Trellis: Size and Design
Before you start cutting wood, take a moment to think about the size and design of your trellis. Consider these factors:
* The size of your honeysuckle: How big will it eventually get? You want a trellis that can support its mature size.
* The location: Where will the trellis be placed? Make sure it won’t block sunlight from other plants.
* Your personal style: Do you prefer a simple, rustic look or something more elaborate?
I’m going to guide you through building a basic rectangular trellis, but feel free to customize the design to your liking. You could add decorative elements, change the shape, or use different materials.
Building the Trellis Frame
This is where the real construction begins! We’ll start by building the main frame of the trellis.
1. Cut the Lumber: Using your measuring tape and saw, cut the lumber to the following lengths:
* Two 8-foot 4×4 posts (these are your main vertical supports)
* Four 4-foot 2x4s (these will be your horizontal supports)
* Cut the 1×2 or 1×3 lumber into the lengths you want for your lattice. I usually cut mine to 2-foot lengths, but you can adjust this based on your desired lattice pattern.
2. Assemble the Frame:
* Lay one of the 4×4 posts on a flat surface.
* Attach two of the 4-foot 2x4s horizontally to the post, creating a rectangular frame. I usually space them about 2 feet apart, but you can adjust this based on your desired trellis height.
* Use 3-inch exterior wood screws to secure the 2x4s to the 4×4 post. Make sure the screws are countersunk so they don’t stick out.
* Repeat this process with the other 4×4 post and the remaining two 2x4s.
* Now you should have two identical rectangular frames.
3. Connect the Frames:
* Stand the two frames upright, parallel to each other.
* Attach the remaining 1×2 or 1×3 lumber horizontally between the two frames, creating the lattice.
* Use galvanized nails or a staple gun to secure the lattice strips to the frame.
* Space the lattice strips evenly apart. The spacing will depend on how dense you want the lattice to be. I usually space them about 4-6 inches apart.
Creating the Lattice
This is where your trellis really starts to take shape! The lattice provides the support that your honeysuckle needs to climb.
1. Prepare the Lattice Strips: If you haven’t already, cut your 1×2 or 1×3 lumber into the desired lengths for the lattice. Remember, I usually go with 2-foot lengths.
2. Attach the First Layer: Starting at the bottom of the frame, attach the first lattice strip horizontally across the two vertical supports. Use galvanized nails or a staple gun to secure it in place. Make sure it’s level!
3. Space and Attach Subsequent Layers: Measure and mark the desired spacing for your lattice strips. I typically go for 4-6 inches. Attach the remaining lattice strips, ensuring they are evenly spaced and parallel to the first one.
4. Add Vertical Lattice (Optional): For a more intricate and supportive lattice, you can add vertical strips as well. Measure and cut the strips to fit between the horizontal ones, and attach them using nails or staples. This creates a classic grid pattern.
Setting the Trellis in the Ground
Now that the trellis is built, it’s time to put it in its permanent home! This step is crucial for ensuring the trellis is stable and can withstand the weight of the honeysuckle.
1. Dig the Post Holes: Use a post hole digger or shovel to dig two holes where you want to place the trellis. The holes should be deep enough to bury the posts at least 2 feet deep. This will provide adequate support.
2. Position the Trellis: Carefully lower the trellis into the holes, making sure it’s level and plumb. Use a level to check both the vertical and horizontal alignment.
3. Secure the Posts:
* Option 1: Concrete: Pour concrete mix into the holes around the posts, following the instructions on the concrete bag. This will provide the most stable support.
* Option 2: Gravel and Soil: If you prefer not to use concrete, you can fill the holes with gravel and soil. Tamp the soil firmly around the posts to secure them.
4. Backfill and Tamp: Once the posts are secured, backfill the holes with soil and tamp it down firmly. This will help to stabilize the trellis and prevent it from shifting.
Finishing Touches (Optional)
These steps are optional, but they can really enhance the look and longevity of your trellis.
1. Stain or Paint: If you want to protect the wood and give the trellis a more finished look, you can stain or paint it. Choose a stain or paint that is designed for exterior use. I personally love a natural wood stain to show off the grain.
2. Add Decorative Elements: You can add decorative elements to the trellis, such as finials, caps, or decorative trim. This is a great way to personalize the trellis and make it your own.
3. Plant Your Honeysuckle: Now for the best part! Plant your honeysuckle at the base of the trellis. Gently guide the vines onto the trellis and encourage them to climb.
Tips for Success
* Use quality lumber: Don’t skimp on the lumber! Using rot-resistant wood like cedar or redwood will ensure that your trellis lasts for years to come.
* Pre-drill holes: Pre-drilling holes before driving in screws will prevent the wood from splitting.
* Use exterior-grade fasteners: Make sure to use exterior-grade screws and nails that are designed to withstand the elements.
* Protect the wood: Staining or painting the trellis will help to protect it from the weather and extend its lifespan.
* Water regularly: Water your honeysuckle regularly, especially during dry periods.
* Prune as needed: Prune your honeysuckle regularly to keep it healthy and encourage it to climb the trellis.
Troubleshooting
* Trellis is wobbly: If the trellis is wobbly, make sure the posts are buried deep enough and that the soil is firmly tamped around them. You may also need to add more support by using concrete.
* Honeysuckle isn’t climbing: If the honeysuckle isn’t climbing the trellis, gently guide the vines onto the trellis and tie them in place with twine. You can also try using plant clips to attach the vines to the trellis.
* Wood is splitting: If the wood is splitting when you drive in screws, try pre-
Conclusion
So, there you have it! Building your own honeysuckle trellis isn’t just a cost-effective alternative to store-bought options; it’s an opportunity to personalize your garden, nurture your honeysuckle vine, and create a stunning focal point that will be the envy of all your neighbors. The satisfaction of watching your honeysuckle climb and flourish on a structure you built with your own hands is truly unparalleled.
This DIY project is a must-try for several reasons. First, it allows you to tailor the trellis to the specific needs and aesthetic of your garden. Whether you have a small balcony, a sprawling backyard, or a particular style in mind, you can customize the size, shape, and materials to perfectly complement your space. Second, it’s a sustainable choice. By using reclaimed wood, bamboo, or other recycled materials, you can reduce your environmental impact and give new life to discarded items. Third, it’s a fun and rewarding project that can be enjoyed by the whole family. Get your kids involved in the design and construction process, and teach them valuable skills along the way.
Looking for variations? Consider adding decorative elements to your trellis, such as painted designs, mosaic tiles, or repurposed garden ornaments. You could also experiment with different trellis shapes, such as arches, fans, or even whimsical animal silhouettes. For a more rustic look, use natural branches and twigs to create a free-form trellis that blends seamlessly with its surroundings. If you’re short on space, a simple wall-mounted trellis or a freestanding obelisk can be a great option. And don’t forget to think about the long-term maintenance of your trellis. Choose durable materials that can withstand the elements, and consider applying a sealant or paint to protect the wood from rot and decay.
We’ve covered the essentials for creating a thriving honeysuckle trellis, but the real magic happens when you put your own spin on it. Don’t be afraid to experiment with different designs, materials, and techniques to create a trellis that is uniquely yours. Remember, the most important thing is to have fun and enjoy the process.
Now it’s your turn! We encourage you to give this DIY honeysuckle trellis project a try. Whether you’re a seasoned gardener or a complete beginner, we’re confident that you’ll be able to create a beautiful and functional trellis that will enhance your garden for years to come. Once you’ve built your trellis and your honeysuckle is thriving, we’d love to see your creations! Share your photos and stories with us on social media using #DIYHoneysuckleTrellis. We can’t wait to see what you come up with! Happy gardening!
Frequently Asked Questions (FAQ)
What type of honeysuckle is best suited for a trellis?
Many varieties of honeysuckle thrive on trellises, but some are better suited than others. Consider these factors when choosing a honeysuckle for your trellis:
* **Growth Habit:** Choose a climbing variety rather than a bush-type honeysuckle. Popular climbing varieties include Japanese honeysuckle (Lonicera japonica), Goldflame honeysuckle (Lonicera x heckrottii), and Trumpet honeysuckle (Lonicera sempervirens).
* **Size:** Consider the size of your trellis and the mature size of the honeysuckle. Some varieties can grow quite large and may require a more robust trellis.
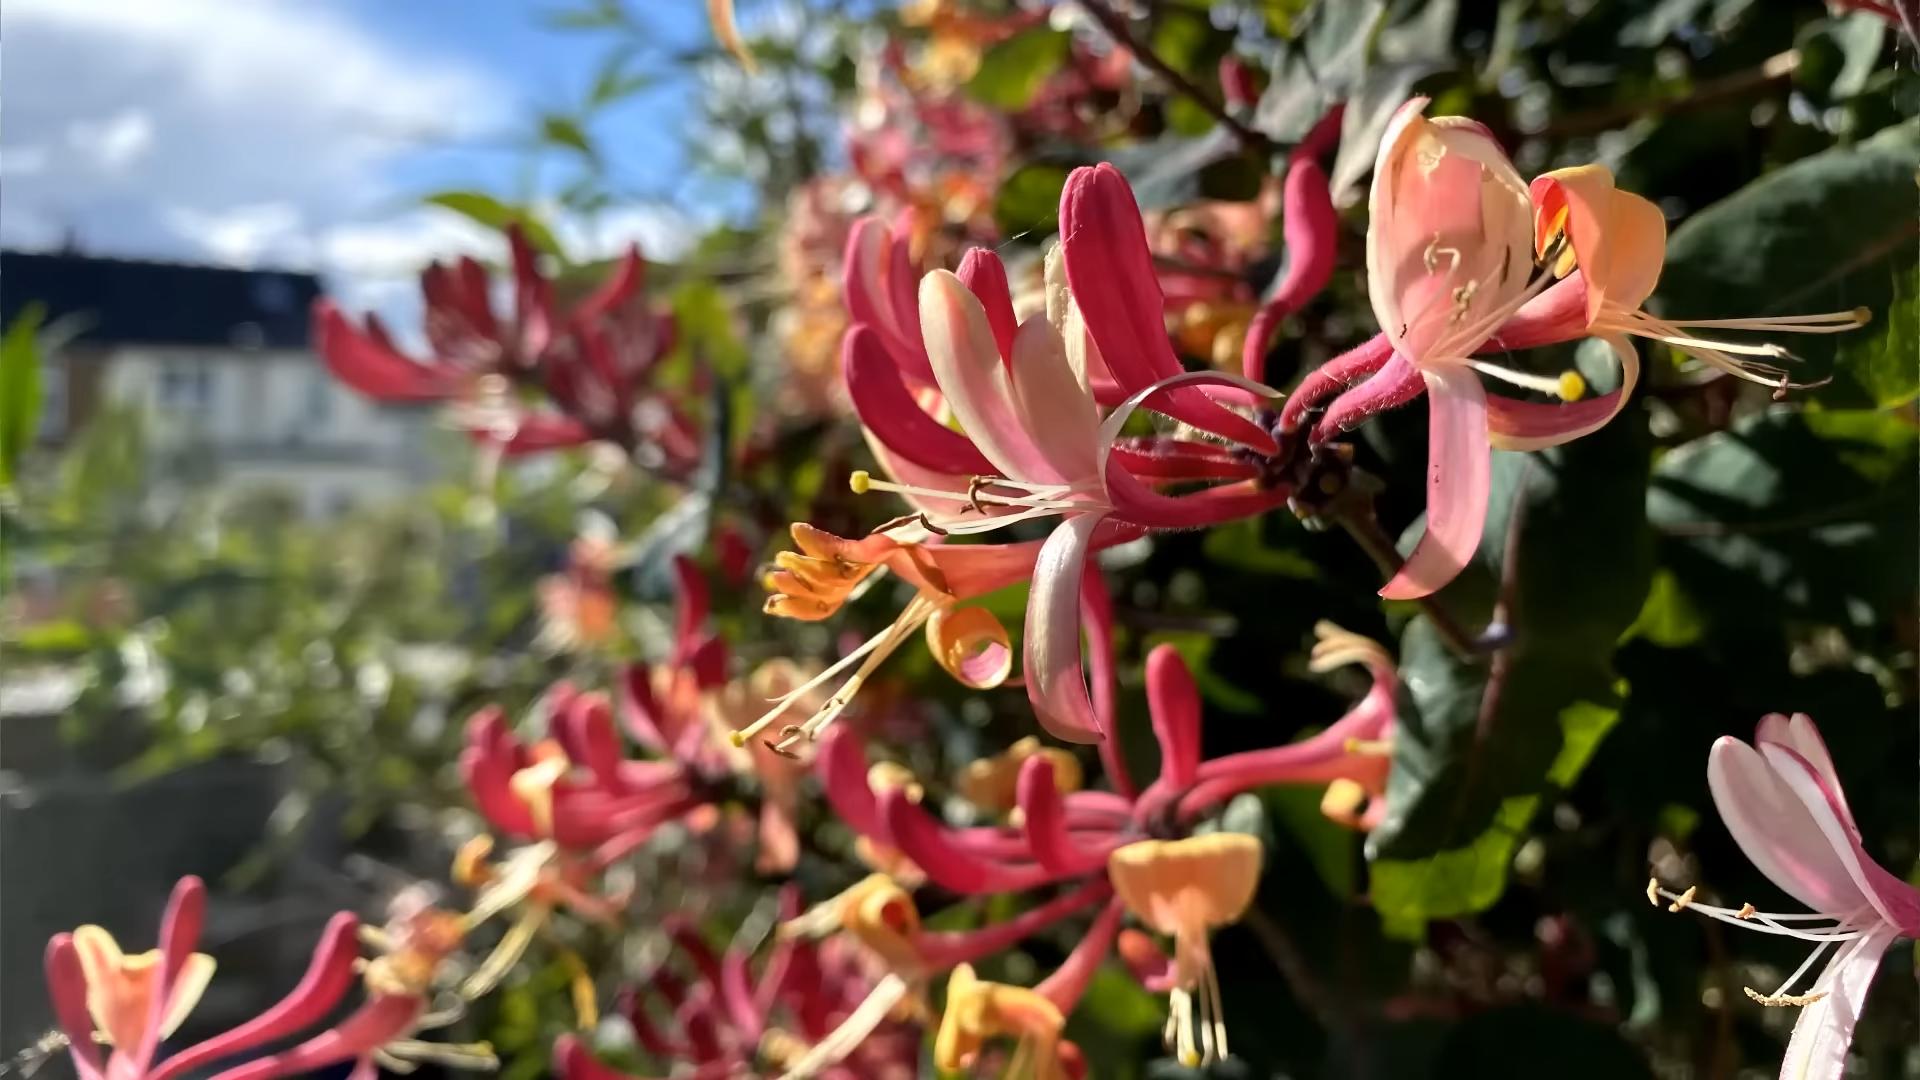
* **Fragrance:** Honeysuckle is known for its sweet fragrance, but some varieties are more fragrant than others. If fragrance is important to you, choose a variety that is known for its strong scent.
* **Hardiness:** Make sure the honeysuckle variety is hardy in your climate zone. This will ensure that it can survive the winter and thrive in your garden.
* **Invasive Potential:** Be aware that some honeysuckle varieties, such as Japanese honeysuckle, can be invasive in certain areas. Choose a non-invasive variety or be prepared to manage its growth.
How do I train my honeysuckle to climb the trellis?
Training your honeysuckle to climb the trellis is essential for ensuring that it grows in the desired direction and covers the trellis evenly. Here are some tips for training your honeysuckle:
* **Start Early:** Begin training your honeysuckle as soon as it is planted. Gently guide the stems towards the trellis and tie them loosely with soft twine or plant ties.
* **Provide Support:** As the honeysuckle grows, continue to provide support by tying the stems to the trellis at regular intervals.
* **Prune Regularly:** Prune your honeysuckle regularly to encourage branching and to maintain its shape. Remove any dead, damaged, or crossing stems.
* **Weave Stems:** Weave the stems through the trellis to help them grip and climb.
* **Be Patient:** It may take some time for your honeysuckle to fully cover the trellis. Be patient and continue to provide support and guidance as it grows.
What materials are best for building a honeysuckle trellis?
The best materials for building a honeysuckle trellis depend on your budget, aesthetic preferences, and the size and weight of the honeysuckle vine. Here are some popular options:
* **Wood:** Wood is a classic and versatile material for building trellises. Cedar, redwood, and pressure-treated lumber are all good choices for outdoor use.
* **Metal:** Metal trellises are durable and long-lasting. Wrought iron, steel, and aluminum are all good options.
* **Bamboo:** Bamboo is a sustainable and eco-friendly material for building trellises. It is lightweight, strong, and naturally resistant to rot and decay.
* **PVC Pipe:** PVC pipe is a lightweight and inexpensive material for building trellises. It is easy to work with and can be painted to match your garden décor.
* **Reclaimed Materials:** Get creative and use reclaimed materials such as old doors, windows, or pallets to build a unique and eco-friendly trellis.
How much sunlight does honeysuckle need?
Honeysuckle thrives in full sun to partial shade. Ideally, it should receive at least 6 hours of direct sunlight per day. However, it can tolerate some shade, especially in hot climates. If your honeysuckle is not getting enough sunlight, it may not bloom as profusely.
How often should I water my honeysuckle?
Water your honeysuckle regularly, especially during dry periods. Water deeply and thoroughly, allowing the soil to dry out slightly between waterings. Avoid overwatering, as this can lead to root rot.
How do I fertilize my honeysuckle?
Fertilize your honeysuckle in the spring with a balanced fertilizer. Follow the instructions on the fertilizer package. Avoid over-fertilizing, as this can lead to excessive growth and fewer blooms.
How do I protect my honeysuckle from pests and diseases?
Honeysuckle is generally resistant to pests and diseases, but it can be susceptible to aphids, spider mites, and powdery mildew. Inspect your honeysuckle regularly for signs of pests or diseases and take action promptly. Use insecticidal soap or horticultural oil to control aphids and spider mites. Apply a fungicide to control powdery mildew.
Can I grow honeysuckle in a container?
Yes, you can grow honeysuckle in a container, but you will need to choose a large container with good drainage. Use a well-draining potting mix and water regularly. You will also need to provide a trellis or other support for the honeysuckle to climb.
How long does it take for honeysuckle to bloom?
Honeysuckle typically blooms in the spring or summer, depending on the variety. It may take a year or two for a newly planted honeysuckle to start blooming.
Is honeysuckle poisonous?
The berries of some honeysuckle varieties are poisonous. It is important to identify the honeysuckle variety before planting it, especially if you have children or pets.
Leave a Comment