

Spring cleaning tips are more than just a chore; they’re a refreshing ritual, a chance to breathe new life into your home after the long winter months. Have you ever walked into a sparkling clean space and felt an instant lift in your mood? That’s the magic of spring cleaning! For centuries, cultures around the world have embraced similar practices, from the Persian tradition of “Khaneh Tekani” (shaking the house) to the Catholic practice of cleaning the church altar before Easter. These traditions highlight a universal desire to start fresh and renew our surroundings.
But let’s be honest, the thought of tackling a whole-house clean can feel overwhelming. Where do you even begin? That’s where these DIY spring cleaning hacks come in! I’m going to share some of my favorite time-saving tricks and budget-friendly solutions that will make your spring cleaning not only effective but also enjoyable. From decluttering secrets to natural cleaning recipes, these tips will help you transform your home into a haven of freshness and order. You’ll be amazed at how much lighter and brighter your space – and your spirit – will feel after implementing these spring cleaning tips. So, grab your gloves, put on some music, and let’s get started!

DIY Spring Cleaning Hacks to Revitalize Your Home
Okay, friends, spring is *finally* here, and you know what that means: it’s time to banish the winter blues and give our homes a serious refresh! I’m not talking about just a quick tidy-up; I’m talking about a deep, down-to-the-nitty-gritty spring cleaning extravaganza. And to make it a little less daunting (and a lot more fun!), I’ve compiled some of my favorite DIY spring cleaning hacks that will leave your space sparkling and feeling brand new. Let’s get started!
Hack 1: The Magic of Homemade All-Purpose Cleaner
Forget those expensive store-bought cleaners filled with questionable chemicals. We’re going natural and effective with this simple DIY all-purpose cleaner. It’s safe for most surfaces and smells amazing!
What You’ll Need:
* Spray bottle
* 1/2 cup white vinegar
* 1/4 cup baking soda
* 1 liter hot water
* 10-15 drops of your favorite essential oil (lemon, lavender, tea tree, or eucalyptus are great choices)
Step-by-Step Instructions:
1. Combine the Ingredients: In a large bowl or measuring cup, slowly mix the baking soda and vinegar. Be careful, it will fizz!
2. Add Water: Once the fizzing subsides, gradually add the hot water, stirring gently to combine.
3. Add Essential Oils: Add your chosen essential oils for a fresh, clean scent and added antibacterial properties.
4. Pour into Spray Bottle: Carefully pour the mixture into your spray bottle.
5. Clean Away! Spray the cleaner onto surfaces and wipe clean with a microfiber cloth.
Where to Use It:
* Kitchen countertops
* Bathroom surfaces
* Floors (test in an inconspicuous area first)
* Windows and mirrors
Hack 2: Revive Your Mattress
We spend a third of our lives sleeping, so our mattresses deserve some love! This DIY mattress cleaning hack will eliminate dust mites, odors, and leave your mattress feeling fresh and clean.
What You’ll Need:
* Vacuum cleaner with upholstery attachment
* Baking soda
* Sieve or strainer
* Essential oils (optional)
Step-by-Step Instructions:
1. Strip the Bed: Remove all bedding, including sheets, blankets, and mattress protectors. Wash them in hot water to kill any dust mites.
2. Vacuum Thoroughly: Use the upholstery attachment on your vacuum cleaner to thoroughly vacuum the entire surface of the mattress, paying special attention to seams and crevices. Vacuum the sides of the mattress as well.
3. Baking Soda Power: In a bowl, mix baking soda with a few drops of your favorite essential oil (lavender is great for relaxation).
4. Sprinkle and Wait: Using a sieve or strainer, evenly sprinkle the baking soda mixture over the entire surface of the mattress.
5. Let it Sit: Allow the baking soda to sit on the mattress for at least 4 hours, or preferably overnight. This will absorb odors and moisture.
6. Vacuum Again: Thoroughly vacuum the mattress again to remove all the baking soda.
7. Flip and Repeat: Flip the mattress and repeat steps 2-6 on the other side.
Why This Works: Baking soda is a natural deodorizer and absorbent, drawing out moisture and odors from the mattress. Vacuuming removes dust mites and other allergens.
Hack 3: Sparkling Showerhead Transformation
Hard water can leave your showerhead looking dull and clogged. This simple vinegar soak will dissolve mineral deposits and restore your showerhead to its former glory.
What You’ll Need:
* White vinegar
* Plastic bag (gallon-sized)
* Rubber band or twist tie
Step-by-Step Instructions:
1. Fill the Bag: Fill the plastic bag with enough white vinegar to completely submerge the showerhead.
2. Secure the Bag: Carefully attach the bag to the showerhead, ensuring the showerhead is fully submerged in the vinegar. Secure the bag with a rubber band or twist tie.
3. Soak Overnight: Let the showerhead soak in the vinegar overnight (at least 8 hours).
4. Remove and Rinse: Remove the bag and discard the vinegar. Run hot water through the showerhead to flush out any remaining mineral deposits.
5. Scrub if Needed: If there are still stubborn deposits, gently scrub the showerhead with an old toothbrush.
Pro Tip: For extra stubborn deposits, you can add a tablespoon of baking soda to the vinegar.
Hack 4: Deep Clean Your Microwave
Microwaves can get pretty gross, pretty quickly. This steam cleaning method is quick, easy, and requires minimal effort.
What You’ll Need:
* Microwave-safe bowl
* 1 cup water
* 1 tablespoon white vinegar
* Lemon or lime slices (optional)
Step-by-Step Instructions:
1. Combine Ingredients: In the microwave-safe bowl, combine the water, vinegar, and lemon or lime slices (if using).
2. Microwave on High: Microwave the mixture on high for 5-7 minutes, or until the water boils and the microwave is filled with steam.
3. Let it Sit: Leave the microwave door closed for 2-3 minutes to allow the steam to loosen any stuck-on food particles.
4. Wipe Clean: Carefully remove the bowl (it will be hot!) and wipe down the inside of the microwave with a clean cloth or sponge.
Why This Works: The steam loosens food particles, making them easy to wipe away. The vinegar helps to disinfect and deodorize the microwave.
Hack 5: Blinds and Shades Dusting Made Easy
Dusting blinds and shades can be a tedious task. This simple hack will make it much faster and more efficient.
What You’ll Need:
* Old sock
* White vinegar
* Water
* Spray bottle
Step-by-Step Instructions:
1. Prepare the Solution: In a spray bottle, mix equal parts white vinegar and water.
2. Sock it to ’em: Put the old sock over your hand, like a puppet.
3. Spray and Wipe: Lightly spray the sock with the vinegar and water solution.
4. Dust Away: Use the sock-covered hand to wipe down each slat of the blinds or shades. The sock will trap the dust and dirt.
5. Repeat: Repeat steps 3 and 4 as needed, rinsing the sock occasionally.
Pro Tip: For vertical blinds, simply slide the sock-covered hand down each slat.
Hack 6: Unclog Your Drain Naturally
Chemical drain cleaners can be harsh and damaging to your pipes. This natural method is a safe and effective way to unclog your drains.
What You’ll Need:
* 1 cup baking soda
* 2 cups boiling water
* 1 cup white vinegar
Step-by-Step Instructions:
1. Pour in Baking Soda: Pour the baking soda down the drain.
2. Add Vinegar: Immediately follow with the white vinegar.
3. Let it Fizz: Let the mixture fizz and bubble for 30 minutes.
4. Flush with Boiling Water: After 30 minutes, carefully pour the boiling water down the drain.
Why This Works: The baking soda and vinegar create a chemical reaction that helps to break down grease and grime. The boiling water flushes away the debris.
Hack 7: Freshen Up Your Garbage Disposal
Garbage disposals can be a breeding ground for bacteria and odors. This simple hack will clean and freshen your disposal in minutes.
What You’ll Need:
* Ice cubes
* Lemon or lime wedges
* Salt
Step-by-Step Instructions:
1. Ice and Salt: Fill the garbage disposal with ice cubes and a generous amount of salt.
2. Grind Away: Turn on the cold water and run the garbage disposal until all the ice is ground up.
3. Add Citrus: Add the lemon or lime wedges to the disposal and continue running it for a few seconds.
Why This Works: The ice helps to scrub the blades of the disposal, while the salt acts as an abrasive to remove grime. The citrus wedges add a fresh, clean scent.
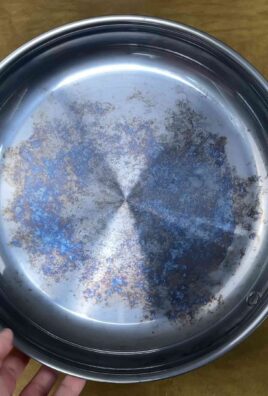
Hack 8: Clean Your Dishwasher Like a Pro
Even dishwashers need a good cleaning! This hack will remove food particles, mineral deposits, and leave your dishwasher sparkling.
What You’ll Need:
* White vinegar
* Baking soda
Step-by-Step Instructions:
1. Vinegar Rinse: Place

Conclusion
So, there you have it! Transforming your cleaning routine with these simple, yet incredibly effective DIY spring cleaning tips is not just about tidying up; it’s about creating a healthier, happier, and more organized living space. We’ve explored how to harness the power of natural ingredients and clever techniques to tackle even the most daunting cleaning tasks. From banishing grime in your grout to revitalizing your furniture, these methods offer a sustainable and budget-friendly alternative to harsh chemical cleaners.
But why is this approach a must-try? Because it’s more than just cleaning; it’s an investment in your well-being. By opting for DIY solutions, you’re reducing your exposure to potentially harmful chemicals, creating a safer environment for your family and pets. You’re also contributing to a more sustainable lifestyle by minimizing your reliance on commercially produced cleaning products and reducing plastic waste. Plus, let’s be honest, there’s a certain satisfaction that comes from creating something yourself and seeing the tangible results of your efforts.
Don’t be afraid to experiment and adapt these spring cleaning tips to suit your specific needs and preferences. For instance, if you’re not a fan of vinegar’s scent, try adding a few drops of your favorite essential oil to your cleaning solutions. Lavender, lemon, and tea tree oil are all excellent choices for their antibacterial and refreshing properties. Or, if you have particularly stubborn stains, consider using a paste of baking soda and water as a pre-treatment before applying your regular cleaning solution.
For those with delicate surfaces, always test your DIY cleaner in an inconspicuous area first to ensure it doesn’t cause any damage or discoloration. And remember, consistency is key. Incorporating these spring cleaning tips into your regular cleaning routine will help prevent dirt and grime from building up in the first place, making your life easier in the long run.
We’re confident that these DIY spring cleaning tips will revolutionize your cleaning routine and leave your home sparkling. But the real magic happens when you share your experiences with others. We encourage you to try these methods, document your results, and share your before-and-after photos on social media. Use the hashtag #DIYSpringCleaning and tag us so we can see your amazing transformations! Let’s inspire each other to create cleaner, healthier, and happier homes, one DIY project at a time. We can’t wait to see what you create!
Frequently Asked Questions (FAQ)
Q: Are these DIY spring cleaning tips safe for all surfaces?
A: While most of these DIY cleaning solutions are generally safe and effective, it’s always best to test them on an inconspicuous area first, especially when dealing with delicate surfaces like wood, marble, or granite. For example, vinegar, while a fantastic cleaner, can be too acidic for some natural stone surfaces. Baking soda, while gentle, can be abrasive on certain finishes. Always err on the side of caution and test before applying liberally. If you’re unsure, consult the manufacturer’s instructions for your specific surface.
Q: Can I use essential oils in all of these DIY cleaning solutions?
A: Yes, essential oils can be a wonderful addition to your DIY cleaning solutions, adding a pleasant scent and boosting their antibacterial properties. However, it’s important to use them safely and responsibly. Always dilute essential oils properly before using them on surfaces, as some oils can be corrosive or cause discoloration. Start with a few drops and adjust to your preference. Also, be mindful of pets and children, as some essential oils can be toxic to them. Do your research and choose oils that are safe for your household. Popular choices include lemon, lavender, tea tree, and eucalyptus.
Q: How often should I perform these spring cleaning tasks?
A: The frequency of these spring cleaning tasks depends on your lifestyle and the level of cleanliness you desire. Some tasks, like wiping down kitchen counters and cleaning bathrooms, should be done regularly, perhaps weekly or even daily. Other tasks, like deep cleaning carpets or organizing closets, can be done less frequently, perhaps seasonally or annually. A good rule of thumb is to tackle tasks as needed, based on your observation and the amount of dirt and grime that accumulates. Regular maintenance will prevent buildup and make your cleaning routine easier in the long run.
Q: What if I don’t have all the ingredients listed in the recipes?
A: Don’t worry if you don’t have every single ingredient on hand. Many of these DIY cleaning solutions are flexible and can be adapted to what you have available. For example, if you don’t have white vinegar, you can try using lemon juice as a substitute. If you don’t have baking soda, you can try using washing soda instead. The key is to understand the purpose of each ingredient and find a suitable alternative that serves the same function. A little experimentation is often necessary to find what works best for you.
Q: Are these DIY spring cleaning tips effective for removing tough stains?
A: Yes, many of these DIY cleaning solutions are effective for removing tough stains, but it may require some extra effort and patience. For stubborn stains, try pre-treating the area with a paste of baking soda and water or a solution of vinegar and water. Let it sit for a few minutes before scrubbing gently with a soft cloth or brush. You may need to repeat the process several times to completely remove the stain. For particularly challenging stains, consider consulting a professional cleaning service.
Q: How do I store these DIY cleaning solutions?
A: It’s important to store your DIY cleaning solutions properly to maintain their effectiveness and prevent spoilage. Store them in airtight containers, preferably glass or plastic bottles with spray nozzles. Label each container clearly with the name of the solution and the date it was made. Store them in a cool, dark place away from direct sunlight and heat. Some solutions, like those containing essential oils, may need to be stored in amber-colored bottles to protect them from light degradation. Discard any solutions that show signs of spoilage, such as discoloration, separation, or a foul odor.
Q: Can I use these DIY spring cleaning tips if I have allergies or sensitivities?
A: If you have allergies or sensitivities, it’s important to be cautious when using any cleaning products, including DIY solutions. Choose ingredients that are known to be hypoallergenic and avoid those that you are allergic to. Wear gloves and a mask to protect your skin and respiratory system. Ensure proper ventilation when cleaning to minimize exposure to fumes. If you experience any adverse reactions, such as skin irritation, respiratory problems, or headaches, discontinue use immediately and consult a doctor.
Q: How can I make my DIY spring cleaning routine more eco-friendly?
A: There are many ways to make your DIY spring cleaning routine more eco-friendly. Use reusable cleaning cloths and sponges instead of disposable paper towels. Choose natural and biodegradable ingredients whenever possible. Reduce your water consumption by using a spray bottle instead of a bucket. Compost your food scraps and other organic waste. Recycle your empty cleaning product containers. By making small changes to your cleaning habits, you can significantly reduce your environmental impact.


Leave a Comment