

Grow Onions in Plastic Bottles: Unlock the secrets to a bountiful harvest, even in the smallest of spaces! Have you ever dreamt of snipping fresh, flavorful onions right from your own backyard, but felt limited by space or resources? Well, dream no more! This DIY guide will revolutionize your gardening game, showing you how to transform discarded plastic bottles into miniature onion-growing powerhouses.
Onions, a staple in cuisines worldwide, have a rich history dating back thousands of years. From ancient Egypt, where they were revered and even used as currency, to medieval Europe, where they were believed to ward off evil spirits, onions have always held a special place in human culture. Now, you can connect with this history by cultivating your own onions, regardless of your gardening experience.
In today’s world, where sustainability and resourcefulness are more important than ever, learning to grow onions in plastic bottles is not just a fun hobby, it’s a practical solution. Many of us live in apartments, condos, or homes with limited garden space. This method allows you to maximize your yield in a minimal footprint. Plus, it’s a fantastic way to recycle those plastic bottles that would otherwise end up in landfills. I’m excited to share these simple yet effective techniques that will empower you to enjoy fresh, homegrown onions all year round. Let’s get started and turn those plastic bottles into a thriving onion patch!
Grow Onions in Plastic Bottles: A Beginner’s Guide
Hey there, fellow gardening enthusiasts! Ever thought about growing onions in plastic bottles? It’s a fantastic way to recycle, save space, and enjoy fresh onions right from your windowsill or balcony. I’ve been doing this for a while now, and I’m excited to share my secrets with you. It’s surprisingly easy, and the results are incredibly rewarding. Let’s dive in!
What You’ll Need
Before we get started, let’s gather all the necessary materials. Trust me, having everything ready beforehand will make the process much smoother.
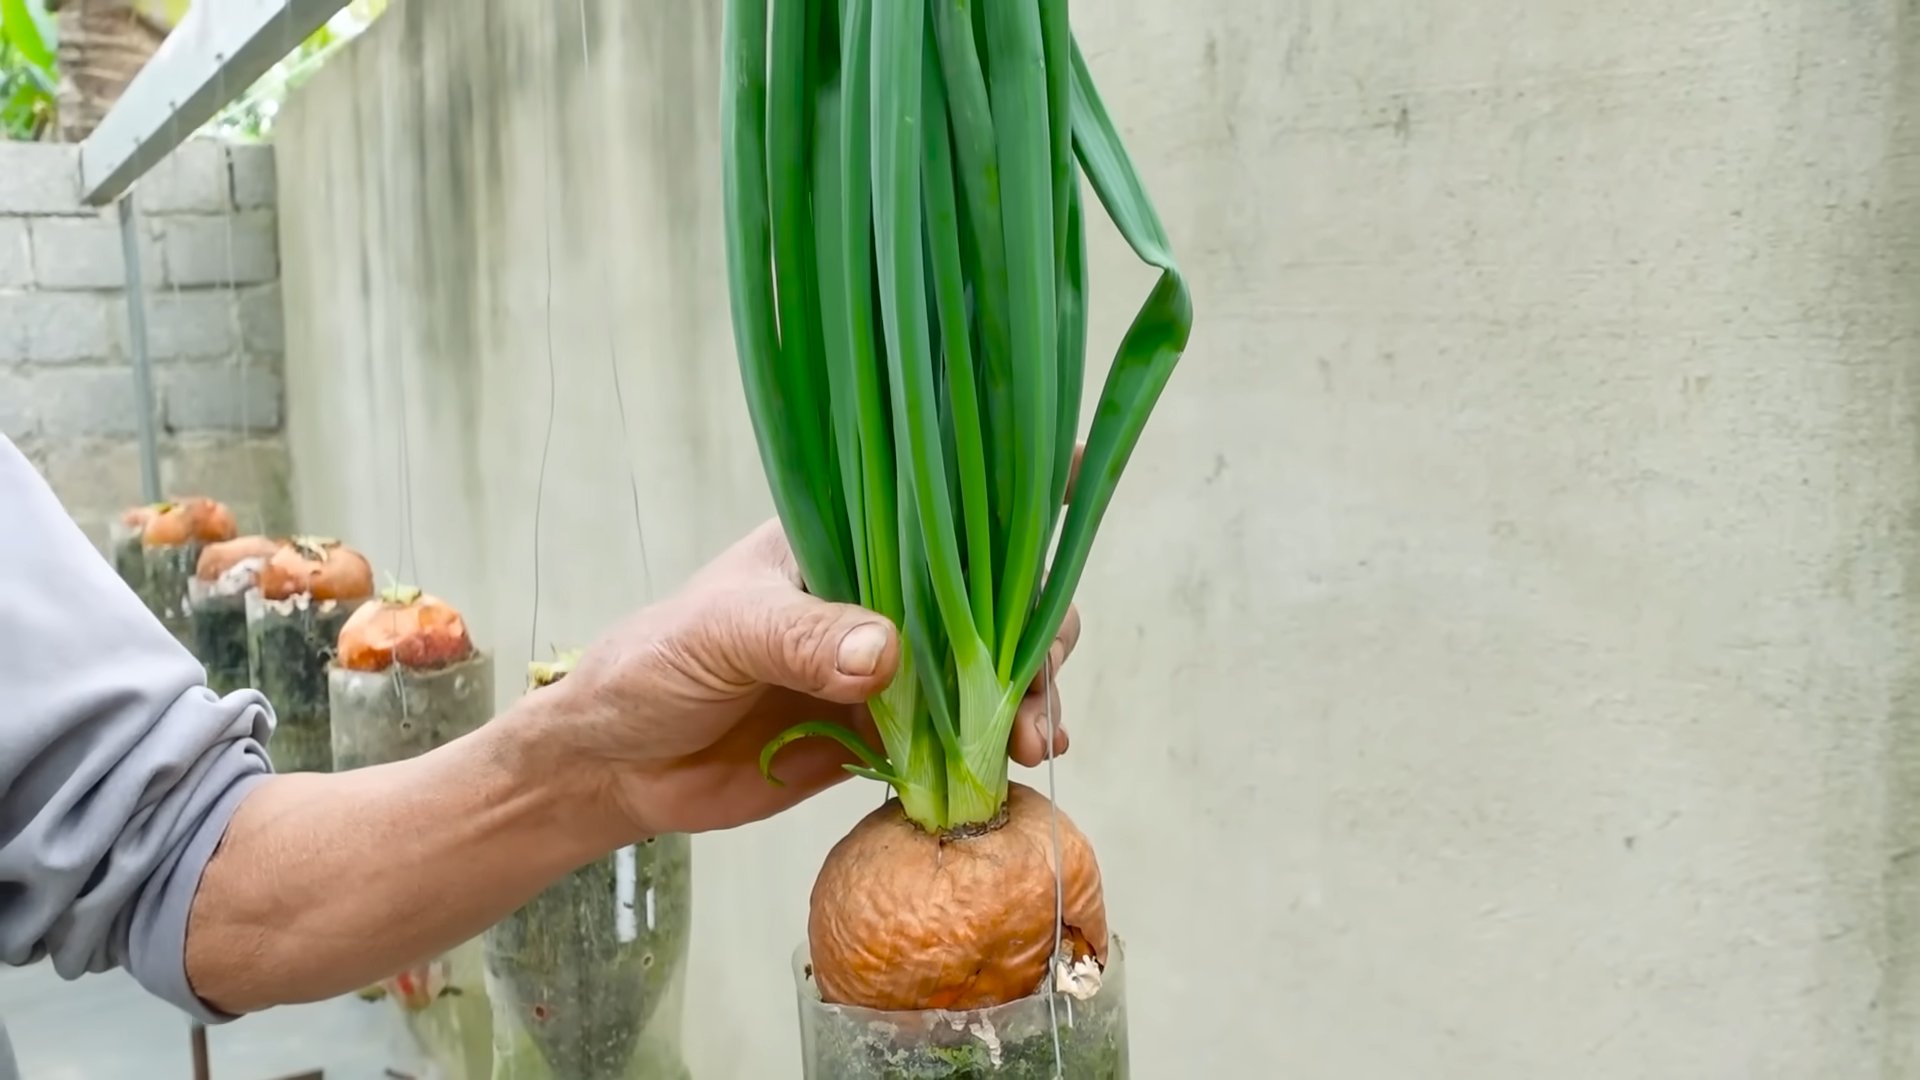
* Plastic Bottles: The size depends on how many onions you want to grow. I usually use 2-liter soda bottles or larger water bottles. Make sure they’re clean!
* Potting Soil: Good quality potting soil is crucial for healthy onion growth. Avoid using garden soil directly, as it can be too dense and may contain pests or diseases.
* Onion Sets or Seeds: You can use onion sets (small, immature onions) for faster results or start from seeds if you’re feeling patient. I prefer sets because they’re easier to handle.
* Scissors or a Utility Knife: For cutting the plastic bottles. Be careful!
* Drill or Nail: To create drainage holes.
* Watering Can or Spray Bottle: For watering your onions.
* Optional: Liquid fertilizer for feeding your onions.
Preparing the Plastic Bottles
This is where we transform those discarded bottles into mini onion gardens. It’s a simple process, but precision is key.
1. Clean the Bottles: Thoroughly wash the plastic bottles with soap and water to remove any residue. Rinse them well and let them dry completely. This prevents mold and other unwanted growth.
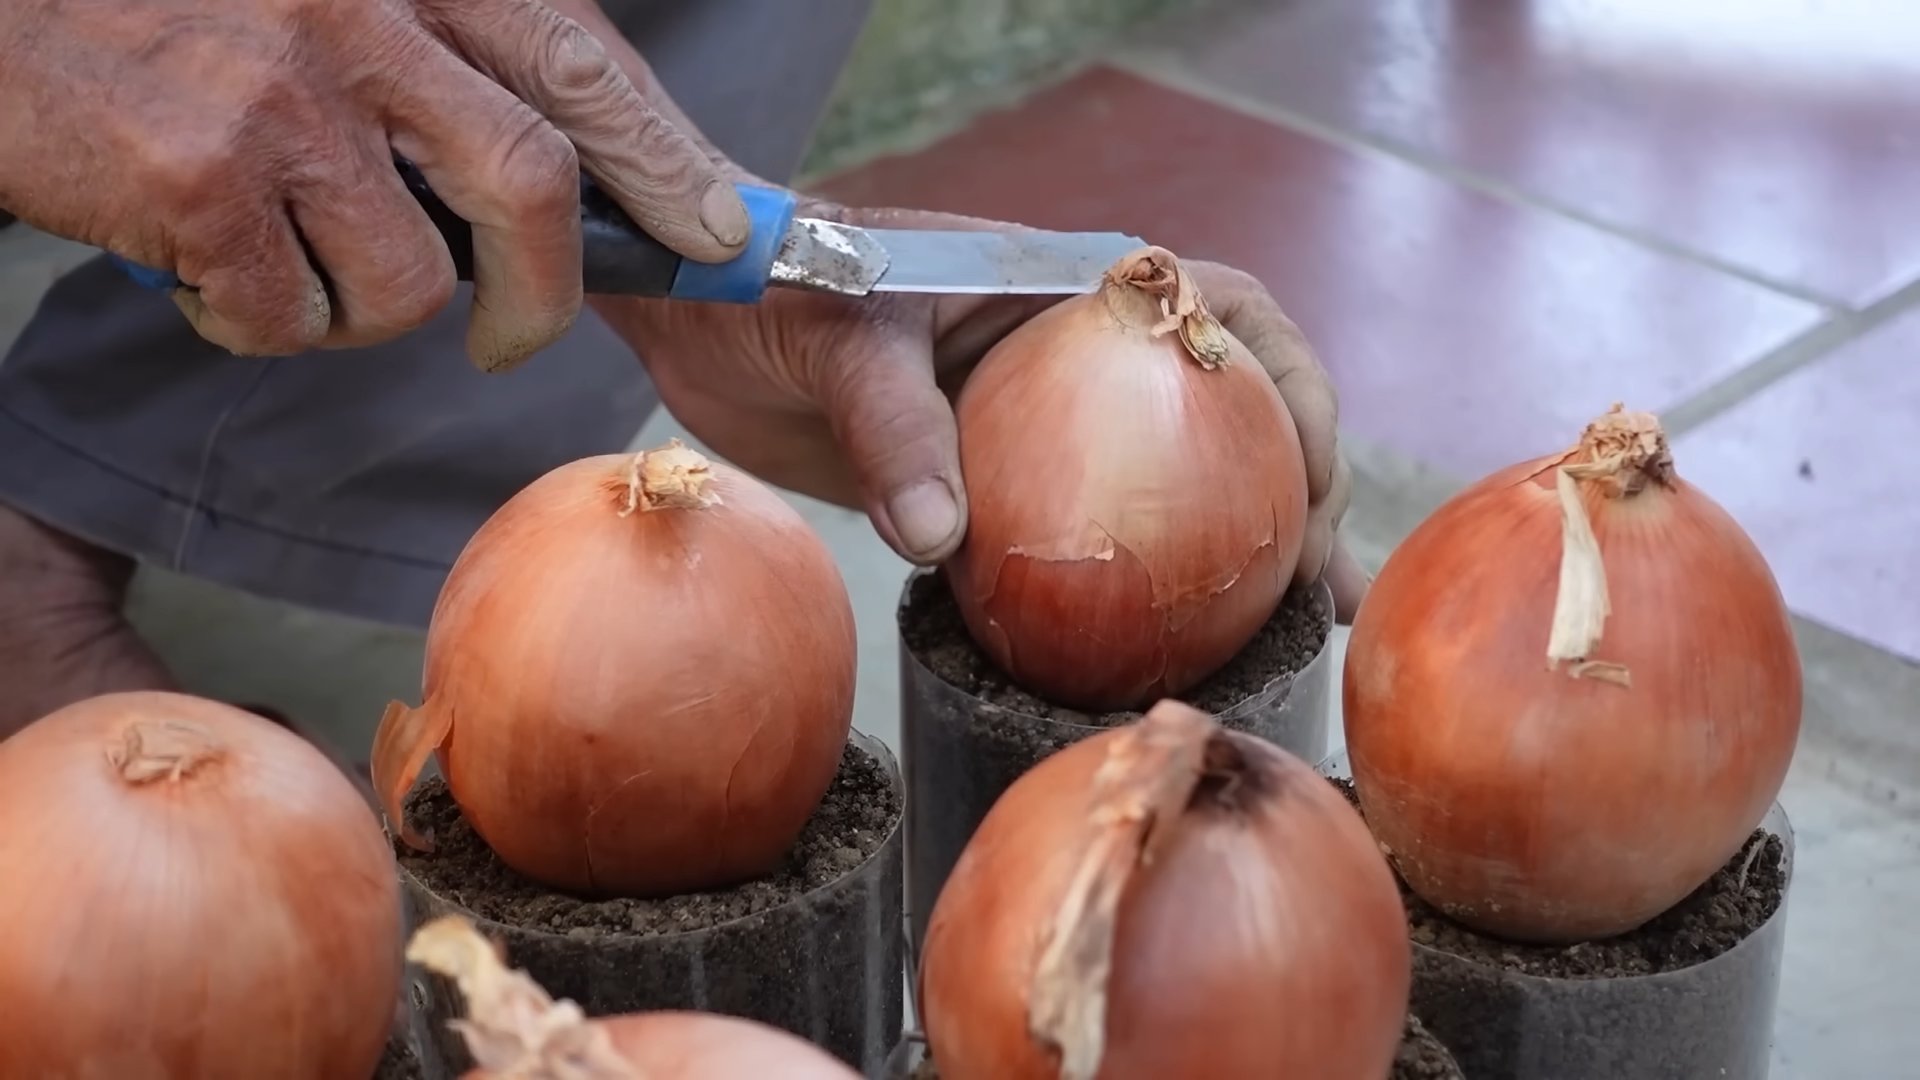
2. Cut the Bottles: Decide how tall you want your onion containers to be. I usually cut the bottles about two-thirds of the way up. You can cut them straight across or at an angle for a more decorative look. Use scissors or a utility knife carefully.
3. Create Drainage Holes: Drainage is essential to prevent root rot. Use a drill or a nail to create several small holes in the bottom of each bottle. I usually make about 5-6 holes, evenly spaced.
4. Optional: Create a Self-Watering System: For a self-watering system, cut the bottle in half. Invert the top half (the part with the bottle cap) and place it inside the bottom half. Line the neck of the bottle with a piece of cloth that will act as a wick to draw water up to the soil. Fill the bottom half with water. The soil will absorb water through the wick.
Planting the Onions
Now for the fun part – planting the onions! This is where you’ll see your hard work start to pay off.
1. Fill the Bottles with Soil: Fill the prepared plastic bottles with potting soil, leaving about an inch of space at the top. Gently pat down the soil to remove any air pockets.
2. Plant the Onion Sets: If you’re using onion sets, make small holes in the soil, about 1-2 inches deep. Place the onion sets in the holes, root-side down, and cover them with soil. Space the sets about 2-3 inches apart.
3. Plant the Onion Seeds: If you’re using onion seeds, sprinkle them evenly over the surface of the soil. Cover them with a thin layer of soil (about ¼ inch).
4. Water Thoroughly: Water the soil gently but thoroughly until it’s evenly moist. Avoid overwatering, which can lead to root rot.
Caring for Your Onions
Growing onions is relatively low-maintenance, but there are a few things you need to keep in mind to ensure a successful harvest.
1. Sunlight: Onions need plenty of sunlight to thrive. Place your plastic bottle gardens in a sunny location, such as a windowsill, balcony, or patio. Aim for at least 6-8 hours of direct sunlight per day.
2. Watering: Water your onions regularly, especially during dry periods. The soil should be consistently moist but not waterlogged. Check the soil moisture by sticking your finger into the soil. If it feels dry, it’s time to water.
3. Fertilizing: Onions are heavy feeders, so they benefit from regular fertilization. Use a liquid fertilizer specifically formulated for vegetables, following the instructions on the label. I usually fertilize my onions every 2-3 weeks.
4. Weeding: Keep the soil free of weeds, which can compete with your onions for nutrients and water. Gently remove any weeds that appear.
5. Pest Control: Keep an eye out for pests, such as aphids or onion flies. If you notice any pests, treat them with an appropriate insecticide or organic pest control method. I prefer using neem oil, which is a natural and effective insecticide.
6. Rotation: Rotate the bottles regularly to ensure even sunlight exposure. This will help the onions grow straight and strong.
Harvesting Your Onions
The moment you’ve been waiting for – harvesting your homegrown onions!
1. When to Harvest: Onions are typically ready to harvest when the tops start to turn yellow and fall over. This usually takes about 90-120 days from planting.
2. How to Harvest: Gently pull the onions from the soil. If the soil is dry, you may need to loosen it with a trowel first.
3. Curing: After harvesting, cure the onions by laying them out in a warm, dry, and well-ventilated place for about 1-2 weeks. This allows the outer layers to dry and helps prevent rot.
4. Storing: Store the cured onions in a cool, dry, and dark place. They should last for several months. I usually store mine in a mesh bag in the pantry.
Troubleshooting
Even with the best care, you might encounter some challenges along the way. Here are a few common problems and how to solve them:
* Yellowing Leaves: This could be a sign of overwatering, underwatering, or nutrient deficiency. Adjust your watering schedule and fertilize your onions if necessary.
* Slow Growth: This could be due to insufficient sunlight, poor soil, or lack of nutrients. Move your onions to a sunnier location, amend the soil with compost, and fertilize regularly.
* Root Rot: This is caused by overwatering and poor drainage. Make sure your plastic bottles have adequate drainage holes and avoid overwatering.
* Pests: Treat any pest infestations promptly with an appropriate insecticide or organic pest control method.
Tips and Tricks
Here are a few extra tips and tricks that I’ve learned over the years:
* Use Different Varieties: Experiment with different varieties of onions to find your favorites. I like to grow both yellow and red onions.
* Succession Planting: Plant new onion sets every few weeks to ensure a continuous harvest throughout the growing season.
* Companion Planting: Plant onions alongside other vegetables that benefit from their presence, such as carrots, tomatoes, and lettuce.
* Label Your Bottles: Label each bottle with the variety of onion you’re growing. This will help you keep track of your plants.
* Get Creative with Decoration: Decorate your plastic bottles with paint, markers, or stickers to add a personal touch to your mini onion gardens.
Why Grow Onions in Plastic Bottles?
You might be wondering, why go through all this trouble to grow onions in plastic bottles? Well, there are several compelling reasons:
* Recycling: It’s a great way to recycle plastic bottles and reduce waste.
* Space-Saving: It’s perfect for small spaces, such as apartments, balconies, or patios.
* Convenience: You can grow fresh onions right at your fingertips, without having to go to the store.
* Cost-Effective: It can save you money on groceries.
* Educational: It’s a fun and educational activity for kids and adults alike.
* Environmentally Friendly: You can grow your own food without using harmful pesticides or herbicides.
Growing onions in plastic bottles is a rewarding and sustainable way to enjoy fresh, homegrown produce. With a little bit of effort and patience, you can transform discarded plastic bottles into thriving onion gardens. So, grab some bottles, soil, and onion sets, and get started today! Happy gardening!
Conclusion
So, there you have it! Growing onions in plastic bottles isn’t just a quirky gardening experiment; it’s a game-changer for urban gardeners, space-conscious enthusiasts, and anyone looking to maximize their yield with minimal effort. We’ve walked you through the simple steps, highlighted the benefits, and hopefully, inspired you to ditch the traditional garden bed (at least for a few onions!).
Why is this DIY trick a must-try? Because it’s efficient, sustainable, and incredibly rewarding. Imagine harvesting plump, flavorful onions from your balcony, windowsill, or even your kitchen counter. No more trips to the store for that one missing ingredient! Plus, you’re repurposing plastic bottles, contributing to a greener planet, one onion at a time.
But the beauty of this method lies in its adaptability. Feel free to experiment with different onion varieties. Shallots, scallions, or even garlic cloves can thrive in these miniature vertical gardens. Consider adding a layer of mulch to the top of the soil to retain moisture and suppress weeds. You can also try different types of soil mixes to see what works best for your local climate and onion variety.
Don’t be afraid to get creative with your bottle design. Paint them, decorate them, or even create a tiered system for a visually stunning and productive onion tower. The possibilities are endless!
Most importantly, we encourage you to embrace the journey. Gardening is a learning process, and even experienced gardeners encounter challenges. Don’t be discouraged if your first attempt isn’t perfect. Observe your onions, adjust your watering schedule, and learn from your mistakes.
Now, it’s your turn to experience the joy of growing your own onions in plastic bottles. Gather your supplies, follow our guide, and prepare to be amazed by the results. We’re confident that you’ll find this DIY trick to be a fun, fulfilling, and ultimately delicious endeavor.
We’d love to hear about your experiences! Share your photos, tips, and challenges in the comments below. Let’s create a community of bottle-onion growers and inspire others to embrace sustainable gardening practices. Happy growing! Let us know how your **grow onions in plastic bottles** project turns out!
Frequently Asked Questions (FAQ)
1. What type of plastic bottles are best for growing onions?
Ideally, you should use sturdy, food-grade plastic bottles. Two-liter soda bottles or larger water bottles work well. Make sure the bottles are clean and free of any residue before using them. Avoid using bottles that have contained harsh chemicals or pesticides. Clear or translucent bottles are preferable as they allow you to monitor the soil moisture levels. Darker bottles can also be used, but you’ll need to be more diligent about checking the soil.
2. What kind of soil should I use for growing onions in plastic bottles?
A well-draining potting mix is essential. You can use a commercially available potting mix or create your own by combining equal parts of garden soil, compost, and perlite or vermiculite. The compost provides nutrients, while the perlite or vermiculite improves drainage and aeration. Avoid using heavy clay soil, as it can become waterlogged and suffocate the onion roots.
3. How often should I water my onions grown in plastic bottles?
Watering frequency depends on several factors, including the climate, the type of soil, and the size of the bottle. Generally, you should water your onions when the top inch of soil feels dry to the touch. Avoid overwatering, as this can lead to root rot. Ensure that the bottles have adequate drainage holes to prevent water from accumulating at the bottom. During hot, dry weather, you may need to water your onions daily. In cooler, wetter weather, you may only need to water them every few days.
4. How much sunlight do onions need when grown in plastic bottles?
Onions need at least 6-8 hours of direct sunlight per day to thrive. Place your plastic bottle gardens in a sunny location, such as a south-facing window or balcony. If you don’t have access to enough natural sunlight, you can supplement with artificial grow lights.
5. What kind of fertilizer should I use for onions grown in plastic bottles?
Onions are heavy feeders, so they benefit from regular fertilization. You can use a balanced liquid fertilizer, such as a 10-10-10 or 20-20-20 formula, diluted to half strength. Apply the fertilizer every 2-3 weeks during the growing season. Alternatively, you can use a slow-release granular fertilizer mixed into the soil at planting time.
6. How long does it take to grow onions in plastic bottles?
The time it takes to grow onions to maturity depends on the variety and the growing conditions. Generally, it takes about 90-120 days to grow bulb onions from sets (small, immature onions) and longer to grow them from seeds. Scallions or green onions can be harvested much sooner, typically within 30-60 days.
7. How do I know when my onions are ready to harvest?
For bulb onions, the leaves will start to turn yellow and fall over when they are ready to harvest. You can then gently pull the onions from the soil and allow them to cure in a dry, well-ventilated place for a week or two before storing them. For scallions or green onions, you can harvest them at any time once they reach a desired size. Simply snip off the green tops as needed.
8. Can I grow onions indoors in plastic bottles?
Yes, you can grow onions indoors in plastic bottles, but you’ll need to provide them with adequate light and ventilation. Place the bottles near a sunny window or use grow lights to supplement natural sunlight. Ensure that the room is well-ventilated to prevent fungal diseases.
9. What are some common problems I might encounter when growing onions in plastic bottles?
Some common problems include root rot (due to overwatering), pests (such as aphids or onion maggots), and diseases (such as downy mildew or onion smut). To prevent these problems, use well-draining soil, avoid overwatering, and inspect your plants regularly for signs of pests or diseases. If you encounter any problems, treat them promptly with appropriate organic or chemical controls.
10. Can I reuse the plastic bottles for growing onions again?
Yes, you can reuse the plastic bottles for growing onions again, but it’s important to clean them thoroughly before each use. Wash the bottles with soap and water to remove any soil or debris. You can also disinfect them with a diluted bleach solution (1 part bleach to 9 parts water) to kill any bacteria or fungi. Rinse the bottles thoroughly with clean water before using them again.
11. What are some variations I can try when growing onions in plastic bottles?
You can try growing different varieties of onions, such as red onions, white onions, or yellow onions. You can also experiment with growing other members of the onion family, such as shallots, leeks, or garlic. Another variation is to create a vertical onion garden by stacking multiple plastic bottles on top of each other. This is a great way to maximize space and create a visually appealing display. You can also try adding companion plants, such as carrots or marigolds, to your plastic bottle gardens. These plants can help to deter pests and improve the overall health of your onions.
12. Is it really worth it to grow onions in plastic bottles?
Absolutely! While it might seem like a small-scale project, **grow onions in plastic bottles** offers numerous benefits. It’s a sustainable way to repurpose plastic waste, it’s perfect for small spaces, and it allows you to enjoy fresh, homegrown onions right at your fingertips. Plus, it’s a fun and rewarding gardening experience that anyone can enjoy!
Leave a Comment