

Bathroom cleaning hacks – who doesn’t need them? Let’s be honest, cleaning the bathroom is nobody’s favorite chore. It’s the one space we all dread tackling, conjuring images of harsh chemicals, stubborn stains, and endless scrubbing. But what if I told you there’s a better way? A way to reclaim your weekends and actually *enjoy* a sparkling clean bathroom without breaking a sweat (or the bank)?
For centuries, people have sought out clever ways to maintain hygiene and cleanliness in their homes. From ancient Roman bathhouses to the communal washrooms of the Victorian era, the need for effective cleaning methods has always been present. While our tools and products have evolved, the underlying desire for a fresh and sanitary space remains the same.
That’s where these DIY bathroom cleaning hacks come in! I’m going to share some simple, yet incredibly effective, tricks that will transform your cleaning routine. We’ll ditch the expensive, chemical-laden cleaners and embrace natural, budget-friendly solutions that are just as powerful. Think vinegar, baking soda, and a little bit of elbow grease – that’s all you need to achieve a bathroom that shines. So, grab your gloves (or don’t, these hacks are gentle!), and let’s get started on making your bathroom the cleanest room in the house!
DIY Bathroom Cleaning Hacks: Sparkling Clean Without Breaking a Sweat
Okay, let’s face it, cleaning the bathroom is nobody’s favorite chore. But a sparkling clean bathroom is a happy bathroom, right? I’m going to share some of my favorite DIY bathroom cleaning hacks that will make the process faster, easier, and way less dreadful. Get ready to ditch those harsh chemicals and embrace some natural, effective solutions!
Hack 1: The Shower Head Deep Clean
That shower head can get pretty gross with mineral buildup, affecting water pressure and potentially harboring bacteria. Here’s how to give it a deep clean without even removing it:
* What you’ll need:
* A sturdy plastic bag (a Ziploc bag works great)
* White vinegar
* Rubber band or twist tie
* Old toothbrush (optional, for extra scrubbing)
* Why this works: Vinegar is a natural descaler, meaning it breaks down mineral deposits like calcium and lime.
Step-by-Step Instructions:
1. Fill the bag: Pour enough white vinegar into the plastic bag to completely submerge the shower head.
2. Attach the bag: Carefully position the bag over the shower head, ensuring the shower head is fully immersed in the vinegar.
3. Secure the bag: Use a rubber band or twist tie to tightly secure the bag around the shower head’s neck. Make sure it’s snug to prevent leaks.
4. Soak overnight: Let the shower head soak in the vinegar overnight (at least 8 hours). This gives the vinegar ample time to dissolve the mineral buildup.
5. Remove and rinse: The next morning, remove the bag and discard the vinegar.
6. Flush the shower head: Turn on the shower and let the water run for a few minutes to flush out any remaining vinegar and loosened debris.
7. Scrub (optional): If you still see some stubborn buildup, use an old toothbrush to gently scrub the shower head. Pay attention to the nozzles.
8. Enjoy your sparkling shower head! You should notice improved water pressure and a cleaner spray.
Hack 2: Grout Whitening Magic
Grime and mildew love to settle into grout lines, making your tiles look dingy. This simple paste will brighten your grout and make your bathroom look instantly fresher.
* What you’ll need:
* Baking soda
* Hydrogen peroxide
* Old toothbrush or grout brush
* Spray bottle (optional)
* Why this works: Baking soda is a mild abrasive that helps scrub away dirt, while hydrogen peroxide acts as a bleaching agent to lighten stains and kill mildew.
Step-by-Step Instructions:
1. Make the paste: In a small bowl, mix baking soda and hydrogen peroxide to form a thick paste. The ratio should be roughly 2 parts baking soda to 1 part hydrogen peroxide.
2. Apply the paste: Using an old toothbrush or grout brush, apply the paste generously to the grout lines.
3. Let it sit: Allow the paste to sit on the grout for at least 10-15 minutes. For heavily stained grout, you can let it sit for up to 30 minutes.
4. Scrub: After the paste has sat, scrub the grout lines with the toothbrush or grout brush. Use a circular motion to loosen the dirt and grime.
5. Rinse: Rinse the grout thoroughly with water. You can use a spray bottle to make rinsing easier.
6. Dry: Wipe the tiles and grout dry with a clean cloth.
7. Repeat if necessary: For stubborn stains, you may need to repeat the process.
Hack 3: Sparkling Clean Toilet Bowl
Let’s be honest, cleaning the toilet is the least glamorous part of bathroom cleaning. But with this simple hack, you can keep your toilet bowl sparkling clean with minimal effort.
* What you’ll need:
* White vinegar
* Baking soda
* Toilet brush
* Why this works: The combination of vinegar and baking soda creates a fizzing action that helps to loosen stains and deodorize the toilet bowl.
Step-by-Step Instructions:
1. Pour in the vinegar: Pour about 1 cup of white vinegar into the toilet bowl. Make sure to coat the sides of the bowl as well.
2. Let it sit: Let the vinegar sit for about an hour. This will help to loosen any mineral deposits or stains.
3. Add baking soda: After an hour, add about 1 cup of baking soda to the toilet bowl.
4. Watch it fizz: The mixture will start to fizz. This is the chemical reaction between the vinegar and baking soda, which helps to clean the bowl.
5. Scrub: Use a toilet brush to scrub the entire bowl, paying attention to any stains or buildup.
6. Flush: Flush the toilet to rinse away the vinegar, baking soda, and loosened debris.
7. Repeat if necessary: For heavily stained bowls, you may need to repeat the process.
Hack 4: Mirror, Mirror on the Wall (Streak-Free!)
Streaky mirrors can be frustrating. This simple solution will leave your mirrors sparkling and streak-free.
* What you’ll need:
* White vinegar
* Water
* Spray bottle
* Microfiber cloth
* Why this works: Vinegar cuts through grime and hard water stains, while a microfiber cloth prevents streaks.
Step-by-Step Instructions:
1. Mix the solution: In a spray bottle, mix equal parts white vinegar and water.
2. Spray the mirror: Lightly spray the mirror with the vinegar solution.
3. Wipe with a microfiber cloth: Immediately wipe the mirror with a clean, dry microfiber cloth. Use a circular motion to remove any streaks.
4. Buff dry: If necessary, buff the mirror dry with another clean, dry microfiber cloth.
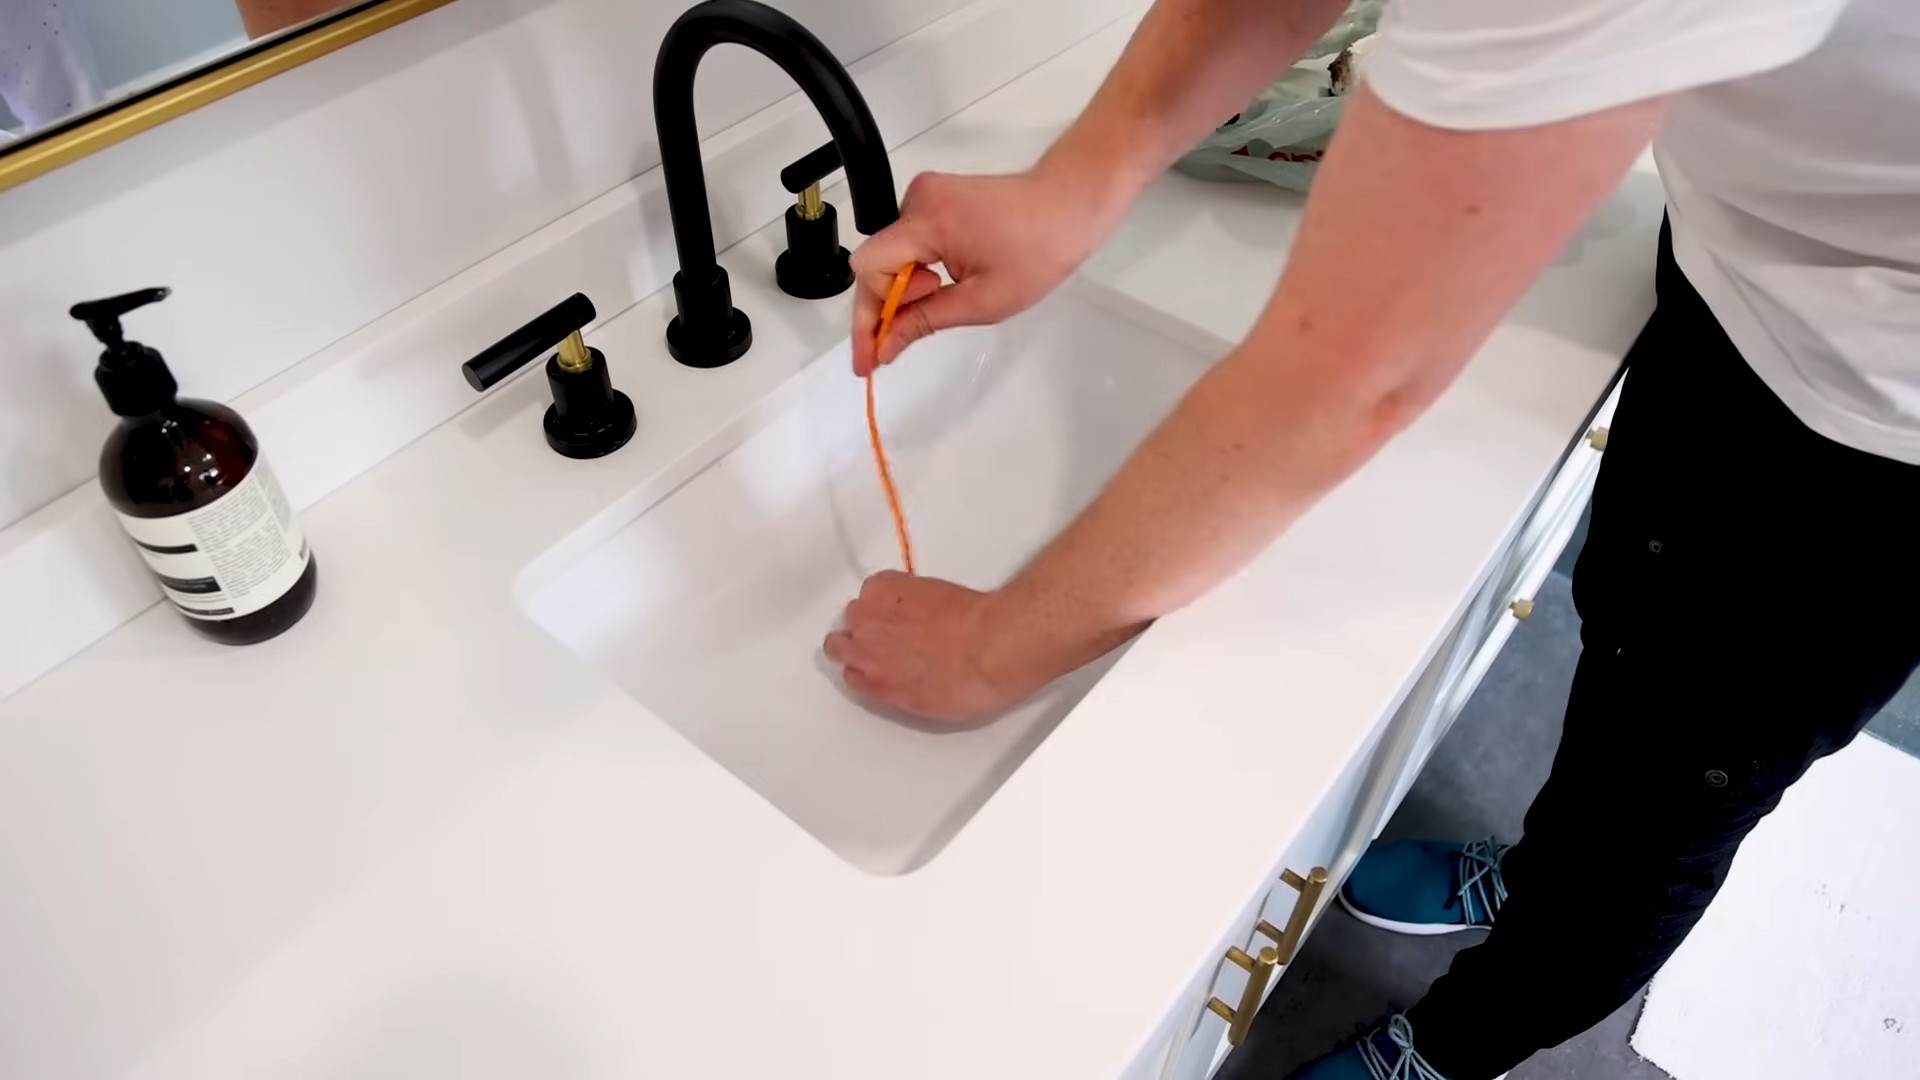
Hack 5: Drain Declogging Power
Slow drains are a common bathroom problem. This natural solution can help clear minor clogs without harsh chemicals.
* What you’ll need:
* Baking soda
* White vinegar
* Boiling water
* Why this works: The baking soda and vinegar create a fizzing action that helps to break down clogs, while the boiling water flushes them away.
Step-by-Step Instructions:
1. Pour in baking soda: Pour about 1/2 cup of baking soda down the drain.
2. Add vinegar: Pour about 1 cup of white vinegar down the drain.
3. Let it fizz: Let the mixture fizz for about 30 minutes.
4. Flush with boiling water: After 30 minutes, carefully pour a pot of boiling water down the drain.
5. Repeat if necessary: If the drain is still slow, repeat the process.
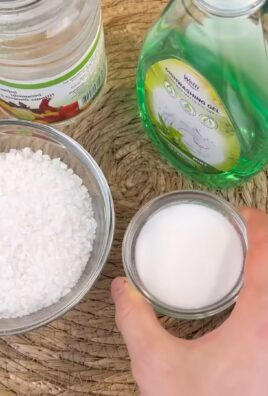
Hack 6: Soap Scum Slayer
Soap scum is a common bathroom nuisance. This easy spray will dissolve soap scum without a ton of scrubbing.
* What you’ll need:
* Dish soap (Dawn works great)
* White vinegar
* Spray bottle
* Sponge or cloth
* Why this works: The combination of dish soap and vinegar helps to break down the fats and oils in soap scum.
Step-by-Step Instructions:
1. Heat the vinegar: Heat the white vinegar in the microwave for about 2 minutes, or until it’s hot but not boiling.
2. Mix the solution: In a spray bottle, mix equal parts hot vinegar and dish soap.
3. Spray the affected areas: Spray the soap scum-covered surfaces with the solution.
4. Let it sit: Let the solution sit for about 15-20 minutes.
5. Scrub: Scrub the surfaces with a sponge or cloth to remove the loosened soap scum.
6. Rinse: Rinse the surfaces thoroughly with water.
7. Dry: Wipe the surfaces dry with a clean cloth.
Hack 7: Freshen Up with Essential Oils
Want to give your bathroom a pleasant scent without using artificial air fresheners? Essential oils are the answer!
* What you’ll need:
* Essential oil(s) of your choice (lavender, eucalyptus, tea tree, lemon are all great options)
* Cotton balls or small sponges
* Small decorative dish or container
* Why this works: Essential oils provide a natural and long-lasting fragrance.
Step-by-Step Instructions:
1. Choose your scent: Select your

Conclusion
So, there you have it! These simple yet incredibly effective DIY bathroom cleaning hacks are a game-changer for anyone looking to maintain a sparkling clean bathroom without resorting to harsh chemicals or spending a fortune on commercial cleaners. We’ve covered everything from tackling stubborn soap scum to banishing mildew and grime, all using ingredients you likely already have in your pantry.
But why is this a must-try? Because it’s more than just cleaning; it’s about creating a healthier, more pleasant environment for yourself and your family. Commercial cleaners often contain volatile organic compounds (VOCs) that can irritate your lungs and skin. By switching to these DIY alternatives, you’re reducing your exposure to these harmful chemicals and contributing to a cleaner, greener home. Plus, let’s be honest, the satisfaction of creating something effective yourself is incredibly rewarding!
Beyond the Basics: Variations and Enhancements
Don’t be afraid to experiment and tailor these hacks to your specific needs and preferences. For example, if you’re not a fan of the vinegar smell, add a few drops of your favorite essential oil to the cleaning solution. Lavender, tea tree, and eucalyptus are all excellent choices for their antibacterial and antifungal properties, and they’ll leave your bathroom smelling fresh and clean.
Another variation you can try is using baking soda as a gentle abrasive cleaner for stubborn stains on your sink or bathtub. Simply sprinkle baking soda onto the affected area, add a little water to form a paste, and scrub gently with a sponge or cloth.
For a deeper clean of your showerhead, try soaking it in a bag filled with vinegar overnight. This will dissolve any mineral buildup and restore your showerhead to its original glory. You can also use an old toothbrush to scrub away any remaining residue.
And if you’re looking for a natural way to freshen up your bathroom, try placing a small bowl of baking soda in a corner. Baking soda is a natural odor absorber and will help keep your bathroom smelling fresh and clean.
Your Turn to Shine!
We’re confident that these DIY bathroom cleaning hacks will transform your cleaning routine and leave your bathroom sparkling. But the real magic happens when you try them out for yourself. So, go ahead, give them a try! We encourage you to experiment, adapt, and find what works best for you.
And most importantly, we want to hear about your experience! Share your before-and-after photos, your favorite variations, and any tips or tricks you’ve discovered along the way. Let’s create a community of DIY cleaning enthusiasts who are passionate about creating clean, healthy homes. Share your stories on social media using #DIYBathroomClean and let us know how these hacks have worked for you. Together, we can make bathroom cleaning a breeze!
Frequently Asked Questions (FAQ)
Q: Are these DIY bathroom cleaning hacks safe for all surfaces?
A: While most of these hacks are generally safe for common bathroom surfaces like tile, porcelain, and glass, it’s always a good idea to test them in an inconspicuous area first, especially on more delicate surfaces like natural stone or marble. Vinegar, in particular, can etch some natural stone surfaces, so proceed with caution. If you’re unsure, consult the manufacturer’s instructions for your specific surface. For example, if you have a gold-plated faucet, avoid using abrasive cleaners like baking soda, as they can scratch the finish. Always dilute vinegar with water before using it on any surface.
Q: How often should I use these DIY bathroom cleaning hacks?
A: The frequency of cleaning depends on how often your bathroom is used and how quickly it gets dirty. For general cleaning, aim to use these hacks at least once a week. For areas prone to mildew or soap scum buildup, like the shower or bathtub, you may need to clean them more frequently, perhaps every few days. Regular maintenance will prevent grime from accumulating and make cleaning easier in the long run. A quick wipe-down of the shower walls after each use can also help prevent soap scum buildup.
Q: Can I use these DIY bathroom cleaning hacks if I have allergies or sensitivities?
A: While these DIY cleaners are generally gentler than commercial cleaners, it’s still important to be mindful of any allergies or sensitivities you may have. If you’re allergic to vinegar, for example, you can try using lemon juice as a substitute. If you’re sensitive to essential oils, start with a small amount and see how you react. Always wear gloves when cleaning to protect your skin, and ensure proper ventilation to avoid inhaling any fumes. If you experience any irritation or discomfort, discontinue use immediately.
Q: What’s the best way to remove stubborn soap scum with these DIY hacks?
A: Stubborn soap scum can be a challenge, but these DIY hacks can help. For a powerful soap scum remover, try mixing equal parts vinegar and dish soap in a spray bottle. Spray the solution onto the affected area and let it sit for 15-20 minutes to allow the vinegar to break down the soap scum. Then, scrub with a sponge or brush and rinse thoroughly with water. For particularly stubborn areas, you can create a paste of baking soda and water and apply it to the soap scum. Let it sit for a few minutes, then scrub and rinse. Remember to test in an inconspicuous area first.
Q: How can I prevent mildew from growing in my bathroom?
A: Preventing mildew is key to maintaining a clean and healthy bathroom. The best way to prevent mildew is to keep your bathroom well-ventilated. Open a window or turn on the exhaust fan after showering to help dry out the moisture. You can also use a squeegee to wipe down the shower walls and door after each use. For areas prone to mildew, like the shower grout, try spraying them with a solution of equal parts water and vinegar. Let it sit for a few minutes, then scrub with a brush and rinse. You can also use a dehumidifier to reduce moisture levels in your bathroom.
Q: Can I use these DIY bathroom cleaning hacks on my toilet?
A: Yes, you can definitely use these DIY hacks to clean your toilet! For a simple toilet bowl cleaner, pour a cup of vinegar into the bowl and let it sit for 30 minutes. Then, scrub with a toilet brush and flush. For a more powerful clean, you can add a cup of baking soda to the bowl before pouring in the vinegar. The mixture will fizz, helping to loosen any stains or buildup. Let it sit for 30 minutes, then scrub and flush. You can also use a solution of borax and water to clean the toilet bowl.
Q: Are these DIY bathroom cleaning hacks environmentally friendly?
A: Yes, one of the biggest advantages of using these DIY bathroom cleaning hacks is that they are much more environmentally friendly than commercial cleaners. They use natural ingredients that are biodegradable and less harmful to the environment. By reducing your reliance on commercial cleaners, you’re also reducing the amount of plastic waste that ends up in landfills. Plus, you’re avoiding the use of harsh chemicals that can pollute waterways and harm aquatic life.
Q: What essential oils are best to use in these DIY bathroom cleaning hacks?
A: Several essential oils are great for adding to your DIY bathroom cleaning solutions, not only for their pleasant scents but also for their antibacterial and antifungal properties. Lavender is a popular choice for its calming scent and antibacterial properties. Tea tree oil is another excellent option for its strong antifungal and antibacterial properties. Eucalyptus oil is known for its refreshing scent and ability to kill germs. Lemon oil is a great degreaser and has a bright, citrusy scent. When using essential oils, always dilute them with water or another carrier oil, and use them sparingly. A few drops are usually enough to add a pleasant scent and boost the cleaning power of your DIY solutions.


Leave a Comment