

DIY Tomato Growing Ideas – ever dreamt of biting into a juicy, sun-ripened tomato, bursting with flavor, straight from your own backyard? I know I have! There’s something incredibly satisfying about nurturing a plant from seed to fruit, and tomatoes, with their vibrant color and versatility, are a fantastic place to start. But let’s be honest, sometimes growing these red beauties can feel a little…challenging.
For centuries, tomatoes have been a staple in cuisines around the world, evolving from humble beginnings in South America to become a beloved ingredient in everything from Italian sauces to refreshing summer salads. But even with all that history, getting a bountiful harvest isn’t always a given. That’s where a little DIY ingenuity comes in!
Are you tired of lackluster tomatoes from the grocery store? Do you want to save money and enjoy the freshest, most flavorful tomatoes imaginable? Then you’re in the right place! This article is packed with clever DIY tomato growing ideas and hacks that will help you overcome common challenges, maximize your yield, and become a tomato-growing pro, even if you’re a complete beginner. We’ll explore simple, cost-effective solutions that will transform your garden and your taste buds. Get ready to roll up your sleeves and discover the secrets to a thriving tomato patch!
DIY Tomato Growing: From Seed to Sauce on a Budget!
Hey there, fellow garden enthusiasts! I’m so excited to share my favorite DIY tomato growing hacks with you. Forget expensive setups and fancy equipment. We’re going to get those juicy, red tomatoes bursting with flavor using simple, budget-friendly methods. Get ready to roll up your sleeves and get your hands dirty!
Choosing Your Tomato Varieties
Before we dive into the nitty-gritty, let’s talk tomatoes! Picking the right variety is crucial for success. Consider your climate, space, and what you want to do with your harvest.
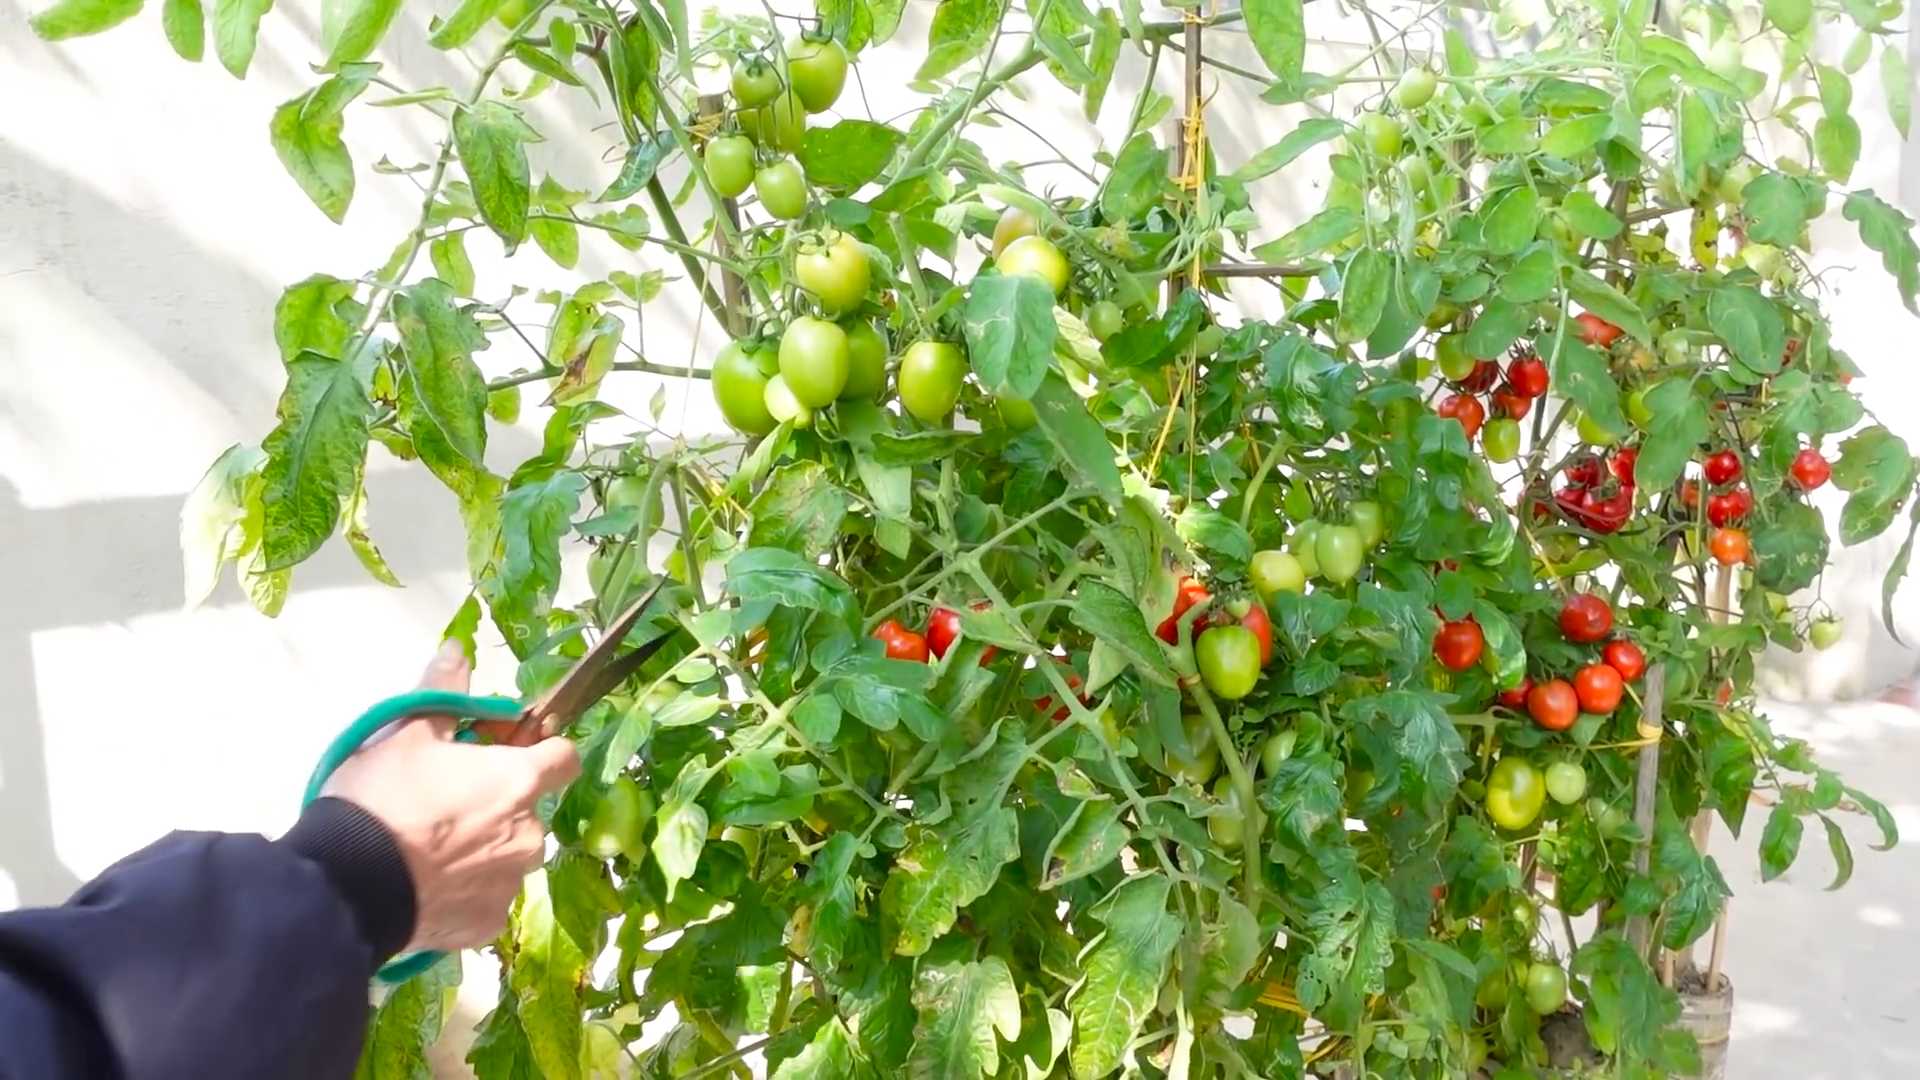
* Determinate vs. Indeterminate: Determinate varieties grow to a certain size and produce all their fruit at once, perfect for canning. Indeterminate varieties keep growing and producing throughout the season, giving you a continuous harvest.
* Heirloom vs. Hybrid: Heirloom tomatoes are open-pollinated varieties passed down through generations, known for their unique flavors and colors. Hybrid tomatoes are bred for specific traits like disease resistance and higher yields.
* Cherry, Roma, Beefsteak: Think about how you’ll use your tomatoes. Cherry tomatoes are great for snacking, Roma tomatoes are ideal for sauces, and beefsteak tomatoes are perfect for sandwiches.
I personally love growing a mix of varieties. This year, I’m trying ‘Black Krim’ (heirloom), ‘San Marzano’ (Roma), and ‘Sungold’ (cherry).
Starting Your Tomato Seeds Indoors (The Frugal Way!)
Starting your seeds indoors gives you a head start on the growing season, especially if you live in a cooler climate. Here’s how I do it without breaking the bank:
* Seed Starting Mix: Don’t use garden soil! It’s too heavy and can harbor diseases. I make my own seed starting mix by combining equal parts peat moss (or coconut coir for a more sustainable option), vermiculite, and perlite.
* Containers: You don’t need fancy seed starting trays. I recycle yogurt cups, plastic takeout containers (with drainage holes poked in the bottom), or even egg cartons. Just make sure they’re clean!
* Lighting: Seedlings need plenty of light to grow strong and healthy. A sunny windowsill might not be enough, especially in early spring. I use inexpensive shop lights with fluorescent bulbs. You can find them at most hardware stores.
* Heat Mat (Optional): Tomato seeds germinate best in warm soil (around 75-85°F). A heat mat can help speed up the process, but it’s not essential.
Step-by-Step Instructions:
1. Prepare Your Containers: Fill your chosen containers with seed starting mix, leaving about half an inch of space at the top. Gently tap the containers to settle the mix.
2. Sow the Seeds: Make a small indentation (about 1/4 inch deep) in the center of each container. Drop 2-3 tomato seeds into each indentation. This increases your chances of at least one seed germinating.
3. Cover the Seeds: Gently cover the seeds with seed starting mix.
4. Water Thoroughly: Use a spray bottle to mist the soil until it’s evenly moist. Avoid overwatering, which can lead to damping off (a fungal disease that kills seedlings).
5. Provide Warmth and Light: Place the containers on a heat mat (if using) and under your grow lights. Keep the lights a few inches above the soil surface.
6. Monitor and Water: Check the soil moisture daily. Keep it consistently moist, but not soggy.
7. Thin the Seedlings: Once the seedlings have their first true leaves (the second set of leaves that appear after the initial seed leaves), thin them to one seedling per container. Choose the strongest, healthiest-looking seedling and snip off the others at the soil line with scissors. Don’t pull them out, as this can disturb the roots of the remaining seedling.
8. Harden Off the Seedlings: Before transplanting your seedlings outdoors, you need to “harden them off.” This gradually acclimates them to the outdoor environment. Start by placing them outside in a sheltered location for an hour or two each day, gradually increasing the time over a week or two. Protect them from direct sunlight and strong winds.
DIY Tomato Cages and Supports
Tomato plants, especially indeterminate varieties, need support to keep them off the ground and prevent the fruit from rotting. Store-bought tomato cages can be expensive, so I prefer to make my own.
* DIY Tomato Cages from Concrete Reinforcement Mesh: This is my favorite method! Concrete reinforcement mesh is strong, durable, and relatively inexpensive. You can find it at most home improvement stores.
* DIY Tomato Stakes from Bamboo or Wood: Simple and effective, especially for determinate varieties.
* DIY Trellis from Repurposed Materials: Get creative! Use old ladders, pallets, or even branches to create a unique trellis.
Making Tomato Cages from Concrete Reinforcement Mesh:
1. Gather Your Materials: You’ll need concrete reinforcement mesh, wire cutters, work gloves (the mesh can be sharp!), and zip ties or wire.
2. Cut the Mesh: Cut a section of mesh that’s about 5-6 feet long. The width will determine the diameter of your cage. I usually aim for a diameter of about 18-24 inches.
3. Form the Cage: Roll the mesh into a cylinder shape, overlapping the edges by a few inches.
4. Secure the Cage: Use zip ties or wire to secure the overlapping edges together. Make sure the cage is sturdy and won’t fall apart.
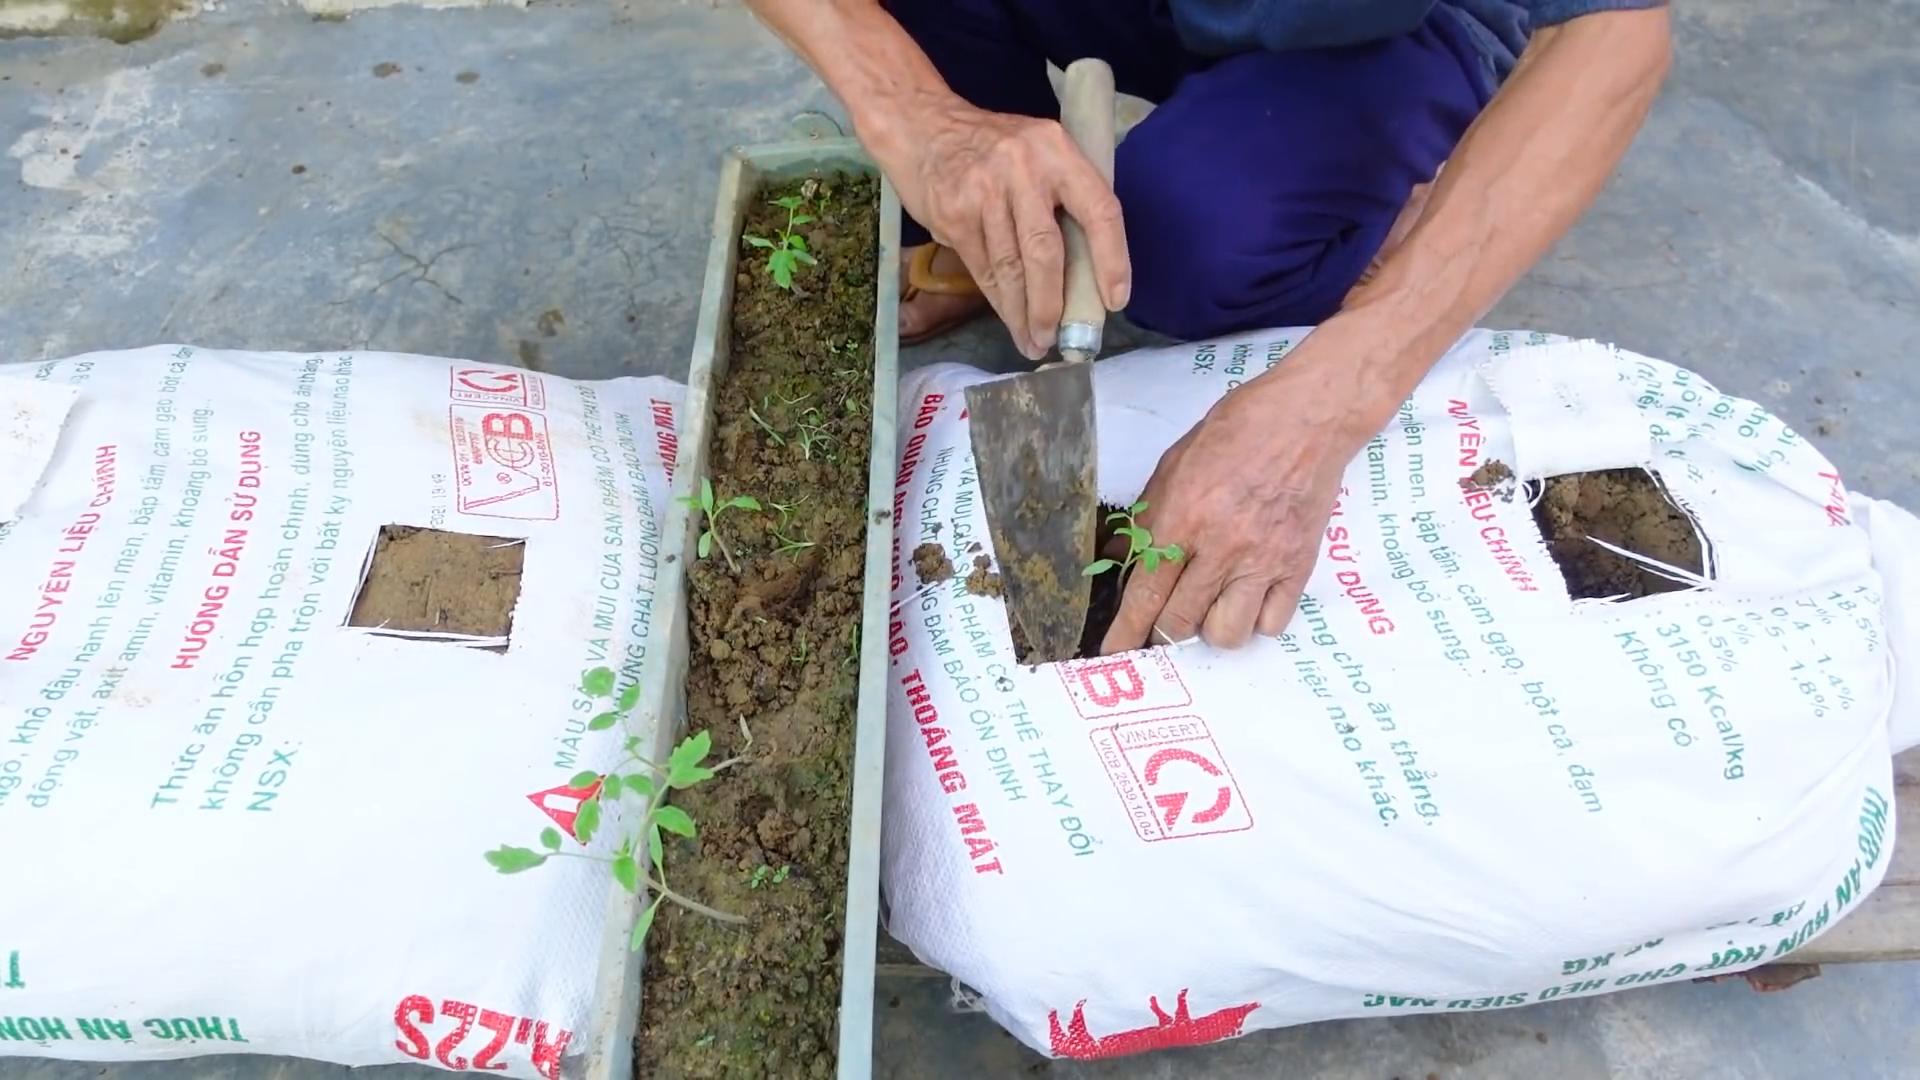
5. Place the Cage: When you transplant your tomato seedlings, place the cage around them. As the plants grow, they’ll climb up the cage for support.
Making Tomato Stakes from Bamboo or Wood:
1. Gather Your Materials: You’ll need bamboo stakes or wooden stakes (about 6-8 feet long), twine or plant ties.
2. Drive the Stake: Drive the stake into the ground a few inches away from the tomato plant. Make sure the stake is firmly planted.
3. Tie the Plant: As the plant grows, tie the main stem to the stake using twine or plant ties. Be careful not to tie it too tightly, as this can damage the stem.
DIY Soil Amendments and Fertilizers
Healthy soil is essential for healthy tomato plants. I like to amend my soil with organic matter and use homemade fertilizers to give my tomatoes a boost.
* Compost: Compost is a fantastic soil amendment that improves drainage, aeration, and nutrient content. I make my own compost using kitchen scraps, yard waste, and coffee grounds.
* Epsom Salts: Epsom salts contain magnesium sulfate, which can help prevent blossom end rot (a common tomato problem caused by calcium deficiency).
* Eggshells: Eggshells are a good source of calcium, which is also important for preventing blossom end rot.
* Banana Peels: Banana peels are rich in potassium, which promotes flowering and fruiting.
Using Compost:
1. Amend the Soil: Before planting your tomato seedlings, mix compost into the soil. I usually add about 2-3 inches of compost to the top layer of soil.
2. Side-Dress: Throughout the growing season, you can side-dress your tomato plants with compost. Simply sprinkle a layer of compost around the base of the plants.
Using Epsom Salts:
1. Mix a Solution: Dissolve 1 tablespoon of Epsom salts in 1 gallon of water.
2. Spray the Plants: Spray the tomato plants with the Epsom salt solution every 2-3 weeks.
Using Eggshells:
1. Dry and Crush: Dry the eggshells in the oven or in the sun. Then, crush them into small pieces.
2. Add to the Soil: Add the crushed eggshells to the soil around the tomato plants.
Using Banana Peels:
1. Bury the Peels: Bury banana peels around the base of the tomato plants. As the peels decompose, they’ll release potassium into the soil.
2. Make Banana Peel Tea: Soak banana peels in water for a few days. Then, use the water to water your tomato plants.
DIY Pest Control
Pests can be a major problem for tomato plants. I prefer to use natural and organic methods to control pests.
* Companion Planting: Planting certain herbs and flowers near your tomatoes can help repel pests. Basil, marigolds, and nasturtiums are all good choices.
* Neem Oil: Neem oil is a natural insecticide that can control a wide range of pests.
* Handpicking: Sometimes, the best way to control pests is to simply pick them off the plants by hand.
Using Companion Planting:
1. Plant Companion Plants: Plant basil, mar
Conclusion
So, there you have it! Transforming your gardening game with these DIY tomato growing ideas isn’t just about saving money; it’s about unlocking a deeper connection with your food, fostering creativity, and enjoying the unparalleled satisfaction of nurturing life from seed to table. We’ve explored a range of options, from upcycling everyday materials into ingenious planters to crafting your own nutrient-rich soil amendments. Each technique offers a unique pathway to a bountiful tomato harvest, tailored to your specific space, resources, and gardening style.
Why is this a must-try? Because store-bought tomatoes, while convenient, often lack the vibrant flavor and nutritional punch of homegrown varieties. Plus, by embracing these DIY methods, you’re actively reducing waste, minimizing your environmental footprint, and gaining invaluable knowledge about the intricate processes of plant growth. Imagine biting into a juicy, sun-ripened tomato that you personally cultivated from a recycled container – the taste is simply unmatched!
But the journey doesn’t end here. Feel free to experiment with variations on these themes. Try adding coffee grounds to your soil mix for an extra nitrogen boost, or incorporate eggshells for calcium enrichment. Explore different types of containers – perhaps an old tire painted with vibrant colors, or a repurposed wooden pallet transformed into a vertical garden. The possibilities are truly endless!
Don’t be afraid to get your hands dirty and embrace the learning process. Gardening is, after all, a continuous experiment, and every success (and even every perceived failure) offers valuable insights.
We wholeheartedly encourage you to try these DIY tomato growing ideas and witness the magic unfold in your own backyard (or balcony!). And most importantly, we want to hear about your experiences! Share your photos, tips, and triumphs in the comments section below. Let’s build a community of passionate DIY gardeners, inspiring each other to cultivate healthier, more sustainable, and more delicious lives, one tomato at a time. Your insights could be the key to someone else’s gardening success! Let us know which of these DIY tomato growing ideas worked best for you!
Frequently Asked Questions (FAQ)
What are the best tomato varieties to grow using DIY methods?
The best tomato varieties for DIY growing often depend on your space and climate. Determinate varieties, which grow to a fixed size and produce all their fruit at once, are generally well-suited for container gardening and smaller spaces. Popular determinate choices include Roma, Celebrity, and Patio tomatoes. Indeterminate varieties, which continue to grow and produce fruit throughout the season, can also be grown using DIY methods, but they typically require more support and space. Consider varieties like Beefsteak, Cherry, or Heirloom tomatoes if you have the room and are willing to provide adequate staking or caging. When selecting your variety, also consider your local climate and growing season. Look for varieties that are known to thrive in your region.
How often should I water my DIY tomato plants?
Watering frequency depends on several factors, including the size of your container, the type of soil you’re using, the weather conditions, and the stage of plant growth. As a general rule, tomato plants need consistent moisture, especially during fruit development. Check the soil moisture level regularly by sticking your finger about an inch or two into the soil. If it feels dry to the touch, it’s time to water. Water deeply, allowing the water to drain out of the bottom of the container. Avoid overwatering, as this can lead to root rot. During hot, dry weather, you may need to water your plants daily, while during cooler, wetter periods, you may only need to water every few days. Mulching around the base of the plants can help retain moisture and reduce the need for frequent watering.
What type of soil is best for DIY tomato growing?
Tomatoes thrive in well-draining, nutrient-rich soil. A good DIY soil mix can be created by combining equal parts of compost, potting soil, and perlite or vermiculite. Compost provides essential nutrients and improves soil structure, while potting soil provides a good base for root growth. Perlite or vermiculite helps to improve drainage and aeration. Avoid using garden soil in containers, as it can become compacted and poorly drained. You can also amend your soil with organic fertilizers, such as bone meal or blood meal, to provide additional nutrients. The ideal soil pH for tomatoes is between 6.0 and 6.8. You can test your soil pH using a soil testing kit and adjust it accordingly with lime (to raise the pH) or sulfur (to lower the pH).
How much sunlight do DIY tomato plants need?
Tomatoes require at least 6-8 hours of direct sunlight per day to thrive. Choose a location for your DIY tomato plants that receives ample sunlight throughout the day. If you’re growing tomatoes indoors, you may need to supplement with grow lights to provide adequate light. Rotate your plants regularly to ensure that all sides receive equal exposure to sunlight. Insufficient sunlight can lead to leggy growth, reduced fruit production, and poor fruit quality.
How do I prevent pests and diseases in my DIY tomato garden?
Prevention is key when it comes to pests and diseases in your tomato garden. Start by selecting disease-resistant tomato varieties. Practice good sanitation by removing any dead or diseased leaves and debris from around your plants. Water your plants at the base to avoid wetting the foliage, which can create a favorable environment for fungal diseases. Use organic pest control methods, such as insecticidal soap or neem oil, to control common pests like aphids, whiteflies, and tomato hornworms. Companion planting can also help deter pests. For example, planting basil near your tomatoes can repel tomato hornworms. Regularly inspect your plants for signs of pests or diseases and take action promptly to prevent them from spreading.
Can I grow tomatoes indoors using DIY methods?
Yes, you can absolutely grow tomatoes indoors using DIY methods! Choose a sunny location near a window that receives at least 6-8 hours of direct sunlight per day. If you don’t have enough natural light, you can supplement with grow lights. Use a large container with good drainage and a well-draining potting mix. Choose determinate tomato varieties that are well-suited for container gardening. Water regularly and fertilize with a balanced fertilizer. Provide support for your plants as they grow, using stakes or cages. Hand-pollinate the flowers by gently shaking the plants or using a small brush to transfer pollen from one flower to another. With proper care and attention, you can enjoy fresh, homegrown tomatoes even if you don’t have a traditional outdoor garden.
What are some creative DIY container ideas for growing tomatoes?
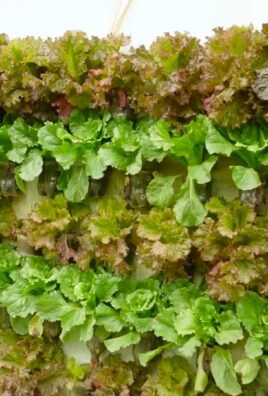
The possibilities are endless when it comes to DIY container ideas for growing tomatoes! Consider repurposing items you already have around the house, such as old buckets, plastic bins, laundry baskets, or even tires. Drill drainage holes in the bottom of the containers to prevent waterlogging. You can also create self-watering containers by using two buckets, one nested inside the other, with a wicking system to draw water up from the bottom. Get creative with decorating your containers by painting them, adding mosaic tiles, or wrapping them in burlap. Vertical gardening is another great option for small spaces. You can create a vertical tomato garden using pallets, hanging baskets, or even repurposed plastic bottles.
How do I fertilize my DIY tomato plants?
Tomatoes are heavy feeders and require regular fertilization to produce a bountiful harvest. Start by amending your soil with compost or other organic matter before planting. During the growing season, fertilize your plants every 2-3 weeks with a balanced fertilizer that is specifically formulated for tomatoes. Look for a fertilizer with a higher phosphorus content, as this promotes fruit development. You can also use organic fertilizers, such as fish emulsion or seaweed extract. Avoid over-fertilizing, as this can lead to excessive foliage growth and reduced fruit production. Follow the instructions on the fertilizer label carefully. You can also side-dress your plants with compost or aged manure throughout the growing season.
Leave a Comment