

Hoarder Cleaning Checklist: Feeling overwhelmed by the sheer volume of clutter in your home? You’re not alone! Many people struggle with hoarding tendencies, and tackling the accumulated possessions can feel like an insurmountable task. But don’t despair; I’m here to help you break down this daunting process into manageable steps with a comprehensive hoarder cleaning checklist.
The act of decluttering and organizing has been valued across cultures for centuries. From the ancient practice of Feng Shui, which emphasizes the importance of a harmonious living space, to the minimalist movements of recent decades, the desire for order and simplicity is deeply ingrained in the human psyche. However, for individuals struggling with hoarding disorder, the emotional attachment to possessions makes decluttering significantly more challenging.
That’s where this DIY article comes in! This isn’t just another generic cleaning guide. This hoarder cleaning checklist is specifically designed to address the unique challenges faced when cleaning a hoarded home. We’ll walk through each stage, from assessing the situation and creating a plan to sorting, discarding, and organizing. I’ll provide practical tips and strategies to help you make progress without feeling overwhelmed. You’ll learn how to prioritize safety, handle sensitive items, and most importantly, develop a sustainable system for maintaining a clutter-free living space. Let’s reclaim your home and your peace of mind, one step at a time!
Tackling the Hoard: Your Ultimate DIY Cleaning Checklist
Okay, so you’re facing a hoarding situation. I get it. It’s overwhelming, but trust me, you can do this! This checklist is designed to break down the process into manageable steps, making it less daunting and more achievable. Remember, safety first, and be kind to yourself throughout this journey. It’s a marathon, not a sprint.
Phase 1: Preparation is Key
Before you even think about touching a single item, proper preparation is crucial. This phase is all about setting yourself up for success and ensuring your safety.
- Assess the Situation: Walk through the entire space. Take pictures or videos if you can. This will help you track your progress and stay motivated. Note any potential hazards like mold, pests, or structural damage.
- Gather Your Supplies: You’ll need a lot! Here’s a comprehensive list:
- Heavy-duty trash bags (lots and lots!)
- Recycling bins
- Cardboard boxes for donations
- Cleaning supplies:
- All-purpose cleaner
- Disinfectant spray
- Bleach (use with caution and proper ventilation!)
- Mold and mildew remover (if needed)
- Glass cleaner
- Floor cleaner
- Protective gear:
- Gloves (heavy-duty and disposable)
- Mask (N95 or better to protect against dust and mold)
- Eye protection (goggles or safety glasses)
- Long sleeves and pants
- Closed-toe shoes or boots
- Tools:
- Box cutter
- Duct tape
- Shovels (for moving large piles)
- Brooms and dustpans
- Vacuum cleaner (with HEPA filter if possible)
- Mops and buckets
- Screwdrivers and other basic tools (you never know what you might find!)
- First-aid kit
- Hand sanitizer
- Plan Your Attack: Don’t try to do everything at once. Break the space down into smaller, more manageable zones. Choose one area to start with, like a corner of a room or a single shelf.
- Enlist Help (If Possible): This is a big job, and having friends, family, or professional organizers can make a huge difference. Even just having someone there for moral support can be invaluable.
- Set Realistic Goals: Don’t expect to completely clear the space in a single day. Set small, achievable goals for each session. Celebrate your progress, no matter how small!
- Ventilation is Vital: Open windows and doors to ensure good ventilation. Use fans to circulate air. This will help reduce dust and odors.
- Inform Neighbors (If Necessary): Depending on the severity of the hoarding situation, you might want to let your neighbors know what you’re doing. This can help avoid misunderstandings and potential complaints.
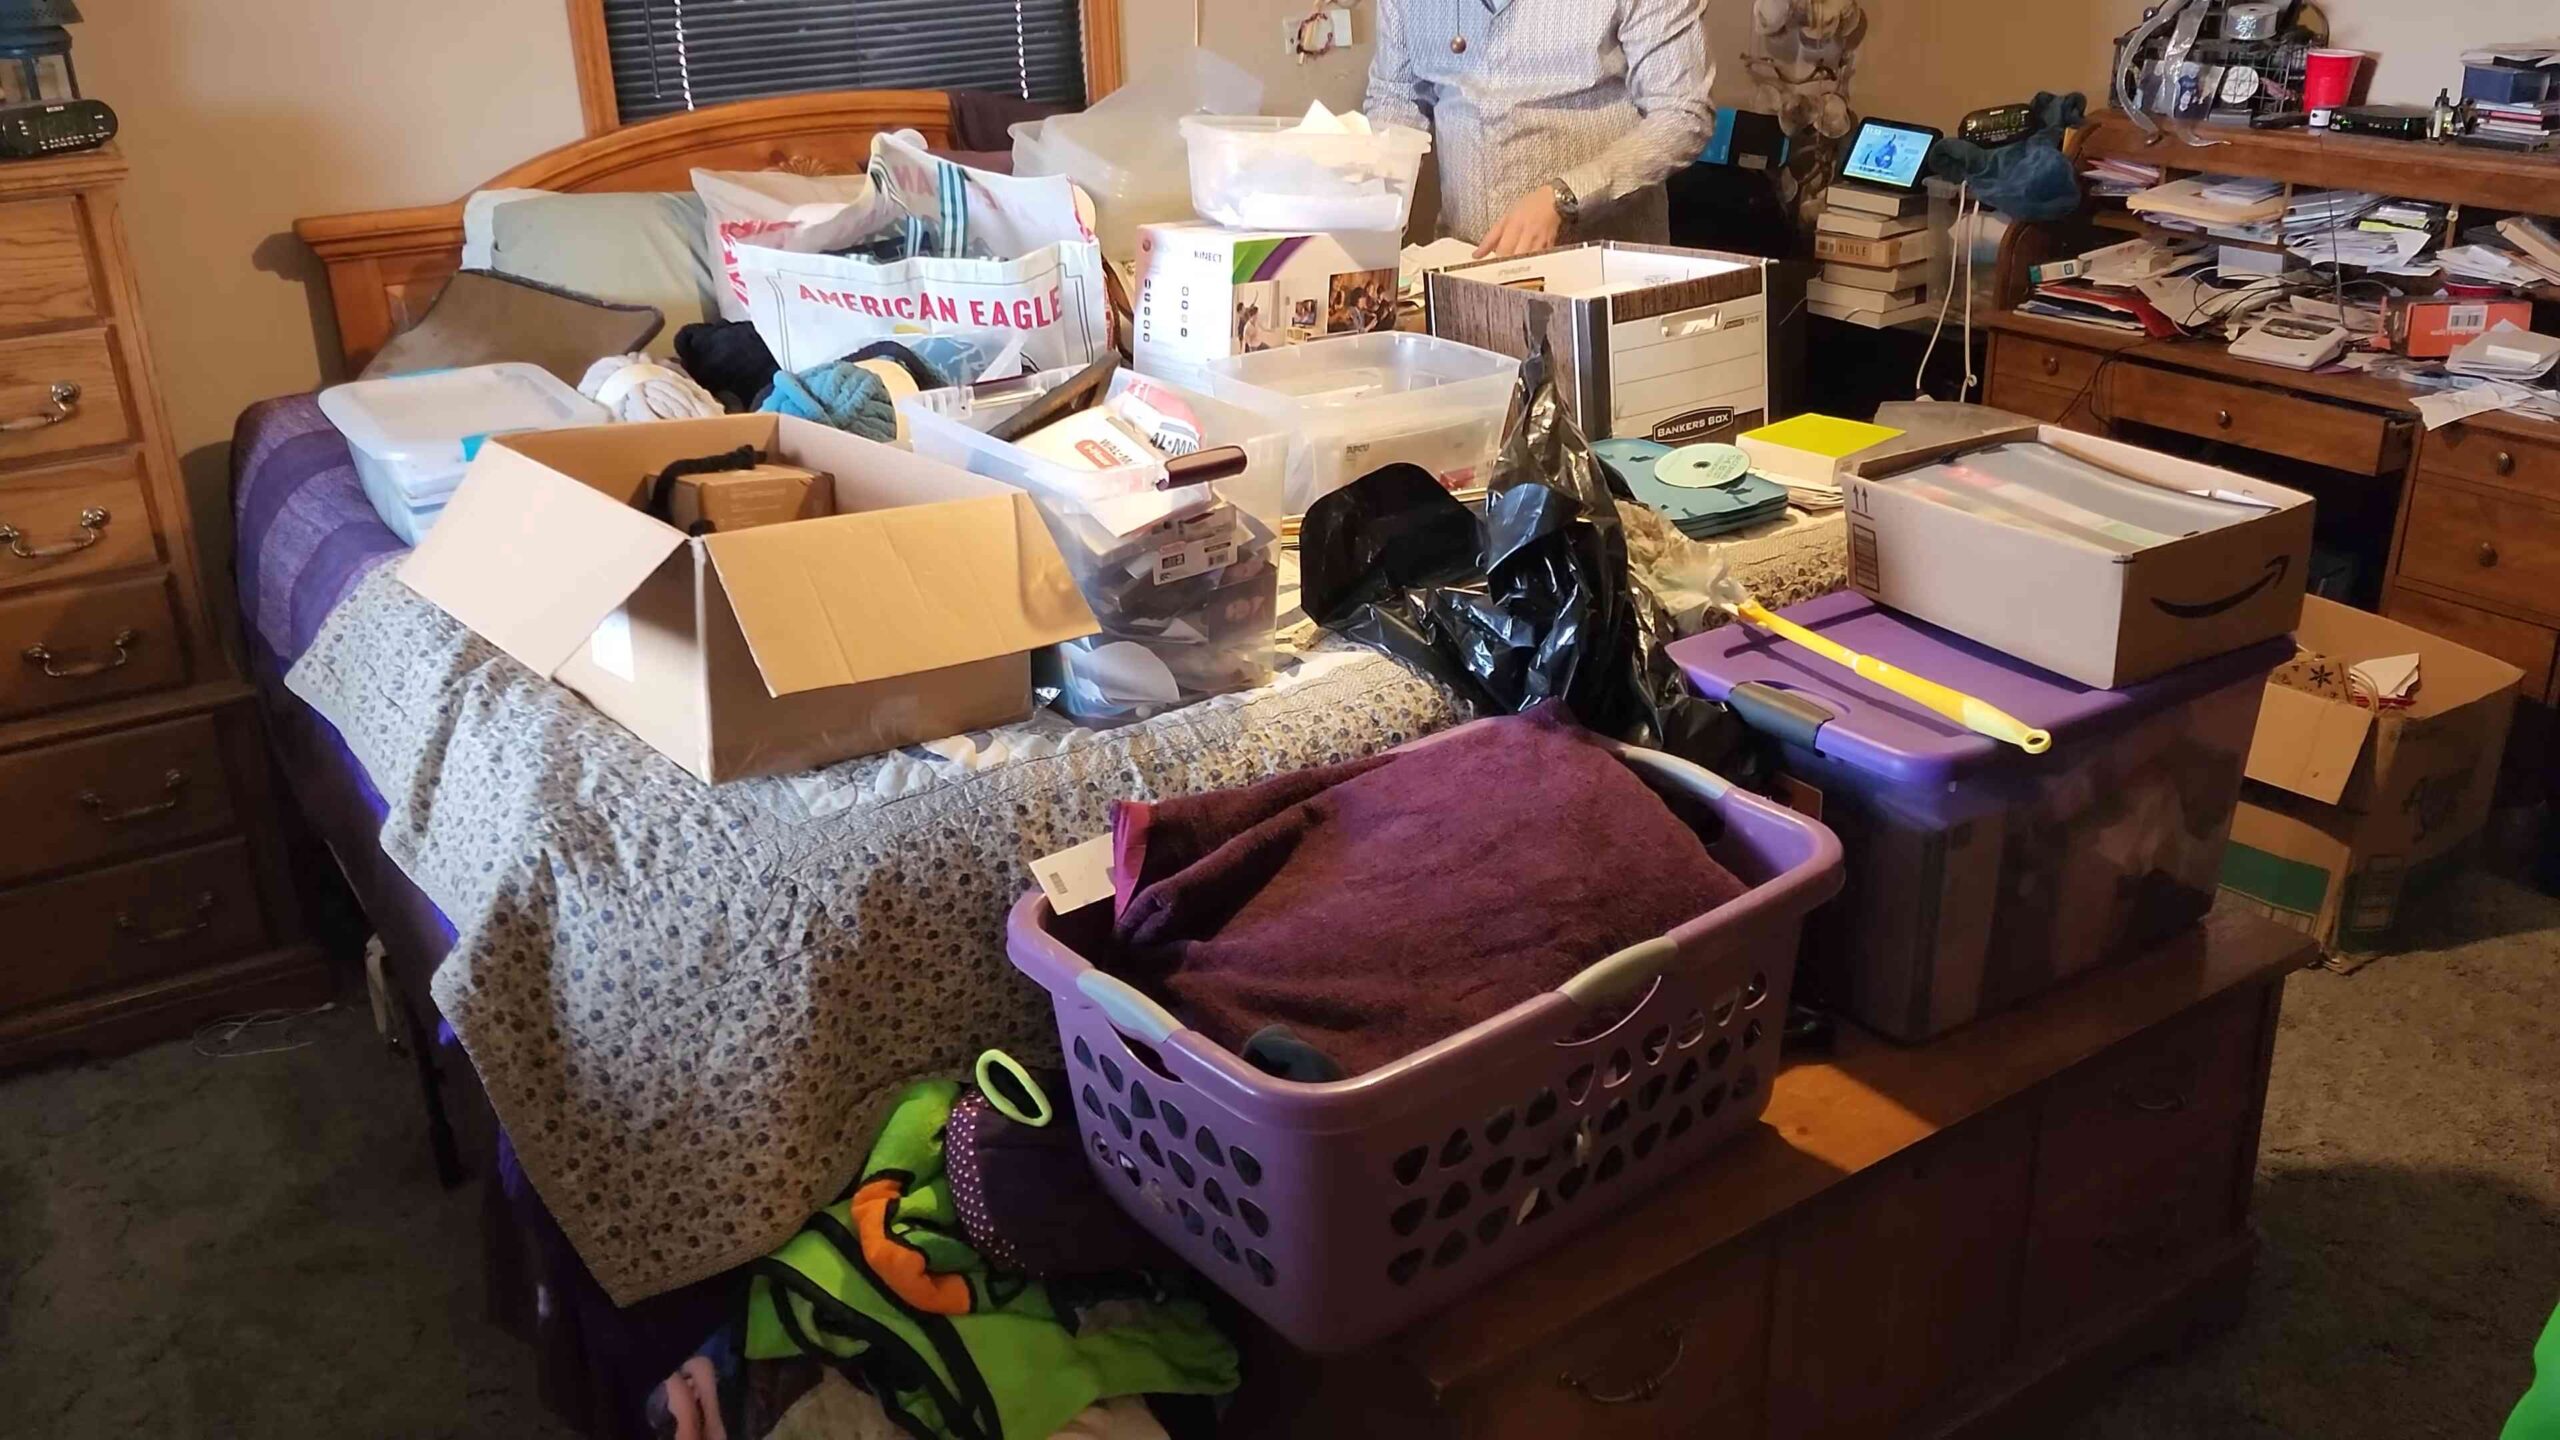
Phase 2: Sorting and Decluttering
This is where the real work begins. The key here is to be ruthless and objective. Remember, you’re not throwing away memories, you’re creating a safer and more livable space.
- The Four-Box Method: This is a classic decluttering technique that works wonders. Set up four boxes labeled:
- Trash: Anything that’s broken, unusable, or contaminated.
- Recycle: Paper, plastic, glass, and metal that can be recycled.
- Donate: Items that are in good condition and can be used by someone else.
- Keep: Only items that you truly need, use, or love.
- One Item at a Time: Pick up one item and ask yourself these questions:
- Have I used this in the past year?
- Do I need this?
- Do I love this?
- Is it easily replaceable?
- Is it taking up valuable space?
Based on your answers, place the item in the appropriate box.
- Be Ruthless: This is the hardest part. It’s easy to get attached to things, but you need to be honest with yourself. If you haven’t used something in a year, chances are you don’t need it.
- Don’t Get Sidetracked: It’s easy to get distracted by old photos or sentimental items. Acknowledge the feeling, but don’t dwell on it. Put the item aside and come back to it later if you need to.
- Focus on One Area at a Time: Don’t try to declutter the entire room at once. Focus on one shelf, one drawer, or one corner. This will make the process less overwhelming.
- Empty Containers: Get rid of empty boxes, jars, and containers. These take up a lot of space and often serve no purpose.
- Deal with Paper Clutter: Paper is a common culprit in hoarding situations. Shred sensitive documents and recycle the rest. Consider scanning important documents and storing them digitally.
- Address Hazardous Materials: Properly dispose of hazardous materials like paint, chemicals, and batteries. Contact your local waste management facility for instructions.
- Take Breaks: Decluttering can be emotionally and physically draining. Take frequent breaks to rest and recharge.
Phase 3: Cleaning and Sanitizing
Once you’ve decluttered, it’s time to clean and sanitize the space. This is essential for removing dust, dirt, and potential contaminants.
- Dust Everything: Start by dusting all surfaces, including walls, ceilings, and floors. Use a microfiber cloth or a vacuum cleaner with a brush attachment.
- Vacuum Thoroughly: Vacuum all floors, carpets, and upholstery. Use a HEPA filter vacuum if possible to capture fine particles.
- Wash Surfaces: Wash all hard surfaces with an all-purpose cleaner. Pay special attention to areas that are frequently touched, such as doorknobs, light switches, and countertops.
- Disinfect: Disinfect surfaces with a disinfectant spray. Follow the manufacturer’s instructions for proper use.
- Clean Windows and Mirrors: Clean windows and mirrors with glass cleaner.
- Mop Floors: Mop hard floors with a floor cleaner.
- Address Mold and Mildew: If you find mold or mildew, clean it with a mold and mildew remover. Follow the manufacturer’s instructions carefully and wear appropriate protective gear.
- Wash Linens and Clothing: Wash all linens and clothing that have been exposed to the hoarding environment. Use hot water and a strong detergent.
- Air Out the Space: Open windows and doors to air out the space. This will help remove odors and improve air quality.
- Consider Professional Cleaning: In severe cases, you may need to hire a professional cleaning service to thoroughly clean and sanitize the space.
Phase 4: Organizing and Maintaining
Now that you’ve decluttered and cleaned, it’s time to organize what’s left and establish a system for maintaining the space.
- Put Everything in Its Place: Find a designated place for everything you’ve decided to keep. This will make it easier to find things and prevent clutter from accumulating.
- Use Storage Solutions: Use storage solutions like shelves, bins, and drawers to organize your belongings.
- Label Everything: Label all storage containers so you know what’s inside.
- Create a System for Incoming Items: Establish a system for dealing with incoming mail, packages, and other items. Don’t let them pile up.
- Regularly Declutter: Make decluttering a regular habit. Spend a few minutes each day or week decluttering a small area.
- Follow the One-In, One-Out Rule: For every new item you bring into the house, get rid of one old item.
- Seek Professional Help (If Needed): If you’re struggling to maintain a clutter-free space, consider seeking professional help from a therapist or organizer.
- Celebrate Your Success: You’ve accomplished a huge task! Celebrate your success and enjoy your newly cleaned and organized space.
Specific Areas to Consider
While the above checklist covers the general process, here are some specific areas that often require extra attention in hoarding situations:
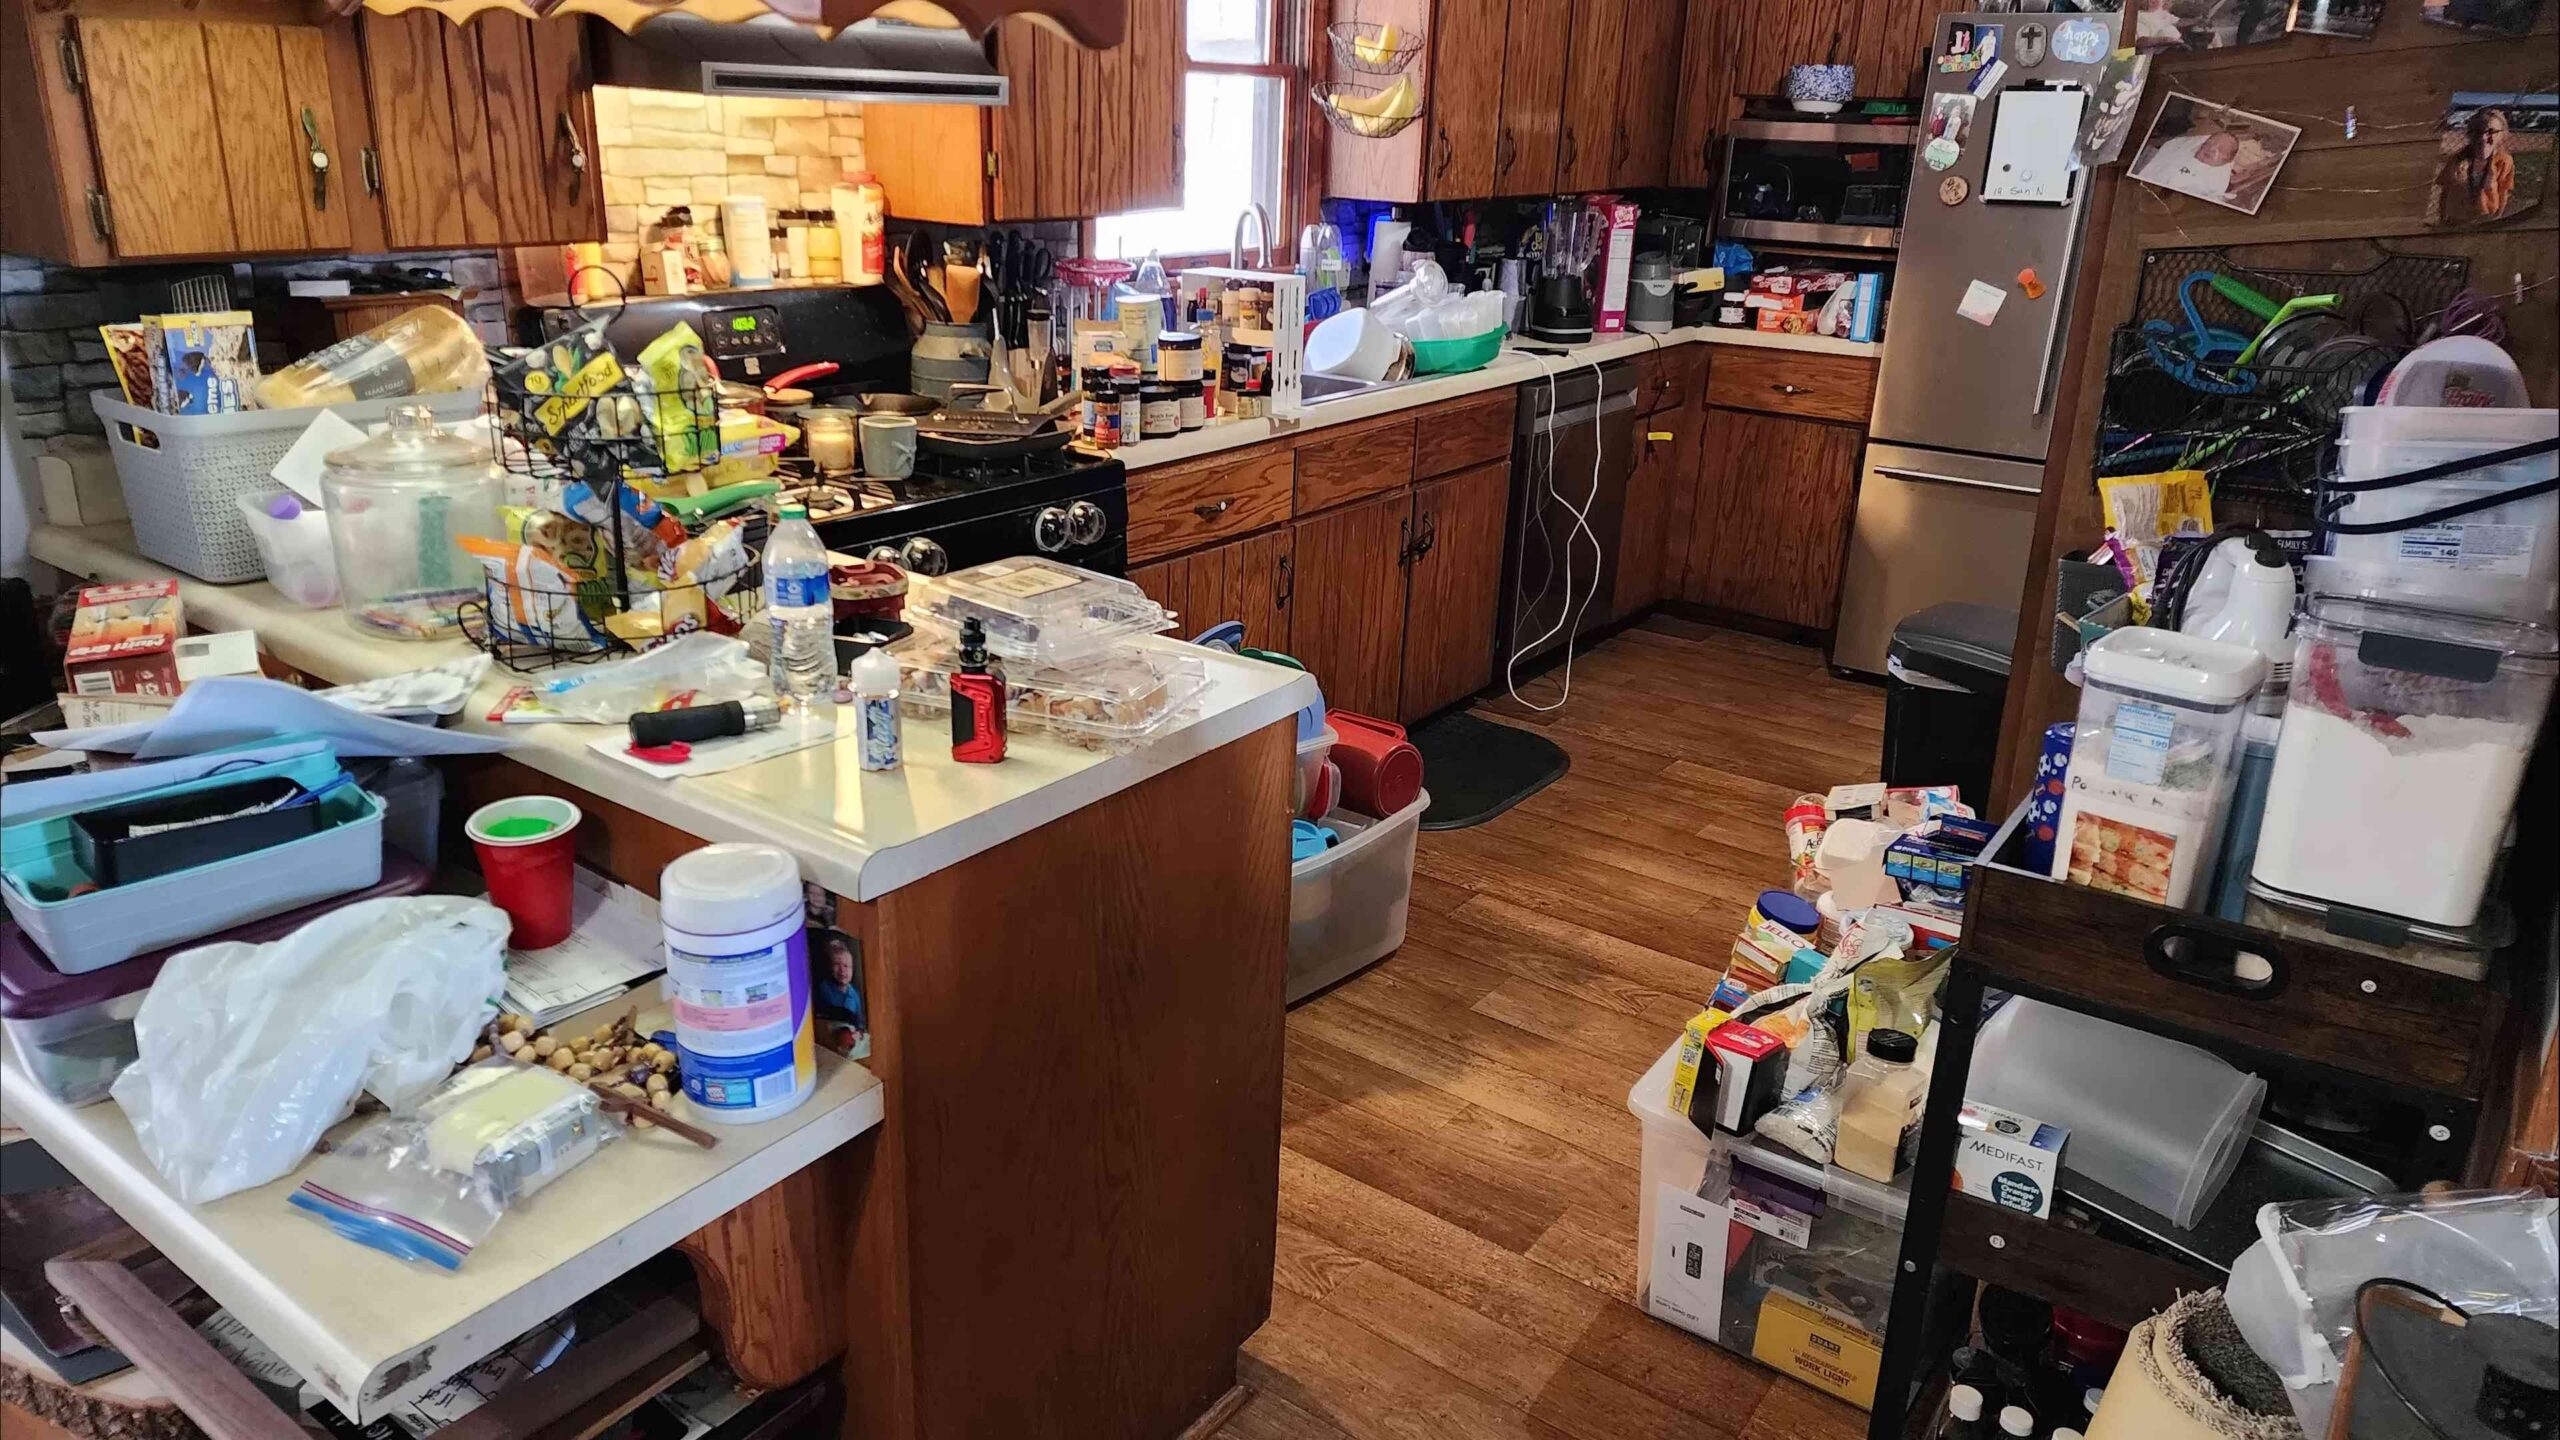
Kitchen
- Expired Food: Discard all expired food items.
Conclusion
So, there you have it! This comprehensive hoarder cleaning checklist isn’t just a list; it’s a roadmap to reclaiming your space and, more importantly, your peace of mind. We understand that tackling a hoarding situation can feel overwhelming, even paralyzing. But remember, every journey begins with a single step, and this checklist is designed to break down the monumental task into manageable, achievable segments.
Why is this DIY approach a must-try? Because it empowers you to take control. It allows you to work at your own pace, focusing on the areas that need the most immediate attention. It provides a structured framework, preventing you from getting lost in the chaos and ensuring that no crucial step is overlooked. Furthermore, by actively participating in the cleaning process, you gain a deeper understanding of the underlying issues contributing to the hoarding behavior, which is essential for long-term recovery and preventing relapse. This isn’t just about cleaning; it’s about healing and creating a healthier living environment.
Consider these variations to tailor the checklist to your specific needs. If you’re dealing with biohazards, such as mold or rodent infestations, prioritize professional remediation services before attempting any DIY cleaning. If emotional attachment to items is a significant hurdle, enlist the support of a therapist or hoarding specialist to guide you through the decluttering process. You might also find it helpful to create a “donate” box, a “sell” box, and a “keep” box for each room, making the sorting process more organized and less emotionally draining. Remember, flexibility is key. Adapt the checklist to fit your unique circumstances and challenges.
Don’t be afraid to modify the checklist to suit your individual needs and the specific challenges presented by the hoarding situation. For example, if you’re dealing with a large collection of books, you might want to dedicate an entire day to sorting and organizing them. If you’re struggling with emotional attachment to certain items, consider taking photos of them before letting them go. This can help you preserve the memories associated with the items without having to keep the physical objects themselves.
We wholeheartedly encourage you to put this **hoarder cleaning checklist** into action. Don’t wait for the “perfect” moment; start today, even if it’s just with one small corner of one room. The sense of accomplishment you’ll feel after completing even a single task will be incredibly motivating. And most importantly, we want to hear about your experience! Share your successes, your challenges, and any tips or modifications you’ve made to the checklist in the comments below. Your insights could be invaluable to others who are embarking on a similar journey. Together, we can create a supportive community and help each other reclaim our spaces and our lives. Remember, you’re not alone, and help is always available. Take that first step, and let’s start cleaning!
Frequently Asked Questions (FAQ)
What if I feel overwhelmed and don’t know where to start?
It’s completely normal to feel overwhelmed when facing a hoarding situation. The key is to break the task down into smaller, more manageable steps. Start with one small area, such as a corner of a room or a single drawer. Focus on completing that one task before moving on to the next. Use the hoarder cleaning checklist as a guide, but don’t feel pressured to follow it perfectly. Adapt it to your own pace and abilities. If you’re feeling particularly anxious or stressed, take a break and come back to it later. Remember, progress, not perfection, is the goal. Consider enlisting the help of a friend, family member, or professional organizer to provide support and guidance.
How do I deal with the emotional attachment to items?
Emotional attachment to items is a common challenge in hoarding situations. It’s important to acknowledge and validate these feelings. Before discarding any item, ask yourself why you’re holding onto it. Is it because of a specific memory, a sense of security, or a fear of regret? Once you understand the underlying reason, you can start to address it. Consider taking photos of items before letting them go, or creating a memory box to store a few special items. If you’re struggling to let go of items, seek the help of a therapist or hoarding specialist who can provide guidance and support. They can help you develop coping mechanisms and strategies for decluttering without feeling overwhelmed.
What if I find hazardous materials during the cleaning process?
If you encounter hazardous materials, such as mold, asbestos, or biohazards (e.g., rodent droppings, bodily fluids), it’s crucial to prioritize your safety and the safety of others. Do not attempt to clean these materials yourself. Contact a professional remediation company that specializes in hazardous waste removal. They have the necessary equipment and expertise to safely and effectively remove these materials. In the meantime, isolate the affected area to prevent further contamination. Wear protective gear, such as gloves and a mask, if you must enter the area.
How do I prevent hoarding from recurring after the cleaning is complete?
Preventing relapse is just as important as the initial cleaning. Once the cleaning is complete, it’s essential to address the underlying issues that contributed to the hoarding behavior. This may involve therapy, support groups, or medication. Develop a system for regularly decluttering and organizing your belongings. Set aside a specific time each week or month to go through your belongings and get rid of anything you no longer need or use. Avoid impulse purchases and be mindful of what you bring into your home. Consider establishing a “one in, one out” rule, where you get rid of one item for every new item you acquire.
Can I hire professionals to help with the cleaning process?
Absolutely! Hiring professionals is often a wise decision, especially in severe hoarding situations. Professional cleaning companies specializing in hoarding cleanup have the experience, equipment, and resources to safely and efficiently clean and declutter a hoarded home. They can also provide services such as biohazard remediation, odor removal, and pest control. When choosing a professional cleaning company, be sure to do your research and select one that is reputable, licensed, and insured. Ask for references and read online reviews. It’s also important to communicate your needs and expectations clearly to the cleaning company.
What resources are available to help with hoarding?
There are many resources available to help individuals struggling with hoarding and their families. The International OCD Foundation (IOCDF) has a hoarding center that provides information, resources, and support groups. The Anxiety and Depression Association of America (ADAA) also offers information and resources on hoarding disorder. Local mental health organizations and social service agencies may also offer support groups, therapy, and other services. Additionally, there are professional organizers who specialize in working with individuals with hoarding disorder. Don’t hesitate to reach out for help. Remember, you’re not alone, and there are people who care and want to support you.
How often should I declutter after the initial cleaning?
Regular decluttering is crucial for maintaining a clean and organized space and preventing the recurrence of hoarding behaviors. Aim to declutter at least once a week, focusing on high-traffic areas and areas prone to clutter accumulation. A more thorough decluttering session should be scheduled monthly or quarterly, depending on the severity of the previous hoarding situation and your personal habits. During these sessions, go through each room and assess your belongings, discarding or donating items you no longer need or use.
What are some strategies for making decluttering less overwhelming?
Several strategies can make decluttering less overwhelming. One effective method is the “Pomodoro Technique,” where you work in focused 25-minute intervals followed by a short break. This can help prevent burnout and maintain focus. Another helpful strategy is to focus on one category of items at a time, such as clothing, books, or kitchenware. This can make the task feel more manageable. You can also enlist the help of a friend or family member to provide support and encouragement. Remember to celebrate your progress and reward yourself for completing decluttering tasks.
Is hoarding a mental health disorder?
Yes, hoarding disorder is recognized as a distinct mental health disorder in the Diagnostic and Statistical Manual of Mental Disorders (DSM-5). It is characterized by persistent difficulty discarding or parting with possessions, regardless of their actual value. This difficulty leads to the accumulation of possessions that clutter and congest living areas and substantially compromise their intended use. Hoarding disorder is often associated with other mental health conditions, such as anxiety, depression, and obsessive-compulsive disorder (OCD). It’s important to seek professional help if you suspect you or someone you know has hoarding disorder.


Leave a Comment