

Pink radishes garden – even the name sounds delightful, doesn’t it? I’ve always been captivated by the vibrant hues and peppery bite of these little root vegetables. But did you know that radishes have been cultivated since pre-Roman times? They were a staple in ancient Egypt and Greece, prized not just for their flavor, but also for their medicinal properties.
Now, you might be thinking, “Why should I bother growing my own radishes?” Well, let me tell you, the store-bought variety simply can’t compare to the crisp, fresh taste of homegrown radishes. And the best part? They’re incredibly easy to grow, even if you’re a complete beginner like I was!
This article is packed with DIY tricks and hacks that will help you create your very own thriving pink radishes garden, no matter how small your space. We’ll cover everything from choosing the right seeds and soil to protecting your precious crop from pests. So, grab your gardening gloves, and let’s get started on this exciting journey to cultivate your own delicious and beautiful pink radishes!
Growing Gorgeous Pink Radishes: A DIY Guide for the Home Gardener
Okay, let’s talk radishes! Specifically, those vibrant, peppery pink radishes that add a pop of color and flavor to any salad or snack. Growing them yourself is surprisingly easy, even if you’re a complete beginner. I’m going to walk you through everything you need to know, from prepping the soil to harvesting your crunchy, homegrown treasures. Get ready to impress your friends (and yourself!) with your radish-growing prowess.
Choosing Your Radish Variety
First things first, let’s pick our radish! While I’m focusing on pink radishes, there’s a whole world of radish varieties out there. Here are a few pink options I’ve had great success with:
* Cherry Belle: This is a classic, reliable choice. They’re round, bright pink, and mature quickly. Perfect for beginners!
* French Breakfast: These are elongated, with a beautiful gradient of pink to white. They have a milder flavor than some other varieties.
* Pink Beauty: As the name suggests, these are stunning! They’re round and a lovely, vibrant pink.
You can find seeds for these (and many other varieties) at your local garden center or online.
Preparing Your Radish Patch
Radishes are pretty low-maintenance, but they do appreciate a little TLC when it comes to soil preparation. Here’s what I recommend:
* Sunlight: Radishes need at least 6 hours of sunlight per day. Choose a spot in your garden that gets plenty of sunshine.
* Soil: Radishes prefer loose, well-drained soil. If your soil is heavy clay, amend it with compost or other organic matter to improve drainage.
* pH: The ideal soil pH for radishes is between 6.0 and 7.0. You can test your soil pH with a simple soil testing kit from your local garden center.
* Fertilizer: Radishes don’t need a lot of fertilizer, but a little boost can help. I like to mix in some compost or a balanced organic fertilizer before planting.
Planting Your Radish Seeds
Now for the fun part: planting! Radishes are cool-season crops, so the best time to plant them is in early spring or late summer/early fall.
* Timing: In the spring, plant your radish seeds as soon as the soil is workable. In the fall, plant them about 4-6 weeks before the first expected frost.
* Spacing: Sow seeds about ½ inch deep and 1 inch apart in rows that are 6 inches apart.
* Watering: Water gently after planting to keep the soil moist.
Step-by-Step Planting Instructions:
1. Prepare the soil: Rake the soil smooth and remove any rocks or debris.
2. Create furrows: Use a hoe or your finger to create shallow furrows about ½ inch deep and 6 inches apart.
3. Sow the seeds: Sprinkle the radish seeds into the furrows, spacing them about 1 inch apart.
4. Cover the seeds: Gently cover the seeds with soil.
5. Water thoroughly: Water the area gently but thoroughly to moisten the soil.
6. Label your rows: It’s always a good idea to label your rows so you know what you’ve planted!
Caring for Your Radishes
Radishes are relatively easy to care for, but here are a few tips to keep them happy and healthy:
* Watering: Keep the soil consistently moist, but not soggy. Radishes need regular watering to grow quickly and prevent them from becoming tough or bitter.
* Weeding: Keep the area around your radishes free of weeds. Weeds can compete with radishes for nutrients and water.
* Thinning: Once the seedlings emerge, thin them to about 2 inches apart. This will give them enough room to grow.
* Pest Control: Radishes are generally pest-resistant, but flea beetles can sometimes be a problem. If you see small holes in the leaves, you can try using insecticidal soap or diatomaceous earth.
Harvesting Your Radishes
This is the best part! Radishes are fast growers, so you can usually harvest them in about 3-4 weeks.
* Timing: Harvest radishes when they are about 1 inch in diameter. If you leave them in the ground too long, they can become tough and bitter.
* Harvesting Method: Gently pull the radishes from the ground. If the soil is dry, you may need to loosen it with a trowel first.
* Storage: Store radishes in the refrigerator in a plastic bag or container. They will keep for about a week.
Step-by-Step Harvesting Instructions:
1. Check for readiness: Gently brush away the soil around the base of the radish to check its size. It should be about 1 inch in diameter.
2. Loosen the soil (if needed): If the soil is dry or compacted, use a trowel to gently loosen the soil around the radish.
3. Grasp the radish: Grasp the radish firmly by the leaves, close to the base.
4. Pull gently: Pull the radish straight up out of the ground.
5. Wash and store: Wash the radishes thoroughly and store them in the refrigerator in a plastic bag or container.
Troubleshooting Common Radish Problems
Even with the best care, you might encounter a few problems along the way. Here are some common issues and how to address them:
* Radishes are too small: This is usually caused by overcrowding or lack of water. Make sure you thin your seedlings and water regularly.
* Radishes are tough or bitter: This can be caused by hot weather, inconsistent watering, or leaving the radishes in the ground too long. Try planting in the spring or fall, watering regularly, and harvesting promptly.
* Radishes are splitting: This is usually caused by inconsistent watering. Try to keep the soil consistently moist.
* Flea beetles: These tiny pests can create small holes in the leaves. Use insecticidal soap or diatomaceous earth to control them.
Creative Ways to Use Your Homegrown Radishes
Now that you’ve harvested your beautiful pink radishes, it’s time to enjoy them! Here are a few of my favorite ways to use them:
* Salads: Thinly sliced radishes add a peppery crunch to any salad.
* Snacks: Serve radishes with butter and sea salt for a simple and delicious snack.
* Pickled radishes: Pickled radishes are a tangy and flavorful condiment.
* Radish greens: Don’t throw away the radish greens! They’re edible and can be used in salads, soups, or stir-fries.
* Radish butter: Blend radishes with softened butter for a flavorful spread.
Extending Your Radish Harvest
Want to keep those radishes coming? Here are a few tips for extending your harvest:
* Succession planting: Plant a new batch of radish seeds every 2-3 weeks to ensure a continuous harvest.
* Choose different varieties: Some radish varieties mature faster than others. Plant a mix of varieties to extend your harvest.
* Use row covers: Row covers can protect your radishes from frost and pests, allowing you to plant earlier in the spring and later in the fall.
Enjoying the Fruits (or Radishes!) of Your Labor
Growing your own pink radishes is a rewarding experience. Not only do you get to enjoy fresh, delicious vegetables, but you also get the satisfaction of knowing that you grew them yourself. So get out there, get your hands dirty, and start growing! I promise, you won’t regret it. Happy gardening!

Conclusion
So, there you have it! Growing your own pink radishes from your garden is not just a fun project; it’s a gateway to unlocking a world of vibrant flavors and stunning visual appeal in your culinary creations. We’ve explored the simple yet rewarding process, from selecting the right seeds and preparing your soil to nurturing your little radish sprouts and harvesting those beautiful, rosy roots.
Why is this DIY trick a must-try? Because it empowers you to take control of your food source, ensuring freshness, quality, and a unique connection to the earth. Store-bought radishes, while convenient, often lack the crispness and peppery bite of homegrown varieties. Plus, let’s be honest, there’s something incredibly satisfying about pulling a perfectly formed, vibrant pink radish from the soil – a feeling that no supermarket trip can replicate.
Beyond the basic method we’ve outlined, there’s plenty of room for experimentation. Consider trying different radish varieties to explore a spectrum of pink hues and flavor profiles. French Breakfast radishes, with their elongated shape and mild flavor, are a great option. Or, for a spicier kick, try a Cherry Belle radish. You can also experiment with companion planting. Carrots and lettuce are known to thrive alongside radishes, creating a mutually beneficial garden ecosystem.
Don’t be afraid to get creative with your harvest! Pink radishes are incredibly versatile. Slice them thinly and add them to salads for a pop of color and a peppery crunch. Pickle them for a tangy and refreshing snack. Roast them with other root vegetables for a sweet and savory side dish. Or, get adventurous and use them in radish-top pesto – a delicious and sustainable way to use the entire plant.
The key to success with your pink radishes garden lies in consistent watering, well-drained soil, and plenty of sunlight. Keep a close eye on your plants, and don’t hesitate to adjust your approach as needed. Gardening is a learning process, and every season brings new opportunities for growth and discovery.
We wholeheartedly encourage you to embark on this rewarding journey of growing your own pink radishes. It’s a simple, accessible, and incredibly satisfying way to connect with nature, enhance your culinary skills, and add a touch of beauty to your garden and your plate.
Now, it’s your turn! Plant those seeds, nurture those sprouts, and watch your pink radish dreams come to life. And most importantly, share your experiences with us! We’d love to hear about your successes, your challenges, and your creative ways of using your homegrown radishes. Tag us in your photos on social media, leave a comment below, or send us an email. Let’s build a community of radish enthusiasts and inspire others to embrace the joy of gardening. Happy growing!
Frequently Asked Questions (FAQ)
Q: How long does it take for pink radishes to grow?
A: Radishes are known for their quick growth, making them a rewarding crop for impatient gardeners! Generally, you can expect to harvest your pink radishes in about 3 to 4 weeks from planting. However, this can vary slightly depending on the specific variety, soil conditions, and weather. Warmer temperatures tend to accelerate growth, while cooler temperatures may slow it down a bit. Keep an eye on your radishes and harvest them when they reach the desired size, typically around 1 inch in diameter. Overgrown radishes can become woody and less flavorful.
Q: What kind of soil is best for growing pink radishes?
A: Radishes thrive in loose, well-drained soil that is rich in organic matter. Before planting, amend your soil with compost or well-rotted manure to improve its fertility and drainage. Avoid heavy clay soils, as they can restrict root growth and lead to misshapen radishes. The ideal soil pH for radishes is between 6.0 and 7.0. If your soil is acidic, you can add lime to raise the pH. A simple soil test can help you determine your soil’s pH and nutrient levels.
Q: How much sunlight do pink radishes need?
A: Radishes need at least 6 hours of sunlight per day to grow properly. Choose a sunny spot in your garden where your radishes will receive ample sunlight. If you live in a hot climate, some afternoon shade can be beneficial to prevent the radishes from bolting (going to seed prematurely).
Q: How often should I water my pink radishes?
A: Consistent watering is crucial for growing plump, juicy radishes. Keep the soil consistently moist, but not waterlogged. Water deeply whenever the top inch of soil feels dry to the touch. Avoid letting the soil dry out completely, as this can cause the radishes to become cracked and bitter. Mulching around your radish plants can help retain moisture and suppress weeds.
Q: What are some common pests and diseases that affect pink radishes?
A: While radishes are relatively pest-resistant, they can be susceptible to certain pests and diseases. Common pests include flea beetles, root maggots, and aphids. Flea beetles can chew small holes in the leaves, while root maggots can damage the roots. Aphids can suck the sap from the plants, weakening them. To control these pests, you can use insecticidal soap, neem oil, or row covers. Common diseases that can affect radishes include damping-off and white rust. Damping-off is a fungal disease that can kill seedlings, while white rust causes white pustules on the leaves. To prevent these diseases, ensure good air circulation, avoid overwatering, and practice crop rotation.
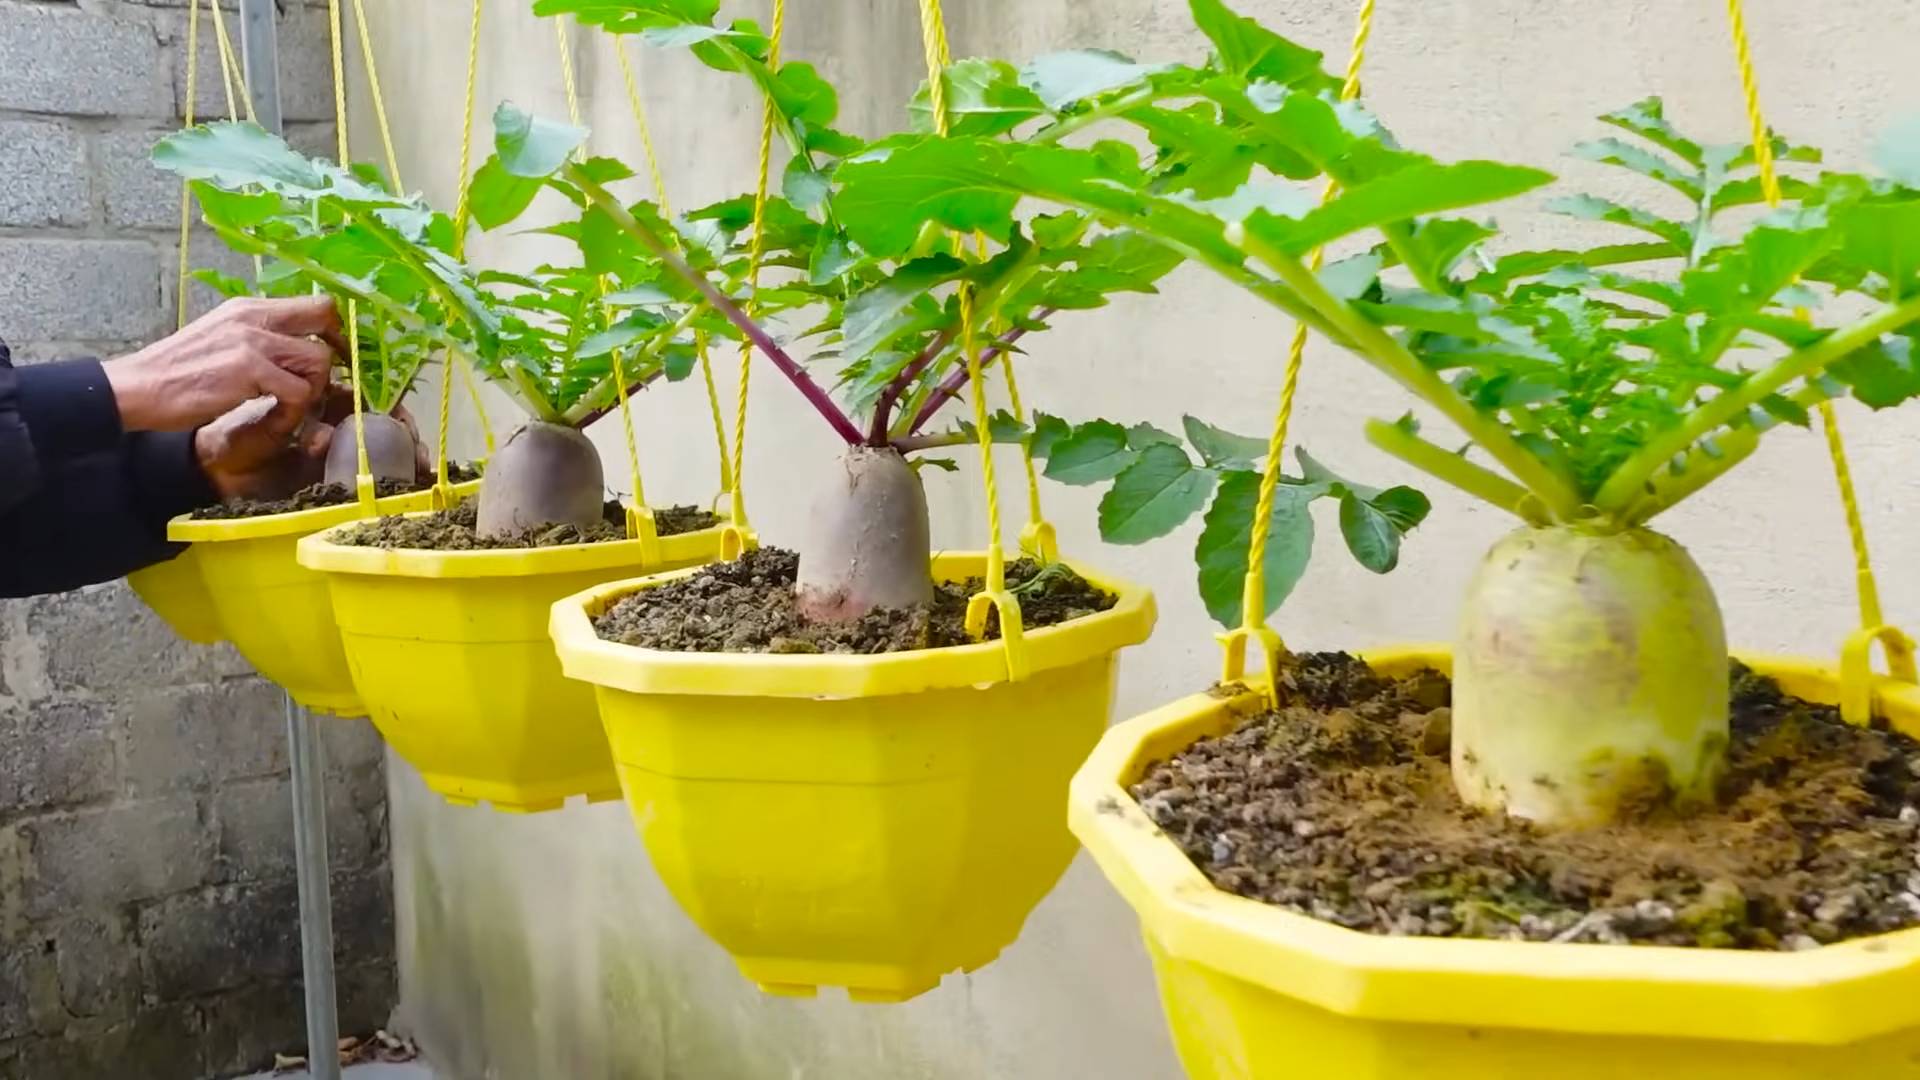
Q: Can I grow pink radishes in containers?
A: Absolutely! Radishes are well-suited for container gardening, making them a great option for those with limited space. Choose a container that is at least 6 inches deep and has drainage holes. Use a good-quality potting mix and follow the same planting and care instructions as you would for growing radishes in the ground. Be sure to water your container radishes more frequently, as they tend to dry out faster than those grown in the ground.
Q: Why are my pink radishes not turning pink?
A: Several factors can influence the color of your radishes. The most common reason is the variety of radish you’re growing. Some varieties are naturally more intensely pink than others. Soil conditions can also play a role. Nutrient-poor soil may result in paler radishes. Finally, insufficient sunlight can also affect the color development. Ensure your radishes are getting at least 6 hours of sunlight per day.
Q: Can I eat the radish greens?
A: Yes, absolutely! Radish greens are not only edible but also nutritious and delicious. They have a peppery flavor similar to the radishes themselves. You can use radish greens in salads, soups, stir-fries, or as a substitute for spinach. Be sure to wash the greens thoroughly before using them.
Q: How do I store pink radishes after harvesting?
A: To store your pink radishes, remove the greens and wash the radishes thoroughly. Place them in a plastic bag or container lined with a damp paper towel. Store them in the refrigerator for up to 1 to 2 weeks. The damp paper towel will help keep the radishes crisp and prevent them from drying out.

Leave a Comment