

Shaving Cream Mirror Cleaning: Who knew the secret to sparkling, fog-free mirrors was hiding in your bathroom cabinet all along? I’m always on the lookout for clever DIY solutions that save time and money, and this one is a game-changer! Forget expensive glass cleaners filled with harsh chemicals; this simple hack uses something you probably already have – shaving cream!
While the exact origins of using shaving cream for mirror cleaning are a bit murky, the principle behind it is rooted in the history of soap making. Early soaps, often made with lye and animal fats, were known for their cleaning and protective properties. Shaving cream, a descendant of these early soaps, contains similar ingredients that create a protective barrier on surfaces. This barrier is what prevents fog from forming, making it perfect for bathroom mirrors.
Let’s be honest, nobody enjoys wiping down a foggy mirror after a hot shower. It’s frustrating, time-consuming, and often leaves streaks. That’s where this shaving cream mirror cleaning trick comes in! It’s not just about aesthetics; a clear mirror can actually improve your morning routine and make your bathroom feel cleaner and brighter. Plus, it’s a fantastic way to avoid the harsh chemicals found in many commercial cleaners, making it a safer and more eco-friendly option for your home. So, are you ready to ditch the streaks and embrace a fog-free future? Let’s dive into this easy and effective DIY method!
DIY Shaving Cream Mirror Cleaning: Streak-Free Shine Guaranteed!
Okay, let’s talk mirrors. We all love a good, clear reflection, but those pesky streaks and smudges can be a real pain. Forget expensive glass cleaners! I’m going to show you a super simple, budget-friendly trick using something you probably already have in your bathroom: shaving cream! Yes, you read that right. Shaving cream isn’t just for shaving; it’s a fantastic mirror cleaner that leaves a streak-free shine and even helps prevent fogging. Trust me, once you try this, you’ll never go back to traditional glass cleaners.
What You’ll Need
Before we dive in, let’s gather our supplies. This is a pretty minimal list, which is one of the things I love about this hack.
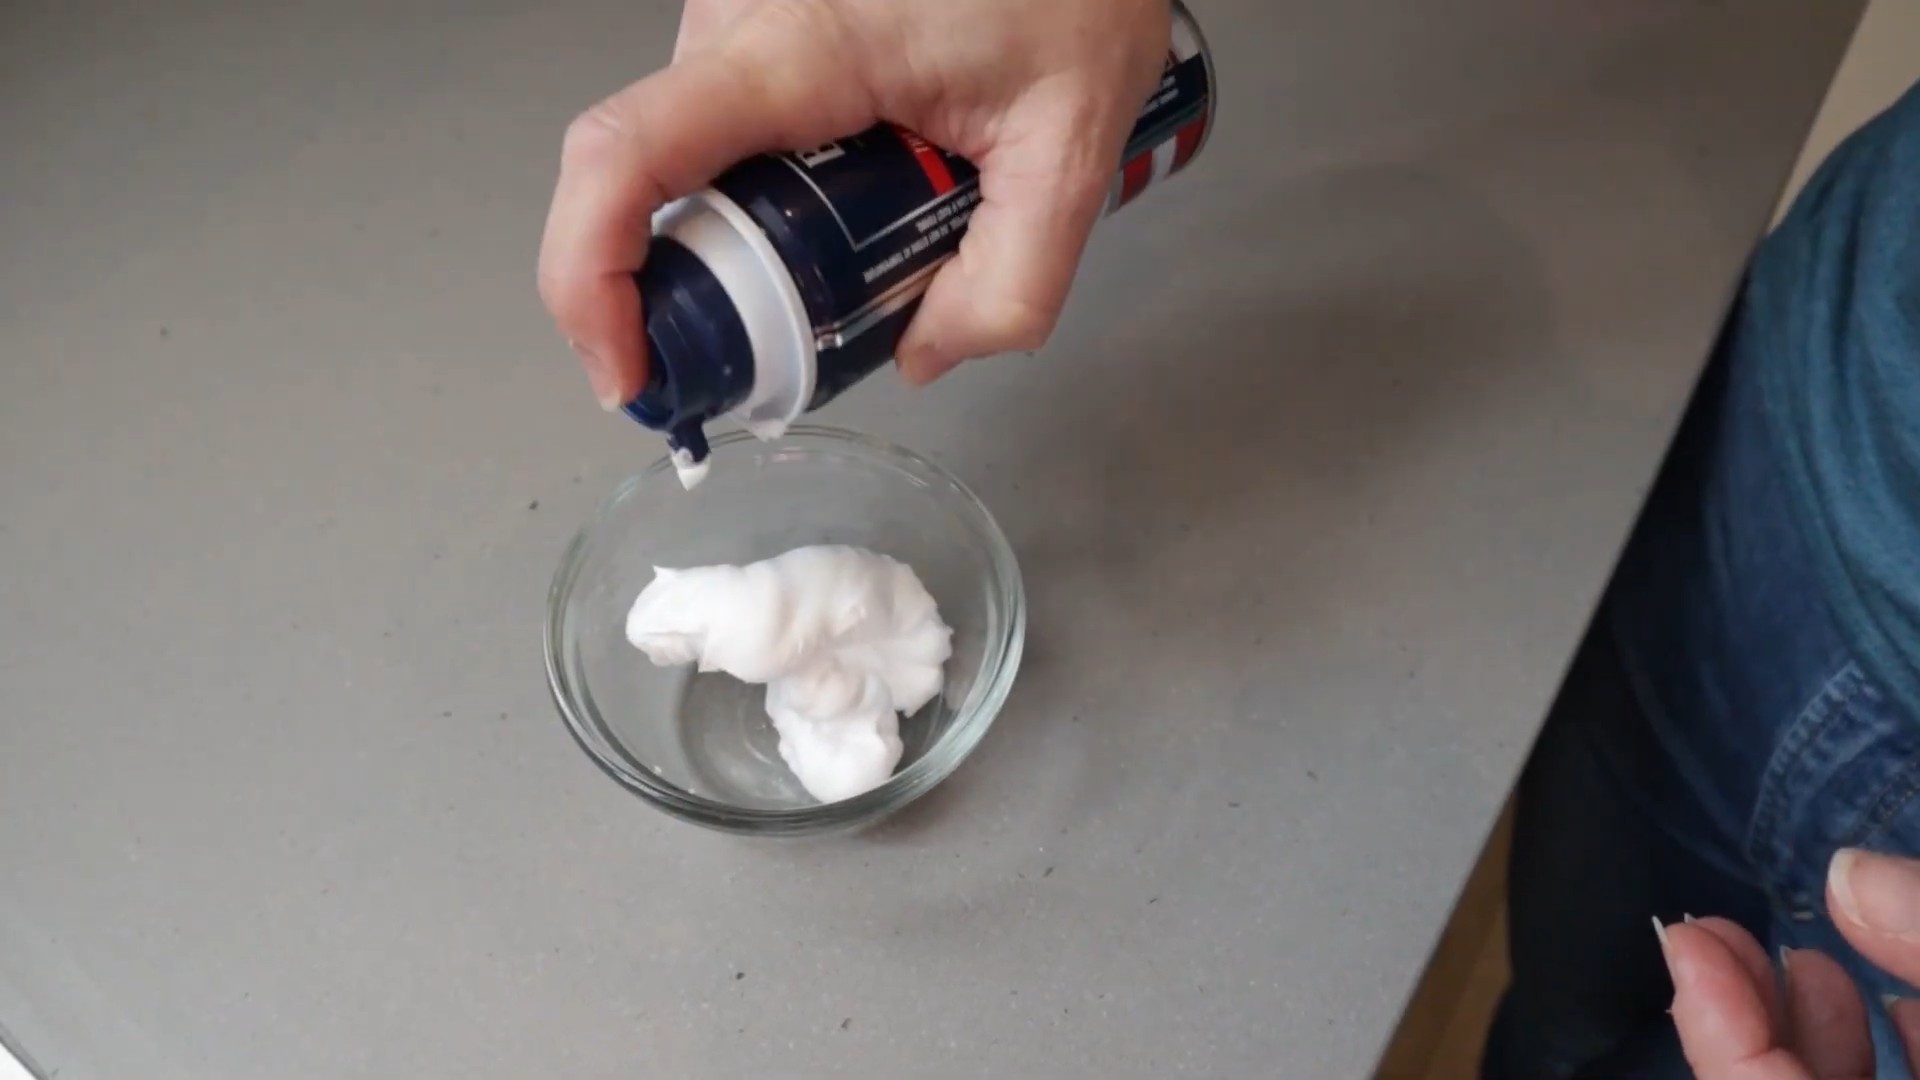
* Shaving Cream: The key here is to use a *foam-based* shaving cream, not a gel. The foamy kind works best for this purpose. I usually grab the cheapest one I can find – no need for fancy scents or moisturizing properties!
* Microfiber Cloth: A good quality microfiber cloth is essential for a streak-free finish. Avoid using paper towels, as they can leave lint behind.
* Spray Bottle with Water (Optional): This is helpful for rinsing, but you can also use a damp cloth.
* Squeegee (Optional): If you have a large mirror, a squeegee can speed up the process and help prevent streaks.
Step-by-Step Instructions: The Shaving Cream Magic
Alright, let’s get those mirrors sparkling! Follow these simple steps, and you’ll be amazed at the results.
1. Prepare the Mirror: Before applying the shaving cream, give your mirror a quick wipe with a dry microfiber cloth to remove any loose dust or debris. This will prevent you from just smearing the dirt around.
2. Apply the Shaving Cream: Now for the fun part! Take your shaving cream and apply a thin, even layer to the entire surface of the mirror. You don’t need to use a ton; a little goes a long way. I usually do this by spraying a small amount into my hand and then spreading it onto the mirror. You can also spray it directly onto the mirror, but be careful not to overdo it.
3. Let it Sit (Important!): This is a crucial step. Let the shaving cream sit on the mirror for a few minutes – about 5-10 minutes should do the trick. This allows the shaving cream to break down any grime and buildup on the surface. Think of it as a mini spa treatment for your mirror!
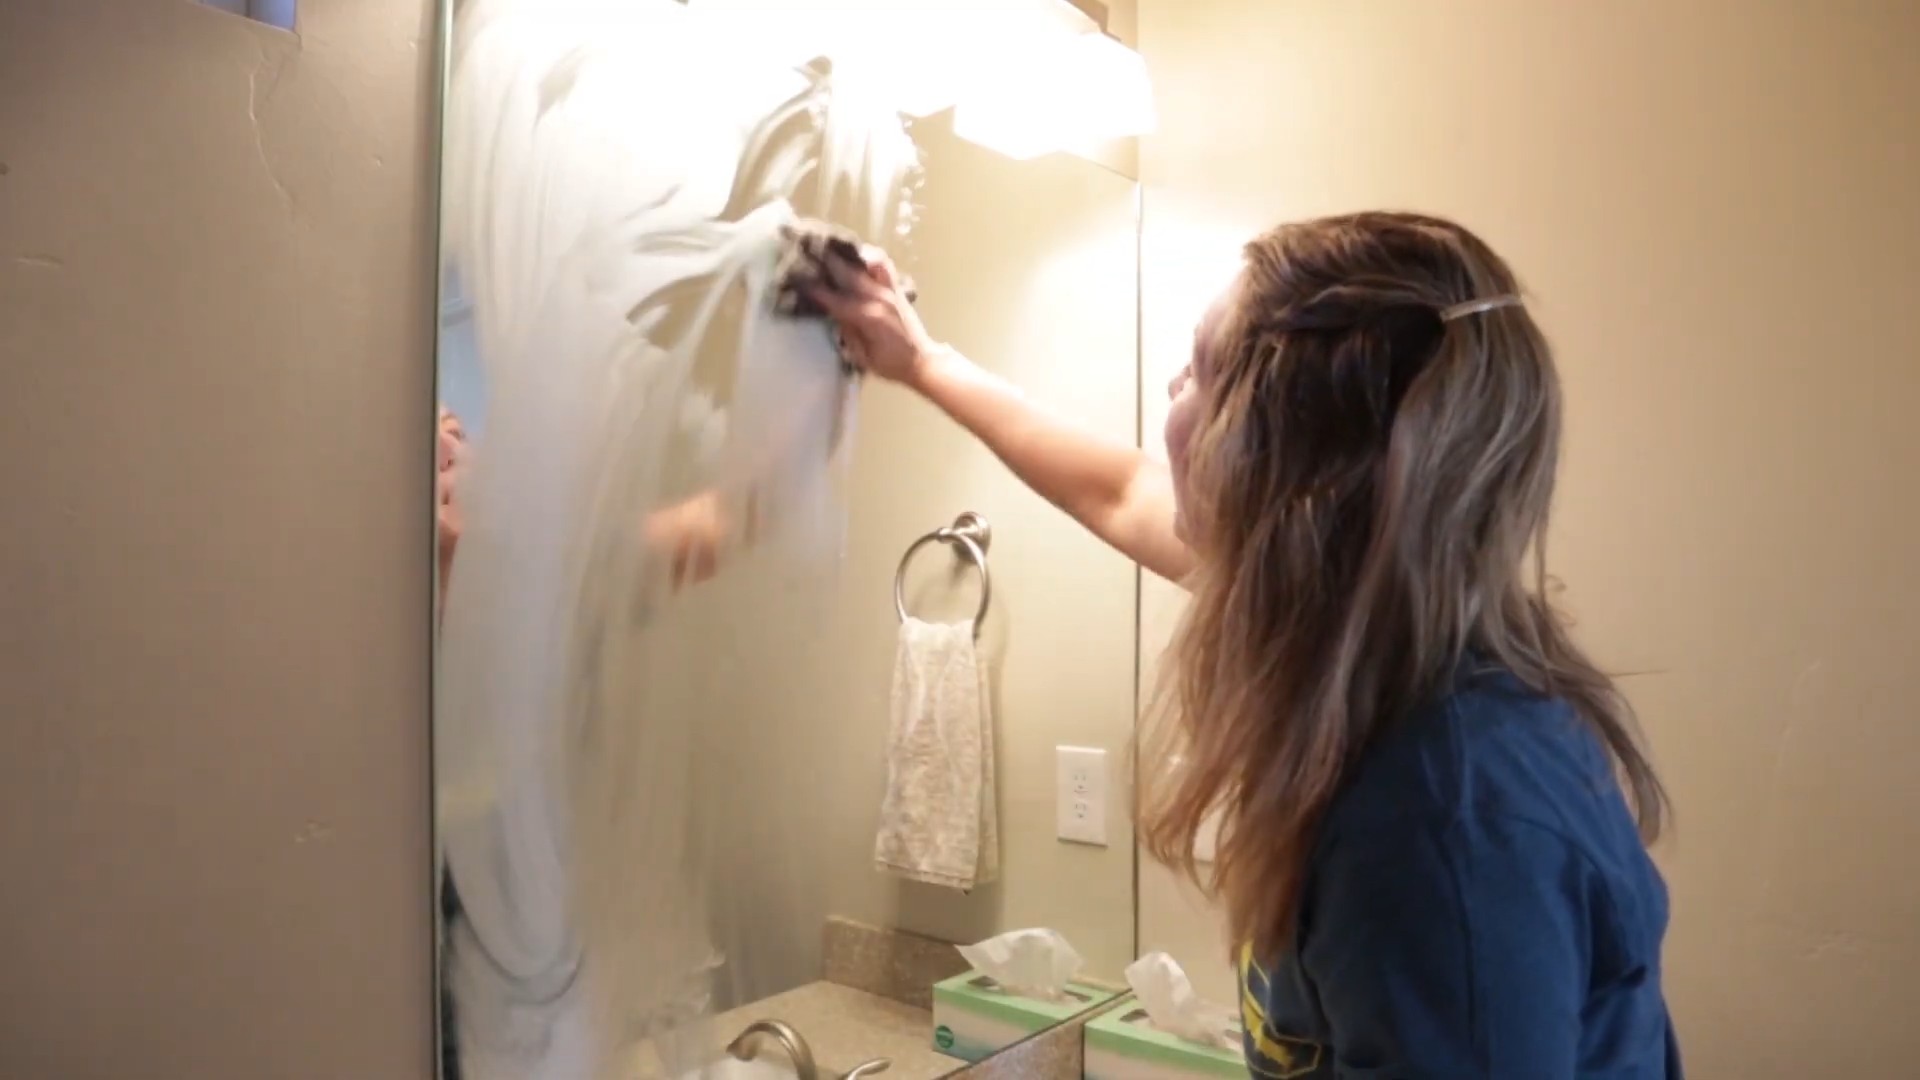
4. Wipe Away the Shaving Cream: After the shaving cream has had time to sit, it’s time to wipe it away. Use a clean, damp microfiber cloth to gently wipe the shaving cream off the mirror. You might need to rinse the cloth a few times as you go, depending on how much shaving cream you used.
5. Rinse (If Needed): If you find that there’s still some shaving cream residue on the mirror, you can use a spray bottle filled with water to lightly rinse the surface. Alternatively, you can use a clean, damp microfiber cloth to wipe away any remaining residue.
6. Dry and Buff: Now, grab a clean, dry microfiber cloth and buff the mirror until it’s completely dry and streak-free. This is where the magic happens! Use circular motions to buff the surface and reveal that sparkling shine. If you’re using a squeegee, overlap each stroke slightly to avoid leaving any streaks.
7. Admire Your Work!: Step back and admire your sparkling clean mirror! You’ll be amazed at how clear and streak-free it looks.
Bonus Tip: Preventing Fogging
One of the best things about using shaving cream to clean your mirrors is that it also helps prevent fogging. The shaving cream creates a protective barrier on the surface of the mirror, which prevents condensation from forming. This is especially helpful in bathrooms, where mirrors tend to fog up after showers.
To maximize the fog-preventing benefits, make sure you apply a thin, even layer of shaving cream to the entire surface of the mirror and let it sit for the recommended time. When you wipe it away, be sure to buff the mirror thoroughly to create a smooth, protective layer.
Troubleshooting: Common Issues and Solutions
Even with the best instructions, sometimes things don’t go exactly as planned. Here are a few common issues you might encounter and how to fix them:
* Streaks: If you’re seeing streaks after cleaning, it could be due to a few things. First, make sure you’re using a clean microfiber cloth. A dirty cloth can just smear the dirt around. Second, make sure you’re buffing the mirror thoroughly with a dry cloth. If you’re still seeing streaks, try using a different microfiber cloth or adding a little bit of white vinegar to your rinsing water.
* Residue: If you’re finding that there’s still shaving cream residue on the mirror after wiping it away, it could be because you used too much shaving cream or didn’t let it sit long enough. Try using less shaving cream next time and make sure you let it sit for the recommended time. You can also try rinsing the mirror with a spray bottle filled with water or using a clean, damp microfiber cloth to wipe away any remaining residue.
* Lint: If you’re seeing lint on the mirror, it’s likely because you’re using paper towels instead of a microfiber cloth. Paper towels tend to leave lint behind, which can be frustrating. Switch to a microfiber cloth for a lint-free finish.
Beyond the Bathroom: Other Uses for This Hack
While this hack is perfect for bathroom mirrors, it’s also great for cleaning other glass surfaces around your home. Here are a few ideas:
* Windows: Use the same method to clean your windows for a streak-free shine.
* Glass Shower Doors: Shaving cream can help prevent soap scum buildup on glass shower doors.
* Car Windows: Keep your car windows clear and fog-free with this simple trick.
* Glass Tabletops: Give your glass tabletops a sparkling clean with shaving cream.
Why This Works: The Science Behind the Shine
You might be wondering why shaving cream works so well as a mirror cleaner. The secret lies in its ingredients. Shaving cream contains surfactants, which are compounds that help to break down dirt and grime. It also contains moisturizers, which help to create a smooth, protective layer on the surface of the mirror. This layer helps to prevent fogging and makes it easier to clean the mirror in the future.
Cost-Effective and Eco-Friendly
One of the best things about this DIY hack is that it’s both cost-effective and eco-friendly. You’re using a product you likely already have on hand, which saves you money on expensive glass cleaners. Plus, you’re reducing your reliance on harsh chemicals, which is better for the environment.
Final Thoughts: A Simple Solution for Sparkling Mirrors
So there you have it! A simple, effective, and budget-friendly way to clean your mirrors using shaving cream. I hope you give this hack a try and see for yourself how well it works. Say goodbye to streaks and smudges and hello to sparkling, clear mirrors! Happy cleaning!
Conclusion
So, there you have it! Shaving cream mirror cleaning isn’t just a quirky internet hack; it’s a genuinely effective, affordable, and surprisingly pleasant way to achieve streak-free, fog-resistant mirrors. Forget expensive glass cleaners laden with harsh chemicals. This simple DIY trick leverages the power of readily available shaving cream to deliver professional-quality results in minutes.
Why is this a must-try? Because it simplifies your cleaning routine, saves you money, and leaves your mirrors sparkling. The anti-fogging properties alone are a game-changer, especially in steamy bathrooms. Imagine stepping out of a hot shower and actually being able to see your reflection clearly – no more wiping frantically or waiting for the fog to dissipate! This is particularly beneficial for those who apply makeup or shave in the bathroom, as it provides a clear and unobstructed view.
But the benefits extend beyond just convenience. Shaving cream is generally gentler than many commercial cleaners, making it a safer option for your mirrors and the environment. Plus, the subtle scent left behind is a refreshing bonus.
Don’t be afraid to experiment with variations to find what works best for you. For example, if you prefer a stronger scent, you could add a drop or two of your favorite essential oil to the shaving cream before applying it to the mirror. Lavender, eucalyptus, or tea tree oil are all excellent choices for a bathroom setting. Alternatively, if you have sensitive skin, opt for a fragrance-free shaving cream to minimize any potential irritation.
Another variation to consider is the type of cloth you use for wiping. While a microfiber cloth is generally recommended, you can also use a soft cotton cloth or even a coffee filter for a lint-free finish. The key is to use a clean, dry cloth and to avoid applying too much pressure, which can cause streaks.
We’re confident that once you try this shaving cream mirror cleaning method, you’ll be hooked. It’s a simple, effective, and eco-friendly way to keep your mirrors looking their best. So, ditch the expensive cleaners and give this DIY trick a try. You won’t be disappointed!
We encourage you to share your experiences with us! Did you find this method as effective as we did? Did you try any variations? Let us know in the comments below. We’re always eager to hear from our readers and learn from your experiences. Your feedback helps us improve our content and provide even more helpful tips and tricks. So, go ahead, give it a try, and let us know what you think! We believe that this simple hack will revolutionize your mirror cleaning routine and leave you with sparkling, fog-free mirrors that you’ll be proud to show off.
Frequently Asked Questions (FAQs)
1. What kind of shaving cream should I use?
The best type of shaving cream for cleaning mirrors is a basic, non-gel shaving cream. The foamy texture is what provides the cleaning and anti-fogging benefits. Avoid using shaving gels or creams that contain added moisturizers or oils, as these can leave a residue on the mirror. A simple, inexpensive shaving cream will work just fine. Many people find that the cheaper, generic brands work just as well as the more expensive ones for this purpose. Experiment to see what works best for you and your mirrors.
2. Will shaving cream damage my mirror?
No, shaving cream is generally safe to use on mirrors. However, it’s always a good idea to test a small, inconspicuous area first, especially if you have an antique or particularly delicate mirror. Ensure that the shaving cream doesn’t contain any abrasive ingredients that could scratch the surface. As long as you use a non-abrasive shaving cream and wipe it off thoroughly, it shouldn’t cause any damage.
3. How often should I clean my mirrors with shaving cream?
The frequency of cleaning depends on how often your mirrors get dirty or foggy. For bathrooms, cleaning once a week or every other week is usually sufficient to maintain a streak-free and fog-resistant surface. In other areas of the house, you may only need to clean your mirrors once a month or even less frequently. Observe how quickly your mirrors get dirty and adjust your cleaning schedule accordingly.
4. Can I use this method on other glass surfaces, like shower doors or windows?
Yes, the shaving cream cleaning method can also be used on other glass surfaces, such as shower doors and windows. The anti-fogging properties are particularly beneficial for shower doors, preventing them from fogging up during showers. However, be sure to test a small area first, especially on tinted or coated glass, to ensure that the shaving cream doesn’t damage the surface. For windows, you may need to use a squeegee to remove the shaving cream more effectively.
5. What if I don’t have shaving cream? Are there any alternatives?
While shaving cream is the recommended ingredient for this DIY trick, there are a few alternatives you can try. One option is to use a mixture of white vinegar and water. Combine equal parts of vinegar and water in a spray bottle, spray it onto the mirror, and wipe it off with a clean cloth. Another option is to use a commercial glass cleaner, but be sure to choose one that is specifically designed for mirrors and glass surfaces. However, keep in mind that these alternatives may not provide the same anti-fogging benefits as shaving cream.
6. How do I prevent streaks when wiping off the shaving cream?
To prevent streaks, use a clean, dry microfiber cloth or a lint-free cotton cloth. Avoid using paper towels, as they can leave behind lint. Wipe the mirror in a circular motion, then go over it again with a clean, dry section of the cloth to remove any remaining residue. You can also use a coffee filter for a streak-free finish. The key is to use a clean cloth and to avoid applying too much pressure.
7. My mirror is really dirty. Will shaving cream be enough to clean it?
If your mirror is heavily soiled, you may need to pre-clean it before applying the shaving cream. Use a damp cloth to remove any loose dirt or debris. You can also use a mild soap and water solution to clean the mirror before applying the shaving cream. Once the mirror is clean, you can proceed with the shaving cream cleaning method as described above.
8. Can I use this method on framed mirrors?
Yes, you can use this method on framed mirrors, but be careful not to get shaving cream on the frame, especially if it’s made of wood or another delicate material. Apply the shaving cream directly to the mirror surface, avoiding the edges. If you do accidentally get shaving cream on the frame, wipe it off immediately with a damp cloth.
9. Does the type of water I use matter?
Using distilled water can help prevent water spots, especially if you have hard water. However, tap water is generally fine to use as long as you wipe the mirror dry thoroughly. If you notice water spots, you can try using distilled water or adding a small amount of white vinegar to the water.
10. How does shaving cream prevent fogging?
Shaving cream contains ingredients that create a thin, protective layer on the surface of the mirror. This layer prevents water droplets from condensing and forming fog. The anti-fogging effect can last for several days or even weeks, depending on the humidity and frequency of use.

Leave a Comment