

Growing carrots in pots might sound like a challenge, especially if you’re used to sprawling garden beds, but trust me, it’s totally achievable and incredibly rewarding! I remember my grandmother, a true gardening guru, always had a vibrant patch of carrots, even when she downsized to a small apartment with just a balcony. Her secret? Clever container gardening, a practice that dates back centuries, with evidence suggesting ancient civilizations like the Romans and Egyptians cultivated vegetables in pots.
But why bother with growing carrots in pots when you could just buy them at the store? Well, for starters, there’s nothing quite like the taste of a freshly harvested, homegrown carrot – the sweetness is unparalleled! Plus, it’s a fantastic way to enjoy gardening even if you have limited space, like an apartment balcony or a small patio. More importantly, you have complete control over the soil quality and growing conditions, ensuring your carrots are free from harmful pesticides and herbicides.
This DIY guide is packed with simple, effective tricks and hacks to help you successfully grow delicious, vibrant carrots right in your own containers. Whether you’re a seasoned gardener or a complete beginner, I’m confident that these tips will empower you to enjoy the satisfaction of harvesting your own homegrown carrots. So, let’s get started and transform your small space into a thriving carrot patch!
Growing Carrots in Pots: A Bumper Harvest on Your Balcony!
Okay, so you want to grow carrots, but you don’t have a sprawling garden? No problem! I’m here to tell you that growing carrots in pots is totally doable, and it’s actually a really rewarding experience. I’ve been doing it for a few years now, and I’ve learned a few tricks along the way to ensure a sweet and crunchy harvest. Let’s get started!
Choosing the Right Pot and Carrot Variety
Before we even think about soil, let’s talk about the two most important factors: the pot and the carrot variety.
* Pot Size Matters: This is crucial. Carrots need depth to grow properly. Forget those cute little flower pots. We’re talking deep containers here. Aim for a pot that’s at least 12 inches deep, but 18 inches is even better. The wider the pot, the more carrots you can grow! I personally prefer using rectangular planters because they maximize space.
* Drainage is Key: Make sure your pot has drainage holes! Carrots hate sitting in soggy soil. If your pot doesn’t have enough drainage, you can drill a few extra holes in the bottom.
* Choosing the Right Carrot Variety: Not all carrots are created equal, especially when it comes to container gardening. Long, slender varieties like ‘Nantes’ or ‘Imperator’ might struggle in pots. Instead, opt for shorter, rounder varieties like ‘Thumbelina,’ ‘Paris Market,’ or ‘Little Finger.’ These are specifically bred to be compact and are perfect for container growing. I’ve had great success with ‘Thumbelina’ – they’re adorable and delicious!
Preparing the Perfect Carrot-Growing Medium
Carrots are picky about their soil. They need loose, well-draining soil that’s free of rocks and clumps. Rocky soil can cause your carrots to fork or become misshapen. Here’s my go-to recipe for the perfect carrot-growing mix:
* The Magic Mix:
* 1 part compost: This provides essential nutrients.
* 1 part peat moss or coco coir: This helps retain moisture.
* 1 part perlite or vermiculite: This improves drainage and aeration.
* Why This Works: Compost provides the nutrients carrots need to thrive. Peat moss or coco coir helps retain moisture without waterlogging the soil. Perlite or vermiculite ensures good drainage, preventing root rot.
* Mixing it Up: Thoroughly mix all the ingredients in a large container or on a tarp. Make sure everything is evenly distributed.
* Filling the Pot: Fill your chosen pot with the soil mixture, leaving about an inch or two of space at the top.
Planting Your Carrot Seeds
Now for the fun part! Planting the seeds.
1. Water the Soil: Before planting, thoroughly water the soil in your pot. This will help settle the soil and provide moisture for the seeds to germinate.
2. Sowing the Seeds: Carrot seeds are tiny, so it’s easy to over-sow. I like to use a seed dispenser or carefully sprinkle the seeds about ½ inch apart on the surface of the soil.
3. Covering the Seeds: Gently cover the seeds with a thin layer (about ¼ inch) of soil. You can use your fingers or a small trowel.
4. Gentle Watering: Water the soil again very gently. You don’t want to wash away the seeds. I use a spray bottle or a watering can with a rose attachment.
5. Labeling: Don’t forget to label your pot with the carrot variety and the date you planted them! It’s easy to forget later on.
Caring for Your Carrot Seedlings
This is where patience comes in. Carrot seeds can take anywhere from 1 to 3 weeks to germinate, depending on the temperature and moisture levels.
1. Keep the Soil Moist: The most important thing is to keep the soil consistently moist, but not waterlogged. Check the soil daily and water whenever the top inch feels dry.
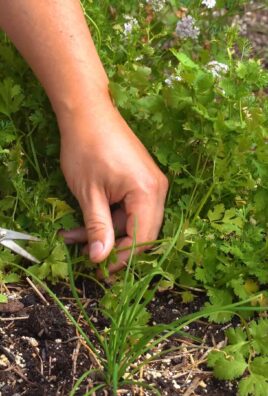
2. Thinning the Seedlings: Once the seedlings emerge and have a few true leaves (the second set of leaves), it’s time to thin them out. This is crucial for giving the remaining carrots enough space to grow.
* Why Thinning is Important: If you don’t thin the seedlings, they’ll compete for resources and you’ll end up with a bunch of small, spindly carrots.
* How to Thin: Gently pull out the weaker seedlings, leaving about 2-3 inches between the remaining plants. I know it feels wasteful, but trust me, it’s worth it!
3. Sunlight: Carrots need at least 6 hours of sunlight per day. Place your pot in a sunny location. If you don’t have a sunny spot, you can use grow lights.
4. Fertilizing: Carrots are not heavy feeders, but they do benefit from occasional fertilization.
* When to Fertilize: Start fertilizing about 4 weeks after the seedlings emerge.
* What to Use: Use a balanced liquid fertilizer diluted to half strength. I like to use a fertilizer specifically formulated for vegetables.
* How Often: Fertilize every 2-3 weeks.
5. Weed Control: Keep an eye out for weeds and remove them promptly. Weeds can compete with your carrots for resources.
6. Pest Control: Carrots are generally pest-resistant, but they can sometimes be affected by carrot rust flies.
* Preventing Carrot Rust Flies: The best way to prevent carrot rust flies is to cover your pot with a fine mesh netting.
* Dealing with Infestations: If you do get an infestation, you can use insecticidal soap or neem oil.
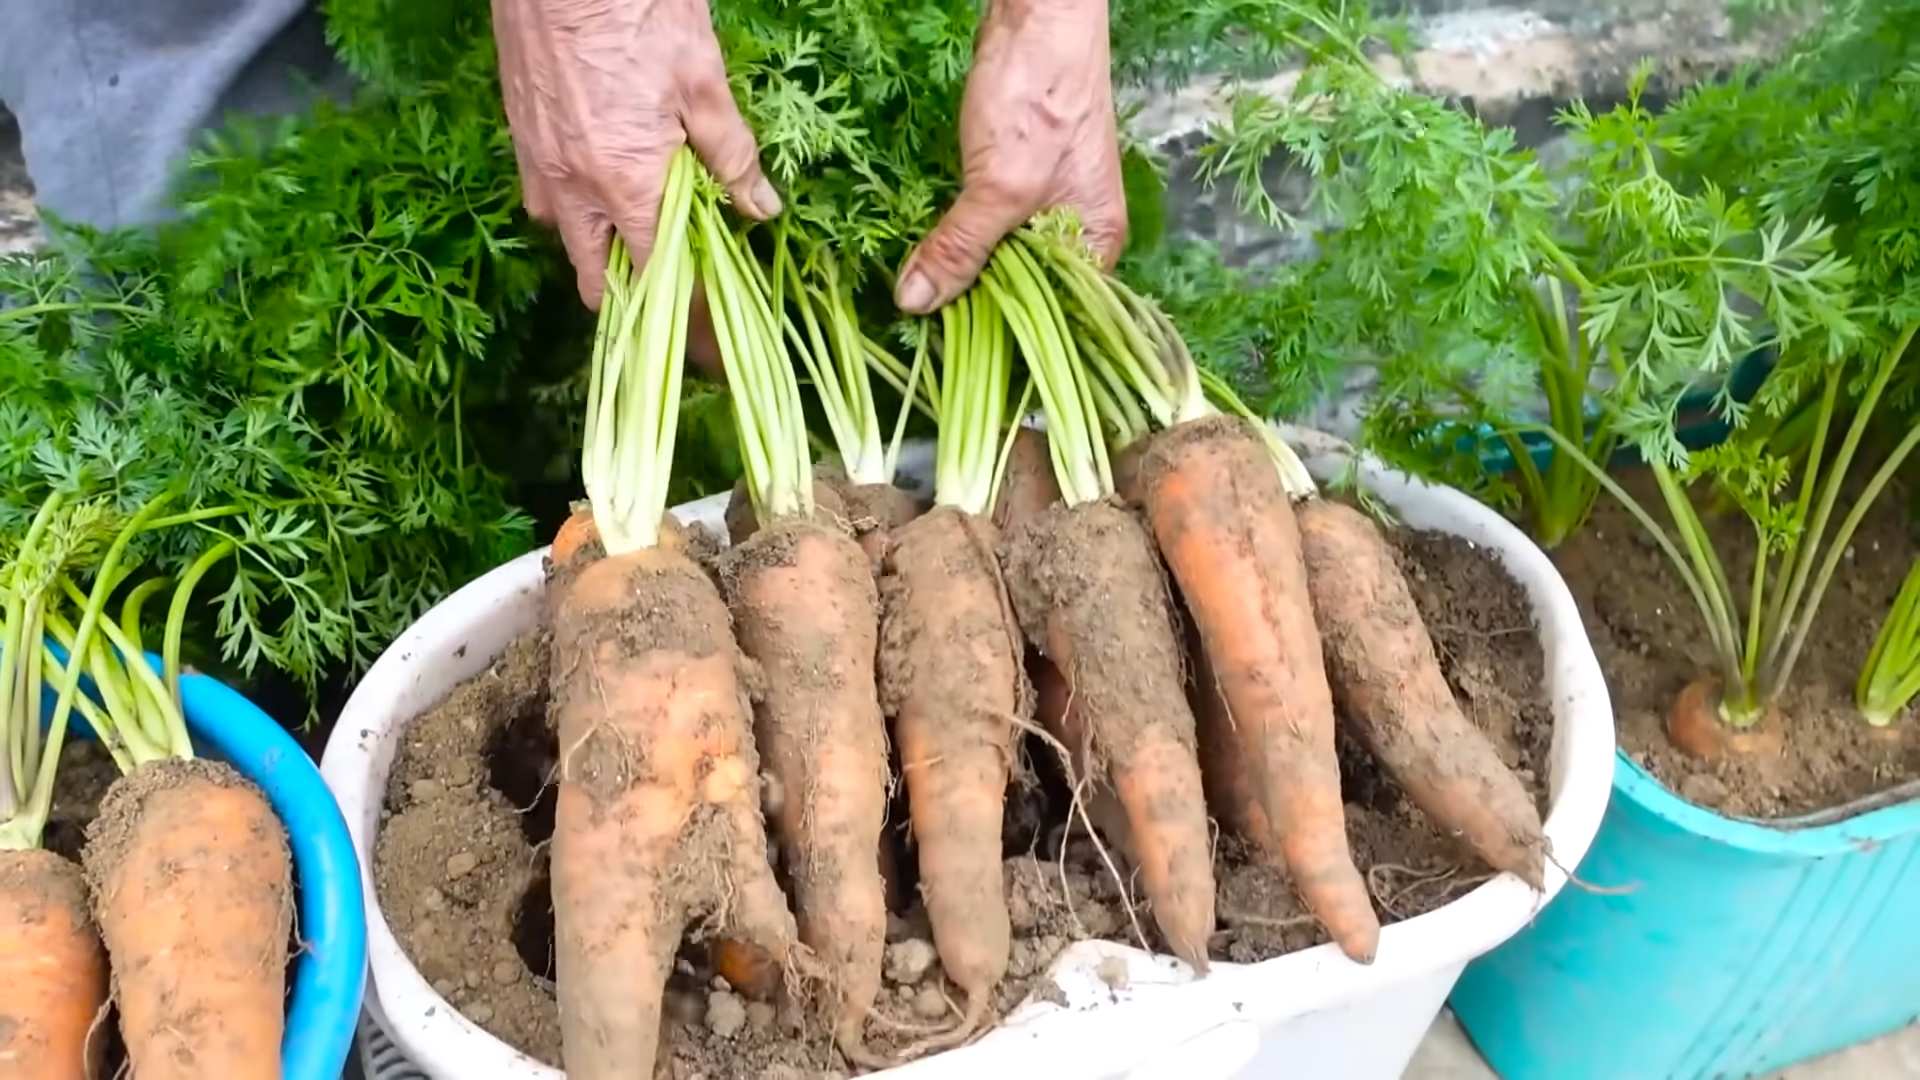
Harvesting Your Homegrown Carrots
The moment you’ve been waiting for! Harvesting your delicious, homegrown carrots.
1. When to Harvest: Carrots are typically ready to harvest 60-80 days after planting, depending on the variety. Check the seed packet for specific maturity dates.
2. Signs of Readiness: The tops of the carrots should be visible above the soil. You can gently brush away some soil to check the size of the carrots.
3. How to Harvest: Gently loosen the soil around the carrot with a trowel or fork. Then, grasp the carrot by the base of the leaves and gently pull it out of the soil. If the carrot is stubborn, you may need to wiggle it back and forth.
4. Washing and Storing: Wash the carrots thoroughly to remove any soil. You can store them in the refrigerator for several weeks. Trim the green tops before storing.
Troubleshooting Common Problems
Even with the best care, you might encounter a few problems along the way. Here are some common issues and how to fix them:
* Forked Carrots: This is usually caused by rocky soil or compacted soil. Make sure your soil is loose and free of rocks.
* Small Carrots: This can be caused by overcrowding, lack of sunlight, or poor soil. Thin your seedlings, provide adequate sunlight, and fertilize regularly.
* Bitter Carrots: This can be caused by inconsistent watering or hot weather. Keep the soil consistently moist and provide shade during the hottest part of the day.
* Root Rot: This is caused by overwatering. Make sure your pot has good drainage and don’t overwater.
Extra Tips for Carrot-Growing Success
Here are a few extra tips that I’ve learned over the years:
* Succession Planting: Plant a new batch of carrot seeds every few weeks to ensure a continuous harvest throughout the growing season.
* Companion Planting: Plant carrots with companion plants like onions, garlic, and rosemary. These plants can help deter pests.
* Watering Deeply: Water deeply and less frequently, rather than shallowly and often. This encourages the roots to grow deeper.
* Mulching: Mulch around your carrot plants with straw or wood chips to help retain moisture and suppress weeds.
* Enjoy the Process: Growing carrots in pots is a fun and rewarding experience. Don’t be afraid to experiment and learn from your mistakes.
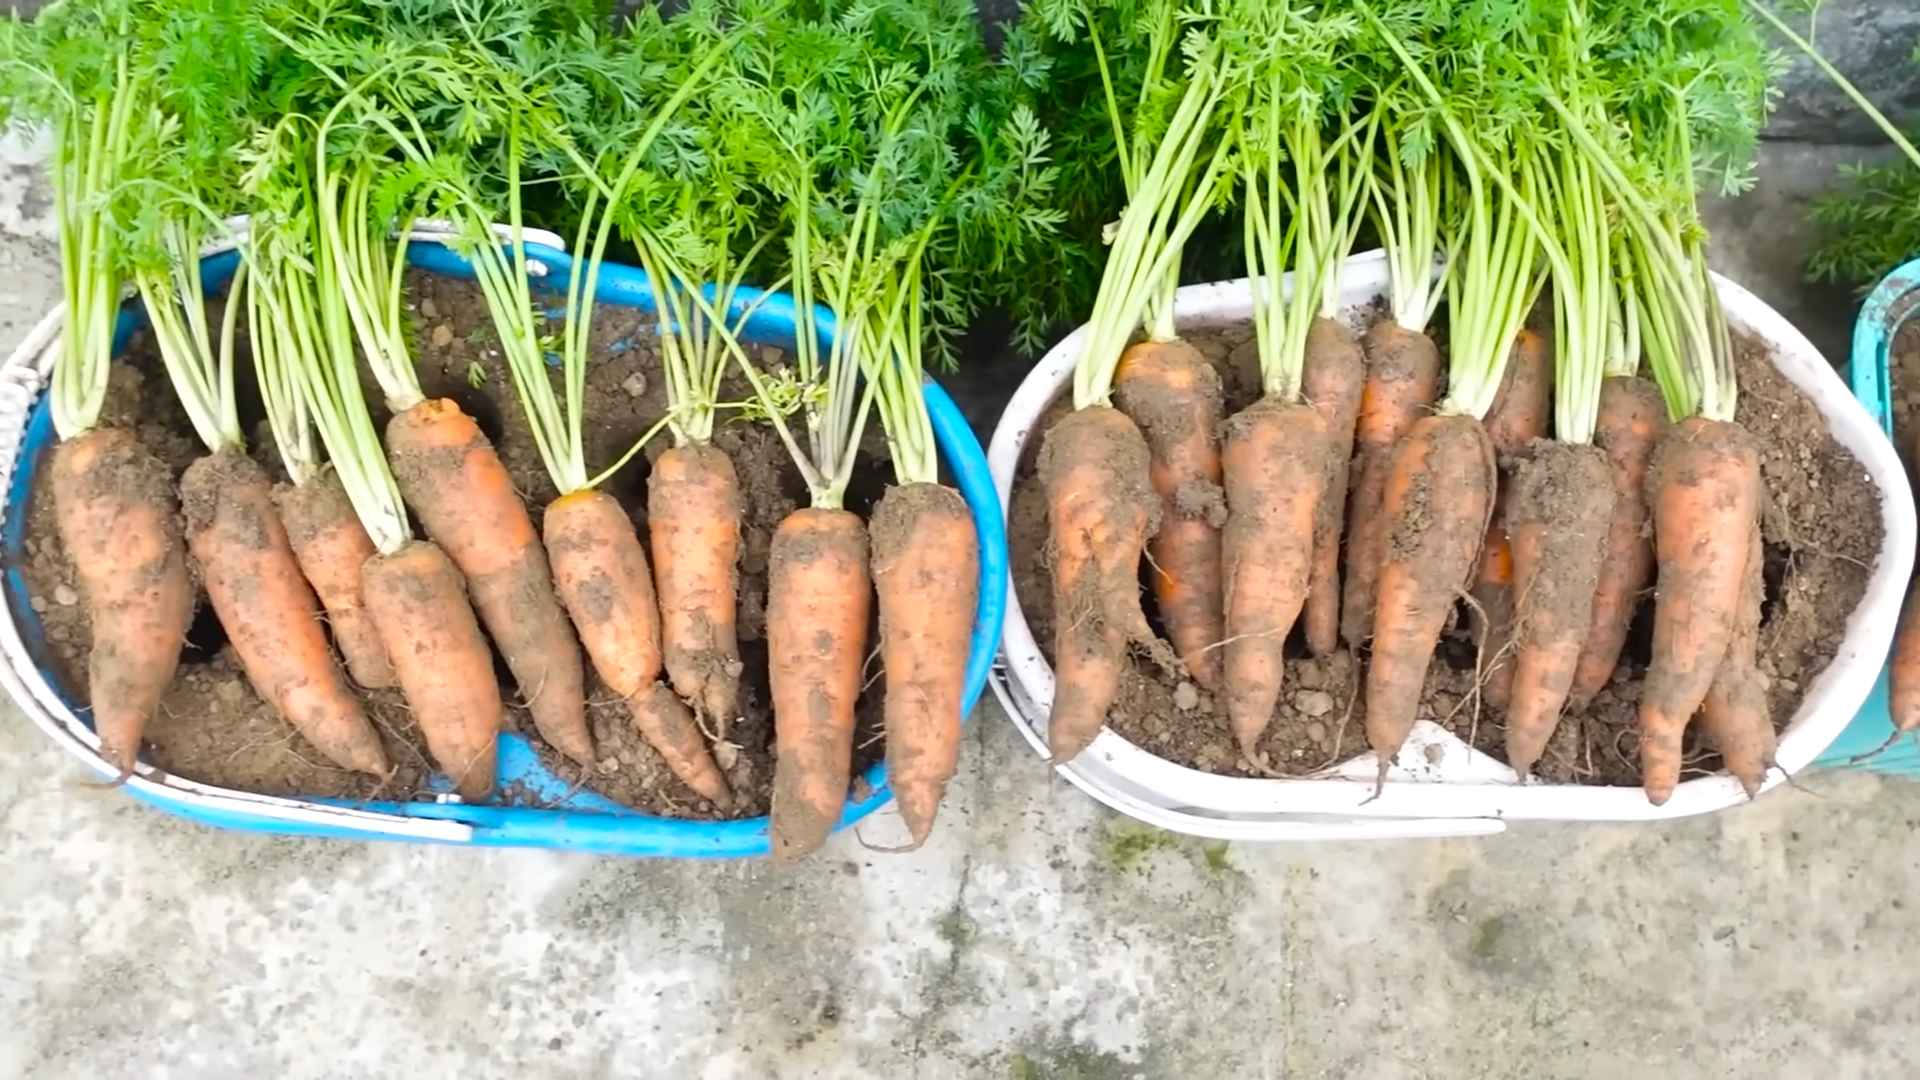
Growing carrots in pots is a fantastic way to enjoy fresh, homegrown vegetables, even if you don’t have a traditional garden. With a little bit of planning and care, you can have a bountiful harvest of sweet and crunchy carrots right on your balcony or patio. Happy gardening!
Conclusion
So, there you have it! Growing carrots in pots isn’t just a whimsical gardening experiment; it’s a practical, space-saving, and incredibly rewarding way to enjoy fresh, homegrown goodness. We’ve walked through the steps, from selecting the right pot and soil to nurturing your seedlings and harvesting your vibrant crop. But why is this DIY trick a must-try?
Firstly, it democratizes gardening. No sprawling acreage required! Whether you have a sunny balcony, a small patio, or even just a well-lit windowsill, you can cultivate your own carrots. This accessibility makes fresh, healthy produce available to everyone, regardless of their living situation.
Secondly, it’s a fantastic learning experience. Watching those tiny seeds sprout and develop into crunchy, sweet carrots is a deeply satisfying process. It connects you to the natural world and provides a tangible understanding of where your food comes from. Plus, it’s a great project for kids, teaching them about responsibility and the wonders of nature.
Thirdly, and perhaps most importantly, the taste is simply superior. Homegrown carrots, freshly pulled from the soil, possess a sweetness and vibrancy that you just can’t find in store-bought varieties. The difference is truly remarkable.
But don’t stop there! Experiment with different carrot varieties. Nantes carrots are a classic choice, but try growing round Parisian carrots for a unique shape or colorful rainbow carrots for a visual treat. You can also companion plant your carrots with herbs like rosemary or sage, which can help deter pests and enhance the flavor of your carrots. Consider adding a slow-release fertilizer specifically formulated for root vegetables to ensure optimal growth and nutrient uptake.
Growing carrots in pots offers a level of control you simply don’t have in a traditional garden. You can easily move your pots to chase the sun, protect them from harsh weather, and monitor the soil moisture levels with precision. This control translates to healthier, more productive plants.
We encourage you to embrace this DIY project and experience the joy of growing your own carrots. It’s a simple, affordable, and incredibly rewarding endeavor. Don’t be afraid to get your hands dirty, experiment with different techniques, and learn from your mistakes. Every gardener, no matter how experienced, started somewhere.
And finally, we want to hear from you! Share your experiences, successes, and challenges in the comments below. What varieties did you grow? What tips and tricks did you discover? Let’s create a community of pot-carrot enthusiasts and learn from each other. Happy gardening!
Frequently Asked Questions (FAQ)
1. What is the best size pot for growing carrots?
The ideal pot size depends on the carrot variety you choose. For shorter varieties like Parisian carrots, a pot that is at least 8 inches deep and 6 inches wide will suffice. However, for longer varieties like Nantes or Imperator carrots, you’ll need a pot that is at least 12 inches deep and 8 inches wide. Remember, carrots need room to grow downwards, so depth is more important than width. A larger pot is always better than a smaller one, as it provides more space for root development and reduces the risk of overcrowding. Consider using a container with drainage holes to prevent waterlogging, which can lead to root rot.
2. What type of soil is best for growing carrots in pots?
Carrots thrive in loose, well-draining soil that is rich in organic matter. Avoid heavy clay soils, as they can impede root growth and result in misshapen carrots. A good potting mix for carrots should consist of equal parts compost, peat moss (or coconut coir), and perlite or vermiculite. The compost provides essential nutrients, the peat moss or coconut coir helps retain moisture, and the perlite or vermiculite improves drainage. You can also add a small amount of slow-release fertilizer to the soil mix to provide a steady supply of nutrients throughout the growing season. Before planting, make sure to remove any rocks or debris from the soil, as these can also hinder root development.
3. How often should I water my carrots in pots?
Carrots need consistent moisture to grow properly, but they don’t like to be waterlogged. Water your carrots deeply whenever the top inch of soil feels dry to the touch. The frequency of watering will depend on the weather conditions, the size of your pot, and the type of soil you’re using. In hot, dry weather, you may need to water your carrots every day, while in cooler, wetter weather, you may only need to water them every few days. Avoid overhead watering, as this can promote fungal diseases. Instead, water at the base of the plant, using a watering can or a soaker hose.
4. How much sunlight do carrots need?
Carrots need at least 6 hours of direct sunlight per day to thrive. Choose a location for your pots that receives plenty of sunlight throughout the day. If you live in a hot climate, you may need to provide some afternoon shade to prevent the soil from drying out too quickly. If you’re growing carrots indoors, you’ll need to supplement with artificial light, such as a grow light. Place the grow light about 6-12 inches above the plants and keep it on for 12-16 hours per day.
5. How long does it take for carrots to grow in pots?
The time it takes for carrots to mature depends on the variety you’re growing and the growing conditions. Generally, carrots take between 60 and 80 days to mature. You can start harvesting carrots when they reach the desired size, even if they’re not fully mature. Baby carrots can be harvested as early as 50 days. To check if your carrots are ready to harvest, gently brush away some of the soil around the base of the plant and check the size of the root.
6. What are some common pests and diseases that affect carrots in pots?
Some common pests that affect carrots include carrot rust flies, aphids, and nematodes. Carrot rust flies lay their eggs near the base of the plant, and the larvae burrow into the roots, causing damage. Aphids suck the sap from the leaves, weakening the plant. Nematodes are microscopic worms that live in the soil and feed on the roots. To prevent pest problems, use a good quality potting mix, keep your pots clean, and monitor your plants regularly for signs of infestation. If you find pests, you can try spraying them with insecticidal soap or neem oil.
Common diseases that affect carrots include leaf blight and root rot. Leaf blight is a fungal disease that causes brown spots on the leaves. Root rot is caused by overwatering and poor drainage. To prevent disease problems, avoid overhead watering, ensure good drainage, and space your plants properly to allow for good air circulation. If you find diseased plants, remove them immediately to prevent the spread of the disease.
7. Can I grow carrots in pots during the winter?
Yes, you can grow carrots in pots during the winter, especially in mild climates. Carrots are a cool-season crop and can tolerate light frosts. If you live in a colder climate, you can protect your carrots from frost by covering them with a blanket or moving them to a sheltered location. You can also grow carrots indoors under grow lights during the winter.
8. How do I thin my carrot seedlings in pots?
Thinning is essential for growing healthy carrots in pots. When the seedlings are about 2 inches tall, thin them to about 1-2 inches apart. This will give the remaining plants enough space to grow and develop properly. To thin the seedlings, gently pull out the weaker ones, being careful not to disturb the roots of the remaining plants. You can also use a pair of scissors to snip off the unwanted seedlings at the soil line.
9. Can I reuse the soil from my carrot pots?
You can reuse the soil from your carrot pots, but it’s important to amend it with fresh compost and fertilizer before planting again. Carrots are heavy feeders and deplete the soil of nutrients. Adding compost and fertilizer will replenish the nutrients and improve the soil structure. You should also sterilize the soil to kill any pests or diseases that may be present. You can sterilize the soil by baking it in the oven at 180 degrees Fahrenheit for 30 minutes or by microwaving it for a few minutes.
10. What are some good companion plants for carrots in pots?
Companion planting can help improve the growth and health of your carrots. Some good companion plants for carrots include rosemary, sage, onions, garlic, and marigolds. Rosemary and sage help deter carrot rust flies. Onions and garlic repel aphids and other pests. Marigolds attract beneficial insects that prey on pests. Avoid planting carrots near dill or fennel, as these plants can inhibit their growth.


Leave a Comment