

Coffee grounds fridge odor got you down? I totally understand! There’s nothing worse than opening your refrigerator and being greeted by a funky, stale smell that makes you question everything inside. It’s a common problem, and thankfully, a super easy and effective DIY solution exists, and it involves something you probably already have on hand: coffee grounds!
Using coffee grounds to absorb odors isn’t exactly a new trick. In fact, people have been using coffee’s absorbent properties for centuries, not just in the kitchen, but also in other areas like neutralizing smells in cars and even in industrial settings. Think about it – the rich, earthy aroma of coffee is often used to “reset” the olfactory senses when sampling perfumes! So, harnessing that power to combat fridge odors is a natural extension of this time-tested practice.
But why is getting rid of that fridge odor so important? Beyond the unpleasantness, lingering smells can actually affect the taste of your food and even shorten its shelf life. Nobody wants their fresh berries tasting like last week’s leftover fish! That’s why this simple DIY trick using coffee grounds fridge odor eliminator is a game-changer. It’s a cost-effective, eco-friendly way to keep your fridge smelling fresh and your food tasting its best. Let’s dive into how you can banish those unwanted smells for good!
DIY Fridge Deodorizer: Banishing Bad Smells with Coffee Grounds
Okay, let’s be honest, nobody likes opening their fridge and being greeted by a funky smell. It’s a sign that something’s gone wrong, and it can make you question everything you’re about to eat! But fear not, my friends, because I’ve got a super simple and effective DIY solution for you: using coffee grounds to deodorize your fridge. Yes, that’s right, those leftover grounds from your morning brew can do wonders beyond just perking you up.
This method is not only incredibly easy and cheap, but it’s also eco-friendly. We’re repurposing something that would otherwise end up in the trash, and we’re avoiding harsh chemicals found in many commercial fridge deodorizers. So, let’s get started!
What You’ll Need
Before we dive in, let’s gather our supplies. The beauty of this DIY is that you probably already have everything you need!
* Used coffee grounds (completely dry)
* A small, breathable container (a small bowl, a jar with holes poked in the lid, or even a nylon stocking will work)
* Optional: Baking soda (for extra odor-absorbing power)
Preparing the Coffee Grounds
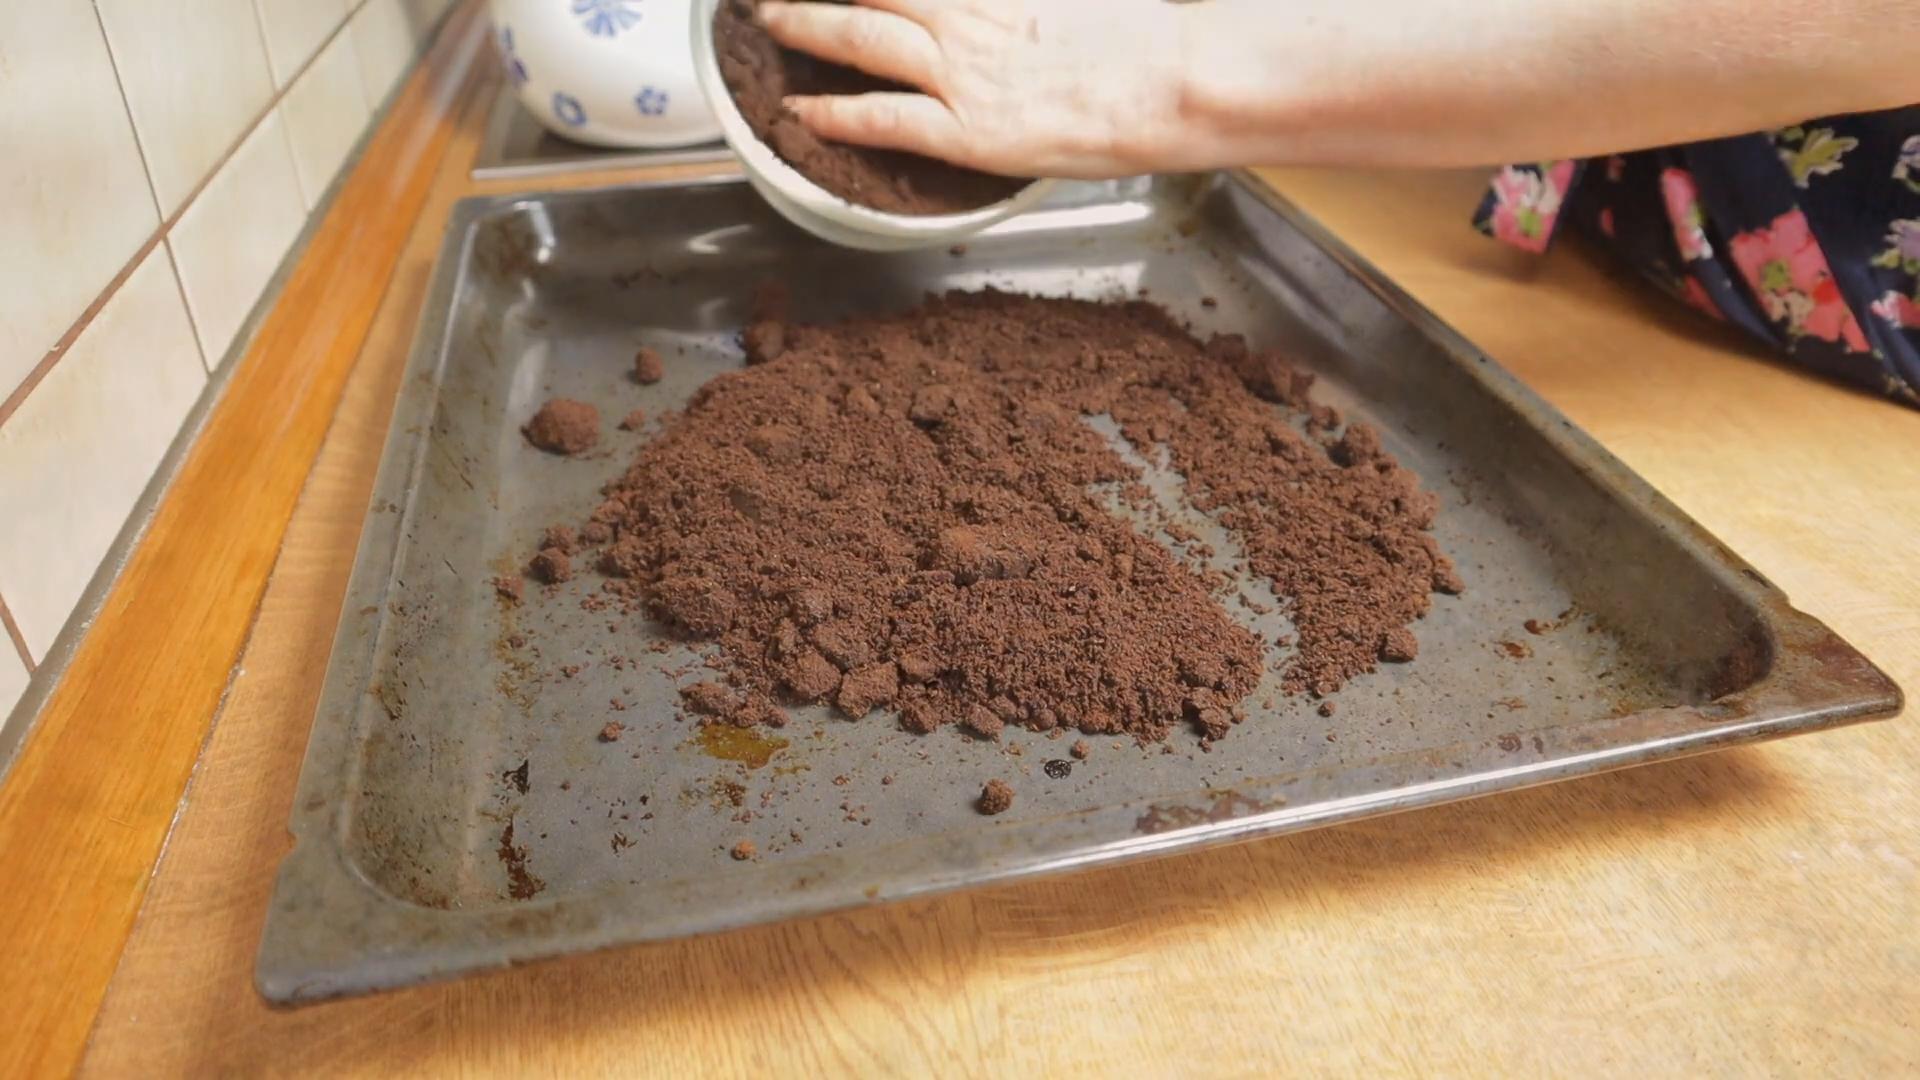
The most crucial step is ensuring your coffee grounds are completely dry. Moisture is the enemy here, as it can lead to mold growth, which is the opposite of what we’re trying to achieve!
1. Collect Your Grounds: After brewing your coffee, don’t toss those grounds! Instead, scoop them out of your coffee maker or French press.
2. Spread Them Out: The best way to dry the grounds is to spread them out in a thin layer on a baking sheet lined with parchment paper. This will allow for maximum air exposure.
3. Drying Options: You have a few options for drying:
* Air Drying: This is the most natural method. Simply leave the baking sheet in a well-ventilated area for a day or two, stirring occasionally to ensure even drying.
* Oven Drying: If you’re in a hurry, you can use your oven. Preheat it to the lowest setting (usually around 170-200°F or 75-95°C). Place the baking sheet in the oven and bake for about an hour, or until the grounds are completely dry. Keep a close eye on them to prevent burning!
* Sun Drying: If the weather is cooperating, you can dry the grounds outside in the sun. Just make sure to bring them in at night or if it starts to rain.
4. Check for Dryness: The grounds should be crumbly and dry to the touch. If they feel damp at all, continue drying them.
5. Important Note: Never use wet or damp coffee grounds in your fridge, as this can promote mold growth.
Creating Your Deodorizing Container
Now that our coffee grounds are nice and dry, it’s time to prepare our container. The key here is to use something that allows air to circulate freely around the grounds, so they can effectively absorb odors.
1. Choosing Your Container: Here are a few options:
* Small Bowl: A small, shallow bowl works perfectly well. Just make sure it’s not too deep, as this can restrict airflow.
* Jar with Holes: An old mason jar or any other glass jar can be repurposed. Simply poke several holes in the lid using a nail or drill.
* Nylon Stocking: This is a great option for maximizing airflow. Simply fill the stocking with coffee grounds and tie it off.
* Cheesecloth Pouch: You can create a small pouch using cheesecloth. This is a breathable and eco-friendly option.
2. Adding Baking Soda (Optional): For an extra boost of odor-absorbing power, you can mix a tablespoon or two of baking soda with the dry coffee grounds before placing them in your container. Baking soda is a natural deodorizer and will help to neutralize even the strongest smells.
3. Filling the Container: Carefully fill your chosen container with the dry coffee grounds (and baking soda, if using). Don’t overfill it, as you want to allow for good airflow.
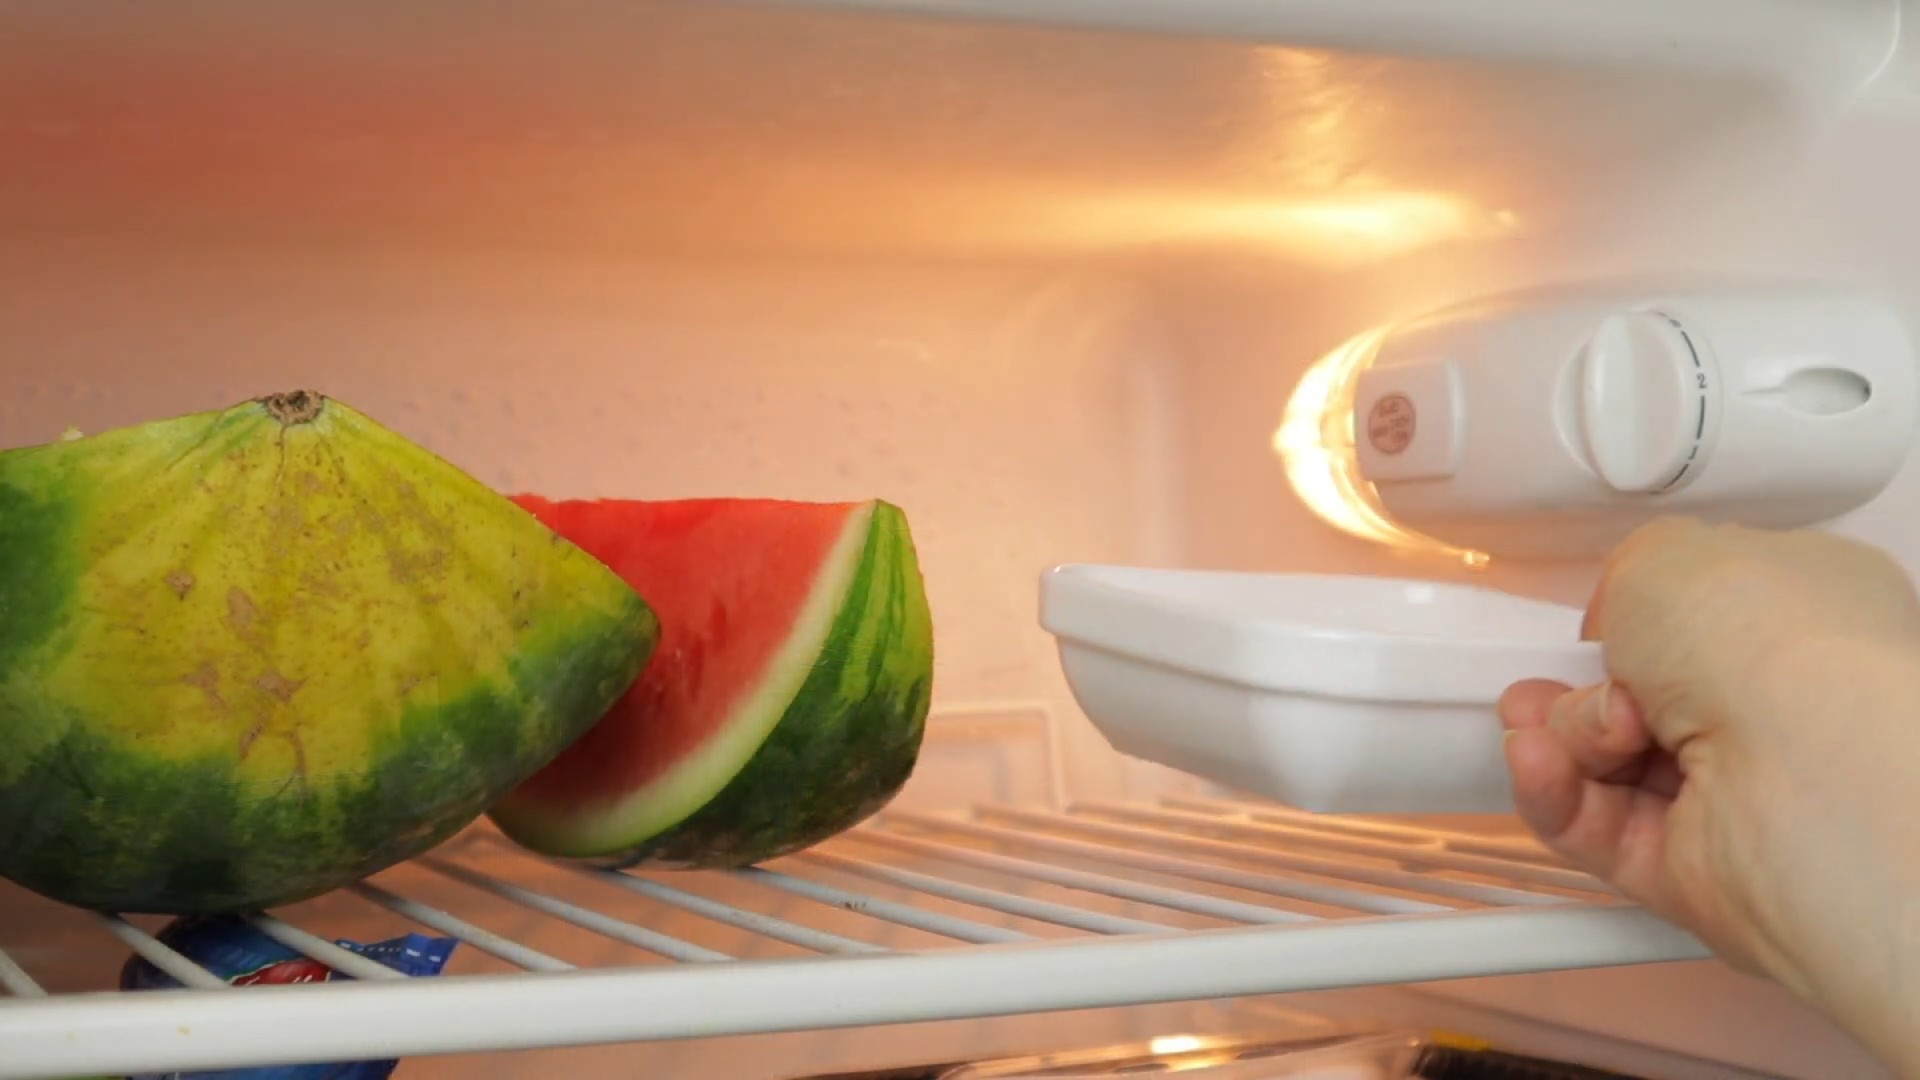
Placing the Deodorizer in Your Fridge
Now for the easiest part: placing your coffee ground deodorizer in your fridge!
1. Strategic Placement: The best place to put your deodorizer is in the area where you suspect the odors are strongest. This is often near the back of the fridge, where things tend to get forgotten.
2. Consider Multiple Locations: For larger fridges or particularly stubborn odors, consider placing multiple containers of coffee grounds in different areas.
3. Avoid Direct Contact with Food: Make sure the container is not directly touching any food items. This will prevent the coffee grounds from absorbing any flavors from your food.
4. Monitor and Replace: The coffee grounds will gradually lose their effectiveness as they absorb odors. I recommend replacing them every 2-3 weeks, or sooner if you notice the odors returning.
Troubleshooting and Tips
Even with the best instructions, sometimes things don’t go exactly as planned. Here are a few troubleshooting tips and extra advice to help you get the most out of your coffee ground fridge deodorizer:
* Mold Growth: If you notice any mold growing on the coffee grounds, discard them immediately and start over with completely dry grounds. This is why drying the grounds thoroughly is so important!
* Weak Odor Absorption: If the coffee grounds don’t seem to be working, try adding baking soda or using a larger container with more grounds. Also, make sure you’re replacing the grounds regularly.
* Persistent Odors: If you have a particularly stubborn odor, it may be necessary to clean your fridge thoroughly before using the coffee ground deodorizer. Remove all food items, wipe down the shelves and walls with a solution of baking soda and water, and then place the deodorizer inside.
* Preventative Measures: To prevent odors from building up in the first place, try to clean out your fridge regularly and discard any expired or spoiled food.
* Experiment with Different Containers: Don’t be afraid to experiment with different containers to see what works best for you. You might find that a particular type of container allows for better airflow and odor absorption.
* Coffee Ground Variety: While any type of coffee grounds will work, some people find that darker roasts are more effective at absorbing odors.
* Don’t Forget the Freezer: This method also works in the freezer! Just follow the same steps, ensuring the grounds are completely dry before placing them in the freezer.
* Beyond the Fridge: This deodorizing trick isn’t just for the fridge! You can also use coffee grounds to deodorize other areas of your home, such as your car, closet, or even your shoes.
Why This Works: The Science Behind the Smell
You might be wondering, “Why coffee grounds?” Well, coffee grounds are porous and contain nitrogen, which helps to neutralize odors. The porous nature of the grounds allows them to absorb and trap odor molecules, while the nitrogen helps to break them down. It’s a natural and effective way to combat those unwanted fridge smells.
So there you have it! A simple, effective, and eco-friendly way to keep your fridge smelling fresh and clean. Give it a try, and say goodbye to those funky fridge odors for good! I hope you found this helpful, and happy deodorizing!
Conclusion
So, there you have it! This simple, yet incredibly effective, DIY trick using coffee grounds to eliminate fridge odor is a game-changer for any home. We’ve explored how the natural properties of coffee, specifically its ability to absorb and neutralize smells, can transform your refrigerator from a smelly storage space into a fresh and inviting haven for your food. No more opening the fridge door to be greeted by an unpleasant mix of lingering aromas!
Why is this a must-try? Because it’s cost-effective, eco-friendly, and remarkably easy. You’re likely already brewing coffee, so you’re essentially repurposing a byproduct that would otherwise end up in the trash. Think about the money you’ll save on expensive commercial odor absorbers, and the positive impact you’ll have on the environment by reducing waste. Plus, the subtle coffee aroma is far more pleasant than the chemical scents often found in store-bought alternatives.
Beyond the basic method, there are several variations you can experiment with to tailor this trick to your specific needs and preferences. For instance, if you’re particularly sensitive to the smell of coffee, try using a coarser grind, as it tends to release less aroma. Alternatively, you can add a few drops of essential oils, such as lemon or lavender, to the coffee grounds for an extra boost of freshness. Just be sure to use food-safe essential oils if you’re concerned about potential contamination. Another variation is to use activated charcoal alongside the coffee grounds for enhanced odor absorption. Activated charcoal is known for its porous structure, which allows it to trap even more odor molecules.
Consider the container you use as well. While a simple bowl or jar works perfectly fine, you might want to explore options that allow for better airflow. A container with a mesh lid, or even a repurposed spice shaker, can help the coffee grounds work more efficiently. You can also create multiple smaller containers and strategically place them throughout your fridge, focusing on areas where odors tend to accumulate, such as near the vegetable crisper or the meat drawer.
Don’t underestimate the power of this simple solution. It’s a testament to the fact that sometimes the most effective remedies are the ones that are readily available and naturally derived.
We wholeheartedly encourage you to give this DIY coffee grounds fridge odor eliminator a try. It’s a small change that can make a big difference in the overall freshness and cleanliness of your kitchen. Once you’ve experienced the benefits firsthand, we’re confident that you’ll be hooked!
But don’t just take our word for it. We’d love to hear about your experiences! Share your results, variations, and any tips you discover in the comments section below. Let’s create a community of fridge-odor-fighting experts and help each other keep our kitchens smelling their best! What kind of coffee grounds did you use? How long did it take to notice a difference? Did you try any variations? Your feedback is invaluable and will help others discover the magic of using coffee grounds to banish those unwanted fridge smells. Let us know if this DIY coffee grounds fridge odor trick worked for you!
Frequently Asked Questions (FAQ)
1. What kind of coffee grounds should I use?
You can use any type of coffee grounds – regular, decaf, light roast, dark roast – it doesn’t really matter. The key is that they are used. The process of brewing the coffee activates the odor-absorbing properties of the grounds. However, some people find that darker roasts have a slightly stronger aroma, which can be beneficial if you want a subtle coffee scent in your fridge. Experiment and see what works best for you. Don’t throw away those expensive gourmet coffee grounds, but the cheap stuff works just as well for odor absorption.
2. How long will the coffee grounds last in the fridge?
Typically, the coffee grounds will remain effective for about two weeks to a month. However, this can vary depending on the severity of the odors in your fridge and the humidity levels. Keep an eye on the grounds; if they start to look moldy or develop an unpleasant smell themselves, it’s time to replace them. A good rule of thumb is to replace them every two to three weeks for optimal freshness.
3. Will the coffee grounds make my fridge smell like coffee?
Yes, initially, there might be a subtle coffee aroma, especially if you’re using freshly brewed grounds. However, this scent usually dissipates within a few days, leaving your fridge smelling neutral and fresh. If you’re concerned about the coffee smell, try using a coarser grind or placing the container further away from your food. As mentioned earlier, you can also add a few drops of essential oils to mask the coffee scent if desired.
4. Can I reuse the coffee grounds after they’ve been in the fridge?
While the coffee grounds will have absorbed odors from your fridge, they can still be used for other purposes. You can add them to your compost pile, use them as fertilizer for acid-loving plants (like azaleas and blueberries), or even use them as a natural scrub for cleaning tough stains. Just be sure to let them dry out completely before storing them to prevent mold growth.
5. What if I don’t drink coffee? Can I still use this trick?
Absolutely! You don’t have to be a coffee drinker to benefit from this DIY trick. You can ask a friend or neighbor to save their used coffee grounds for you, or you can even purchase a small bag of pre-ground coffee specifically for this purpose. Alternatively, you can explore other natural odor absorbers, such as baking soda or activated charcoal.
6. My fridge is really smelly. Will this trick be strong enough?
For particularly strong odors, you might need to take a multi-pronged approach. Start by thoroughly cleaning your fridge, removing any spoiled food and wiping down all surfaces with a mixture of baking soda and water. Then, place multiple containers of coffee grounds throughout the fridge, focusing on areas where the odors are most concentrated. You can also try combining the coffee grounds with other odor absorbers, such as baking soda or activated charcoal. If the odors persist, you might need to consider professional fridge cleaning services.
7. Is it safe to put coffee grounds near my food?
Yes, it’s generally safe to put coffee grounds near your food, as long as you take a few precautions. Make sure the container you’re using is clean and food-safe, and avoid placing the coffee grounds directly on top of your food. If you’re concerned about potential contamination, you can use a container with a lid or cover the coffee grounds with a layer of cheesecloth.
8. Can I use this trick in other places besides the fridge?
Yes, the odor-absorbing properties of coffee grounds can be beneficial in other areas of your home as well. You can use them to eliminate odors in your car, closet, or even your shoes. Simply place a container of coffee grounds in the affected area and let them work their magic.
9. How do coffee grounds actually absorb odors?
Coffee grounds are porous and contain nitrogen compounds that help neutralize odors. The brewing process further enhances these properties, making used coffee grounds an effective and natural odor absorber. Think of them as tiny sponges that soak up the bad smells in your fridge.
10. What are some other tips for keeping my fridge smelling fresh?
In addition to using coffee grounds, there are several other things you can do to keep your fridge smelling fresh. Regularly clean your fridge, removing any spoiled food and wiping down all surfaces. Store food properly in airtight containers to prevent odors from spreading. Place an open box of baking soda in the fridge to absorb odors. And finally, avoid storing strong-smelling foods, such as onions and garlic, in the fridge unless they are properly sealed.


Leave a Comment