

Easy Shower Cleaning Hack: Are you tired of battling stubborn soap scum and mildew in your shower? I know I am! It feels like no matter how hard I scrub, those grimy stains just keep coming back. But what if I told you there’s a simple, almost effortless way to keep your shower sparkling clean, using ingredients you probably already have at home?
For centuries, people have sought out ways to simplify household chores. While our ancestors might have relied on lye and elbow grease, we’re fortunate to live in an age of clever DIY solutions. This easy shower cleaning hack isn’t just about saving time; it’s about reclaiming your weekends and enjoying a bathroom that feels fresh and inviting.
Let’s face it, cleaning the shower is nobody’s favorite task. It’s often put off until it becomes a major undertaking. But with this simple trick, you can prevent the build-up of grime and keep your shower looking its best with minimal effort. Say goodbye to harsh chemicals and endless scrubbing, and hello to a sparkling clean shower, the easy way!
Easy Shower Cleaning Hack: Sparkling Clean with Minimal Effort!
Okay, let’s be honest, cleaning the shower is nobody’s favorite chore. The soap scum, the mildew, the hard water stains… it’s a battle! But what if I told you there’s a super easy way to keep your shower sparkling clean with minimal scrubbing? This DIY hack uses ingredients you probably already have at home and will save you tons of time and effort. Get ready to say goodbye to endless scrubbing and hello to a gleaming shower!
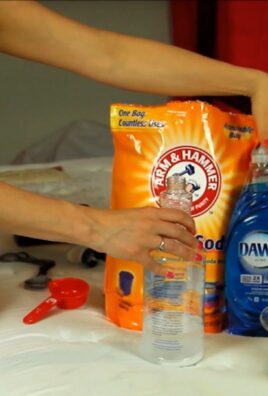
What You’ll Need: The Magic Ingredients
Before we dive in, let’s gather our supplies. This is a pretty simple recipe, so you won’t need much!
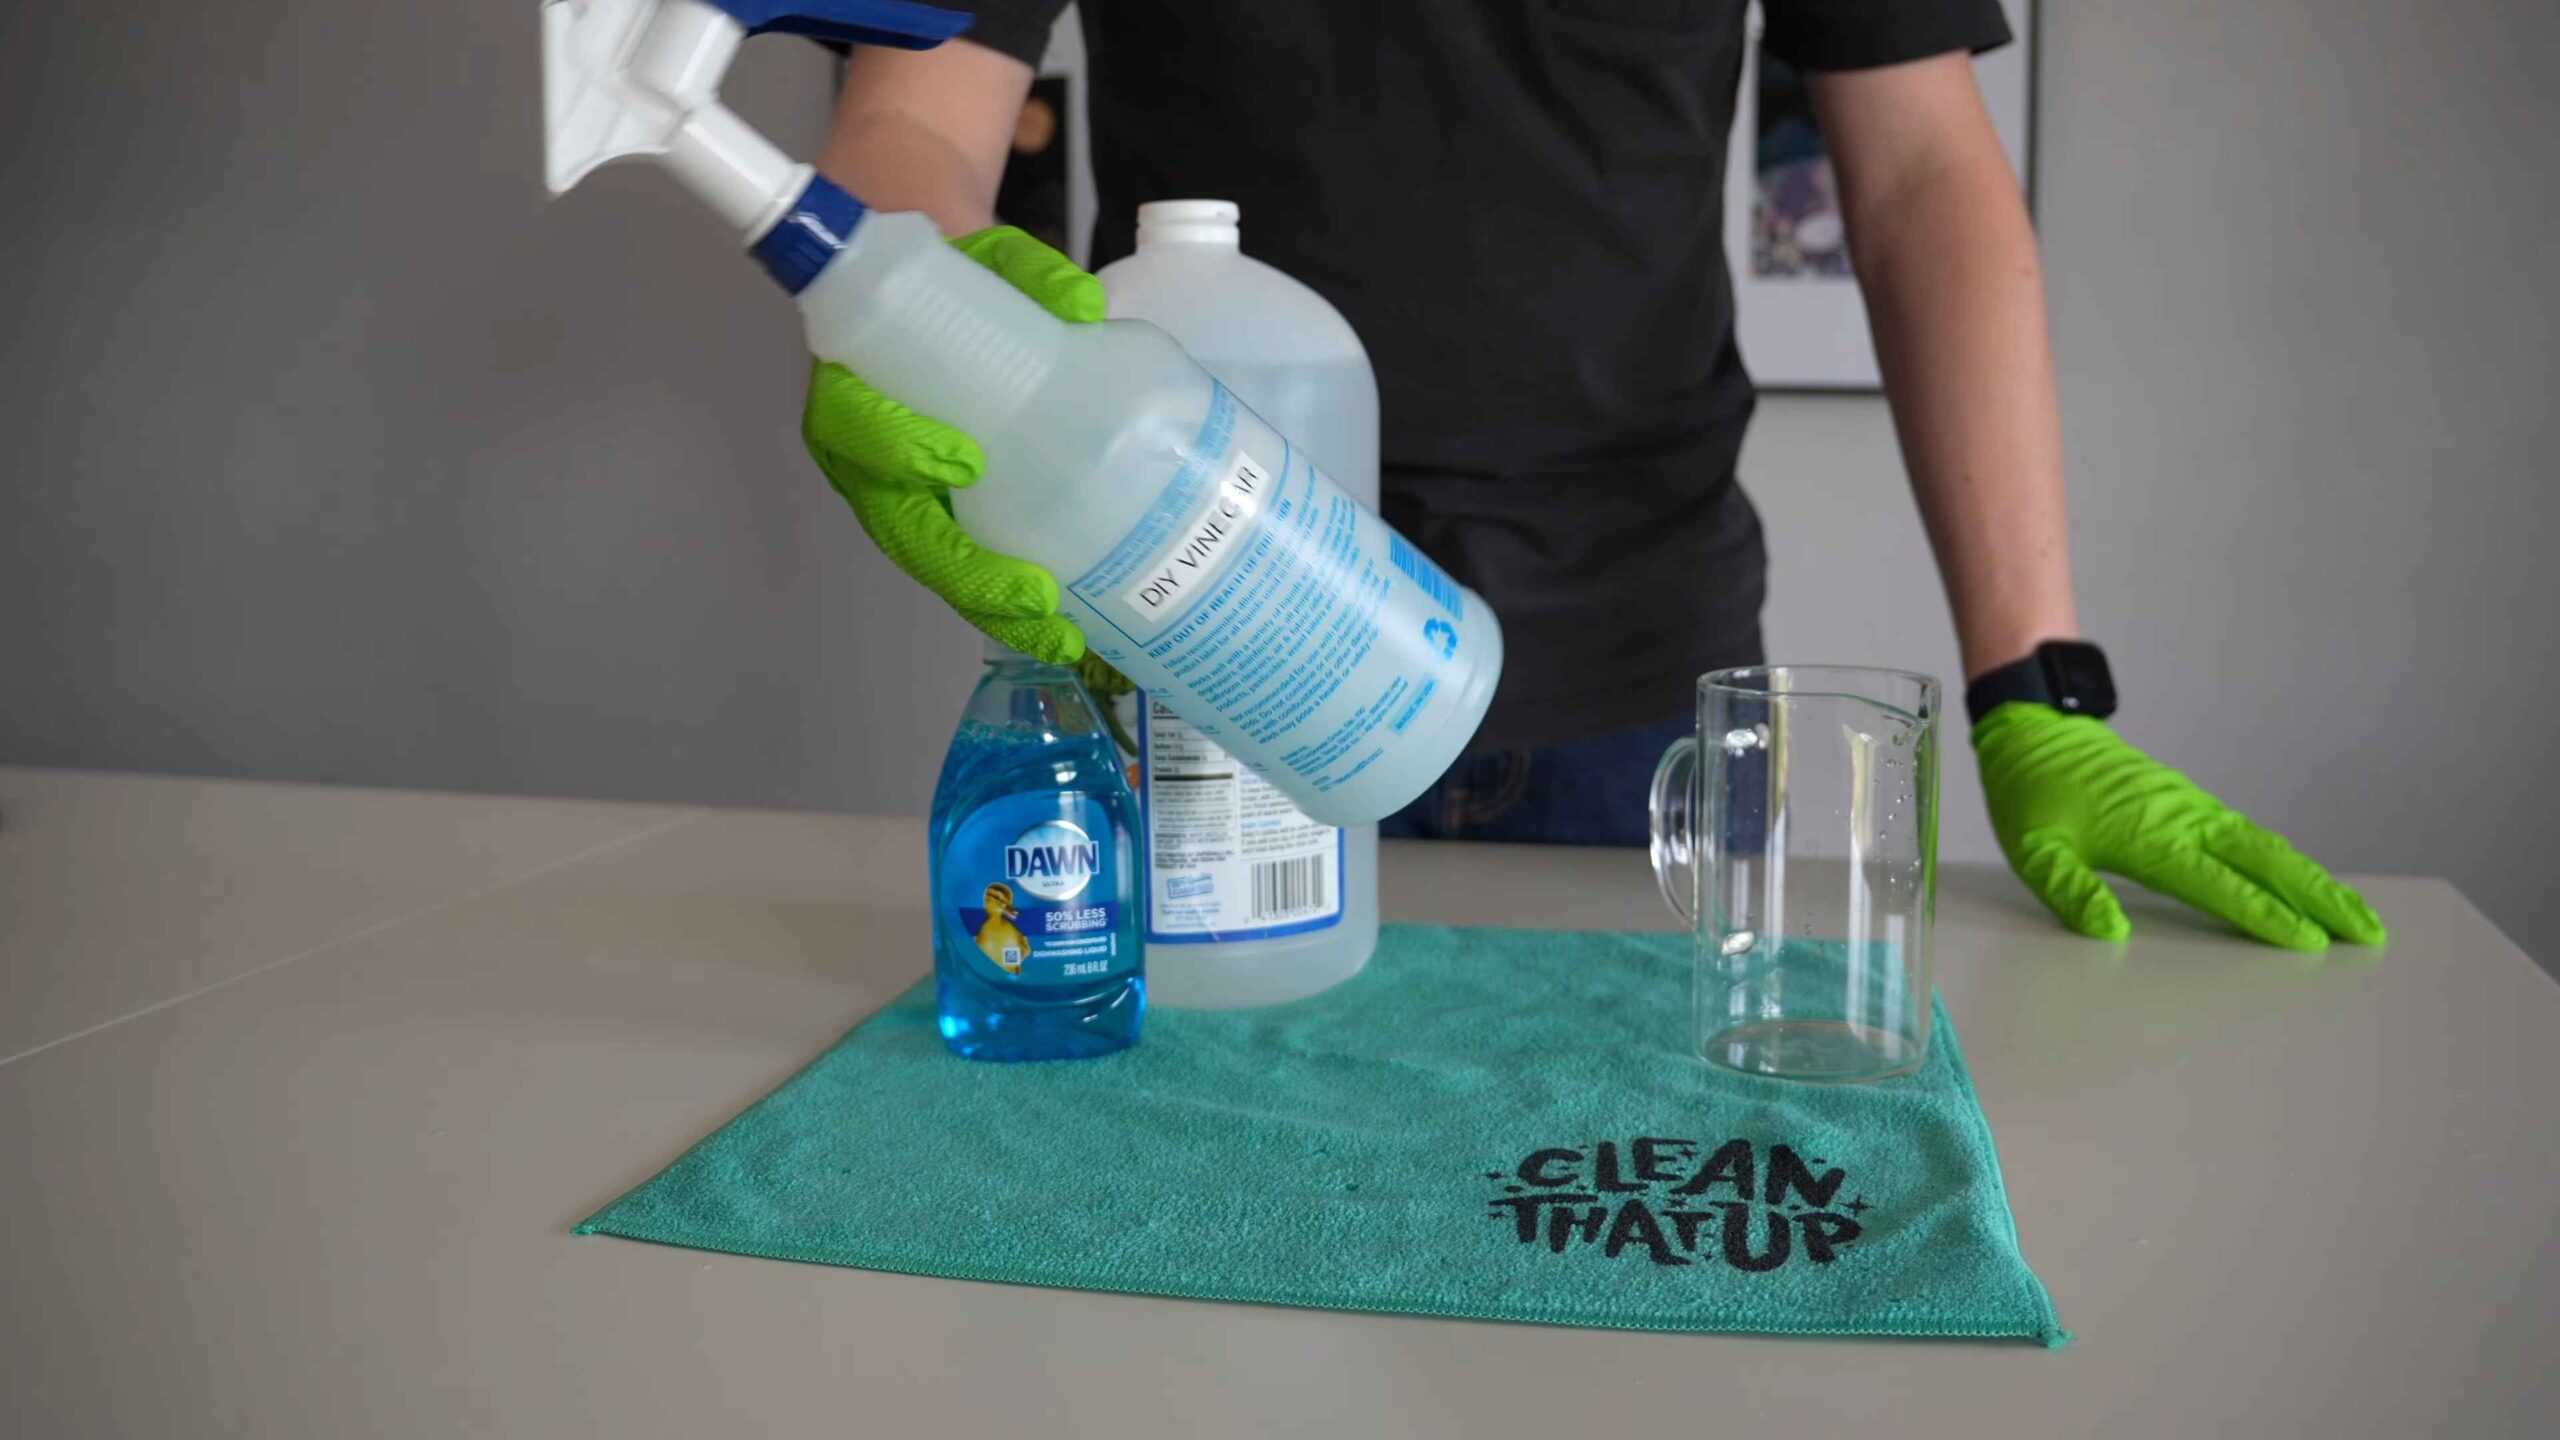
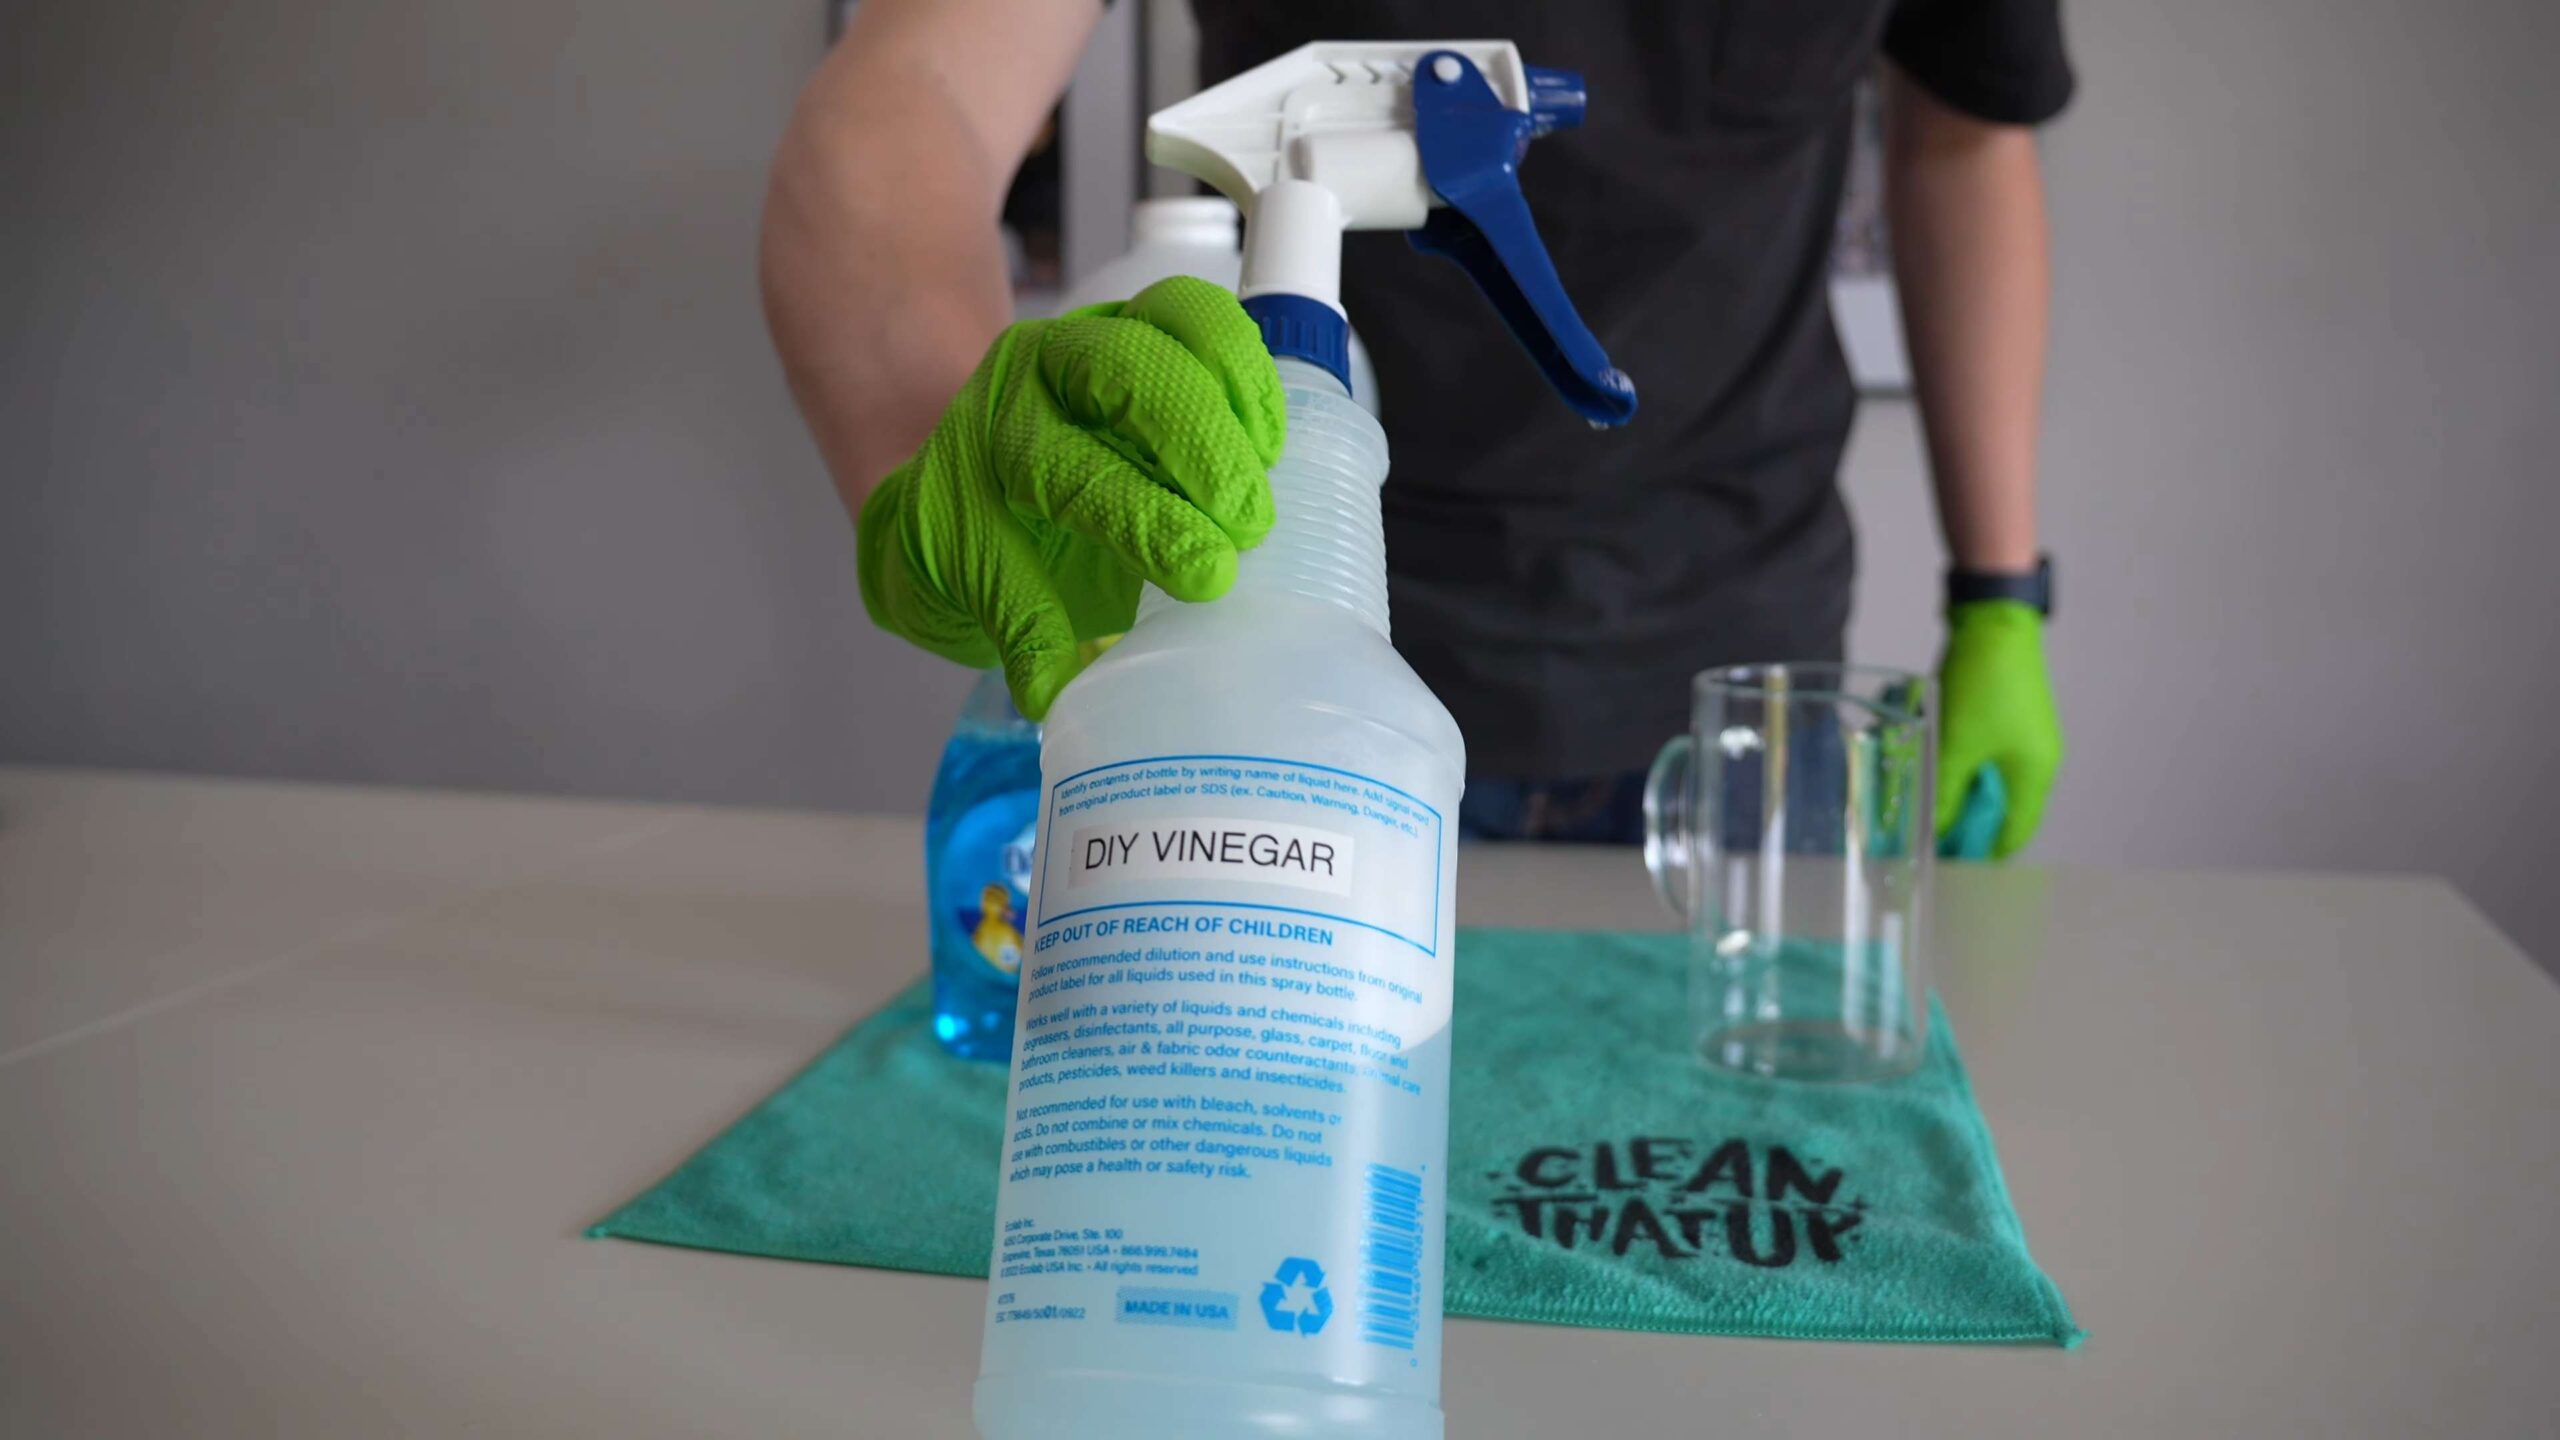
* **Spray Bottle:** An empty spray bottle is essential for applying our cleaning solution. Make sure it’s clean and has a good spray nozzle.
* **White Vinegar:** This is our main cleaning agent. Vinegar is a natural disinfectant and does a fantastic job of dissolving soap scum and hard water stains.
* **Dish Soap:** A little dish soap helps to cut through grease and grime, boosting the cleaning power of the vinegar. I recommend using a clear dish soap to avoid any potential staining, especially on lighter-colored tiles.
* **Microfiber Cloth:** Microfiber cloths are perfect for wiping down surfaces without leaving streaks or lint.
* **Optional: Essential Oils:** If you’re not a fan of the vinegar smell, you can add a few drops of your favorite essential oil to the mixture. Lavender, tea tree, or eucalyptus are all great choices for a fresh, clean scent.
* **Optional: Baking Soda:** For extra stubborn stains, baking soda can be used as a gentle abrasive.
Mixing the Cleaning Solution: The Secret Formula
Now for the fun part – creating our shower-cleaning potion! This is where the magic happens.
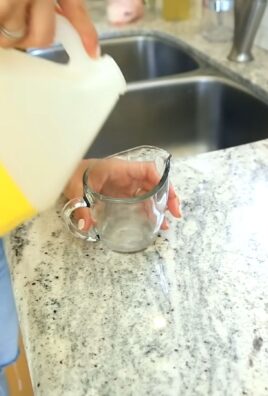
1. **Heat the Vinegar:** Pour about 1 cup of white vinegar into a microwave-safe container. Heat it in the microwave for about 2 minutes, or until it’s hot but not boiling. Heating the vinegar helps it to work even better at dissolving soap scum.
2. **Combine Vinegar and Dish Soap:** Carefully pour the hot vinegar into your spray bottle. Then, add about 1 cup of dish soap to the spray bottle.
3. **Optional: Add Essential Oils:** If you’re using essential oils, add 10-20 drops to the spray bottle.
4. **Gently Mix:** Gently swirl the spray bottle to combine the ingredients. Avoid shaking vigorously, as this can create excessive bubbles.
5. **Dilute (If Necessary):** If you have sensitive surfaces in your shower (like natural stone), you may want to dilute the mixture with a bit of water. Start with a 1:1 ratio of solution to water.
Applying the Solution: The Spray and Wait Method
This is where the “minimal effort” part comes in. We’re going to let the cleaning solution do most of the work for us!
1. **Spray the Shower:** Thoroughly spray the entire shower area with the cleaning solution. Make sure to cover all surfaces, including the walls, floor, shower door or curtain, and fixtures.
2. **Let it Sit:** This is the key! Let the solution sit on the surfaces for at least 30 minutes. For really tough stains, you can let it sit for up to a few hours. The longer it sits, the more time the vinegar has to break down the soap scum and hard water stains.
3. **Optional: Baking Soda Scrub:** If you have any particularly stubborn stains, sprinkle a little baking soda on the area and gently scrub with a sponge or cloth.
4. **Rinse Thoroughly:** After the solution has had time to work its magic, rinse the entire shower area thoroughly with hot water. Make sure to remove all traces of the cleaning solution.
5. **Wipe Down:** Use a microfiber cloth to wipe down all surfaces. This will help to prevent water spots and leave your shower sparkling clean.
Maintaining Your Sparkling Shower: Prevention is Key
Now that your shower is clean, let’s talk about how to keep it that way! A little bit of maintenance can go a long way in preventing soap scum and mildew buildup.
* **Daily Spray:** After each shower, spray the walls and door with a daily shower cleaner. You can use a commercial product or make your own by diluting the vinegar and dish soap solution with water.
* **Ventilate:** Always make sure to ventilate your bathroom after showering. Open a window or turn on the exhaust fan to help remove moisture and prevent mildew growth.
* **Squeegee:** Use a squeegee to wipe down the shower walls and door after each shower. This will remove excess water and prevent water spots.
* **Wash Shower Curtain/Liner:** Regularly wash your shower curtain or liner to remove soap scum and mildew. Most shower curtains can be machine washed on a gentle cycle.
* **Clean Regularly:** Even with these preventative measures, it’s still important to clean your shower regularly. I recommend doing a deep clean with the vinegar and dish soap solution every 1-2 weeks.
Dealing with Stubborn Stains: When Extra Help is Needed
Sometimes, despite our best efforts, we encounter stubborn stains that just won’t budge. Here are a few tips for dealing with those tricky spots:
* **Hard Water Stains:** For hard water stains, try using a paste of baking soda and water. Apply the paste to the stain, let it sit for a few minutes, and then scrub gently.
* **Mildew:** For mildew, try using a solution of bleach and water. Mix 1 part bleach with 10 parts water and apply to the affected area. Let it sit for a few minutes, then rinse thoroughly. **Important: Always wear gloves and eye protection when working with bleach, and make sure to ventilate the area well.**
* **Rust Stains:** For rust stains, try using a commercial rust remover or a paste of lemon juice and salt. Apply the paste to the stain, let it sit for a few minutes, and then scrub gently.
* **Magic Eraser:** A magic eraser can be a lifesaver for removing stubborn stains. Just wet the eraser and gently scrub the affected area.
Safety First: Important Precautions
Before you start cleaning, it’s important to take a few safety precautions:
* **Ventilation:** Always make sure to ventilate your bathroom well when cleaning. Open a window or turn on the exhaust fan.
* **Gloves:** Wear gloves to protect your hands from the cleaning solution.
* **Eye Protection:** Wear eye protection to prevent the cleaning solution from splashing into your eyes.
* **Test in an Inconspicuous Area:** Before applying the cleaning solution to the entire shower, test it in an inconspicuous area to make sure it doesn’t damage the surface.
* **Never Mix Bleach and Vinegar:** Mixing bleach and vinegar can create toxic fumes. Never mix these two ingredients together.
* **Keep Out of Reach of Children and Pets:** Store the cleaning solution out of reach of children and pets.
Troubleshooting: Common Issues and Solutions
Sometimes, things don’t go exactly as planned. Here are a few common issues you might encounter and how to solve them:
* **Vinegar Smell:** If you’re not a fan of the vinegar smell, try adding more essential oils to the cleaning solution. You can also open a window or turn on the exhaust fan to help dissipate the smell.
* **Streaky Surfaces:** If you’re getting streaks on your shower surfaces, make sure you’re using a clean microfiber cloth to wipe them down. You can also try diluting the cleaning solution with a bit of water.
* **Stains Not Coming Off:** If you’re having trouble removing stubborn stains, try letting the cleaning solution sit for a longer period of time. You can also try using a more abrasive cleaner, like baking soda or a magic eraser.
* **Solution Not Spraying Properly:** If your spray bottle isn’t spraying properly, make sure the nozzle is clean and that the bottle isn’t clogged. You may also need to dilute the cleaning solution with a bit of water.
Alternative Recipes: Mixing it Up
While the vinegar and dish soap solution is my go-to, there are other variations you can try:
* **Baking Soda Paste:** Mix baking soda with a little water to form a paste. Apply the paste to stained areas and let it sit for a few minutes before scrubbing.
* **Lemon Juice:** Lemon juice is a natural acid that can help to dissolve soap scum and hard water stains. Simply squeeze lemon juice onto the affected areas and let it sit for a few minutes before rinsing.
* **Hydrogen Peroxide:** Hydrogen peroxide is a mild disinfectant that can help to kill mildew. Spray hydrogen peroxide onto the affected areas and let it sit for a few minutes before rinsing.
Conclusion: Enjoy Your Sparkling Clean Shower!
So there you have it! A super easy and effective way to keep your shower sparkling clean with minimal effort. By following these tips and tricks, you can say goodbye to endless scrubbing and hello to a gleaming shower. Happy cleaning!
Conclusion
So, there you have it! This easy shower cleaning hack isn’t just a shortcut; it’s a game-changer for anyone who wants a sparkling clean shower without the harsh chemicals and back-breaking scrubbing. We’ve all been there, staring at soap scum and mildew, dreading the task ahead. But with this simple DIY solution, those days are over.
Why is this a must-try? Because it’s effective, affordable, and uses ingredients you likely already have in your home. No more expensive, store-bought cleaners filled with questionable chemicals. This method is gentle on your shower surfaces, tough on grime, and better for the environment. Plus, the satisfaction of creating your own cleaning solution and seeing it work wonders is incredibly rewarding.
But the best part? It’s adaptable! Feel free to experiment with variations to suit your specific needs and preferences. For example, if you have particularly stubborn hard water stains, consider adding a bit more vinegar to the solution. Or, if you prefer a different scent, swap out the essential oil for your favorite fragrance. Lavender, eucalyptus, and tea tree oil are all excellent choices for their antibacterial properties and refreshing aromas. You can even infuse your vinegar with citrus peels for a natural, zesty scent. Simply add the peels to a jar of vinegar and let it sit for a week or two before straining and using.
Another variation involves the application method. While the spray bottle is convenient, you can also use a sponge or microfiber cloth to apply the solution directly to problem areas. For grout, a small brush can be particularly effective in reaching those hard-to-clean spaces. Remember to always test the solution on a small, inconspicuous area first to ensure it doesn’t damage your shower surfaces.
We truly believe this easy shower cleaning hack will revolutionize your cleaning routine. It’s a simple, effective, and eco-friendly way to keep your shower sparkling clean and fresh. So, ditch the harsh chemicals and embrace this DIY solution.
Now, it’s your turn! We encourage you to try this easy shower cleaning hack and see the amazing results for yourself. Don’t just take our word for it – experience the difference firsthand. And most importantly, share your experience with us! Let us know what variations you tried, what scents you used, and how well it worked for you. Your feedback is invaluable and helps us refine and improve this already fantastic cleaning method. Share your tips and tricks in the comments below, and let’s create a community of sparkling clean showers! We can’t wait to hear your success stories and see how this easy shower cleaning hack transforms your cleaning routine.
Frequently Asked Questions (FAQ)
1. What exactly is this “easy shower cleaning hack” and what makes it so easy?
This easy shower cleaning hack refers to a homemade cleaning solution made with common household ingredients like vinegar, dish soap, and water, often with the addition of essential oils for fragrance and added cleaning power. What makes it easy is the simplicity of the recipe and the application process. You simply mix the ingredients, spray the solution onto your shower surfaces, let it sit for a bit, and then rinse. No harsh scrubbing or complicated steps are required. It’s a quick, effective, and affordable way to keep your shower clean.
2. What are the exact proportions of vinegar, dish soap, and water I should use for this cleaning solution?
A good starting point is a 1:1 ratio of vinegar and dish soap, diluted with water. For example, you could use 1 cup of vinegar, 1 cup of dish soap, and 1 cup of water. However, you can adjust these proportions based on the severity of the soap scum and mildew in your shower. For tougher stains, you might want to increase the amount of vinegar. Remember to always test the solution on a small, inconspicuous area first.
3. Can I use any type of vinegar for this cleaning hack?
White distilled vinegar is generally recommended for cleaning purposes due to its acidity and lack of color, which minimizes the risk of staining. However, you can use other types of vinegar, such as apple cider vinegar, but be aware that they may have a stronger odor and could potentially leave a slight residue. White distilled vinegar is the most effective and safest option for most shower surfaces.
4. What kind of dish soap should I use? Does it matter?
While most dish soaps will work, it’s best to use a grease-cutting dish soap for optimal cleaning power. Avoid using dish soaps that contain moisturizers or lotions, as these can leave a residue on your shower surfaces. A clear, basic dish soap is usually the best choice.
5. Is this cleaning solution safe for all shower surfaces?
While this solution is generally safe for most shower surfaces, it’s always a good idea to test it on a small, inconspicuous area first, especially if you have natural stone or delicate surfaces. Vinegar can be acidic and may damage certain materials. Avoid using this solution on marble, granite, or other porous stones without testing it first. If you’re unsure, consult the manufacturer’s recommendations for your shower surfaces.
6. How often should I use this cleaning hack to keep my shower clean?
The frequency of cleaning depends on how often you use your shower and how quickly soap scum and mildew build up. As a general guideline, cleaning your shower once a week with this solution should be sufficient to keep it clean and prevent the buildup of grime. However, if you notice soap scum or mildew appearing more frequently, you may need to clean it more often.
7. How long should I let the cleaning solution sit on the shower surfaces before rinsing?
Allow the cleaning solution to sit on the shower surfaces for at least 15-20 minutes before rinsing. This allows the vinegar and dish soap to penetrate and loosen the soap scum and mildew. For tougher stains, you can let it sit for up to an hour. Just be sure to keep the area well-ventilated.
8. What if I don’t have essential oils? Can I still use this cleaning hack?
Yes, you can definitely still use this cleaning hack without essential oils. The vinegar and dish soap are the primary cleaning agents. Essential oils are added for their fragrance and potential antibacterial properties, but they are not essential for the solution to be effective. If you don’t have essential oils, simply omit them from the recipe.
9. My shower has really tough soap scum and mildew. Will this cleaning hack be strong enough to remove it?
This cleaning hack can be effective for removing tough soap scum and mildew, but it may require some extra effort. For particularly stubborn stains, try increasing the amount of vinegar in the solution or letting it sit for a longer period of time. You can also use a scrub brush or sponge to agitate the solution and help loosen the grime. In some cases, you may need to repeat the cleaning process a few times to completely remove the buildup.
10. Can I use this cleaning solution on my shower door?
Yes, this cleaning solution is safe to use on most shower doors, including glass and acrylic. However, as with all shower surfaces, it’s always a good idea to test it on a small, inconspicuous area first. Apply the solution to the shower door, let it sit for a few minutes, and then wipe it clean with a microfiber cloth. For streak-free results, you can use a squeegee to remove any excess water.
11. Is there anything else I can add to this cleaning solution to make it even more effective?
Some people add baking soda to the cleaning solution for extra scrubbing power. Baking soda is a mild abrasive that can help loosen stubborn grime. You can also add a few drops of hydrogen peroxide for its bleaching and disinfecting properties. However, be careful when mixing hydrogen peroxide with other cleaning agents, as it can create harmful fumes. Always use caution and ensure proper ventilation.
12. How do I store the leftover cleaning solution?
Store the leftover cleaning solution in a labeled spray bottle in a cool, dark place. It’s best to use the solution within a few months, as the ingredients may separate over time. Before each use, shake the bottle well to ensure that the ingredients are properly mixed.
13. What if I don’t like the smell of vinegar?
The smell of vinegar can be strong, but it usually dissipates quickly after rinsing. To help mask the vinegar smell, you can add essential oils to the cleaning solution. Citrus scents like lemon or orange are particularly effective at neutralizing the vinegar odor. You can also infuse your vinegar with citrus peels for a natural, zesty scent.
14. Can I use this cleaning hack on other bathroom surfaces besides the shower?
Yes, this cleaning hack can be used on other bathroom surfaces, such as sinks, toilets, and countertops. However, be sure to test it on a small, inconspicuous area first, especially if you have delicate surfaces. Avoid using this solution on marble or granite countertops without testing it first.
15. What are the benefits of using this DIY shower cleaning hack compared to store-bought cleaners?
There are several benefits to using this DIY shower cleaning hack compared to store-bought cleaners. First, it’s more affordable, as you’re using common household ingredients that you likely already have on hand. Second, it’s more eco-friendly, as you’re avoiding the harsh chemicals and plastic packaging found in many store-bought cleaners. Third, it’s
Leave a Comment