

Acai Berry Planting Guide: Unlock the secrets to growing your own superfood oasis right in your backyard! Have you ever dreamed of harvesting those antioxidant-rich berries straight from your own garden? I know I have! For centuries, the acai berry has been a vital part of the Amazonian diet and culture, revered for its health benefits and unique flavor. Now, you can bring a piece of that vibrant tradition to your home.
But let’s be honest, navigating the world of home gardening can sometimes feel overwhelming. That’s where this DIY guide comes in. I’m going to walk you through everything you need to know, from selecting the perfect spot for your acai palm to nurturing it for a bountiful harvest. With the right knowledge and a little bit of effort, you can enjoy fresh, delicious acai berries without ever leaving your property. This Acai Berry Planting Guide will empower you to cultivate your own thriving acai berry plant, ensuring a sustainable source of this amazing superfood. Let’s get started!
Growing Your Own Acai Berries: A DIY Guide
Okay, so you want to grow your own acai berries? Awesome! It’s a bit of a journey, especially if you don’t live in the Amazon rainforest, but totally doable with a little patience and the right know-how. I’m going to walk you through everything you need to know, from choosing the right seeds or seedlings to harvesting those delicious, antioxidant-packed berries. Let’s get started!
Choosing Your Acai Adventure: Seeds vs. Seedlings
First things first, you need to decide how you want to start your acai journey. You have two main options: growing from seeds or starting with seedlings. Each has its pros and cons.
* **Seeds:** Growing from seeds is definitely the more challenging (and time-consuming) route. It requires more patience and a higher likelihood of failure. However, it’s also the most rewarding, in my opinion! You get to witness the entire life cycle of the plant. Plus, it’s generally cheaper.
* **Seedlings:** Starting with seedlings is much faster and easier. You’ll skip the germination process and have a head start on growing your acai palm. However, seedlings are more expensive, and you need to make sure you’re getting them from a reputable source to ensure they’re healthy and disease-free.
For this guide, I’ll focus on growing from seeds, but I’ll also give you some tips for working with seedlings if that’s the route you choose.
Sourcing and Preparing Acai Seeds
Finding acai seeds can be a bit tricky, depending on where you live. You might be able to find them online from specialty seed suppliers. Make sure you’re buying from a reputable source that guarantees the seeds are viable.
Once you have your seeds, you’ll need to prepare them for germination. Acai seeds have a hard outer shell that can make it difficult for them to sprout. Here’s what I do:
1. **Scarification:** This involves gently scratching or nicking the seed coat to allow water to penetrate. You can use sandpaper, a nail file, or even a sharp knife. Be careful not to damage the inside of the seed! Just a small nick is enough.
2. **Soaking:** After scarification, soak the seeds in warm water for 24-48 hours. This will further soften the seed coat and help to initiate germination. Change the water every 12 hours to prevent the growth of mold or bacteria.
Germinating Your Acai Seeds
Now comes the fun part: germinating your acai seeds! Here’s my preferred method:
1. **Prepare Your Germination Medium:** I like to use a mix of equal parts peat moss and perlite. This provides good drainage and aeration, which are essential for successful germination. You can also use a commercial seed starting mix.
2. **Sow the Seeds:** Fill small pots or seedling trays with your germination medium. Moisten the medium thoroughly, but don’t let it get soggy. Plant the scarified and soaked seeds about 1/2 inch deep.
3. **Create a Humid Environment:** Acai seeds need a warm, humid environment to germinate. You can create this by covering the pots or trays with plastic wrap or a humidity dome.
4. **Provide Warmth:** Place the pots or trays in a warm location, ideally between 80-85°F (27-29°C). You can use a heat mat to maintain a consistent temperature.
5. **Be Patient:** Germination can take anywhere from a few weeks to several months, so don’t get discouraged if you don’t see sprouts right away. Keep the medium moist and the environment humid, and eventually, you should see some tiny green shoots emerging.
Transplanting Your Acai Seedlings
Once your seedlings have developed a few true leaves (the leaves that look like miniature versions of the adult leaves), it’s time to transplant them into larger pots.
1. **Choose the Right Pot:** Select a pot that’s at least 6 inches in diameter. Acai palms have deep roots, so a taller pot is better.
2. **Prepare Your Potting Mix:** Use a well-draining potting mix that’s rich in organic matter. A mix of equal parts potting soil, compost, and perlite works well.
3. **Gently Remove the Seedling:** Carefully remove the seedling from its germination pot, being careful not to damage the roots.
4. **Plant the Seedling:** Place the seedling in the center of the new pot and fill in around it with potting mix. Gently firm the soil around the base of the seedling.
5. **Water Thoroughly:** Water the seedling thoroughly after transplanting.
Caring for Your Acai Palms
Now that your acai palms are growing in their own pots, it’s time to provide them with the care they need to thrive.
* **Light:** Acai palms need plenty of bright, indirect light. Avoid direct sunlight, which can scorch the leaves. If you’re growing your acai palm indoors, place it near a sunny window or use a grow light.
* **Watering:** Water your acai palm regularly, keeping the soil consistently moist but not soggy. Allow the top inch of soil to dry out between waterings.
* **Humidity:** Acai palms thrive in humid environments. If you live in a dry climate, you may need to increase the humidity around your plant by misting it regularly, using a humidifier, or placing it on a pebble tray filled with water.
* **Fertilizing:** Fertilize your acai palm every month during the growing season (spring and summer) with a balanced liquid fertilizer.
* **Temperature:** Acai palms prefer warm temperatures, ideally between 70-85°F (21-29°C). Avoid exposing them to temperatures below 50°F (10°C).
Growing Acai Palms Outdoors (If You’re Lucky!)
If you live in a tropical or subtropical climate, you can grow your acai palms outdoors. Here are some things to keep in mind:
1. **Choose the Right Location:** Select a location that receives plenty of sunlight but is sheltered from strong winds. Acai palms prefer well-draining soil that’s rich in organic matter.
2. **Prepare the Soil:** Amend the soil with compost or other organic matter to improve drainage and fertility.
3. **Planting:** Dig a hole that’s twice as wide as the root ball of your acai palm and just as deep. Gently remove the palm from its pot and place it in the hole. Backfill with soil and water thoroughly.
4. **Ongoing Care:** Water your acai palm regularly, especially during dry periods. Fertilize it every month during the growing season. Protect it from frost or freezing temperatures.
Dealing with Pests and Diseases
Acai palms are generally resistant to pests and diseases, but they can occasionally be affected by problems like spider mites, scale, or fungal infections.
* **Spider Mites:** These tiny pests can cause yellowing and stippling on the leaves. You can control them by spraying your acai palm with insecticidal soap or neem oil.
* **Scale:** These small, armored insects can suck the sap from your acai palm, causing it to weaken and decline. You can remove them by hand or spray your plant with horticultural oil.
* **Fungal Infections:** These can cause spots or lesions on the leaves. You can prevent fungal infections by providing good air circulation and avoiding overwatering. If your acai palm does develop a fungal infection, you can treat it with a fungicide.
Harvesting Your Acai Berries
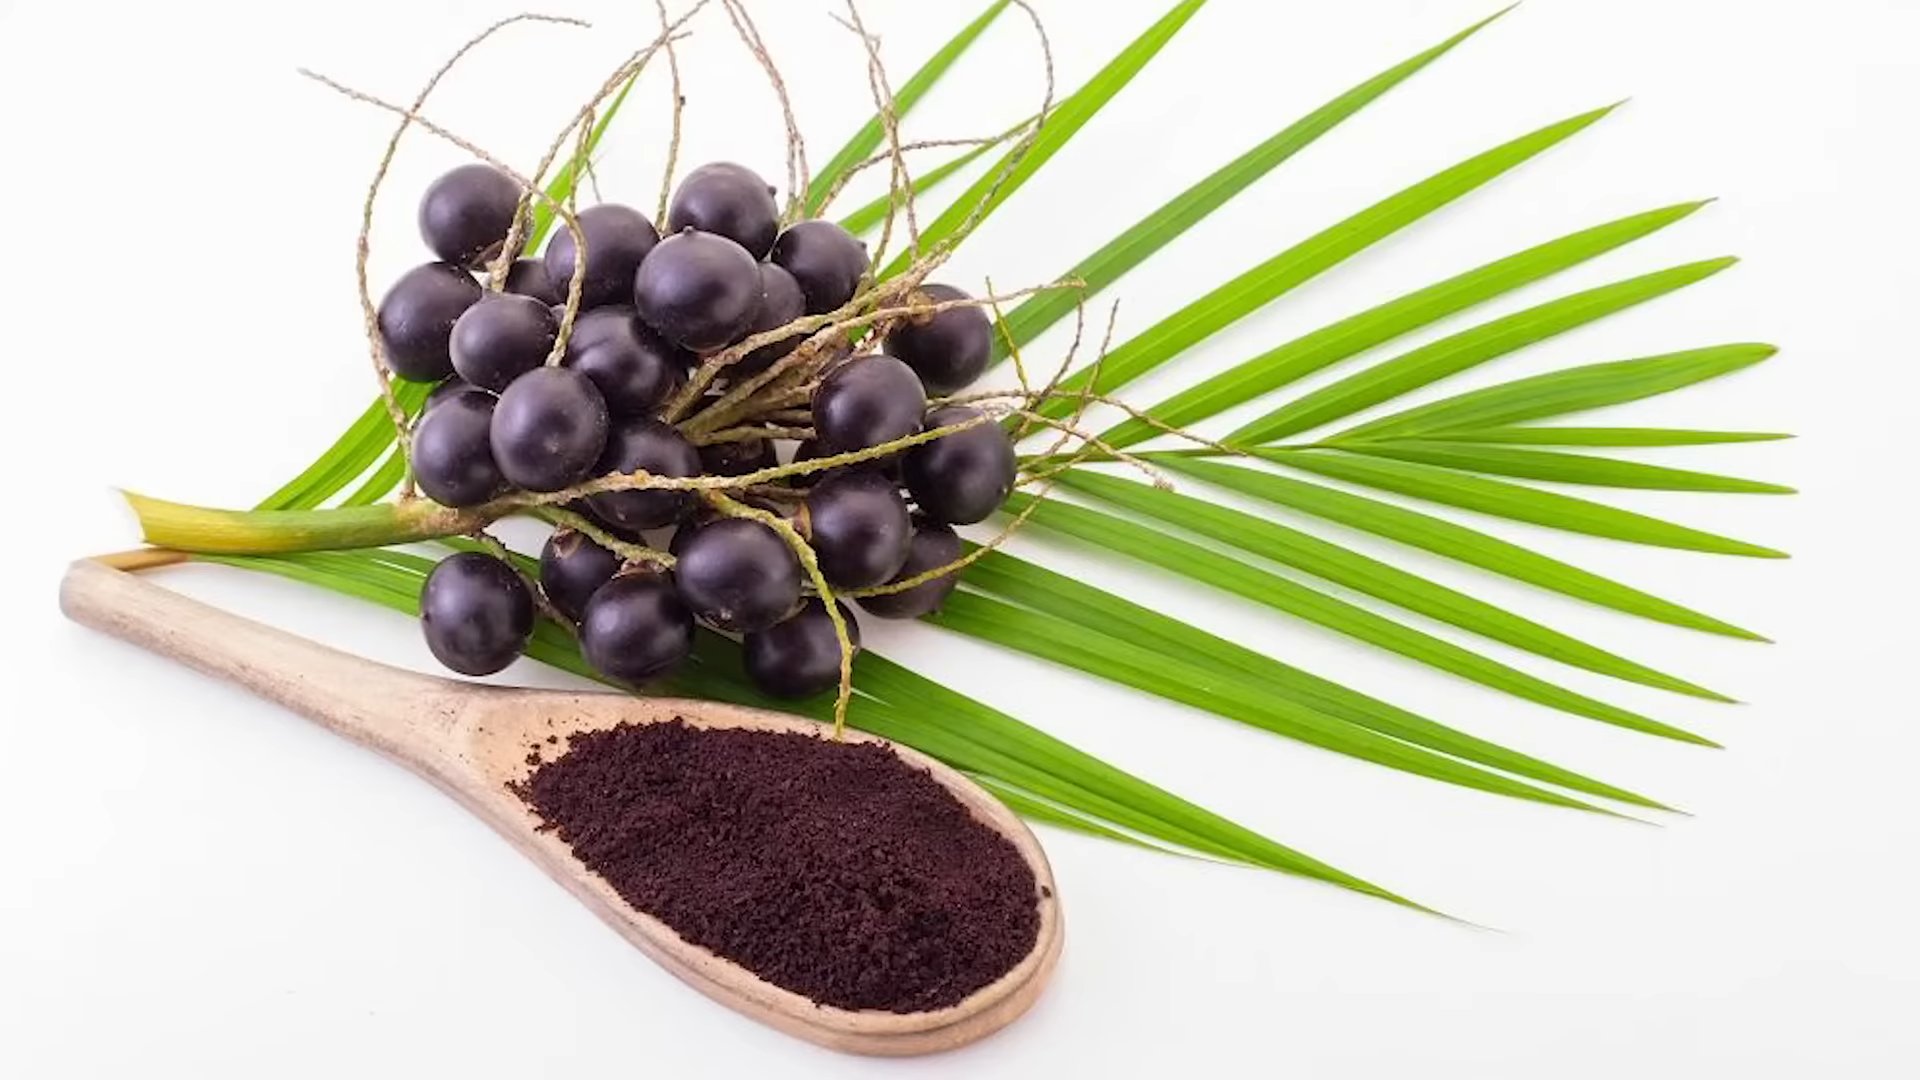
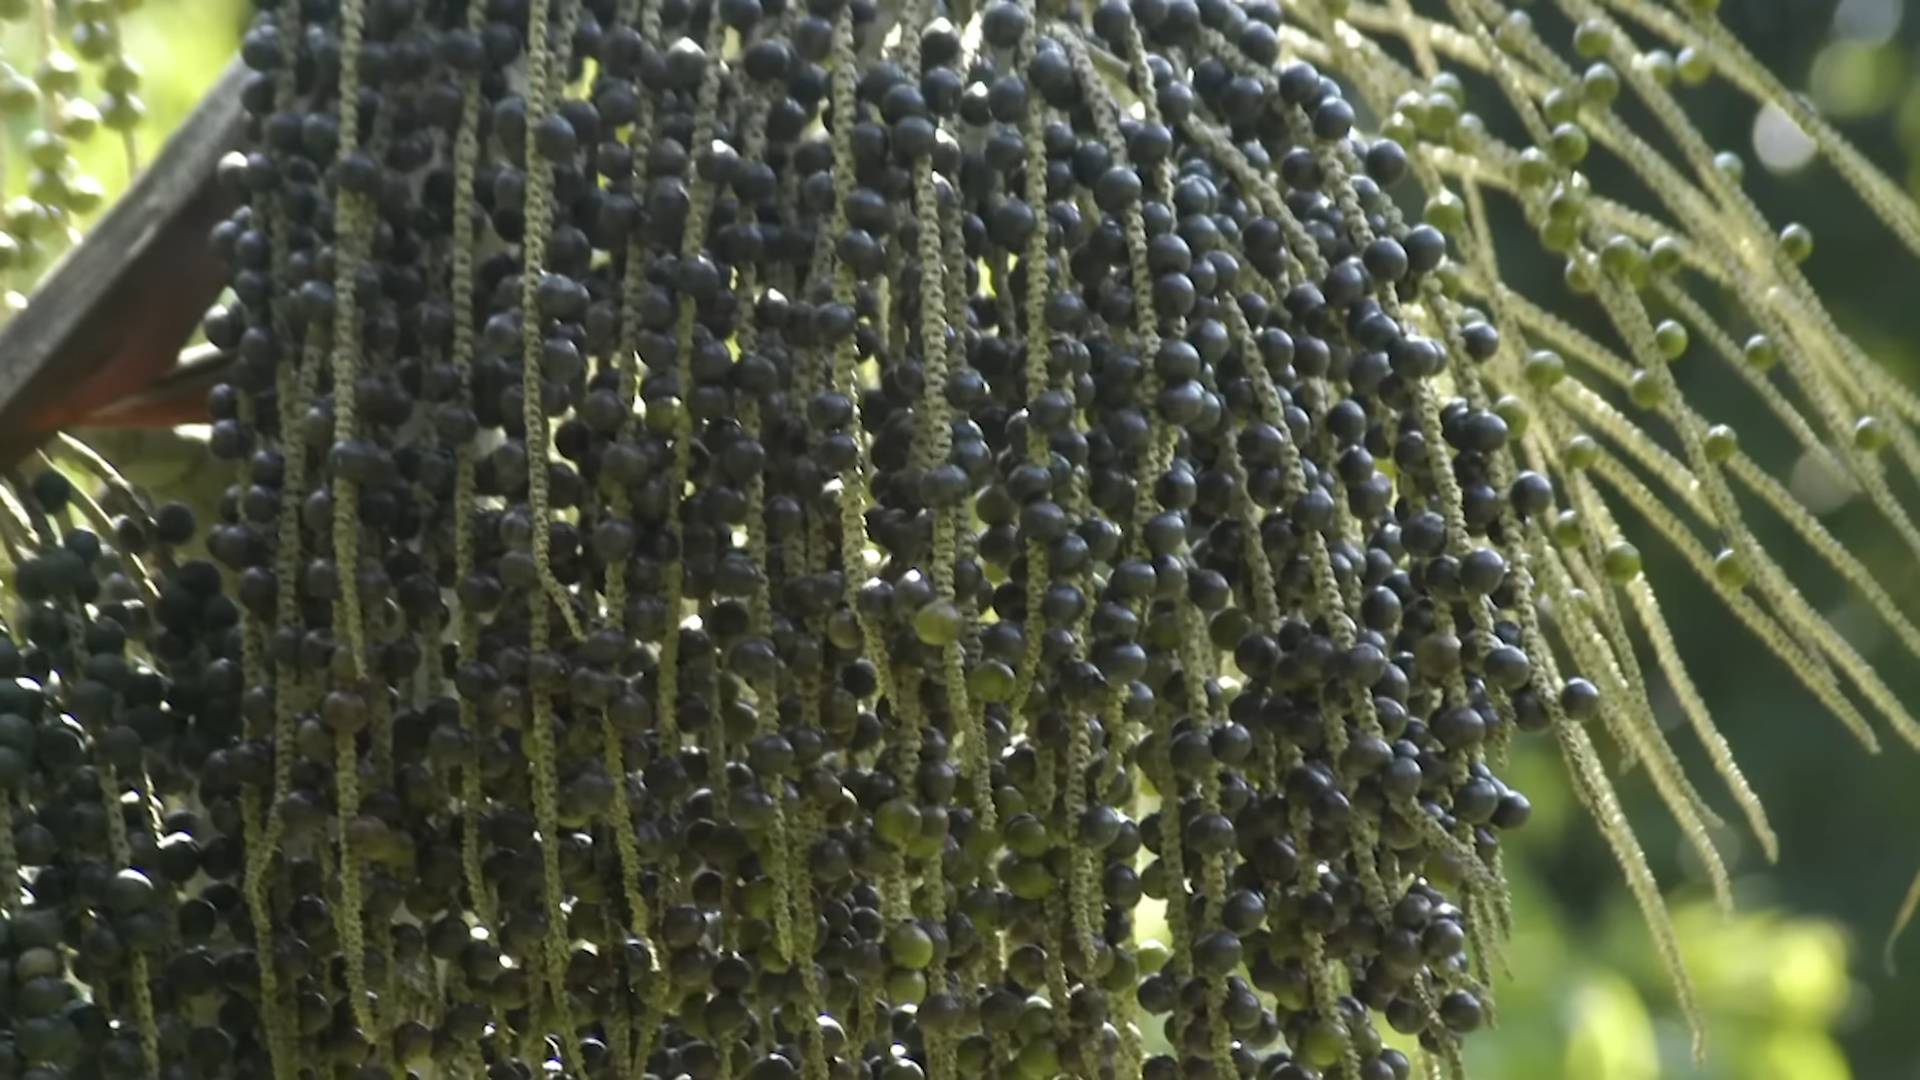
This is what we’ve all been waiting for! It takes several years for acai palms to mature and start producing fruit, so be patient. Once your palm is mature, it will produce clusters of small, dark purple berries.
1. **Harvest Time:** The berries are ready to harvest when they’re fully ripe and have a deep purple color.
2. **Harvesting:** Use a sharp knife or pruning shears to cut the clusters of berries from the palm.
3. **Processing:** Acai berries are highly perishable and need to be processed quickly after harvesting. You can soak them in water to soften the pulp and then mash them to extract the juice. The juice can be used to make smoothies, bowls, or other delicious treats.
Tips for Success
Here are a few extra tips to help you succeed in growing your own acai berries:
* Be Patient: Growing acai palms from seed takes time and patience. Don’t get discouraged if you don’t see results right away.
* Provide the Right Conditions: Acai palms need plenty of light, warmth, humidity, and well-draining soil.
* Don’t Overwater: Overwatering can lead to root rot, which can kill your acai palm.
* Fertilize Regularly: Fertilizing your acai palm will help it to grow and produce fruit.
* Protect from Frost: Acai palms are sensitive to frost and freezing temperatures. If you live in an area with cold winters,
Conclusion
So, there you have it – a comprehensive guide to successfully planting your own acai berry palm! We’ve covered everything from seed selection and germination to soil preparation, planting techniques, and ongoing care. But why go through all this effort? Because the reward is well worth it. Imagine harvesting your own fresh, antioxidant-rich acai berries, knowing exactly where they came from and how they were grown. No more relying solely on expensive store-bought purees or powders. You’ll have a sustainable source of this superfood right in your backyard (or balcony, depending on your climate and space!).
This DIY acai berry planting project isn’t just about saving money; it’s about connecting with nature, learning new skills, and enjoying the satisfaction of growing your own food. It’s about embracing a healthier lifestyle and contributing to a more sustainable future. Plus, let’s be honest, it’s pretty cool to say you grow your own acai berries!
But the journey doesn’t end here. Feel free to experiment with different soil amendments to find what works best for your specific environment. Consider companion planting with other tropical fruits or vegetables to create a thriving ecosystem around your acai palm. You could even try propagating new plants from suckers that emerge from the base of your mature palm, expanding your acai berry empire!
And speaking of variations, if you live in a cooler climate, don’t despair! While acai palms thrive in warm, humid environments, you can still enjoy the benefits of growing them indoors. Choose a large pot with excellent drainage and provide plenty of sunlight (or supplement with grow lights). Regular misting will help maintain the humidity levels they crave. With a little extra care, you can successfully cultivate acai berries even in less-than-ideal conditions.
The key to success with **acai berry planting** is patience and persistence. Don’t be discouraged if your seeds don’t germinate immediately or if your young plants experience setbacks. Remember that growing anything takes time and effort. But with the knowledge and guidance provided in this guide, you’ll be well on your way to enjoying a bountiful harvest of delicious and nutritious acai berries.
We encourage you to take the plunge and try this DIY project. Share your experiences with us! Let us know what challenges you faced, what successes you celebrated, and any tips or tricks you discovered along the way. Your feedback will help us improve this guide and inspire others to embark on their own acai berry planting adventures. Post pictures of your seedlings, your mature palms, and your delicious acai berry creations on social media using #AcaiBerryDIY and #GrowYourOwnSuperfood. We can’t wait to see what you create!
Frequently Asked Questions (FAQ)
1. How long does it take for an acai berry palm to produce fruit?
Patience is key! Acai berry palms typically take 3-5 years to begin producing fruit from seed. Grafted plants may fruit sooner, sometimes within 1-2 years. The exact timeframe depends on several factors, including the variety of acai palm, the growing conditions, and the overall health of the plant. Consistent watering, fertilization, and protection from extreme temperatures will help accelerate the fruiting process. Remember to provide adequate space for the palm to grow, as overcrowding can also delay fruit production.
2. What kind of soil is best for acai berry palms?
Acai berry palms thrive in well-draining, slightly acidic soil. A pH range of 5.5 to 6.5 is ideal. The soil should be rich in organic matter to provide essential nutrients and retain moisture. A mixture of equal parts potting soil, peat moss, and perlite or coarse sand works well. You can also amend the soil with compost or well-rotted manure to improve its fertility and drainage. Avoid heavy clay soils, as they can become waterlogged and lead to root rot.
3. How much sunlight do acai berry palms need?
Acai berry palms require plenty of sunlight to thrive. Aim for at least 6-8 hours of direct sunlight per day. If you’re growing your acai palm indoors, place it near a sunny window or supplement with grow lights. Insufficient sunlight can lead to stunted growth, reduced fruit production, and pale leaves. However, young seedlings may be sensitive to intense sunlight, so provide some shade during the hottest part of the day.
4. How often should I water my acai berry palm?
Acai berry palms prefer consistently moist soil, but they don’t like to be waterlogged. Water deeply whenever the top inch of soil feels dry to the touch. During the growing season (spring and summer), you may need to water more frequently. Reduce watering during the dormant season (fall and winter). Ensure that the pot has adequate drainage holes to prevent water from accumulating at the bottom.
5. What kind of fertilizer should I use for my acai berry palm?
Feed your acai berry palm with a balanced fertilizer specifically formulated for palms or tropical fruits. Look for a fertilizer with an NPK ratio of around 8-4-8 or 10-5-10. Apply the fertilizer according to the manufacturer’s instructions, typically every 2-3 months during the growing season. Avoid over-fertilizing, as this can damage the roots. You can also supplement with organic fertilizers such as compost tea or fish emulsion.
6. How do I protect my acai berry palm from pests and diseases?
Acai berry palms are generally resistant to pests and diseases, but they can occasionally be affected by scale, spider mites, or fungal infections. Regularly inspect your plant for any signs of infestation or disease. Treat any problems promptly with appropriate insecticides or fungicides. Good air circulation and proper watering practices can help prevent fungal diseases. You can also use neem oil as a natural pest repellent.
7. Can I grow acai berry palms in containers?
Yes, you can successfully grow acai berry palms in containers, especially if you live in a cooler climate. Choose a large pot with excellent drainage and use a well-draining potting mix. Be sure to provide adequate sunlight and humidity. Container-grown acai palms may require more frequent watering and fertilization than those grown in the ground. You may also need to repot your plant every few years as it grows larger.
8. What are some common problems with acai berry planting and how can I fix them?
Some common problems include slow germination, stunted growth, yellowing leaves, and lack of fruit production. Slow germination can be addressed by ensuring proper seed scarification and maintaining consistent moisture and warmth. Stunted growth may be due to insufficient sunlight, poor soil, or inadequate fertilization. Yellowing leaves can indicate nutrient deficiencies or overwatering. Lack of fruit production can be caused by insufficient sunlight, improper pollination, or the plant being too young. Addressing these issues with appropriate care and attention can help your acai berry palm thrive.
9. How do I harvest acai berries?
Acai berries grow in clusters on the palm. Harvest the berries when they are ripe, which is indicated by a deep purple color. Cut the entire cluster from the palm using pruning shears or a sharp knife. Be careful not to damage the palm when harvesting. The berries are highly perishable and should be processed or consumed within a few days of harvesting.
10. Are acai berry seeds difficult to germinate?
Yes, acai berry seeds can be challenging to germinate. They have a hard outer shell that needs to be scarified to allow water to penetrate. Soaking the seeds in warm water for 24-48 hours after scarification can also improve germination rates. Maintaining consistent moisture and warmth is crucial for successful germination. Don’t be discouraged if some seeds don’t germinate; it’s common for only a percentage of seeds to sprout.


Leave a Comment