

Aloe vera leaf propagation might sound intimidating, but trust me, it’s easier than you think! Have you ever admired the soothing power of aloe vera and wished you could have an endless supply right at your fingertips? Well, you absolutely can! For centuries, aloe vera has been revered for its medicinal properties, dating back to ancient Egypt where it was known as the “plant of immortality.” From soothing sunburns to aiding digestion, this succulent is a true powerhouse.
But buying aloe vera plants can get expensive, and sometimes you just want to share the love with friends and family. That’s where this DIY guide comes in. I’m going to show you a simple, step-by-step method for aloe vera leaf propagation that will have you multiplying your aloe vera collection in no time. Imagine having enough aloe to create your own natural skincare products, share with neighbors, or simply enjoy the beauty of these fascinating plants throughout your home. This trick is perfect for anyone who wants to save money, expand their green thumb skills, and enjoy the many benefits of aloe vera without breaking the bank. Let’s get started!
Propagating Aloe Vera from a Single Leaf: A Gardener’s Guide
Hey there, fellow plant enthusiasts! Ever looked at your thriving aloe vera plant and wished you could magically create more? Well, while magic isn’t involved, propagating aloe vera from a leaf is a fun (and surprisingly effective!) way to expand your succulent family. It’s not always a guaranteed success, but with a little patience and the right technique, you can significantly increase your chances of rooting a new aloe plant. Let’s dive in!
Understanding Aloe Vera Propagation
Before we get our hands dirty, it’s important to understand that aloe vera propagation from a leaf is a bit different than propagating other succulents. Aloe vera leaves don’t always readily root like, say, a succulent leaf from a Sedum or Echeveria. It’s more challenging, and success isn’t always guaranteed. However, it’s definitely worth a try, especially if you have a leaf that’s broken off or you’re simply feeling adventurous.
The key is to encourage the leaf to form a callus and then, hopefully, develop roots. We’ll be mimicking the natural process of how aloe vera sometimes propagates in the wild when a leaf breaks off and lands on the ground.
Materials You’ll Need
* A healthy aloe vera leaf (more on this below!)
* A clean, sharp knife or scissors
* Rooting hormone powder (optional, but recommended)
* A small pot (2-4 inches in diameter is perfect)
* Well-draining potting mix (cactus or succulent mix is ideal)
* A spray bottle with water
* A warm, bright location (but not direct sunlight)
Choosing the Right Leaf
The success of your propagation efforts largely depends on the leaf you choose. Here’s what to look for:
* Maturity: Select a mature, healthy leaf from the bottom of the plant. These leaves are usually thicker and have more stored energy, which will help them survive and root.
* Health: Avoid leaves that are damaged, discolored, or show signs of disease. A healthy, vibrant green leaf is your best bet.
* Size: A larger leaf generally has a better chance of rooting than a small one. Aim for a leaf that’s at least 4-6 inches long.
Step-by-Step Instructions: Propagating Your Aloe Leaf
Okay, let’s get to the fun part! Here’s a detailed guide to propagating your aloe vera leaf:
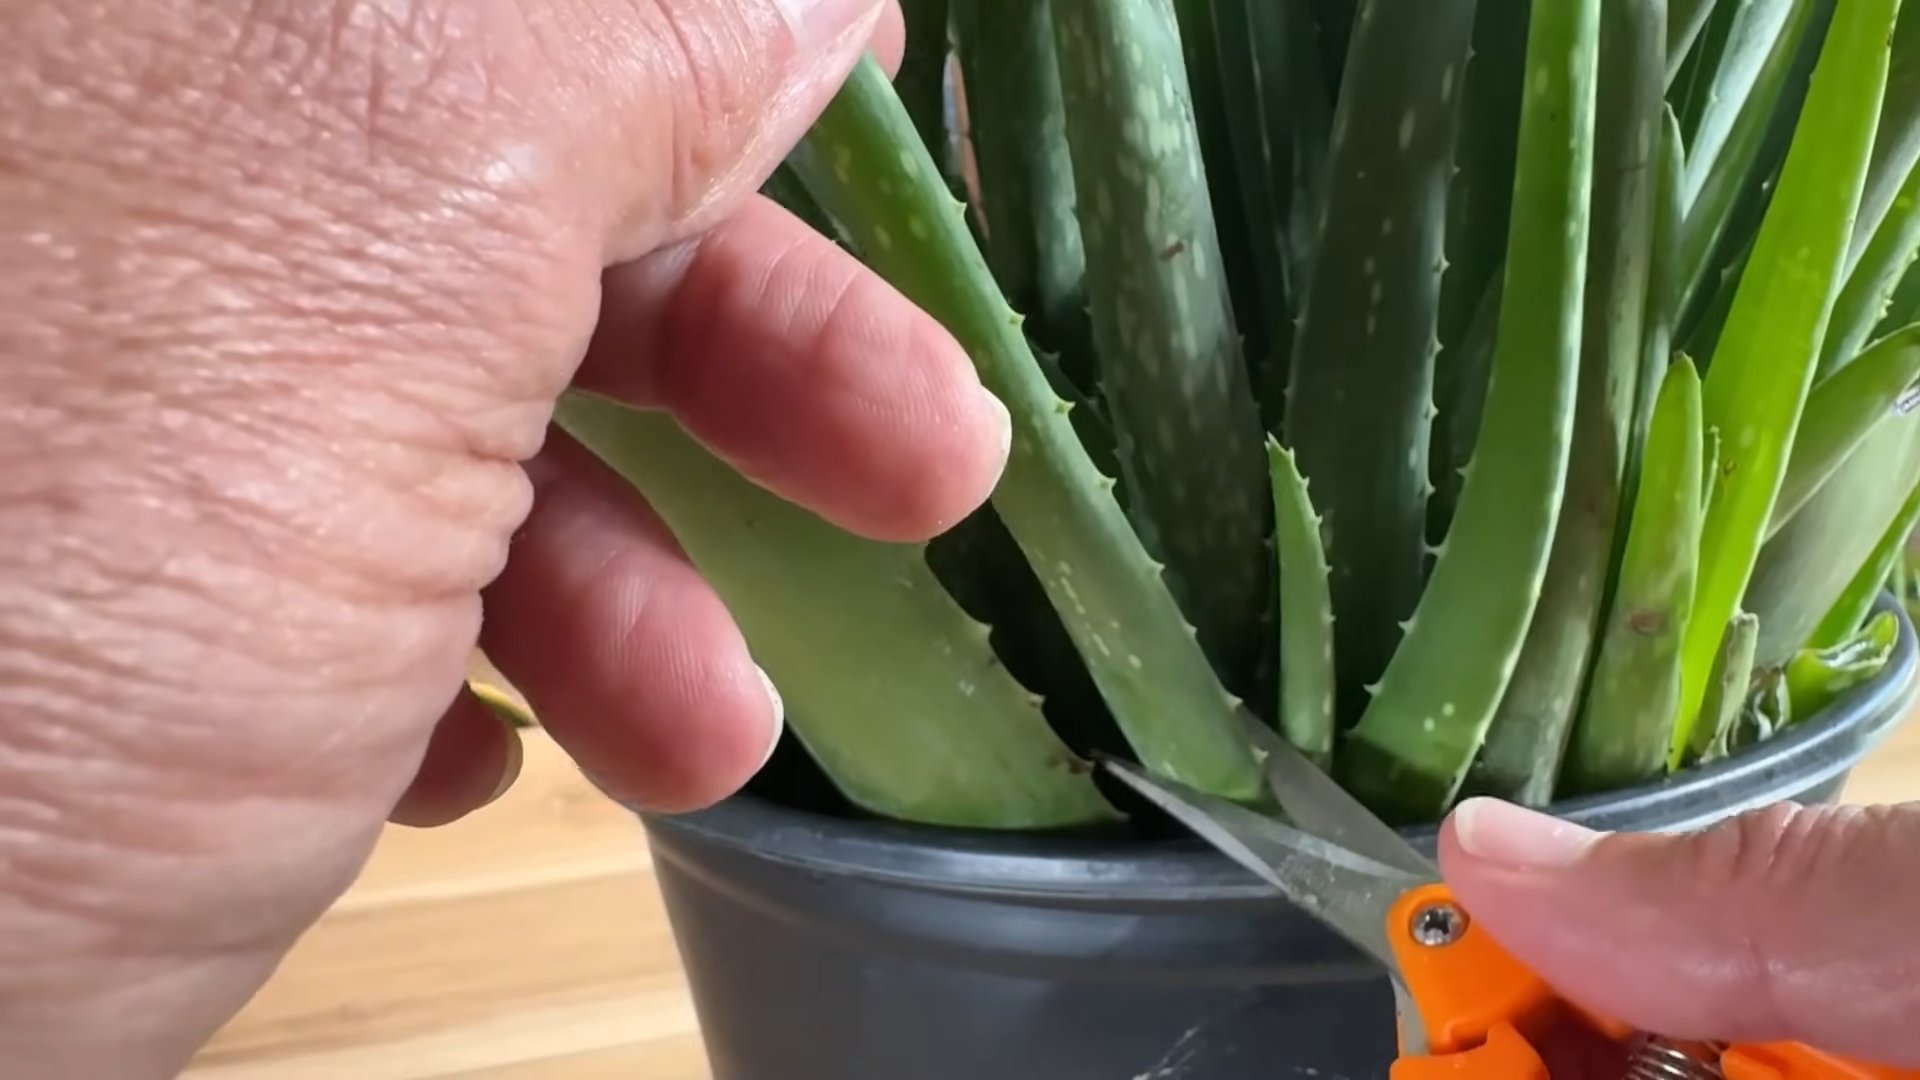
1. Prepare Your Cutting Tool: Sanitize your knife or scissors with rubbing alcohol to prevent the spread of bacteria or fungus. This is a crucial step to ensure a healthy start for your new plant.
2. Carefully Cut the Leaf: Using your clean knife or scissors, carefully cut the leaf from the base of the aloe vera plant. Make a clean, straight cut. Try to avoid tearing the leaf, as this can increase the risk of rot.
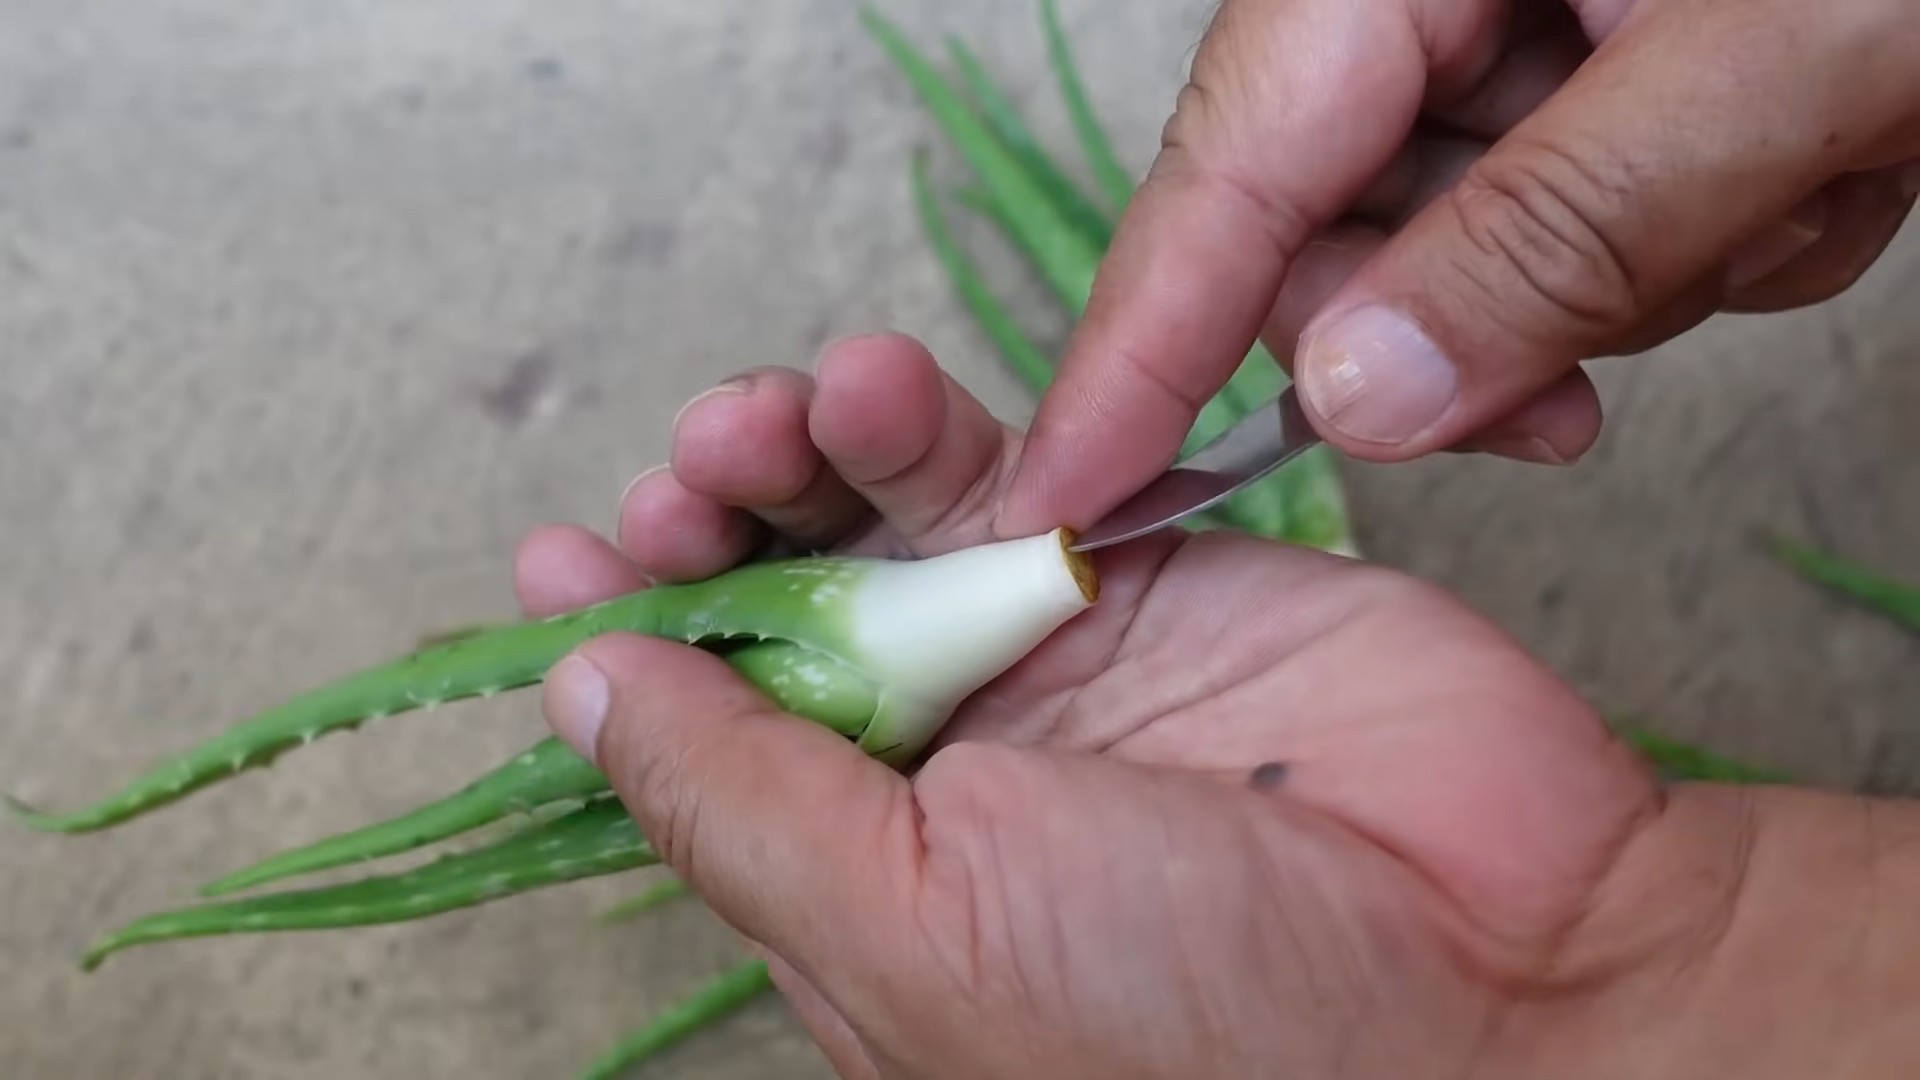
3. Allow the Cut End to Callus: This is perhaps the most important step. Place the cut end of the leaf on a paper towel in a dry, well-ventilated area. You need to let the cut end callus over, which means it will form a protective layer of hardened tissue. This prevents rot when you plant it. This process can take anywhere from 3 days to a week, or even longer depending on the humidity and temperature. You’ll know it’s ready when the cut end is dry and slightly shriveled.
4. Apply Rooting Hormone (Optional): While not essential, rooting hormone can significantly increase your chances of success. Dip the calloused end of the leaf into rooting hormone powder, tapping off any excess. This will stimulate root growth.
5. Prepare Your Potting Mix: Fill your small pot with well-draining potting mix. Cactus or succulent mix is ideal because it allows excess water to drain away quickly, preventing root rot. You can also create your own mix by combining regular potting soil with perlite or coarse sand.
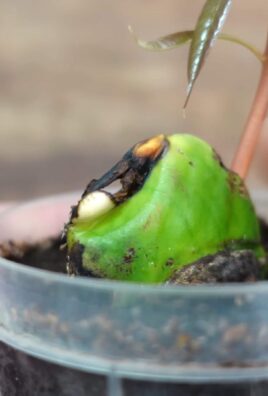
6. Plant the Leaf: Make a small hole in the potting mix, about 1-2 inches deep. Insert the calloused end of the leaf into the hole and gently firm the soil around it. You want the leaf to be stable and upright.
7. Water Sparingly: After planting, lightly mist the soil with water. Avoid overwatering, as this can lead to rot. The soil should be slightly moist, but not soggy.
8. Provide Indirect Sunlight: Place the pot in a warm, bright location that receives indirect sunlight. Direct sunlight can scorch the leaf, so avoid placing it in a south-facing window. An east- or west-facing window is usually ideal.
9. Be Patient and Monitor: Now comes the waiting game. It can take several weeks, or even months, for the leaf to develop roots. During this time, keep the soil lightly moist and monitor the leaf for any signs of rot. If you notice any discoloration or softening, remove the leaf immediately to prevent the spread of rot.
10. Check for Root Development: After a few weeks, gently tug on the leaf. If you feel resistance, it means roots have started to form. You can also carefully dig around the base of the leaf to check for roots.
11. Care for Your New Aloe Plant: Once your aloe vera leaf has developed roots, you can start caring for it like a regular aloe vera plant. Water it sparingly, allowing the soil to dry out completely between waterings. Provide it with plenty of bright, indirect sunlight.
Troubleshooting Common Issues
Even with the best efforts, propagating aloe vera from a leaf can sometimes be challenging. Here are some common issues you might encounter and how to address them:
* Rotting: This is the most common problem. If the leaf starts to rot, it’s usually due to overwatering or insufficient callusing. Remove the leaf immediately and start over with a fresh leaf, making sure to let it callus properly and avoid overwatering.
* No Root Development: Sometimes, the leaf simply won’t root. This can be due to a variety of factors, such as the age of the leaf, the quality of the potting mix, or the environmental conditions. Don’t give up! Try again with a different leaf and make sure to provide the right conditions.
* Leaf Shriveling: If the leaf starts to shrivel, it could be a sign that it’s not getting enough water. Lightly mist the soil more frequently, but avoid overwatering.
Tips for Success
Here are a few extra tips to increase your chances of successfully propagating aloe vera from a leaf:
* Use a humidity dome: Placing a clear plastic bag or container over the pot can help create a humid environment, which can encourage root growth. Just make sure to vent the dome regularly to prevent the buildup of moisture and rot.
* Bottom watering: Instead of watering from the top, try placing the pot in a shallow dish of water and allowing the soil to absorb the water from the bottom. This can help prevent overwatering and rot.
* Be patient: Propagating aloe vera from a leaf takes time and patience. Don’t get discouraged if it doesn’t work the first time. Keep trying, and eventually, you’ll be rewarded with a new aloe vera plant!
* Experiment: Try different techniques and see what works best for you. Some people have success with water propagation, while others prefer to plant the leaf directly in soil.
Alternative Propagation Methods
While propagating from a leaf is a fun experiment, the most reliable way to propagate aloe vera is through offsets, also known as “pups.” These are small plants that grow at the base of the mother plant. To propagate from offsets, simply:
1. Carefully remove the offset from the mother plant, making sure to include some roots.
2. Plant the offset in a small pot with well-draining potting mix.
3. Water sparingly and provide bright, indirect sunlight.
Offsets are much more likely to root successfully than leaves, so if you’re looking for a guaranteed way to expand your aloe vera collection, this is the way to go.
Final Thoughts
Propagating aloe vera from a leaf is a rewarding experience, even if it’s not always successful. It’s a great way to learn more about plant propagation and to appreciate the resilience of these amazing succulents. So, grab a leaf, follow these steps, and get ready to grow your own aloe vera forest! Good luck, and happy gardening!
Conclusion
So, there you have it! Transforming a single aloe vera leaf into multiple thriving plants might seem like botanical wizardry, but it’s surprisingly achievable with a little patience and the right approach. This DIY aloe vera leaf propagation method isn’t just a cost-effective way to expand your succulent collection; it’s a deeply rewarding experience that connects you with the natural world. Imagine the satisfaction of nurturing new life from a single leaf, witnessing the slow but steady growth of your own little aloe army!
Why is this a must-try? Beyond the sheer joy of propagation, consider the benefits. You’re creating clones of your favorite aloe vera plant, ensuring you have backups in case of unforeseen circumstances. You’re also producing living gifts for friends and family, spreading the healing power of aloe vera far and wide. And, let’s be honest, it’s a fantastic conversation starter! “Oh, these? I grew them from a single leaf!” – instant plant parent bragging rights.
But the beauty of this method lies in its adaptability. While we’ve outlined a straightforward approach, feel free to experiment. Some gardeners swear by dipping the cut end in rooting hormone to accelerate the process. Others prefer different types of well-draining soil mixes. You could even try varying the humidity levels by placing the cuttings in a mini greenhouse or covering them with a plastic bag (remember to vent it regularly to prevent mold!).
Consider these variations to personalize your aloe vera leaf propagation journey:
* Aloe Vera Gel Boost: Before planting, try dipping the cut end of the leaf in pure aloe vera gel from another leaf. This can act as a natural rooting hormone and provide extra nutrients.
* Cinnamon Power: A light dusting of cinnamon on the cut end can help prevent fungal infections.
* Gravel Layer: Add a layer of gravel at the bottom of your pot to improve drainage and prevent root rot.
* Light Experimentation: While indirect sunlight is best, try different levels of indirect light to see what your aloe cuttings respond to best.
The key is to observe your cuttings closely and adjust your approach as needed. Don’t be discouraged if some leaves don’t take root. Propagation is a learning process, and every attempt brings you closer to success.
We wholeheartedly encourage you to give this DIY aloe vera leaf propagation method a try. It’s a simple, sustainable, and incredibly satisfying way to expand your plant family. And most importantly, don’t forget to share your experiences! We’d love to hear about your successes, your challenges, and any variations you discover along the way. Post pictures of your baby aloe plants on social media using #AloePropagation or leave a comment below. Let’s build a community of aloe vera enthusiasts and learn from each other’s green thumbs! Your insights could help other aspiring plant parents embark on their own propagation adventures. Happy growing!
Frequently Asked Questions (FAQ)
1. What kind of aloe vera leaf is best for propagation?
The ideal leaf for propagation is a healthy, mature leaf from a well-established aloe vera plant. Look for leaves that are plump, firm, and free from blemishes or signs of disease. Avoid using leaves that are damaged, discolored, or overly thin, as they are less likely to successfully root. The size of the leaf also matters; larger leaves generally have more stored energy and are more likely to produce roots and pups. A leaf that is at least 4-6 inches long is a good starting point.
2. How long does it take for aloe vera leaves to root?
Patience is key! Rooting time can vary depending on several factors, including the health of the leaf, the environmental conditions (temperature, humidity, light), and the specific aloe vera variety. Generally, you can expect to see roots forming within 4-8 weeks. However, it can sometimes take longer, even up to several months. Don’t be discouraged if you don’t see immediate results. Continue to provide the cuttings with the proper care, and eventually, roots should emerge. Look for signs of new growth, such as small pups (baby plants) forming at the base of the leaf, as an indication that rooting is successful.
3. What type of soil is best for aloe vera leaf propagation?
Aloe vera plants, including cuttings, thrive in well-draining soil. This is crucial to prevent root rot, which is a common problem with succulents. A suitable soil mix can be created by combining equal parts of:
* Potting soil: Provides essential nutrients.
* Coarse sand or perlite: Improves drainage and aeration.
* Peat moss or coco coir: Helps retain moisture without becoming waterlogged.
You can also purchase pre-made succulent or cactus potting mixes, which are specifically formulated for these types of plants. Avoid using heavy garden soil, as it tends to retain too much moisture and can suffocate the roots.
4. How often should I water aloe vera leaf cuttings?
Watering frequency is critical for successful aloe vera leaf propagation. Overwatering is a common mistake that can lead to rot. Water the cuttings sparingly, only when the soil is completely dry to the touch. A good rule of thumb is to water every 1-2 weeks, but this will vary depending on the environmental conditions. In hotter, drier climates, you may need to water more frequently, while in cooler, more humid climates, you may need to water less often. When you do water, water thoroughly until the water drains out of the bottom of the pot. Then, allow the soil to dry out completely before watering again.
5. What kind of light do aloe vera leaf cuttings need?
Aloe vera leaf cuttings need bright, indirect sunlight. Avoid placing them in direct sunlight, as this can scorch the leaves. A location near an east- or west-facing window is ideal. If you don’t have access to natural light, you can use a grow light to provide supplemental lighting. The cuttings should receive at least 6-8 hours of light per day. If the leaves start to turn brown or yellow, it may be a sign that they are getting too much light. If the leaves start to become pale or elongated, it may be a sign that they are not getting enough light.
6. Can I use rooting hormone to propagate aloe vera leaves?
While not strictly necessary, using rooting hormone can help to speed up the rooting process and increase the success rate of aloe vera leaf propagation. Rooting hormone contains auxins, which are plant hormones that stimulate root growth. To use rooting hormone, simply dip the cut end of the leaf in the hormone powder or liquid before planting it in the soil. Be sure to follow the instructions on the rooting hormone packaging.
7. What if my aloe vera leaf cutting starts to rot?
If your aloe vera leaf cutting starts to rot, it’s important to take action immediately to prevent the rot from spreading. Remove the cutting from the soil and carefully inspect it. If the rot is only affecting a small portion of the leaf, you can try cutting away the affected area with a clean, sharp knife. Be sure to sterilize the knife with rubbing alcohol before using it. Allow the cut end to callus over for a few days before replanting it in fresh, well-draining soil. If the rot is extensive, it’s best to discard the cutting and start with a new leaf. To prevent rot in the future, be sure to use well-draining soil, water sparingly, and provide adequate ventilation.
8. How do I know when my aloe vera leaf cutting is ready to be transplanted?
You’ll know your aloe vera leaf cutting is ready to be transplanted when it has developed a healthy root system and has started to produce pups (baby plants). The roots should be at least an inch long and should be well-established in the soil. The pups should be several inches tall and should have their own set of leaves. Once the cutting has reached this stage, you can carefully transplant it into a larger pot with fresh, well-draining soil. Be gentle when transplanting to avoid damaging the roots.
9. Can I propagate aloe vera from a broken leaf?
Yes, you can propagate aloe vera from a broken leaf, as long as the leaf is still healthy and has a clean cut. Follow the same steps as you would for propagating from a whole leaf: allow the cut end to callus over, plant it in well-draining soil, and water sparingly. Keep in mind that a broken leaf may be more susceptible to rot, so it’s important to monitor it closely and take action immediately if you see any signs of decay.
10. Is aloe vera leaf propagation the only way to propagate aloe vera?
No, aloe vera can also be propagated from offsets (pups) that grow at the base of the mother plant. This is often a faster and easier method than leaf propagation. To propagate from offsets, simply separate the pups from the mother plant with a clean, sharp knife and plant them in their own pots with well-draining soil. Be sure to include some roots with each pup.

Leave a Comment