

Banana plant propagation methods might sound intimidating, but trust me, it’s easier than you think! Have you ever looked at your thriving banana plant and wished you could have even more of those lush, tropical beauties gracing your home or garden? Well, you’re in luck! This DIY guide will unlock the secrets to multiplying your banana plants, saving you money and filling your space with vibrant greenery.
For centuries, banana plants have held cultural significance in many societies, symbolizing prosperity and abundance. From ancient rituals to modern-day cuisine, these plants have woven themselves into the fabric of human history. Now, you can participate in this legacy by learning how to propagate your own banana plants.
Why bother with banana plant propagation methods? Simple! Banana plants, while relatively easy to care for, can be expensive to purchase. Plus, propagating your own allows you to share the joy of gardening with friends and family, creating a sustainable cycle of growth and sharing. Imagine gifting a baby banana plant to a loved one, knowing you nurtured it from its very beginning! This guide will provide you with simple, step-by-step instructions, ensuring even beginners can successfully expand their banana plant family. Let’s get started!
Propagating Banana Plants: A DIY Guide to Multiplying Your Green Friends!
Okay, banana lovers! So you’ve got a thriving banana plant and you’re thinking, “Wouldn’t it be amazing to have more of these beauties?” Well, you’re in luck! Propagating banana plants isn’t as tricky as you might think. I’m going to walk you through a couple of different methods, so you can choose the one that best suits your plant and your patience level. Let’s get started!
Understanding Banana Plant Propagation
Before we dive into the nitty-gritty, let’s quickly cover the basics. Banana plants, despite their tree-like appearance, are actually giant herbs. They grow from an underground stem called a rhizome. This rhizome is the key to propagation. We’ll be focusing on two main methods:
* Division of Pups (Suckers): This is the most common and easiest method. Banana plants naturally produce “pups” or “suckers” – smaller plants that sprout from the base of the main plant. We’ll separate these pups and replant them.
* Rhizome Division: This method involves cutting the main rhizome into sections, each with a growing point (an “eye”). It’s a bit more involved but can be useful if your plant isn’t producing many pups.
Method 1: Propagating Banana Plants from Pups (Suckers)
This is my go-to method because it’s generally the most successful and least stressful for the mother plant.
Identifying the Right Pup
Not all pups are created equal! You want to choose pups that are:
* At least 1-3 feet tall: Smaller pups are less likely to survive on their own.
* Have their own roots: Gently dig around the base of the pup to check for root development. If it’s just a tiny sprout with no roots, it’s not ready to be separated.
* Healthy and free from disease: Avoid pups with yellowing leaves, spots, or signs of pests.
Tools You’ll Need
* A sharp, clean knife or pruning saw
* A shovel or trowel
* Gloves (optional, but recommended)
* Potting mix suitable for banana plants (well-draining is key!)
* A pot or container with drainage holes
* Watering can
Step-by-Step Instructions
1. Prepare the Pot: Fill your pot with the potting mix, leaving a few inches of space at the top. Water the soil thoroughly to moisten it.
2. Carefully Excavate the Pup: Using your shovel or trowel, carefully dig around the base of the pup you’ve selected. You want to expose the connection between the pup and the mother plant’s rhizome. Be gentle to avoid damaging the roots of either plant.
3. Sever the Connection: This is the crucial part! Using your sharp knife or pruning saw, carefully sever the connection between the pup and the mother plant’s rhizome. Make a clean cut to minimize the risk of infection. If the pup has a substantial root system, try to retain as much of it as possible.
4. Remove the Pup: Gently lift the pup out of the ground. If it’s tightly connected, you might need to wiggle it a bit.
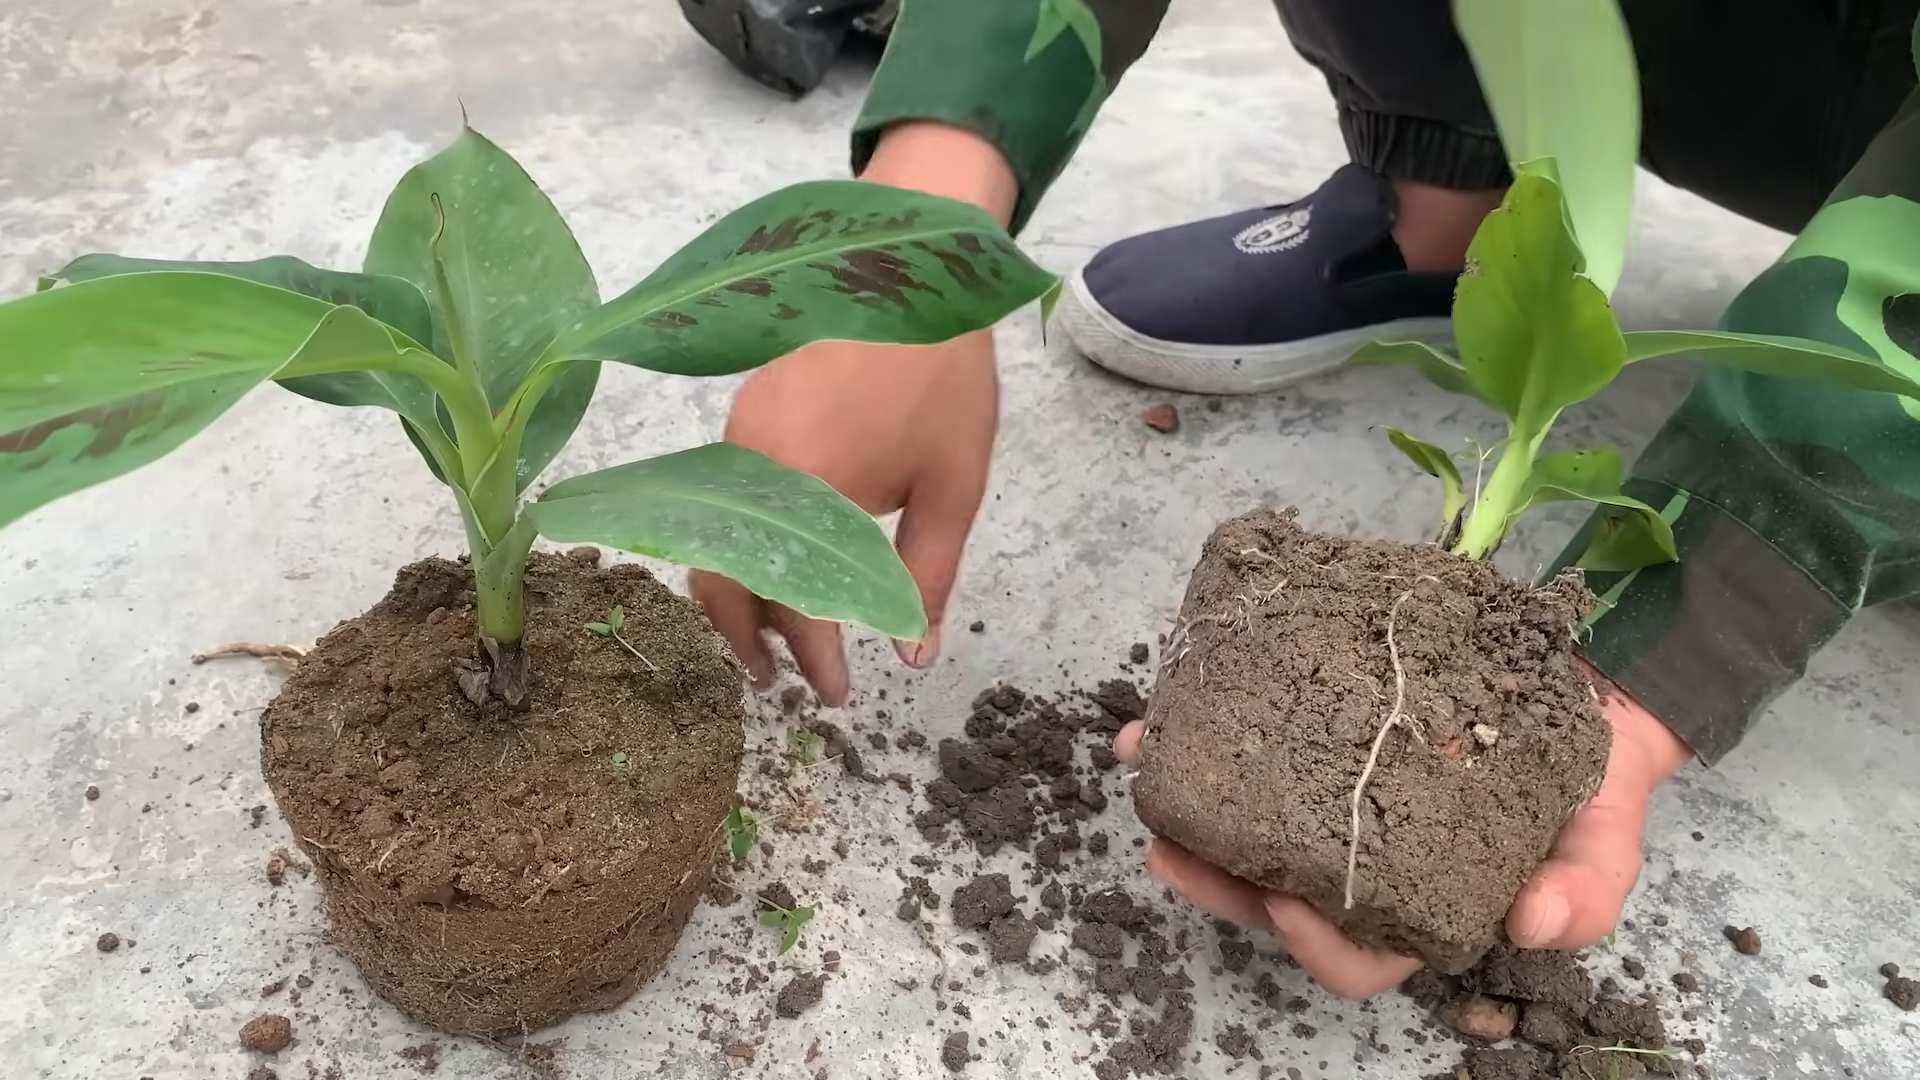
5. Plant the Pup: Place the pup in the prepared pot, making sure the top of the root ball is level with the soil surface. Fill in around the roots with more potting mix, gently firming the soil.
6. Water Thoroughly: Water the newly planted pup thoroughly, allowing the excess water to drain out of the drainage holes.
7. Provide Proper Care: Place the pot in a location that receives bright, indirect sunlight. Keep the soil consistently moist, but not soggy. Avoid overwatering, as this can lead to root rot.
8. Monitor and Be Patient: It may take a few weeks for the pup to establish itself and start growing. Be patient and continue to provide proper care. You should see new growth emerging from the center of the plant.
Method 2: Propagating Banana Plants from Rhizome Division
This method is a bit more advanced, but it can be useful if your banana plant isn’t producing many pups, or if you want to propagate a specific variety.
When to Divide the Rhizome
The best time to divide the rhizome is in the spring or early summer, when the plant is actively growing.
Tools You’ll Need
* A sharp, clean knife or pruning saw (a larger saw might be necessary for larger rhizomes)
* A shovel or spade
* Gloves
* Potting mix suitable for banana plants
* Pots or containers with drainage holes
* Fungicide (optional, but recommended to prevent rot)
* Watering can
Step-by-Step Instructions
1. Prepare the Rhizome: Carefully dig up the entire banana plant, exposing the rhizome. This can be a bit of a workout, especially for larger plants! Gently remove as much soil as possible from the rhizome so you can clearly see its structure.
2. Identify Growing Points (Eyes): Look for “eyes” or buds on the rhizome. These are the points from which new shoots will emerge. Each section you divide should have at least one healthy eye.
3. Divide the Rhizome: Using your sharp knife or pruning saw, carefully cut the rhizome into sections, ensuring that each section has at least one eye and some roots. Make clean cuts to minimize the risk of infection.
4. Treat the Cut Surfaces (Optional): To help prevent rot, you can dust the cut surfaces of the rhizome sections with a fungicide. This is especially helpful if you live in a humid climate.
5. Prepare the Pots: Fill your pots with the potting mix, leaving a few inches of space at the top. Water the soil thoroughly to moisten it.
6. Plant the Rhizome Sections: Plant each rhizome section in a separate pot, making sure the eye is facing upwards and is just below the soil surface. Fill in around the rhizome with more potting mix, gently firming the soil.
7. Water Thoroughly: Water the newly planted rhizome sections thoroughly, allowing the excess water to drain out of the drainage holes.
8. Provide Proper Care: Place the pots in a location that receives bright, indirect sunlight. Keep the soil consistently moist, but not soggy. Avoid overwatering.
9. Monitor and Be Patient: It may take several weeks or even months for the rhizome sections to sprout. Be patient and continue to provide proper care. Keep the soil consistently moist, but not waterlogged. You should eventually see new growth emerging from the eye.
General Tips for Success
* Use well-draining potting mix: Banana plants don’t like to sit in soggy soil.
* Provide adequate sunlight: Banana plants need plenty of light to thrive.
* Water regularly: Keep the soil consistently moist, but avoid overwatering.
* Fertilize regularly: Feed your banana plants with a balanced fertilizer during the growing season.
* Protect from frost: Banana plants are sensitive to frost. If you live in a cold climate, you’ll need to protect your plants during the winter.
* Be patient! Propagation can take time, so don’t get discouraged if you don’t see results immediately.
Troubleshooting
* Pup isn’t growing: Make sure it’s getting enough light and water. Check for pests or diseases.
* Rhizome section is rotting: You may have overwatered it, or the cut surfaces may have become infected. Try using a fungicide.
* Leaves are yellowing: This could be a sign of overwatering, underwatering, or nutrient deficiency.
I hope this guide has been helpful! With a little patience and care, you’ll be well on your way to expanding your banana plant collection. Happy propagating!
Conclusion
So, there you have it! Mastering banana plant propagation is not only achievable but also incredibly rewarding. We’ve explored a simple yet effective method that allows you to expand your banana family without breaking the bank or relying on expensive nursery plants. This DIY approach empowers you to take control of your garden and cultivate these tropical beauties right in your own backyard.
Why is this a must-try? Because it’s cost-effective, sustainable, and deeply satisfying. Imagine the pride you’ll feel when you nurture a tiny sucker into a thriving banana plant, knowing you played an integral role in its growth. Plus, propagating your own banana plants allows you to select the best and healthiest specimens from your existing plant, ensuring a strong and productive new generation.
But the fun doesn’t stop there! Feel free to experiment with variations on this method. For example, you could try using different rooting mediums, such as perlite or vermiculite, to see which yields the best results in your specific climate and growing conditions. You can also experiment with different sizes of suckers. While we recommend using suckers that are at least a foot tall, you might find success with smaller ones if you provide them with extra care and attention.
Another exciting variation is to explore different banana varieties. Each variety has its own unique characteristics, from the size and flavor of the fruit to the plant’s overall growth habit. Propagating different varieties allows you to create a diverse and fascinating banana collection.
Don’t be afraid to get your hands dirty and embrace the learning process. Banana plant propagation is a journey, and every attempt, successful or not, will teach you something valuable about these amazing plants.
We are confident that with a little patience and dedication, you’ll be enjoying homegrown bananas in no time. So, gather your tools, select your suckers, and embark on this exciting horticultural adventure.
Now, we want to hear from you! Have you tried propagating banana plants before? What methods have you used? What challenges have you encountered? Share your experiences, tips, and tricks in the comments below. Your insights could be incredibly helpful to other aspiring banana growers.
And if you’re trying this method for the first time, we encourage you to document your progress and share your results with us. We’d love to see your success stories and learn from your experiences. Together, we can create a community of passionate banana enthusiasts who are dedicated to sharing knowledge and supporting each other’s gardening endeavors.
So, go ahead, give it a try! You might just surprise yourself with your green thumb. Happy propagating!
Frequently Asked Questions (FAQ)
What is the best time of year to propagate banana plants?
The ideal time to propagate banana plants is during the warmer months, typically spring or early summer. This is when the plants are actively growing and have the best chance of establishing roots quickly. However, if you live in a tropical or subtropical climate, you can propagate banana plants year-round, as long as you provide them with adequate warmth and moisture. Avoid propagating during the coldest months, as the plants may be dormant and less likely to root successfully.
How long does it take for a banana sucker to develop roots?
The time it takes for a banana sucker to develop roots can vary depending on several factors, including the size of the sucker, the rooting medium, the temperature, and the humidity. Generally, you can expect to see roots developing within 2-4 weeks. However, it may take longer in cooler conditions or if the sucker is smaller. Be patient and continue to provide the sucker with adequate moisture and warmth. You can gently check for root development by carefully lifting the sucker from the rooting medium.
What type of soil is best for planting a newly propagated banana plant?
Newly propagated banana plants thrive in well-draining, fertile soil that is rich in organic matter. A good mix would include equal parts of potting soil, compost, and perlite or vermiculite. This combination provides the necessary nutrients, drainage, and aeration for healthy root development. Avoid using heavy clay soils, as they can become waterlogged and inhibit root growth. You can also amend your existing garden soil with compost and other organic matter to improve its fertility and drainage.
How often should I water a newly propagated banana plant?
Newly propagated banana plants need consistent moisture to establish their roots. Water them thoroughly whenever the top inch of soil feels dry to the touch. Avoid overwatering, as this can lead to root rot. The frequency of watering will depend on the climate, the type of soil, and the size of the pot. In hotter, drier climates, you may need to water more frequently. In cooler, more humid climates, you may need to water less frequently.
What kind of fertilizer should I use for my banana plant?
Banana plants are heavy feeders and require regular fertilization to thrive. Use a balanced fertilizer with a ratio of 10-10-10 or 15-15-15. Apply the fertilizer according to the manufacturer’s instructions, typically every 4-6 weeks during the growing season. You can also supplement with organic fertilizers, such as compost tea or fish emulsion, to provide additional nutrients and improve soil health. Avoid over-fertilizing, as this can burn the roots and damage the plant.
My banana plant’s leaves are turning yellow. What could be the problem?
Yellowing leaves on a banana plant can be caused by several factors, including overwatering, underwatering, nutrient deficiencies, pests, or diseases. Check the soil moisture to ensure that you are not overwatering or underwatering. If the soil is consistently wet, reduce the frequency of watering. If the soil is dry, increase the frequency of watering. Also, check the plant for signs of pests or diseases, such as aphids, spider mites, or fungal infections. Treat any infestations or infections promptly. If the yellowing is due to nutrient deficiencies, fertilize the plant with a balanced fertilizer.
Can I propagate banana plants from seeds?
While it is possible to propagate banana plants from seeds, it is a much more challenging and time-consuming process than propagating from suckers. Banana seeds have a very hard seed coat and require scarification (nicking or scratching the seed coat) to germinate. Even with scarification, the germination rate is often low. Additionally, banana plants grown from seeds may not be true to type, meaning that they may not produce fruit that is identical to the parent plant. For these reasons, propagating from suckers is the preferred method for most home gardeners.
How big will my banana plant get?
The size of your banana plant will depend on the variety. Some dwarf varieties only grow to be 6-8 feet tall, while others can reach heights of 20 feet or more. Consider the mature size of the variety you are growing when choosing a location for your plant. Make sure it has enough space to grow without crowding other plants or structures.
What do I do with my banana plant during the winter?
If you live in a climate with cold winters, you will need to protect your banana plant from frost and freezing temperatures. If your plant is in a pot, you can move it indoors to a bright, sunny location. If your plant is planted in the ground, you can wrap the trunk with burlap or blankets to insulate it from the cold. You can also mulch heavily around the base of the plant to protect the roots. During the winter, reduce watering and fertilization, as the plant will be dormant.
How do I know when my bananas are ripe?
Bananas are typically harvested when they are still green but have reached their full size. They will then ripen off the plant. To determine if your bananas are ready to harvest, look for the following signs: the bananas should be plump and rounded, the ridges on the bananas should be less prominent, and the bananas should start to turn a lighter shade of green. You can also gently squeeze the bananas to see if they give slightly. Once harvested, you can ripen the bananas at room temperature. To speed up the ripening process, you can place the bananas in a paper bag with an apple or a banana.
Leave a Comment