

Beeswax Wood Polish DIY: Unlock the secret to restoring your furniture’s natural beauty with a simple, homemade solution! Have you ever looked at your cherished wooden pieces and wished you could bring back that warm, inviting glow they once had? I know I have! Instead of reaching for expensive, chemical-laden products, I’m going to show you how to create your own beeswax wood polish, a time-honored method that’s both effective and eco-friendly.
The use of beeswax for wood preservation dates back centuries. Ancient Egyptians used it to protect their sarcophagi, and European artisans relied on it to maintain the luster of their finest furniture. This isn’t just a modern trend; it’s a practice rooted in history and proven to stand the test of time.
But why should *you* bother with a beeswax wood polish DIY project? Well, for starters, it’s incredibly cost-effective. You’ll save money compared to buying commercial polishes. More importantly, you’ll know exactly what’s going onto your furniture – no harsh chemicals or mystery ingredients! Plus, it’s a surprisingly satisfying project. There’s something truly rewarding about creating something yourself that breathes new life into your beloved wooden items. So, let’s dive in and discover how to make your own beeswax wood polish!
DIY Beeswax Wood Polish: Revive Your Furniture with Natural Shine
Hey there, fellow DIY enthusiasts! I’m so excited to share one of my favorite homemade recipes with you: beeswax wood polish. Not only is it incredibly effective at restoring the natural beauty of your wooden furniture, but it’s also made with all-natural ingredients, making it a safe and eco-friendly alternative to commercial polishes. Plus, it’s surprisingly easy to make! Let’s get started!
What You’ll Need
Before we dive into the process, let’s gather all the necessary ingredients and equipment. Trust me, having everything ready beforehand will make the whole experience much smoother.
* **Beeswax:** This is the star of the show! It provides a protective layer and a beautiful shine. You can find beeswax in pellet or block form; either works perfectly. I usually buy mine online or at a local craft store.
* **Carrier Oil:** This helps to thin the beeswax and makes it easier to apply. My go-to choices are:
* **Olive Oil:** A readily available and affordable option. It adds a nice, subtle sheen.
* **Mineral Oil:** Creates a more durable and water-resistant finish.
* **Jojoba Oil:** A fantastic choice for delicate wood, as it’s gentle and nourishing.
* **Coconut Oil (Fractionated):** Stays liquid at room temperature and provides a lovely scent. Avoid using regular coconut oil, as it can solidify and leave a greasy residue.
* **Essential Oils (Optional):** These add a pleasant fragrance and can even offer additional benefits. Some popular choices include:
* **Lemon Essential Oil:** Adds a refreshing scent and helps to clean the wood.
* **Orange Essential Oil:** Provides a warm and inviting aroma.
* **Cedarwood Essential Oil:** Offers a classic woodsy scent and can help to repel insects.
* **Double Boiler or Heat-Safe Bowl and Saucepan:** This is essential for safely melting the beeswax.
* **Wooden Spoon or Stirring Utensil:** For mixing the ingredients.
* **Measuring Cups and Spoons:** For accurate measurements.
* **Storage Container:** A glass jar or tin with a tight-fitting lid is ideal for storing your finished polish.
* **Soft Cloths:** For applying and buffing the polish. I prefer using microfiber cloths.
* **Optional: Cheesecloth:** For straining the polish if you notice any impurities in your beeswax.
Understanding the Ratios
The ratio of beeswax to carrier oil is crucial for achieving the right consistency. I’ve experimented with different ratios, and I’ve found that the following works best for me:
* **For a softer, more spreadable polish:** 1 part beeswax to 4 parts carrier oil.
* **For a firmer, more durable polish:** 1 part beeswax to 3 parts carrier oil.
Feel free to adjust the ratio slightly to suit your preferences. If you live in a warmer climate, you might want to use a slightly higher ratio of beeswax to prevent the polish from becoming too soft.
Step-by-Step Instructions
Alright, let’s get down to the nitty-gritty! Here’s how to make your own beeswax wood polish:
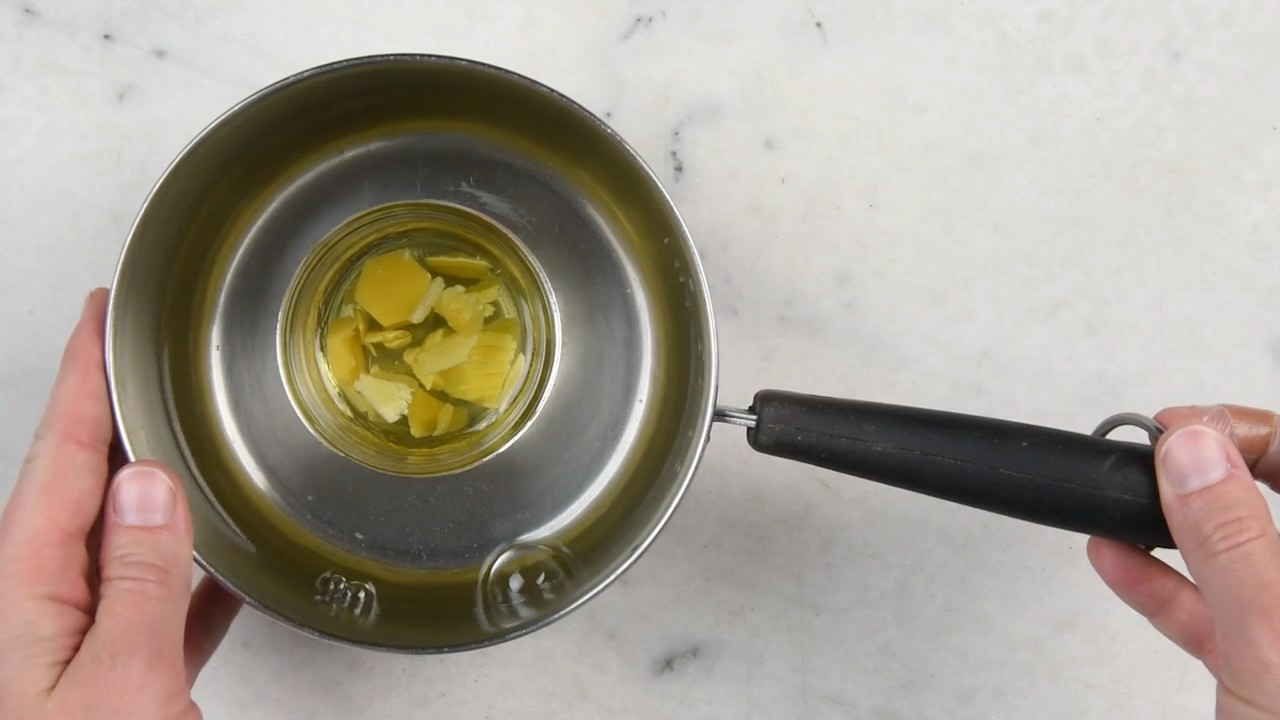
1. **Prepare Your Double Boiler:** If you don’t have a double boiler, don’t worry! You can easily create one by placing a heat-safe bowl (glass or stainless steel) over a saucepan filled with about an inch or two of water. Make sure the bottom of the bowl doesn’t touch the water.
2. **Melt the Beeswax:** Add the beeswax to the double boiler or heat-safe bowl. Turn the heat to medium-low and let the beeswax melt slowly and evenly. Stir occasionally with your wooden spoon to help it melt faster. This process can take a little while, so be patient!
3. **Add the Carrier Oil:** Once the beeswax is completely melted, slowly pour in your chosen carrier oil. Stir gently to combine the beeswax and oil until they are fully incorporated. The mixture should be smooth and homogenous.
4. **Incorporate Essential Oils (Optional):** If you’re using essential oils, now’s the time to add them. I usually add about 10-20 drops of essential oil per cup of polish. Stir well to distribute the essential oils evenly throughout the mixture. Remember to choose essential oils that are safe for use on wood.
5. **Check for Impurities (Optional):** If you notice any impurities or debris in your beeswax, you can strain the polish through a piece of cheesecloth before pouring it into your storage container. This will ensure a smoother and more refined finish.
6. **Pour into Storage Container:** Carefully pour the hot polish into your chosen storage container. Be careful, as the mixture will be hot!
7. **Let it Cool and Harden:** Allow the polish to cool completely at room temperature. As it cools, it will solidify and become a creamy, paste-like consistency. This usually takes a few hours.
8. **Test the Consistency:** Once the polish has cooled, check the consistency. If it’s too soft, you can remelt it and add a little more beeswax. If it’s too hard, you can remelt it and add a little more carrier oil.
9. **Label and Store:** Label your container with the date and ingredients. Store your beeswax wood polish in a cool, dry place away from direct sunlight. It should last for several months.
Applying Your Homemade Beeswax Wood Polish
Now that you’ve made your own beeswax wood polish, it’s time to put it to use! Here’s how to apply it to your furniture:
1. **Prepare the Surface:** Before applying the polish, make sure the wood surface is clean and dry. Remove any dust, dirt, or debris with a soft cloth or vacuum cleaner.
2. **Test in an Inconspicuous Area:** Always test the polish in a small, hidden area of the furniture first to ensure it doesn’t damage or discolor the wood.
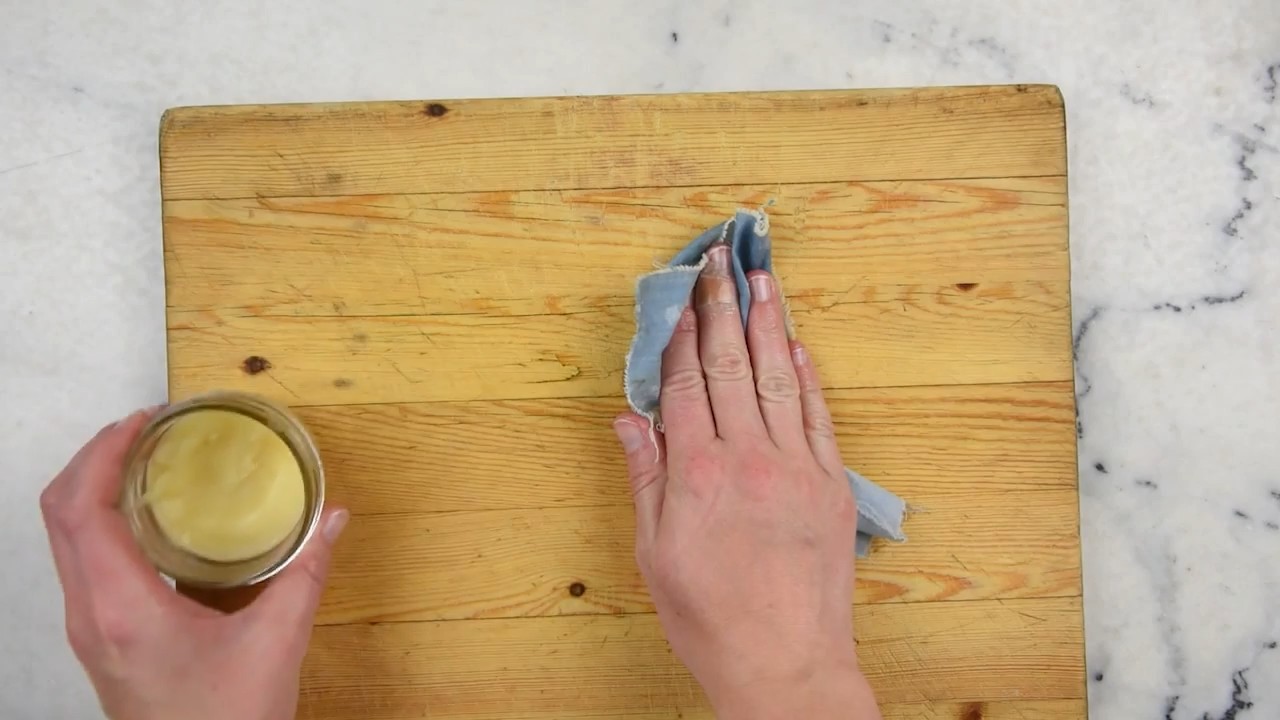
3. **Apply a Small Amount:** Using a clean, soft cloth, apply a small amount of polish to the wood surface. A little goes a long way!
4. **Work in Circular Motions:** Gently rub the polish into the wood using circular motions. This will help to distribute the polish evenly and work it into the grain.
5. **Let it Sit:** Allow the polish to sit on the wood for about 10-15 minutes. This will give it time to penetrate and nourish the wood.
6. **Buff to a Shine:** Using a clean, dry cloth, buff the wood surface to a beautiful shine. Continue buffing until all the excess polish is removed and the wood feels smooth and silky.
7. **Repeat as Needed:** For heavily worn or damaged furniture, you may need to apply a second coat of polish.
Tips and Tricks for Success
Here are a few extra tips and tricks to help you get the best results with your homemade beeswax wood polish:
* Warm the Polish: If your polish is too hard to apply easily, you can warm it slightly by placing the container in a bowl of warm water for a few minutes.
* Use a Soft Brush: For intricate carvings or hard-to-reach areas, you can use a soft brush to apply the polish.
* Avoid Over-Polishing: Applying too much polish can leave a sticky or greasy residue. Start with a small amount and add more as needed.
* Clean Your Cloths: Wash your polishing cloths regularly to remove any buildup of polish.
* Experiment with Different Oils: Don’t be afraid to experiment with different carrier oils and essential oils to find your perfect combination.
* Safety First: Always work in a well-ventilated area when melting beeswax and using essential oils. Never leave a double boiler unattended.
Troubleshooting
Sometimes, things don’t go exactly as planned. Here are a few common problems you might encounter and how to fix them:
* **Polish is too soft:** Remelt the polish and add more beeswax.
* **Polish is too hard:** Remelt the polish and add more carrier oil.
* **Polish is streaky:** You may be applying too much polish or not buffing it enough. Try using less polish and buffing more thoroughly.
* **Polish leaves a greasy residue:** You may be using too much carrier oil or not allowing the polish to sit long enough before buffing. Try using less carrier oil and allowing the polish to sit for a longer period of time.
* **Polish has a strong odor:** You may be using too much essential oil. Try using less essential oil in your next batch.
Why I Love This DIY
I absolutely love this DIY beeswax wood polish because it’s so versatile and effective. I use it on everything from my antique furniture to my wooden cutting boards. It’s a great way to protect and nourish your wood while also adding a beautiful shine. Plus, knowing that I’m using all-natural ingredients gives me peace of mind. I hope you enjoy making and using this polish as much as I do! Happy polishing!
Conclusion
So, there you have it! Crafting your own beeswax wood polish DIY isn’t just a cost-effective alternative to store-bought products; it’s a way to connect with the natural beauty of wood and ensure its longevity. We’ve walked you through the simple steps, highlighting the benefits of using natural ingredients and avoiding harsh chemicals that can damage your furniture over time.
But why is this DIY trick a must-try? Beyond the savings and the eco-friendliness, it’s about the quality of the finish. Commercial polishes often contain silicones and other additives that create a superficial shine, masking the wood’s true character. Our beeswax polish, on the other hand, penetrates the wood, nourishing it from within and bringing out its natural luster. The result is a deep, rich shine that enhances the wood’s grain and protects it from drying out and cracking.
Think of it as a spa treatment for your wooden furniture! It’s a chance to revitalize those cherished pieces, giving them a new lease on life and preserving them for generations to come. Plus, the subtle, natural scent of beeswax is far more pleasant than the artificial fragrances often found in commercial polishes.
Now, let’s talk about variations. While the basic recipe is fantastic as is, feel free to experiment and tailor it to your specific needs and preferences. For a deeper conditioning effect, consider adding a small amount of carnauba wax to the mixture. This will create a harder, more durable finish, ideal for high-traffic areas or furniture that gets a lot of use.
If you prefer a lighter scent, you can infuse your oil with herbs or essential oils. Lavender, lemon, or cedarwood are all excellent choices that complement the natural aroma of beeswax. Simply add a few drops of your chosen essential oil to the melted mixture before pouring it into your container. Remember to use high-quality, pure essential oils for the best results.
Another variation involves adding a touch of pigment to the polish. This can be particularly useful for restoring antique furniture or covering up minor scratches and blemishes. Use a small amount of artist’s oil paint or wood stain, ensuring it’s compatible with the oil you’re using. Start with a tiny amount and gradually add more until you achieve the desired color.
Ultimately, the beauty of this beeswax wood polish DIY is its versatility. You can customize it to suit your specific needs and preferences, creating a truly unique and effective product.
So, what are you waiting for? Gather your ingredients, follow our simple instructions, and prepare to be amazed by the results. We’re confident that you’ll love the way your furniture looks and feels after a treatment with this natural polish.
We encourage you to try this DIY trick and share your experience with us! Post photos of your revitalized furniture on social media using #BeeswaxWoodPolishDIY and let us know what variations you tried and how they worked. We’re eager to see your creations and learn from your experiences. Let’s build a community of DIY enthusiasts who appreciate the beauty and value of natural wood care!
Frequently Asked Questions (FAQ)
What type of beeswax should I use?
We recommend using pure, filtered beeswax for the best results. You can find beeswax in various forms, such as blocks, pellets, or pastilles. Pellets are often easier to melt and measure. Avoid beeswax that contains additives or artificial fragrances, as these can affect the quality of the polish. Organic beeswax is an excellent choice if you’re concerned about pesticide residues.
What kind of oil is best for beeswax wood polish?
Mineral oil is a popular choice due to its affordability and availability. However, we highly recommend using natural oils like olive oil, coconut oil, or jojoba oil. These oils are non-toxic, food-safe, and offer additional conditioning benefits for the wood. They penetrate the wood more effectively than mineral oil, nourishing it from within and preventing it from drying out. Each oil will impart a slightly different sheen and feel to the finished product, so experiment to find your favorite.
How often should I use beeswax wood polish?
The frequency of polishing depends on the type of wood, the environment, and how often the furniture is used. As a general rule, you should polish your furniture every 3-6 months. However, if you live in a dry climate or your furniture is exposed to direct sunlight, you may need to polish it more frequently. You can also polish your furniture whenever it starts to look dull or dry.
Can I use this polish on all types of wood?
Beeswax wood polish is generally safe for most types of wood, including hardwoods like oak, maple, and walnut, as well as softwoods like pine and cedar. However, it’s always a good idea to test the polish on an inconspicuous area first to ensure it doesn’t discolor or damage the wood. Avoid using beeswax polish on unfinished wood, as it may not absorb properly and could leave a sticky residue.
How do I apply the beeswax wood polish?
Apply a small amount of polish to a soft, clean cloth. Gently rub the polish onto the wood in a circular motion, working it into the grain. Allow the polish to sit for a few minutes to penetrate the wood. Then, use a clean, dry cloth to buff the surface until it shines. Be sure to remove any excess polish to prevent a sticky or greasy residue.
How should I store the beeswax wood polish?
Store your beeswax wood polish in an airtight container in a cool, dark place. This will help to prevent the oils from going rancid and the beeswax from melting. The polish should last for several months, or even years, if stored properly. If you notice any changes in the color, smell, or consistency of the polish, it’s best to discard it.
What if my polish is too hard or too soft?
The consistency of your beeswax wood polish can be affected by the temperature and the ratio of beeswax to oil. If your polish is too hard, you can gently warm it in a double boiler or microwave (in short intervals) until it softens. Then, add a small amount of oil to thin it out. If your polish is too soft, you can melt it down and add a small amount of beeswax to thicken it.
Can I use this polish on painted or varnished wood?
Beeswax wood polish is generally not recommended for use on painted or varnished wood, as it may not penetrate the surface properly and could leave a sticky residue. It’s best to use a polish specifically designed for painted or varnished surfaces.
Is beeswax wood polish safe for food surfaces like cutting boards?
While the ingredients are food-safe, we don’t recommend using this polish on surfaces that come into direct contact with food, such as cutting boards or wooden utensils. Over time, the polish can build up and potentially contaminate food. Instead, use a food-grade mineral oil or a specialized cutting board oil.
What if I get beeswax polish on my clothes?
Beeswax polish can be difficult to remove from clothing. The best approach is to scrape off any excess polish with a dull knife or spoon. Then, pretreat the stain with a stain remover and wash the garment according to the care instructions. You may need to repeat the process several times to completely remove the stain.

Leave a Comment