

Clean baseball cap DIY: Is your favorite baseball cap looking a little worse for wear? Don’t toss it just yet! I’m here to share some amazing and easy DIY tricks to bring it back to life. Baseball caps have been a staple in wardrobes for over a century, evolving from functional sportswear to a fashion statement embraced by everyone. From protecting players from the sun to representing our favorite teams, these hats hold a special place in our hearts (and on our heads!).
But let’s face it, baseball caps can get pretty grimy. Sweat, dirt, and everyday wear can leave them looking faded and dingy. That’s where this clean baseball cap DIY guide comes in! I’ll walk you through simple, effective methods using common household items to restore your cap to its former glory. You’ll save money, extend the life of your favorite hat, and avoid the risk of damaging it in the washing machine. Plus, who doesn’t love a good DIY project that yields fantastic results? Let’s get started and give your baseball cap the refresh it deserves!
DIY Baseball Cap Cleaning & Restoration: From Grimy to Gleaming!
Okay, let’s face it, baseball caps are awesome. They shield us from the sun, hide bad hair days, and add a touch of cool to any outfit. But they also get *really* dirty. Sweat, dust, sunscreen – it all accumulates, leaving your favorite cap looking less-than-fresh. Don’t worry, though! I’m going to walk you through a few methods to get your baseball caps looking brand new again. We’ll cover everything from a gentle hand wash to tackling stubborn stains. Let’s get started!
Assessing the Damage: What Kind of Cleaning Does Your Cap Need?
Before we dive in, let’s take a good look at your cap. This will help us determine the best cleaning method.
* Material: Is it cotton, polyester, wool, or a blend? The material will dictate the water temperature and cleaning products we can use.
* Color: Dark colors are generally more forgiving, but lighter colors show dirt more easily and might require a bit more stain treatment.
* Stains: Identify any specific stains like sweat stains around the brim, dirt smudges, or even food spills.
* Construction: Is it a structured cap (with a stiff front panel) or an unstructured cap (more floppy)? Structured caps need a little extra care to maintain their shape.
* Tag Instructions: Always, always, always check the care label inside the cap! If it says “Dry Clean Only,” you might want to consider taking it to a professional.
Method 1: The Gentle Hand Wash (My Go-To for Most Caps)
This is my preferred method for cleaning most of my baseball caps. It’s gentle, effective, and minimizes the risk of damage.
What You’ll Need:
* A clean sink or basin
* Cool or lukewarm water (never hot!)
* Mild laundry detergent (something gentle, like baby detergent or a detergent for delicates)
* A soft-bristled brush (an old toothbrush works great!)
* Clean towels
* A cap shaper or something to help the cap hold its shape while drying (a balloon, a bowl, or even a rolled-up towel will do)
Step-by-Step Instructions:
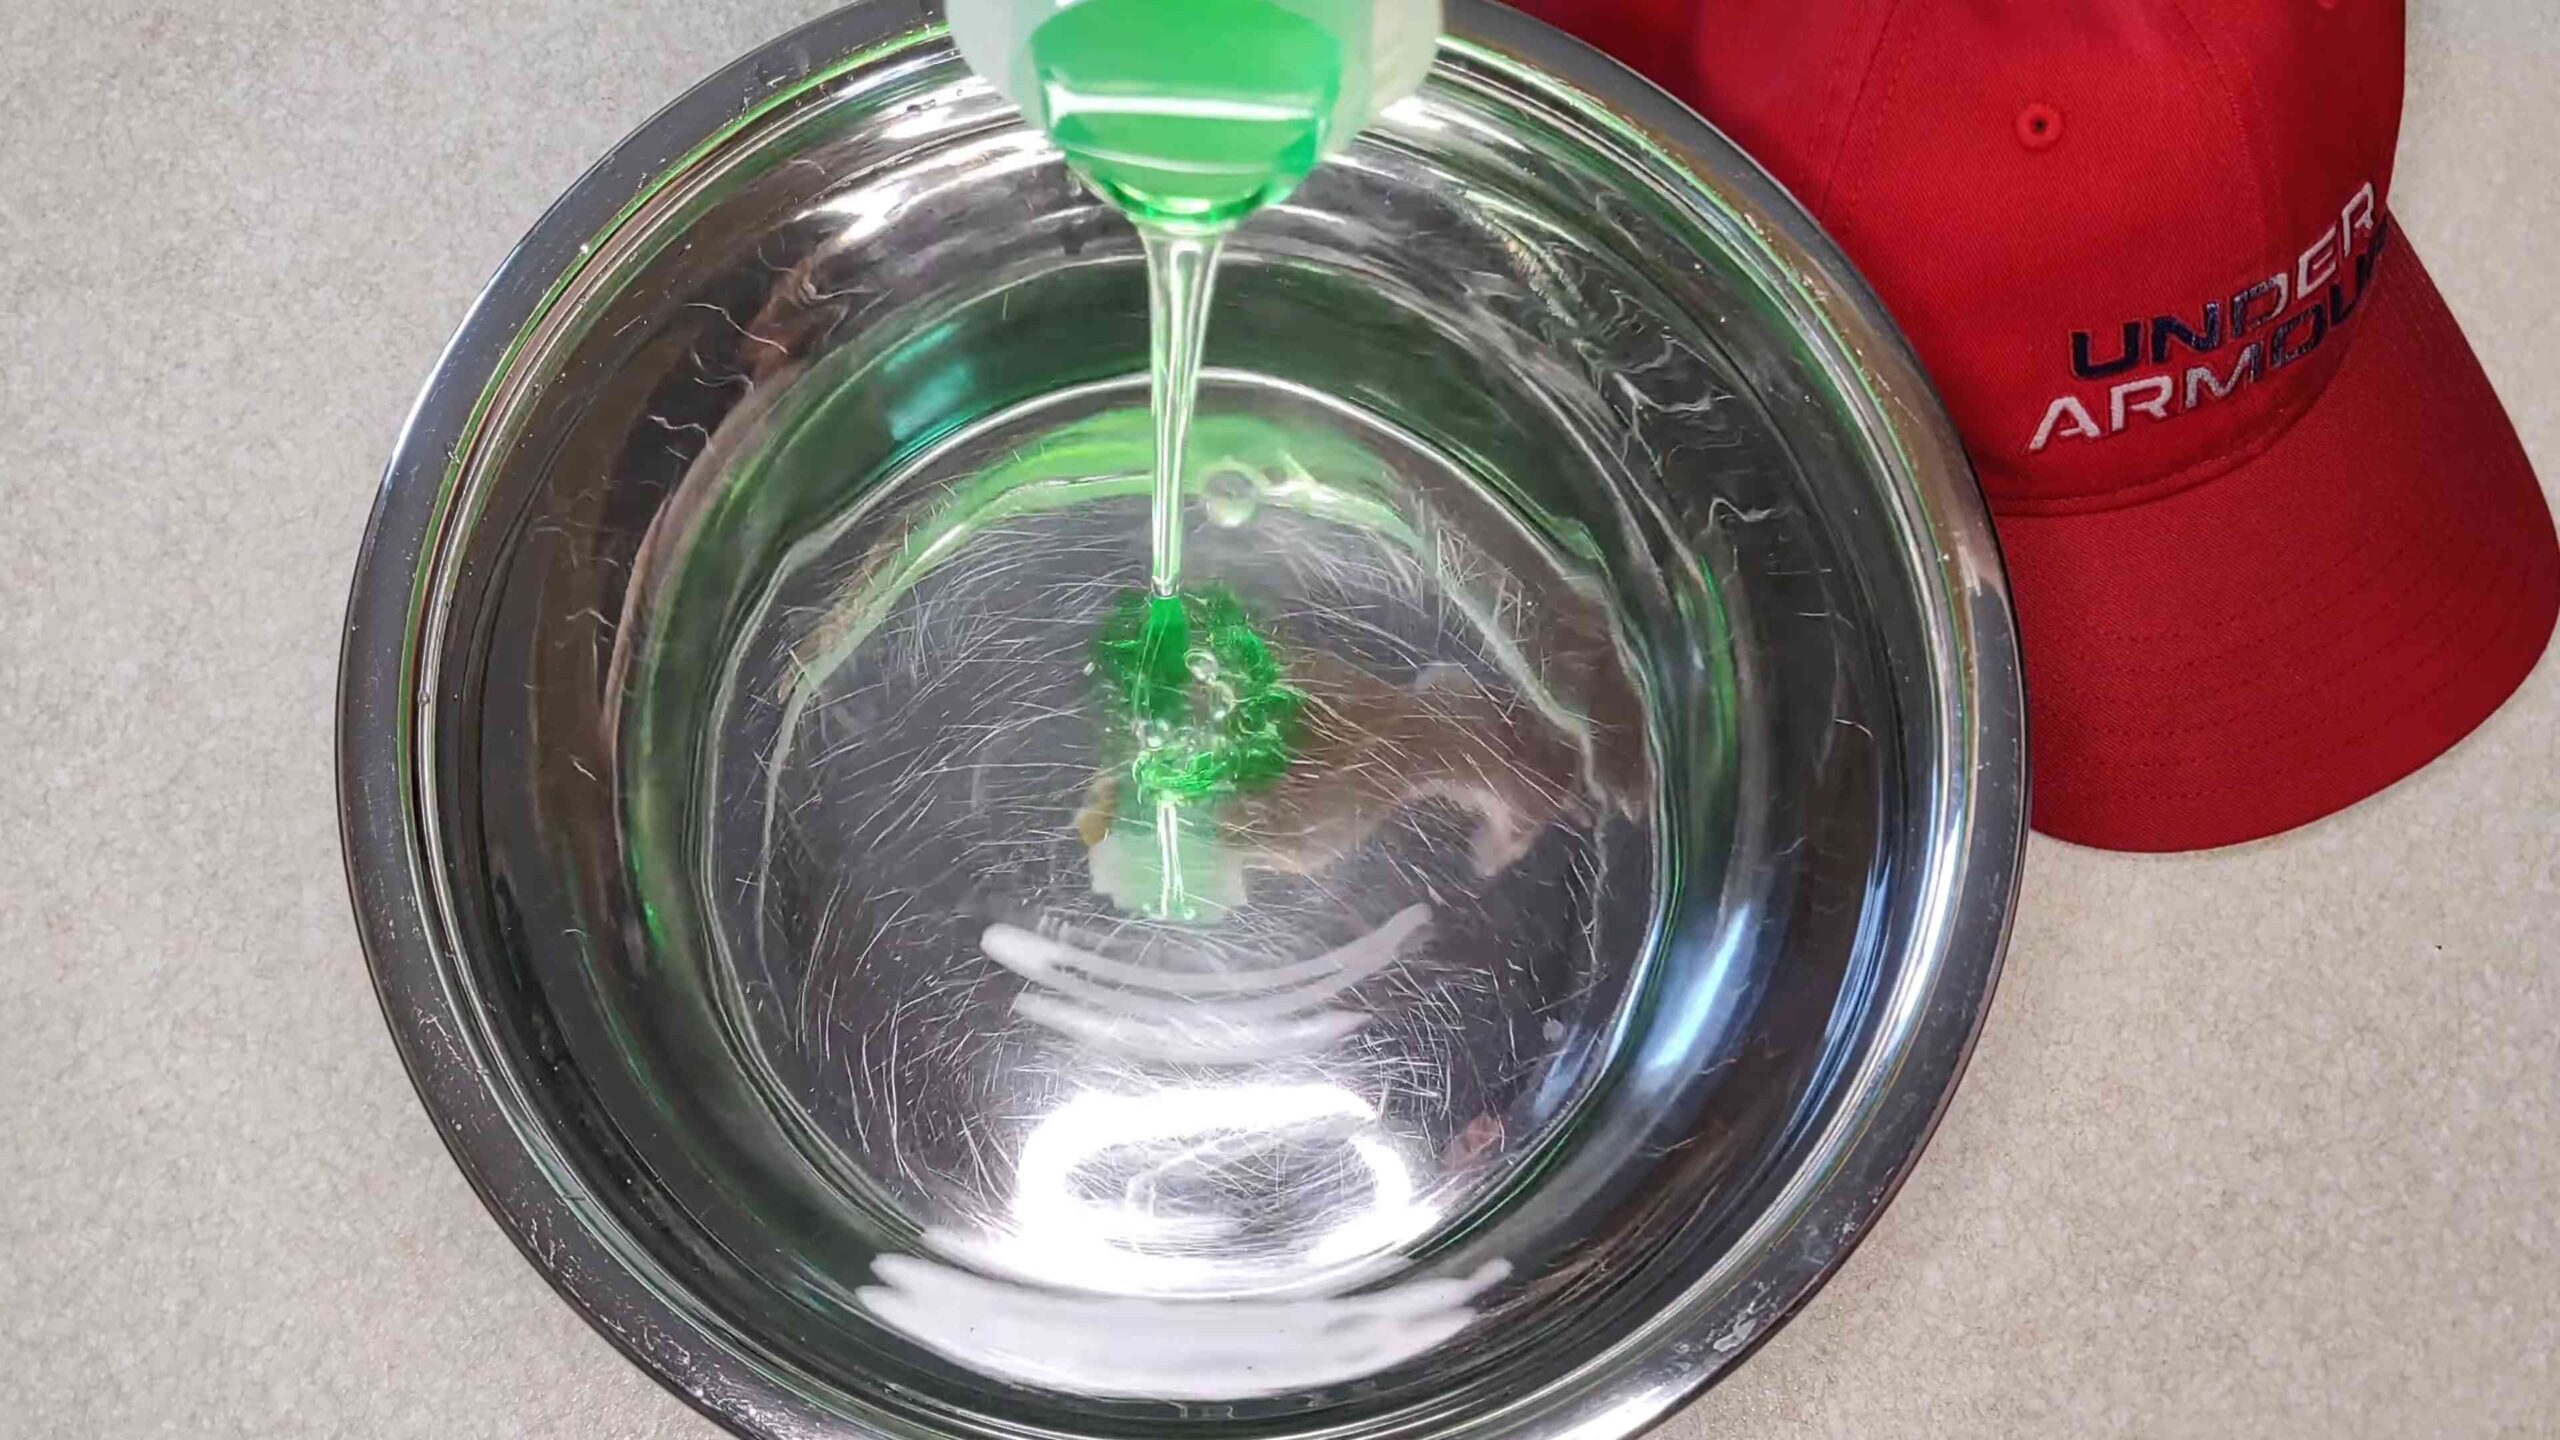
1. Fill the Sink: Fill your sink or basin with cool or lukewarm water. Make sure it’s not too hot, as hot water can damage the fabric and cause colors to fade.
2. Add Detergent: Add a small amount of mild laundry detergent to the water. You really don’t need much – a teaspoon or two should be plenty. Swirl the water around to distribute the detergent evenly.
3. Submerge the Cap: Gently submerge the baseball cap in the soapy water. Make sure the entire cap is wet.
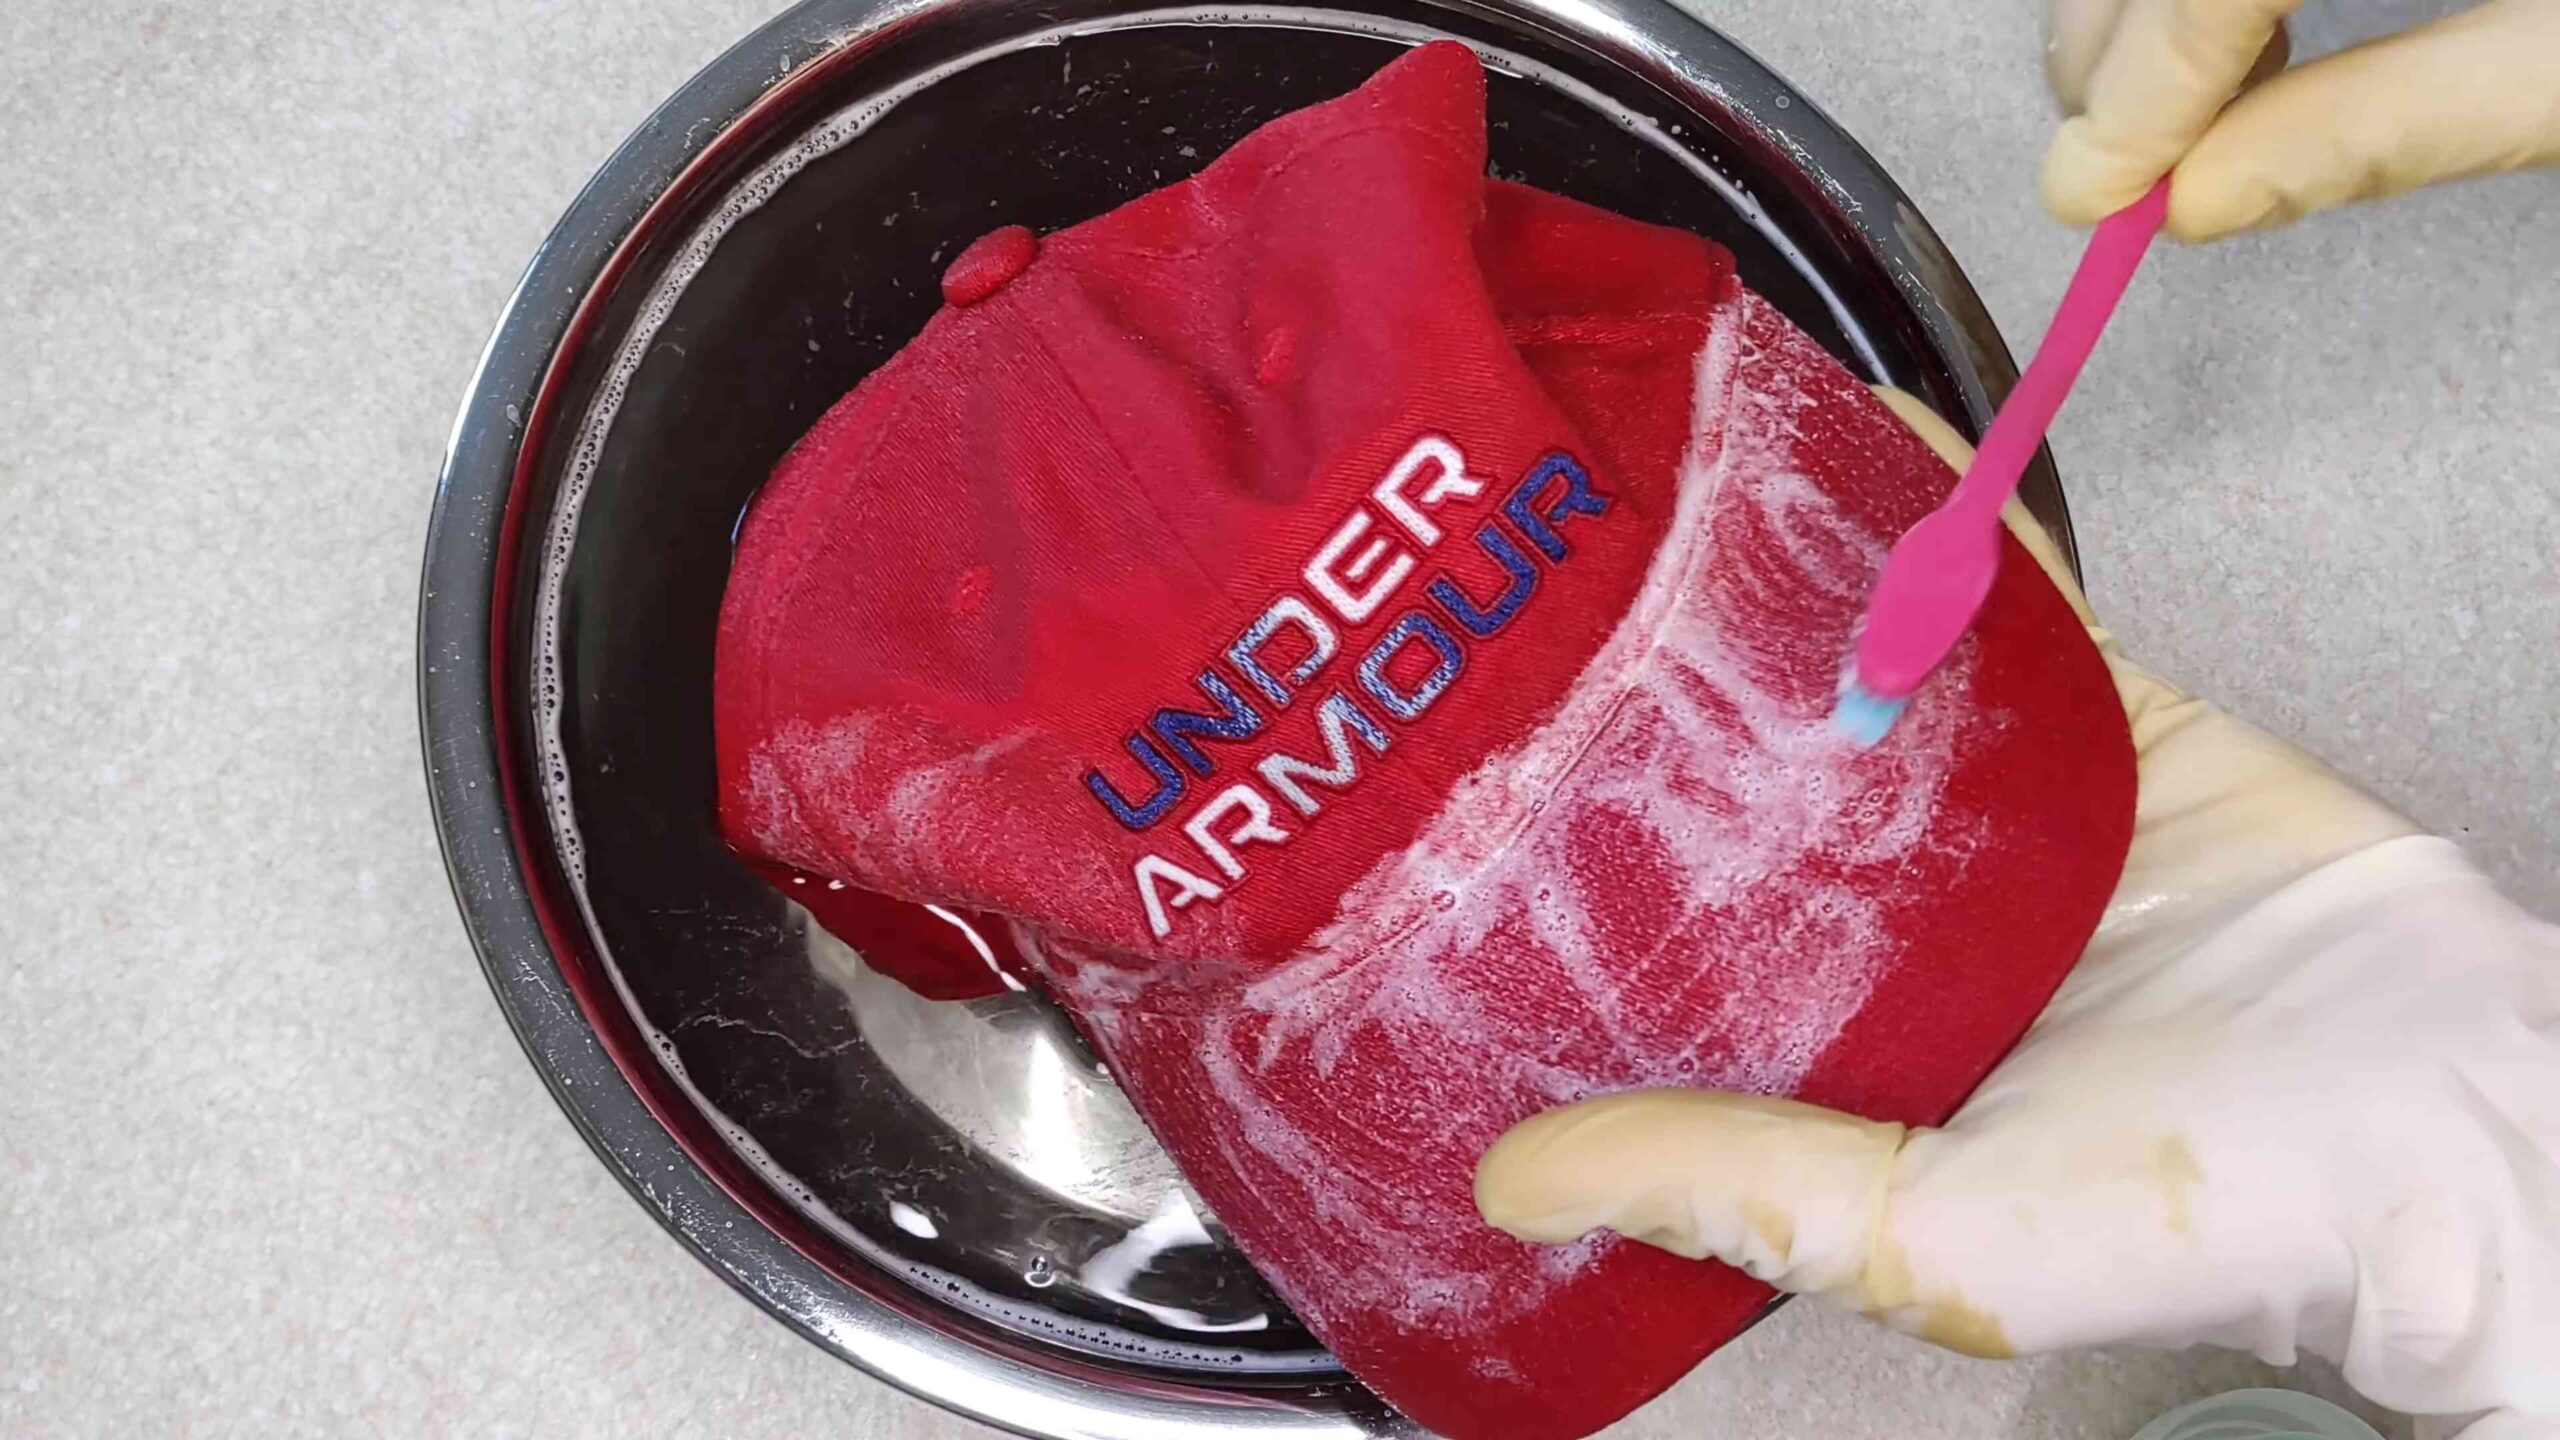
4. Agitate Gently: Use your hands to gently agitate the cap in the water. This will help loosen dirt and grime. Don’t scrub too hard, especially on delicate areas like the brim or any embroidered logos.
5. Spot Clean Stains: If you have any specific stains, now’s the time to address them. Apply a small amount of detergent directly to the stain and gently scrub with your soft-bristled brush. Work in small, circular motions.
6. Rinse Thoroughly: Drain the soapy water and rinse the cap thoroughly with cool, clean water. Keep rinsing until all the soap is gone. This is important, as any remaining soap can attract dirt and leave a residue.
7. Gently Squeeze Out Excess Water: Gently squeeze out the excess water from the cap. Don’t wring it out, as this can damage the shape.
8. Shape and Air Dry: This is crucial! Place the cap on a cap shaper, balloon, bowl, or rolled-up towel to help it maintain its shape while drying. This is especially important for structured caps.
9. Air Dry Completely: Allow the cap to air dry completely in a well-ventilated area. Avoid direct sunlight, as this can cause colors to fade. It might take a day or two for the cap to dry completely.
Method 2: The Dishwasher Method (Use with Caution!)
Okay, I know what you’re thinking: “The dishwasher? Really?” Yes, really! But this method is a bit controversial, and I only recommend it for *certain* types of caps – specifically, durable, unstructured caps made of cotton or polyester. Never put a wool cap or a cap with a cardboard brim in the dishwasher! The heat and water can ruin them.
What You’ll Need:
* Your dishwasher (obviously!)
* Mild laundry detergent (powdered detergent is best)
* A cap shaper (essential for this method)
* A top-rack dishwasher basket (optional, but recommended)
Step-by-Step Instructions:
1. Prepare the Cap: Remove any loose dirt or debris from the cap.
2. Place in Dishwasher: Place the cap on a cap shaper. This is absolutely essential to prevent the cap from losing its shape in the dishwasher. If you have a top-rack dishwasher basket, place the cap (on the shaper) inside the basket. This will help keep it from getting tossed around during the wash cycle.
3. Add Detergent: Add a small amount of powdered laundry detergent to the dishwasher’s detergent dispenser. Use about half the amount you would normally use for a load of dishes.
4. Run a Gentle Cycle: Run the dishwasher on a gentle cycle with cool or lukewarm water. Do not use the heated dry cycle! The heat can damage the cap.
5. Remove and Air Dry: Once the wash cycle is complete, remove the cap from the dishwasher. Gently reshape it if necessary and allow it to air dry completely in a well-ventilated area, still on the cap shaper. Again, avoid direct sunlight.
Important Considerations for the Dishwasher Method:
* Test First: If you’re unsure about whether your cap can handle the dishwasher, test it on a small, inconspicuous area first.
* No Heat: Absolutely no heat! Use cool or lukewarm water and skip the heated dry cycle.
* Cap Shaper is a Must: Don’t even think about putting your cap in the dishwasher without a cap shaper.
* Color Bleeding: Be aware that some colors may bleed in the dishwasher. Wash similar colors together to minimize the risk of staining.
Method 3: Targeting Stubborn Stains
Sometimes, a simple wash isn’t enough to remove those really stubborn stains. Here are a few tips and tricks for tackling specific types of stains:
Sweat Stains:
* Baking Soda Paste: Mix baking soda with a little water to form a paste. Apply the paste to the sweat stain and let it sit for 30 minutes. Then, gently scrub with a soft-bristled brush and rinse thoroughly.
* Vinegar Solution: Mix equal parts white vinegar and water. Apply the solution to the sweat stain and let it sit for 15 minutes. Then, gently scrub with a soft-bristled brush and rinse thoroughly.
* Hydrogen Peroxide: For light-colored caps, you can try using hydrogen peroxide. Apply a small amount of hydrogen peroxide to the sweat stain and let it sit for a few minutes. Then, gently blot with a clean cloth and rinse thoroughly. Always test hydrogen peroxide on an inconspicuous area first to make sure it doesn’t cause discoloration.
Dirt and Mud Stains:
* Let it Dry: The first step is to let the dirt or mud dry completely. This will make it easier to brush off.
* Brush it Off: Once the dirt is dry, use a soft-bristled brush to gently brush it off.
* Spot Clean: If any stain remains, spot clean with a mild detergent and water.
Oil and Grease Stains:
* Cornstarch or Baking Soda: Sprinkle cornstarch or baking soda on the oil stain to absorb the grease. Let it sit for several hours, or even overnight. Then, brush off the powder and spot clean with a mild detergent and water.
* Dish Soap: Dish soap is designed to cut through grease, so it can be effective on oil stains. Apply a small amount of dish soap to the stain and gently scrub with a soft-bristled brush. Rinse thoroughly.
Maintaining Your Clean Cap: Prevention is Key!
The best way to keep your baseball caps looking great is to prevent them from getting too dirty in the first place. Here are a few tips:
* Spot Clean Regularly: Don’t wait until your cap is completely filthy to clean it. Spot clean any stains as soon as they occur.
* Store Properly: Store your caps in a clean, dry place. Avoid storing them in direct sunlight or in areas where they can get crushed.
*
Conclusion
So, there you have it! This simple, yet incredibly effective, DIY trick for cleaning your baseball cap is a game-changer. Forget expensive cleaning services or risking damage in the washing machine. This method is gentle, affordable, and yields fantastic results, breathing new life into your favorite headwear. We’ve shown you how to tackle sweat stains, dirt, and grime, restoring your cap to its former glory.
Why is this a must-try? Because it saves you time, money, and potential heartache. Think about all those beloved baseball caps languishing in your closet, victims of everyday wear and tear. This DIY approach empowers you to take control and keep them looking their best. Plus, it’s incredibly satisfying to see the transformation firsthand.
But don’t stop there! Feel free to experiment with variations to suit your specific needs. For instance, if you’re dealing with particularly stubborn stains, consider pre-treating them with a paste of baking soda and water before the main cleaning process. You can also adjust the type of detergent used based on the fabric of your cap. Delicate materials might benefit from a gentler, enzyme-free formula.
Another variation to consider is the drying method. While air-drying is generally recommended, you can speed up the process by using a fan or placing the cap in a well-ventilated area. Just be sure to avoid direct sunlight, which can cause fading. For structured caps, consider using a cap shaper during the drying process to help maintain their form.
This DIY cleaning method isn’t just about aesthetics; it’s about extending the lifespan of your baseball cap. By regularly cleaning your cap, you prevent the buildup of sweat and dirt, which can degrade the fabric over time. This means you can enjoy your favorite cap for years to come.
We are confident that this method will become your go-to solution for keeping your baseball caps clean and fresh. It’s a simple, effective, and environmentally friendly way to care for your headwear.
Now, it’s your turn! We encourage you to try this DIY trick and see the amazing results for yourself. Don’t be afraid to experiment with the variations we’ve suggested and find what works best for you. And most importantly, share your experience with us! We’d love to hear your tips, tricks, and success stories in the comments below. Let’s build a community of baseball cap cleaning enthusiasts!
Remember, a clean baseball cap is a happy baseball cap (and a happy you!). So, grab your supplies, follow our instructions, and get ready to transform your headwear. You’ll be amazed at the difference a little DIY can make.
Frequently Asked Questions (FAQ)
Q: What type of detergent should I use?
A: For most baseball caps, a mild, liquid laundry detergent is ideal. Avoid using harsh chemicals, bleach, or detergents with strong fragrances, as these can damage the fabric or cause discoloration. If your cap is made of a delicate material like wool or silk, opt for a detergent specifically designed for delicate fabrics. Enzyme-free detergents are also a good choice for delicate materials, as they are less likely to cause fading or damage. Always test the detergent on a small, inconspicuous area of the cap first to ensure it doesn’t cause any adverse reactions.
Q: How often should I clean my baseball cap?
A: The frequency of cleaning depends on how often you wear your cap and the activities you engage in while wearing it. If you wear your cap daily or during strenuous activities that cause you to sweat, you should clean it more frequently, perhaps every week or two. If you only wear your cap occasionally, you can clean it less often, such as every month or two. Regularly spot-cleaning your cap to remove dirt and stains can also help extend the time between full cleanings.
Q: Can I use this method on all types of baseball caps?
A: This method is generally safe for most types of baseball caps, but it’s always a good idea to check the care label before proceeding. Caps made of delicate materials like wool, silk, or vintage fabrics may require special care. For these types of caps, consider hand-washing them with a gentle detergent and avoiding harsh scrubbing. Structured caps with cardboard brims should be handled with extra care to prevent damage to the brim. If you’re unsure about the best way to clean your cap, it’s always best to err on the side of caution and consult a professional cleaner.
Q: How do I dry my baseball cap after cleaning?
A: Air-drying is the best method for drying your baseball cap after cleaning. Avoid using a dryer, as the heat can shrink or damage the fabric. To air-dry your cap, place it in a well-ventilated area away from direct sunlight. Direct sunlight can cause fading, especially on darker-colored caps. You can also use a fan to speed up the drying process. For structured caps, consider using a cap shaper or stuffing the cap with clean towels to help maintain its shape while it dries. Make sure the cap is completely dry before storing it to prevent mildew growth.
Q: What if I have stubborn stains that won’t come out?
A: For stubborn stains, pre-treating the area with a stain remover or a paste of baking soda and water can be helpful. Apply the stain remover or baking soda paste to the stain and let it sit for 15-30 minutes before proceeding with the main cleaning process. You can also try using a soft-bristled brush to gently scrub the stain. Avoid using harsh chemicals or abrasive cleaners, as these can damage the fabric. If the stain persists after multiple attempts, consider consulting a professional cleaner.
Q: How can I prevent my baseball cap from fading?
A: To prevent your baseball cap from fading, avoid exposing it to direct sunlight for extended periods. When storing your cap, keep it in a cool, dark place. You can also use a UV protectant spray to help shield the fabric from the sun’s harmful rays. When washing your cap, use a mild detergent and avoid using bleach or harsh chemicals. Turning the cap inside out before washing can also help protect the color.
Q: My baseball cap has a cardboard brim. Is this method safe for it?
A: Cleaning a baseball cap with a cardboard brim requires extra caution. Avoid submerging the entire cap in water, as this can damage the cardboard. Instead, focus on spot-cleaning the affected areas with a damp cloth and a mild detergent. Be careful not to saturate the brim with water. After cleaning, blot the area dry with a clean towel and allow the cap to air-dry in a well-ventilated area. Consider using a cap shaper during the drying process to help maintain the brim’s shape. If you’re concerned about damaging the cardboard brim, consider consulting a professional cleaner.
Q: Can I use a washing machine to clean my baseball cap?
A: While some people have success cleaning baseball caps in a washing machine, it’s generally not recommended, especially for structured caps with cardboard brims. The washing machine can be too harsh on the fabric and can damage the shape of the cap. If you choose to use a washing machine, place the cap in a garment bag or pillowcase to protect it. Use a gentle cycle with cold water and a mild detergent. Avoid using a dryer, as the heat can shrink or damage the fabric. Air-drying is always the safest option.
Q: How do I store my baseball cap properly?
A: Proper storage is essential for maintaining the shape and condition of your baseball cap. Avoid stacking caps on top of each other, as this can crush the brim. Instead, store your caps individually in a cool, dry place away from direct sunlight. You can use a cap rack or hat boxes to help organize your caps and protect them from dust and damage. For structured caps, consider using a cap shaper to help maintain their shape while they’re being stored.
Leave a Comment