

Clean Cutting Board Naturally – that’s the secret weapon every home cook needs in their arsenal! Let’s face it, our cutting boards are the unsung heroes of the kitchen, silently enduring countless chopping sessions. But all that action leaves them vulnerable to stains, odors, and even bacteria. Are you tired of scrubbing endlessly, only to be met with lingering smells and unsightly marks? I know I was!
For generations, resourceful cooks have sought natural solutions to keep their kitchens sparkling. Think about it – before harsh chemicals, our grandmothers relied on the power of simple ingredients like lemon and salt to keep their wooden tools fresh. This isn’t just about cleaning; it’s about connecting with a tradition of sustainable and effective home care.
That’s why I’m so excited to share these easy and effective DIY tricks for how to clean cutting board naturally. Not only will you save money by ditching expensive cleaning products, but you’ll also be creating a healthier and more hygienic cooking environment for yourself and your family. Plus, these methods are gentle on your cutting boards, extending their lifespan and keeping them looking their best. Ready to say goodbye to stubborn stains and hello to a sparkling clean cutting board? Let’s get started!
DIY: Revive Your Cutting Board with Natural Cleaning Power!
Hey there, fellow DIY enthusiasts! I’m so excited to share this super simple, yet incredibly effective, method for cleaning and sanitizing your wooden cutting boards using all-natural ingredients. Forget harsh chemicals – we’re going green and getting our boards sparkling clean! I’ve been using this method for years, and my cutting boards are always ready for action.
Why Natural Cleaning?
Before we dive in, let’s talk about why I prefer natural cleaning for my cutting boards. First and foremost, wooden cutting boards are porous, meaning they can absorb liquids and odors. Using harsh chemicals can leave residue that could potentially leach into your food. Yuck! Natural ingredients like lemon, salt, and vinegar are not only effective at killing bacteria and removing odors, but they’re also safe for food contact. Plus, they’re readily available and budget-friendly!
What You’ll Need:
* Coarse Salt: This acts as a gentle abrasive to scrub away food particles. I usually use kosher salt or sea salt.
* Lemon: The citric acid in lemon juice is a natural disinfectant and deodorizer. Plus, it smells amazing!
* White Vinegar: Another powerful disinfectant and odor eliminator.
* Baking Soda (Optional): For extra stubborn stains or odors.
* Food-Grade Mineral Oil or Beeswax: To condition and protect the wood after cleaning.
* Clean Cloth or Sponge: For scrubbing and wiping.
* Knife or Scraper: To remove any stuck-on food debris.
* Small Bowl: To mix ingredients (optional).
* Paper Towels: For drying.
Step-by-Step Cleaning Guide
Alright, let’s get down to business! Here’s my tried-and-true method for cleaning wooden cutting boards naturally:
1. Remove Loose Debris: Start by scraping off any loose food particles with a knife or scraper. This will make the cleaning process much easier. Don’t skip this step!
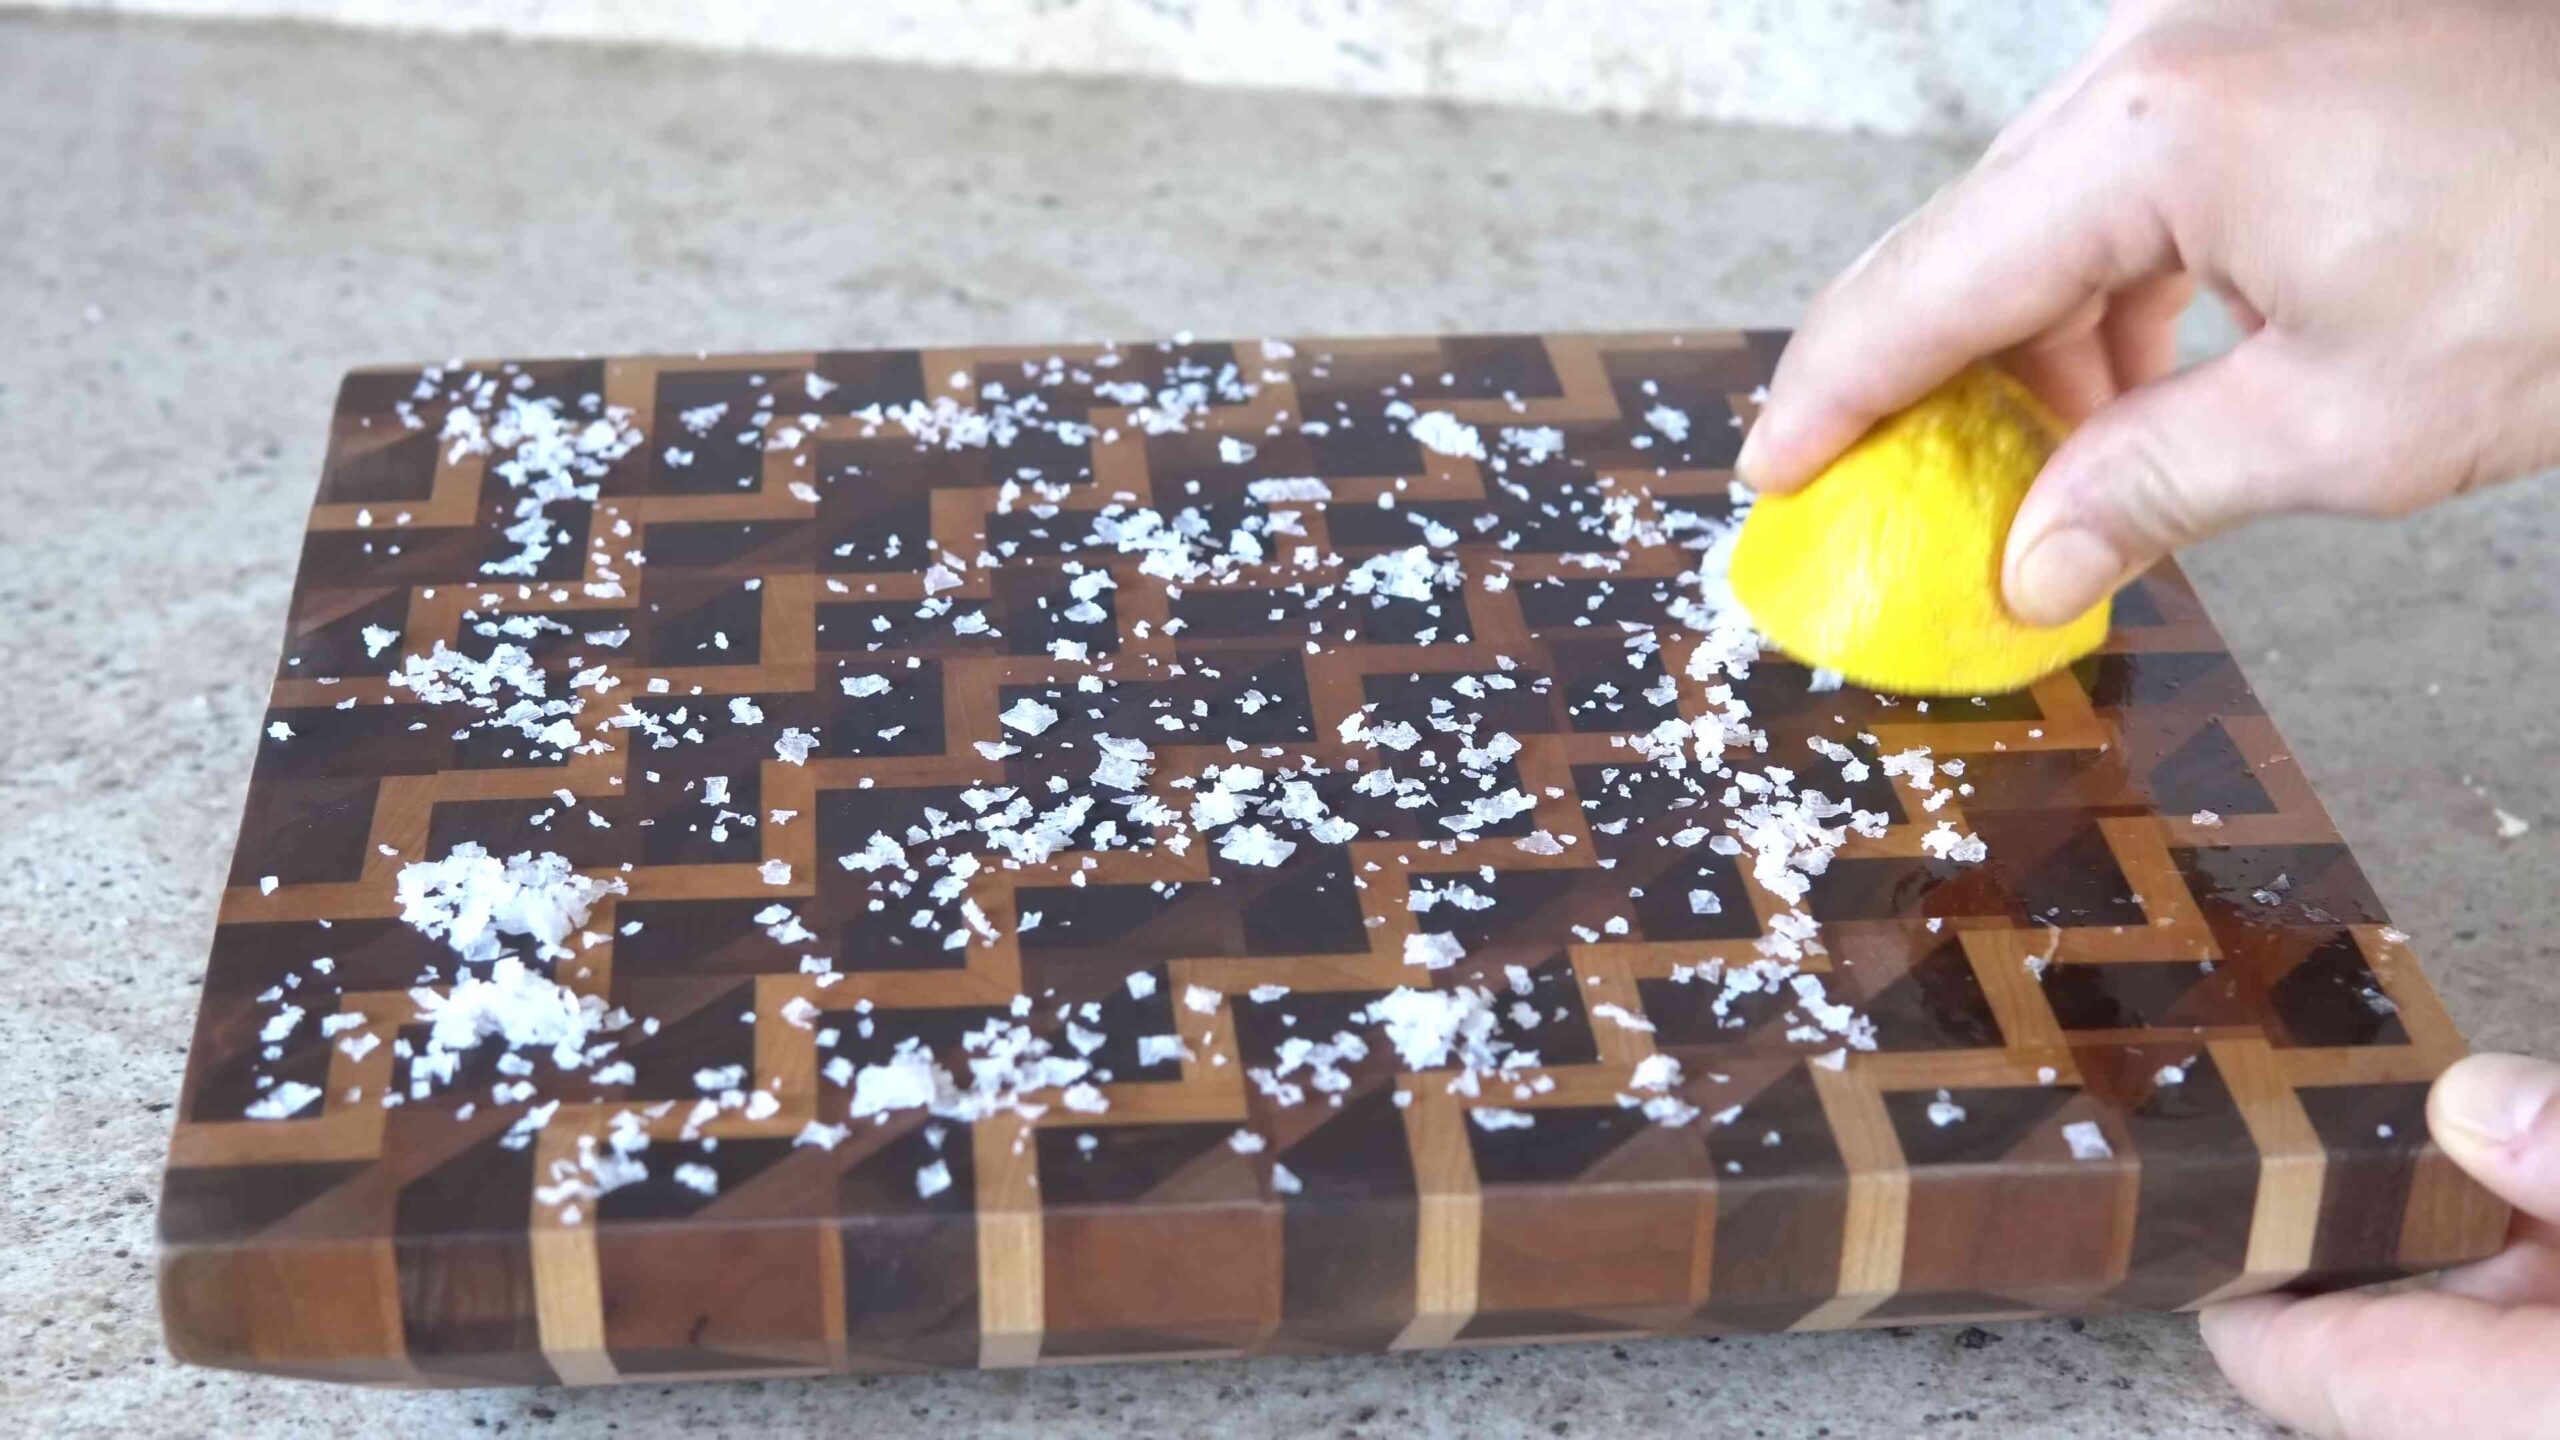
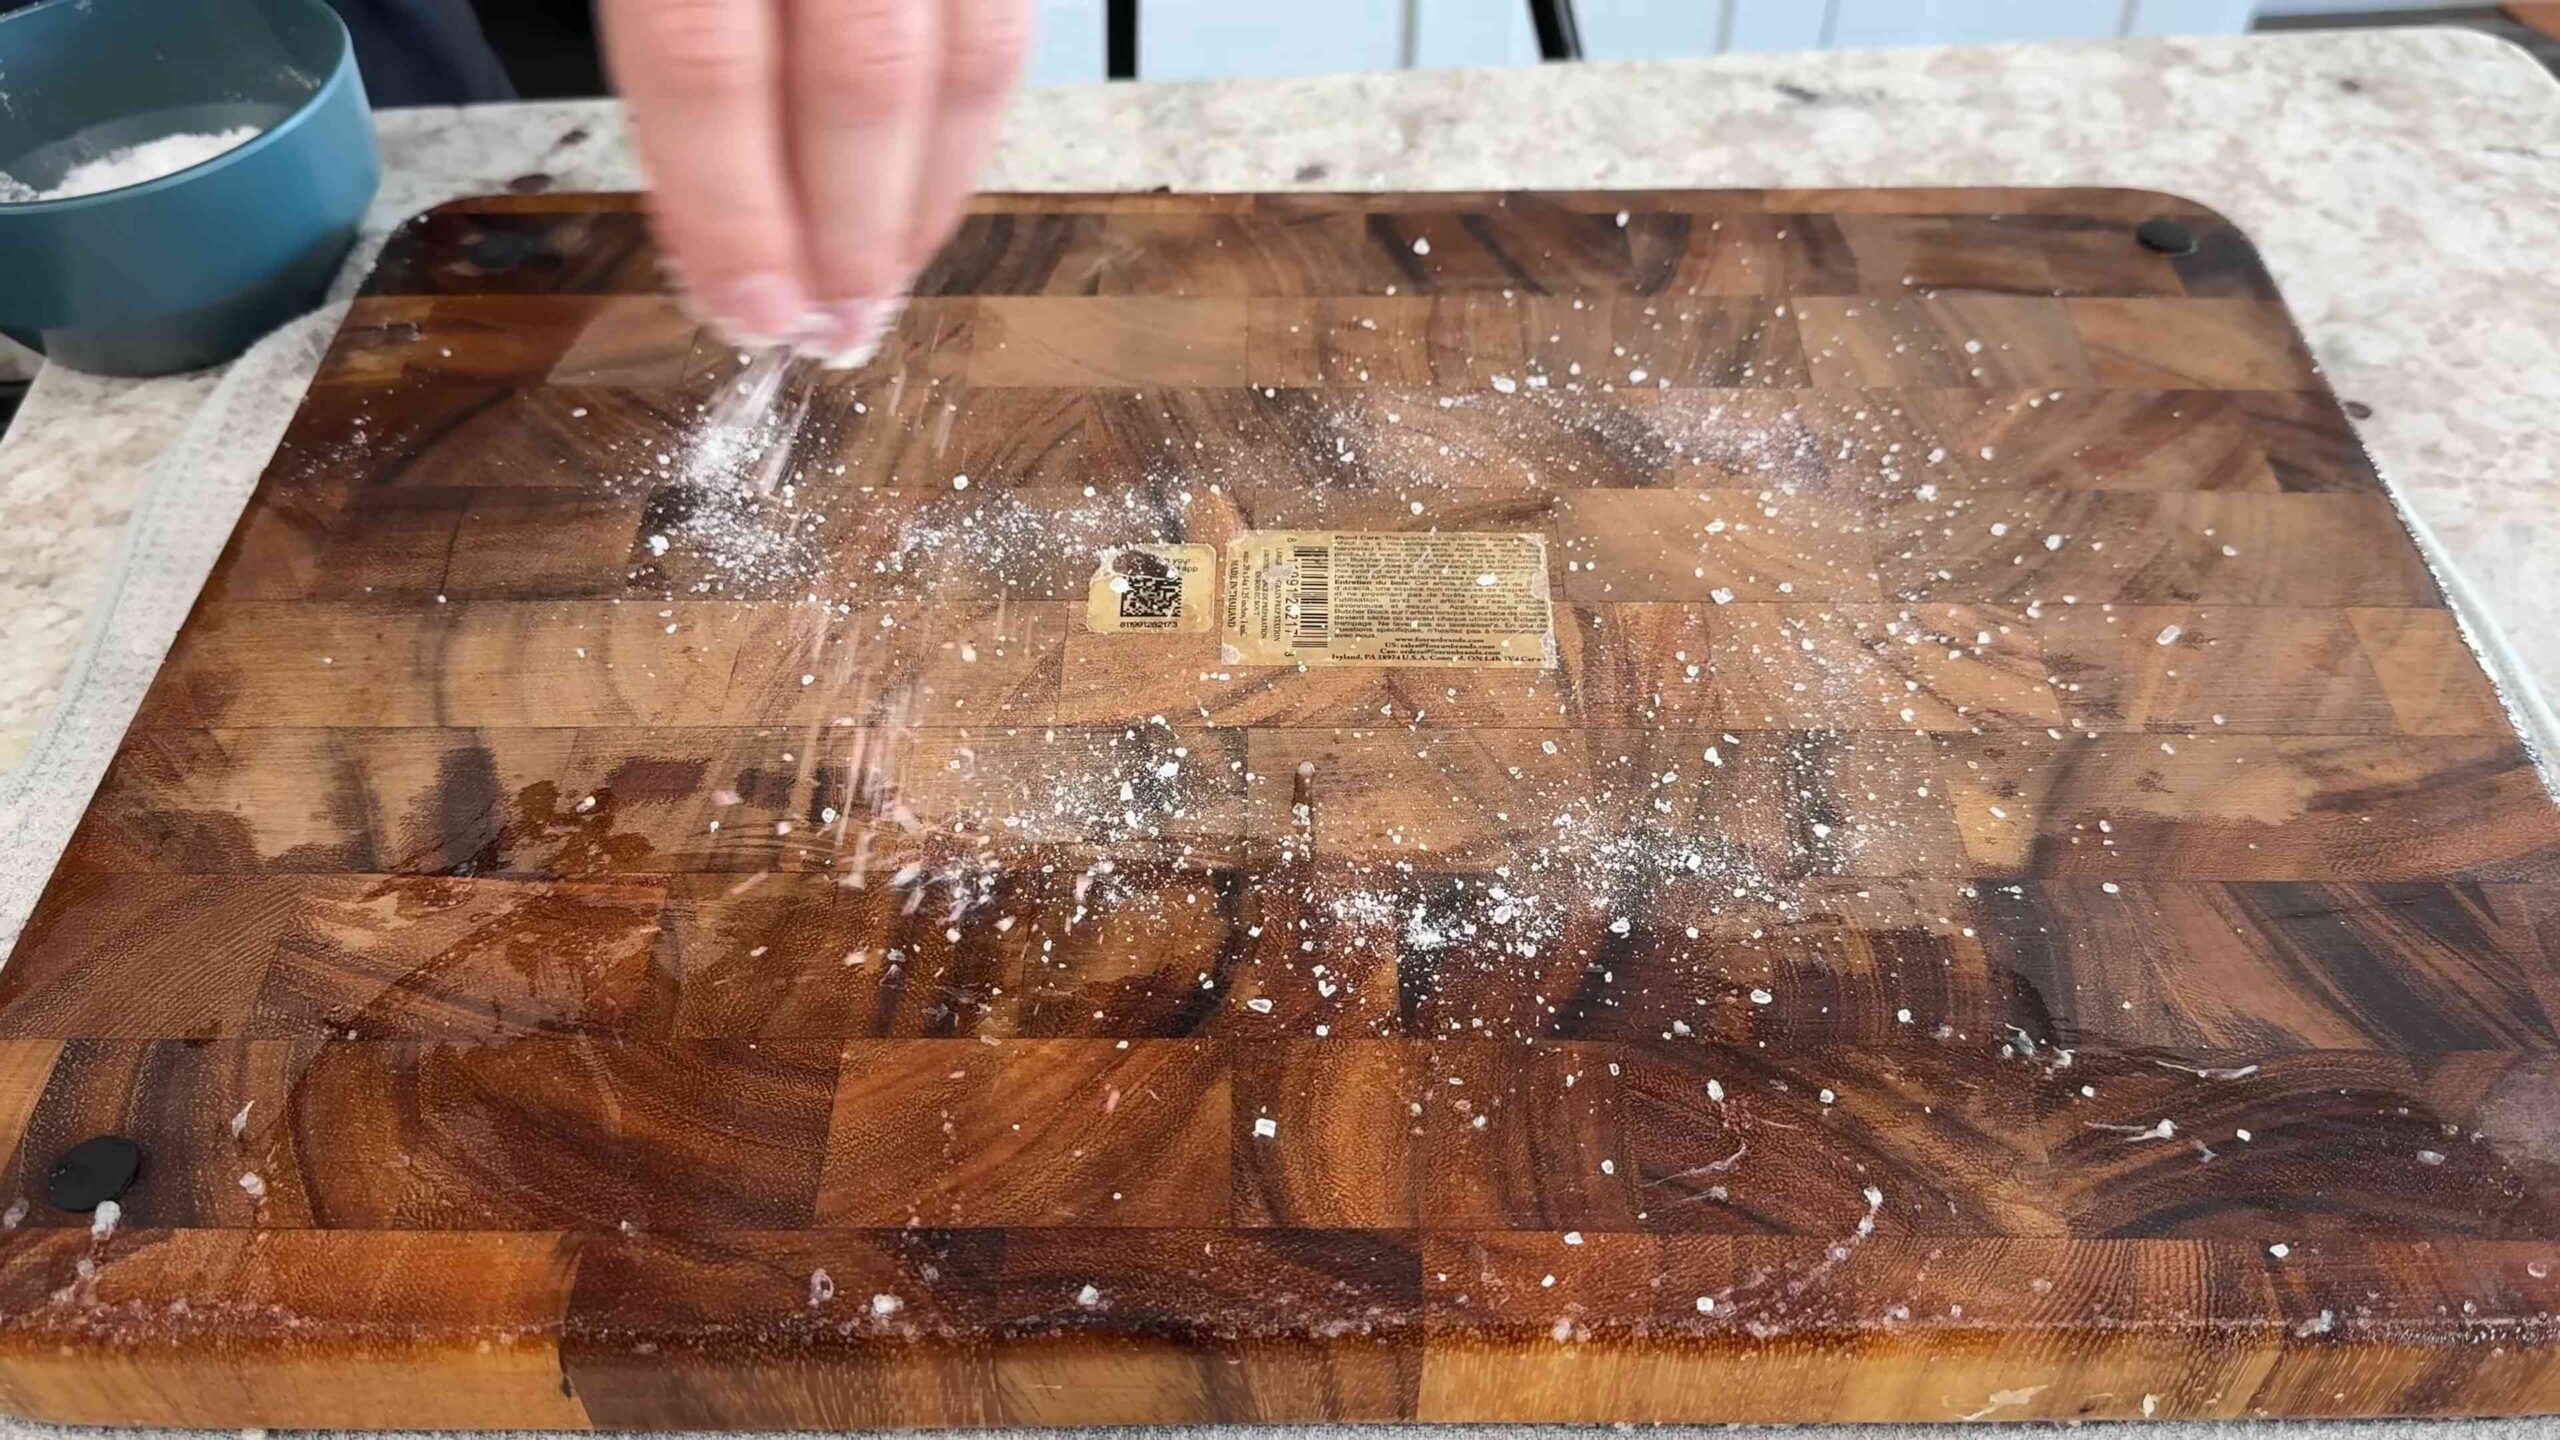
2. Salt Scrub: Generously sprinkle coarse salt all over the surface of your cutting board. Don’t be shy – you want a good layer of salt to work with.
3. Lemon Power: Cut a lemon in half. Use one half to scrub the salt into the cutting board. Squeeze the lemon as you scrub to release the juice. The combination of the salt and lemon juice will create a powerful cleaning paste. Scrub in a circular motion, paying extra attention to any stained or heavily used areas. I usually spend a good 2-3 minutes on this step.
4. Vinegar Rinse (Optional): If your cutting board has a particularly strong odor or stubborn stains, you can rinse it with white vinegar after the lemon scrub. Simply pour a small amount of vinegar over the board and let it sit for a few minutes. Then, rinse thoroughly with warm water.
5. Baking Soda Boost (For Stubborn Stains): If you’re dealing with really tough stains, create a paste of baking soda and water. Apply the paste to the stained areas and let it sit for about 15-20 minutes. Then, scrub with a cloth or sponge and rinse thoroughly.
6. Thorough Rinse: Rinse the cutting board thoroughly with warm water to remove all traces of salt, lemon juice, vinegar, or baking soda. Make sure there’s no residue left behind.
7. Dry Completely: Pat the cutting board dry with paper towels. Then, stand it upright to air dry completely. This is crucial! Never store a damp cutting board, as this can lead to mold and bacteria growth. I usually let mine air dry overnight.
Conditioning Your Cutting Board
Once your cutting board is completely dry, it’s time to condition it. This step is essential for protecting the wood and preventing it from drying out and cracking.
1. Apply Mineral Oil or Beeswax: Pour a generous amount of food-grade mineral oil or beeswax onto the cutting board. I personally prefer mineral oil because it’s readily available and inexpensive.
2. Rub it In: Use a clean cloth to rub the oil or beeswax into the wood. Make sure to cover the entire surface, including the edges and sides.
3. Let it Soak: Allow the oil or beeswax to soak into the wood for at least a few hours, or preferably overnight. The longer it soaks, the better.
4. Wipe Off Excess: After the soaking period, wipe off any excess oil or beeswax with a clean cloth. You want the wood to be conditioned, but not greasy.
Maintaining Your Cutting Board
To keep your cutting board in tip-top shape, here are a few maintenance tips:
* Clean After Each Use: After each use, wipe down your cutting board with a damp cloth and mild soap. Avoid soaking it in water, as this can damage the wood.
* Sanitize Regularly: Sanitize your cutting board using the lemon and salt method at least once a week, or more often if you’re cutting raw meat or poultry.
* Oil Regularly: Re-oil your cutting board every few weeks, or whenever it starts to look dry.
* Avoid Dishwashers: Never put your wooden cutting board in the dishwasher. The high heat and harsh detergents can damage the wood.
* Store Properly: Store your cutting board in a dry, well-ventilated area. Avoid storing it in a damp cabinet or drawer.
Addressing Common Cutting Board Issues
Let’s tackle some common problems you might encounter with your wooden cutting boards:
Odor Removal
Sometimes, even after cleaning, your cutting board might retain lingering odors, especially after cutting onions or garlic. Here’s how to combat those stubborn smells:
* Baking Soda Paste: As mentioned earlier, a baking soda paste is excellent for absorbing odors. Apply it to the affected area, let it sit for a while, and then rinse thoroughly.
* Vinegar Soak: For really persistent odors, you can soak your cutting board in a solution of equal parts white vinegar and water for about 30 minutes. Make sure to rinse it well afterward.
* Sunlight: Believe it or not, sunlight can also help to eliminate odors. Place your cutting board in direct sunlight for a few hours. The UV rays will help to break down the odor-causing molecules.
Stain Removal
Stains are another common issue with wooden cutting boards. Here are a few tips for removing them:
* Lemon Juice and Sunlight: This is a classic combination for lightening stains. Apply lemon juice to the stained area and then place the cutting board in direct sunlight. The sun will help to bleach the stain.
* Hydrogen Peroxide: For more stubborn stains, you can try using hydrogen peroxide. Apply a small amount of hydrogen peroxide to the stain, let it sit for a few minutes, and then rinse thoroughly. Be careful not to use too much hydrogen peroxide, as it can damage the wood.
* Fine-Grit Sandpaper: If all else fails, you can try sanding the stained area with fine-grit sandpaper. Be sure to sand in the direction of the grain and to re-oil the board afterward.
Warping
Warping can occur if your cutting board is exposed to excessive moisture or heat. Here’s how to prevent and address warping:
* Proper Drying: Always dry your cutting board thoroughly after washing it.
* Avoid Extreme Temperatures: Don’t place your cutting board near a heat source, such as a stove or oven.
* Even Oiling: Oil both sides of your cutting board evenly to prevent uneven moisture absorption, which can lead to warping.
* Weighting: If your cutting board is already warped, you can try to flatten it by placing it on a flat surface and weighting it down with heavy objects. This may take several days or even weeks to work.
Choosing the Right Wood
The type of wood your cutting board is made from can also affect its durability and hygiene. Here are a few popular choices:
* Maple: Maple is a hard, dense wood that is resistant to scratches and cuts. It’s also relatively non-porous, which makes it less likely to absorb bacteria.
* Cherry: Cherry is another good choice for cutting boards. It’s a bit softer than maple, but it’s still durable and attractive.
* Walnut: Walnut is a beautiful, dark-colored wood that is also relatively durable. However, it’s more porous than maple or cherry, so it’s important to oil it regularly.
* Bamboo: Bamboo is a sustainable and eco-friendly option for cutting boards. It’s also naturally antibacterial.
Safety First!
Before I forget, a quick word about safety:
* Always use caution when working with knives and other sharp objects.
* Wear gloves if you have sensitive skin or if you’re using hydrogen peroxide.
* Keep cleaning products out of reach of children and pets.
Final Thoughts
Conclusion
So, there you have it! A simple, effective, and completely natural way to clean cutting board naturally. We’ve walked you through the steps, explained the science behind the ingredients, and hopefully, convinced you that ditching harsh chemicals for this DIY method is not only better for your health and the environment but also incredibly satisfying.
Why is this a must-try? Because it works! Stubborn stains, lingering odors, and the general grime that accumulates on a cutting board after repeated use are no match for the power of lemon, salt, and baking soda. This isn’t just about aesthetics; it’s about hygiene. A clean cutting board is a safe cutting board, preventing the spread of harmful bacteria that can lead to foodborne illnesses.
But the beauty of this method lies in its adaptability. Feel free to experiment with variations to suit your specific needs and preferences. For instance, if you’re dealing with a particularly pungent odor, like garlic or onion, you can add a few drops of tea tree oil to the baking soda paste for its antibacterial and deodorizing properties. Or, if you find that lemon alone isn’t cutting through tough stains, try using a combination of lemon juice and white vinegar. Vinegar is a powerful disinfectant and degreaser that can further enhance the cleaning power of this DIY solution.
Another variation involves the type of salt you use. While regular table salt works perfectly well, coarse sea salt can provide extra scrubbing power for those really stubborn stains. Just be mindful of the pressure you apply, especially on softer wood cutting boards, to avoid scratching the surface.
For wooden cutting boards, after cleaning and drying, consider applying a food-grade mineral oil or beeswax to condition the wood and prevent it from drying out and cracking. This will not only prolong the life of your cutting board but also make it more resistant to future stains and odors.
We truly believe that this DIY trick is a game-changer for anyone who values a clean and healthy kitchen. It’s affordable, eco-friendly, and incredibly effective. So, we urge you to give it a try! You’ll be amazed at the results.
More importantly, we want to hear about your experience! Did you find this method helpful? Did you try any variations? What were your results? Share your thoughts, tips, and photos in the comments below. Let’s build a community of clean-cutting-board enthusiasts and help each other keep our kitchens sparkling and safe! Your feedback is invaluable and will help us refine and improve this method for everyone. Don’t be shy – let us know how it goes! We are confident that once you experience the satisfaction of a naturally clean cutting board, you’ll never go back to harsh chemicals again.
Frequently Asked Questions (FAQ)
Q: What type of cutting board is this method suitable for?
A: This method is generally safe and effective for most types of cutting boards, including wooden, plastic, and bamboo. However, it’s always a good idea to test a small, inconspicuous area first, especially on delicate or antique wooden boards. For glass cutting boards, you can skip the salt scrubbing step to avoid scratching the surface. Be extra cautious with antique wooden boards, as they may have finishes that are sensitive to acidic ingredients like lemon juice and vinegar.
Q: How often should I clean my cutting board using this method?
A: The frequency of cleaning depends on how often you use your cutting board and what types of food you’re preparing. For daily use, a quick rinse with soap and water after each use is sufficient. However, we recommend a deep clean using this method at least once a week, or more often if you’re preparing raw meat, poultry, or fish. If you notice any lingering odors or stains, it’s a good indication that it’s time for a deep clean.
Q: Can I use this method to disinfect my cutting board?
A: While this method is excellent for cleaning and removing stains and odors, it’s not a substitute for proper disinfection, especially after preparing raw meat, poultry, or fish. For disinfection, you can use a solution of diluted bleach (1 tablespoon of bleach per gallon of water) or white vinegar. Apply the solution to the cutting board, let it sit for a few minutes, and then rinse thoroughly with hot water. Always follow up with the natural cleaning method to remove any residual bleach or vinegar odor.
Q: What if I don’t have lemons? Can I use something else?
A: Yes, you can substitute lemons with other acidic ingredients like limes or white vinegar. Limes have a similar acidity level to lemons and can be used in the same way. White vinegar is also a powerful cleaning agent and can be used in place of lemon juice. However, be aware that vinegar has a stronger odor than lemon, so you may want to rinse the cutting board more thoroughly after cleaning.
Q: My cutting board has deep scratches. Will this method still work?
A: Deep scratches can harbor bacteria and make it difficult to thoroughly clean your cutting board. While this method can help to remove surface stains and odors, it may not be able to reach the bacteria hidden in the scratches. If your cutting board has deep scratches, it’s best to replace it with a new one to ensure proper hygiene. Alternatively, you can try sanding down the surface of a wooden cutting board to remove the scratches, but this requires some effort and skill.
Q: Can I use essential oils in this cleaning method?
A: Yes, you can add a few drops of essential oils to the baking soda paste for their antibacterial and deodorizing properties. Tea tree oil, lemon essential oil, and eucalyptus essential oil are all good choices. However, be sure to use food-grade essential oils and use them sparingly, as some essential oils can be toxic if ingested in large quantities. Also, be aware that some people may be sensitive to certain essential oils, so it’s always a good idea to test a small area first.
Q: How do I prevent my wooden cutting board from drying out and cracking?
A: After cleaning and drying your wooden cutting board, it’s important to condition it with a food-grade mineral oil or beeswax. Apply a generous amount of oil or wax to the cutting board and let it soak in for several hours or overnight. Then, wipe off any excess oil or wax with a clean cloth. This will help to prevent the wood from drying out and cracking, and it will also make it more resistant to future stains and odors. Repeat this process every few weeks or as needed.
Q: Is baking soda abrasive? Will it scratch my cutting board?
A: Baking soda is mildly abrasive, but it’s generally safe to use on most cutting boards. However, it’s always a good idea to test a small, inconspicuous area first, especially on delicate or antique wooden boards. Avoid using excessive pressure when scrubbing with baking soda, and rinse the cutting board thoroughly after cleaning to remove any residue. For glass cutting boards, you can skip the baking soda scrubbing step altogether to avoid scratching the surface.
Q: What’s the best way to store my cutting board after cleaning?
A: After cleaning and drying your cutting board, store it in a dry, well-ventilated area. Avoid storing it in a damp or humid environment, as this can promote the growth of bacteria and mold. If you’re storing your cutting board in a cabinet or drawer, make sure it’s completely dry before putting it away. You can also prop it up on its side to allow air to circulate around it.


Leave a Comment