

Clean Silver Baking Soda Foil: Sounds like a science experiment, right? Well, it kind of is, but it’s also your secret weapon to sparkling silver without the elbow grease! I’m so excited to share this incredibly simple and effective DIY trick with you. For generations, families have struggled with tarnished silver, resorting to harsh chemicals and endless polishing. But what if I told you there’s a gentler, more eco-friendly way to restore your silverware, jewelry, and other silver treasures to their former glory?
The history of silver polishing is almost as old as silver itself! From ancient civilizations using abrasive materials to modern-day polishing compounds, people have always sought ways to maintain the luster of this precious metal. But this method, using baking soda and foil, is a game-changer. It’s based on a simple chemical reaction that reverses the tarnishing process, transferring the tarnish from your silver to the aluminum foil.
Let’s face it, nobody enjoys spending hours polishing silver. It’s tedious, time-consuming, and often involves harsh chemicals that can irritate your skin. That’s why this clean silver baking soda foil hack is so revolutionary. It’s quick, easy, inexpensive, and uses ingredients you probably already have in your kitchen. Whether you’re preparing for a special occasion or simply want to keep your silver looking its best, this DIY method will save you time, money, and effort. So, ditch the harsh chemicals and let’s get started on this simple, yet effective, way to clean silver!
DIY Silver Cleaning Hack: Baking Soda, Foil, and a Little Magic!
Okay, let’s be honest, polishing silver is a chore. I used to dread it. The creams, the cloths, the endless rubbing… ugh! But then I discovered this amazing DIY hack using baking soda, aluminum foil, and hot water. It’s seriously like magic, and it’s so much easier than traditional methods. Plus, you probably already have everything you need in your kitchen!
What You’ll Need:
* Baking Soda: The star of the show! It helps create a chemical reaction that removes the tarnish.
* Aluminum Foil: This acts as the other half of the chemical reaction, attracting the tarnish away from your silver.
* Hot Water: The hotter, the better! It speeds up the reaction.
* A Container: A glass or plastic bowl or baking dish works perfectly. Just make sure it’s large enough to hold your silver pieces and the water.
* Tongs or a Fork: To safely remove the silver from the hot water.
* Soft Cloth: For drying and buffing your newly cleaned silver.
How it Works: The Science Behind the Sparkle
Before we dive in, let’s quickly understand why this works. Tarnish on silver is actually silver sulfide, a black layer that forms when silver reacts with sulfur compounds in the air. The baking soda and aluminum foil create an electrolytic reaction. The hot water helps to facilitate this reaction. The aluminum is more reactive than silver, so the sulfur atoms are drawn to the aluminum foil, leaving your silver sparkling clean! Pretty cool, right?
Step-by-Step Instructions: Let’s Get Cleaning!
1. Prepare Your Cleaning Station: First things first, gather all your supplies. Find a well-ventilated area, just in case. Lay down some newspaper or a towel to protect your countertop.
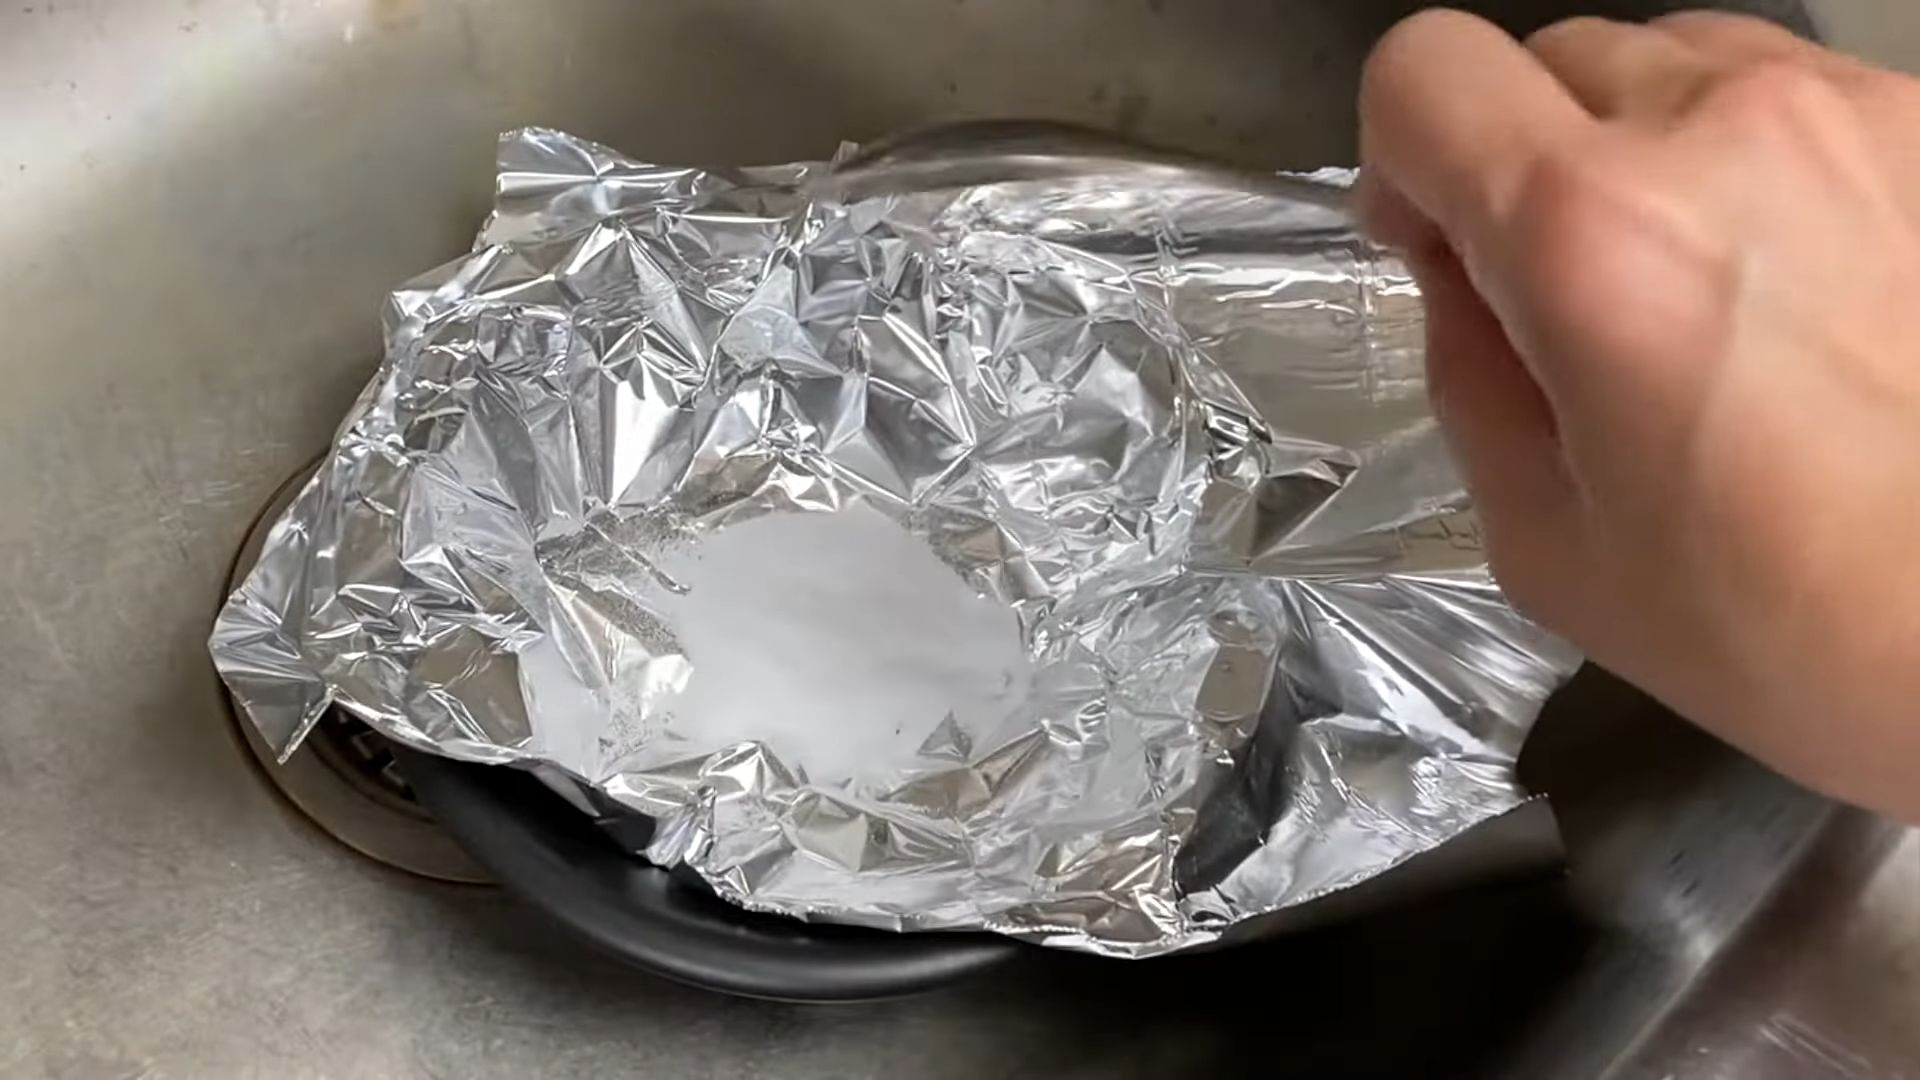
2. Line Your Container with Foil: This is important! Completely line the bottom and sides of your bowl or dish with aluminum foil. Make sure the shiny side of the foil is facing up, towards where the silver will be placed. This is the side that will attract the tarnish.
3. Add Baking Soda: Now, sprinkle a generous amount of baking soda into the foil-lined container. A good rule of thumb is about 1 tablespoon of baking soda per cup of water you’ll be using. Don’t be shy!
4. Pour in the Hot Water: Carefully pour very hot (but not boiling) water into the container. The hotter the water, the faster and more effective the cleaning process will be. Be cautious to avoid burns.
5. Stir the Mixture: Use a spoon or your tongs to stir the baking soda and hot water until the baking soda is mostly dissolved. It’s okay if there are a few undissolved grains.
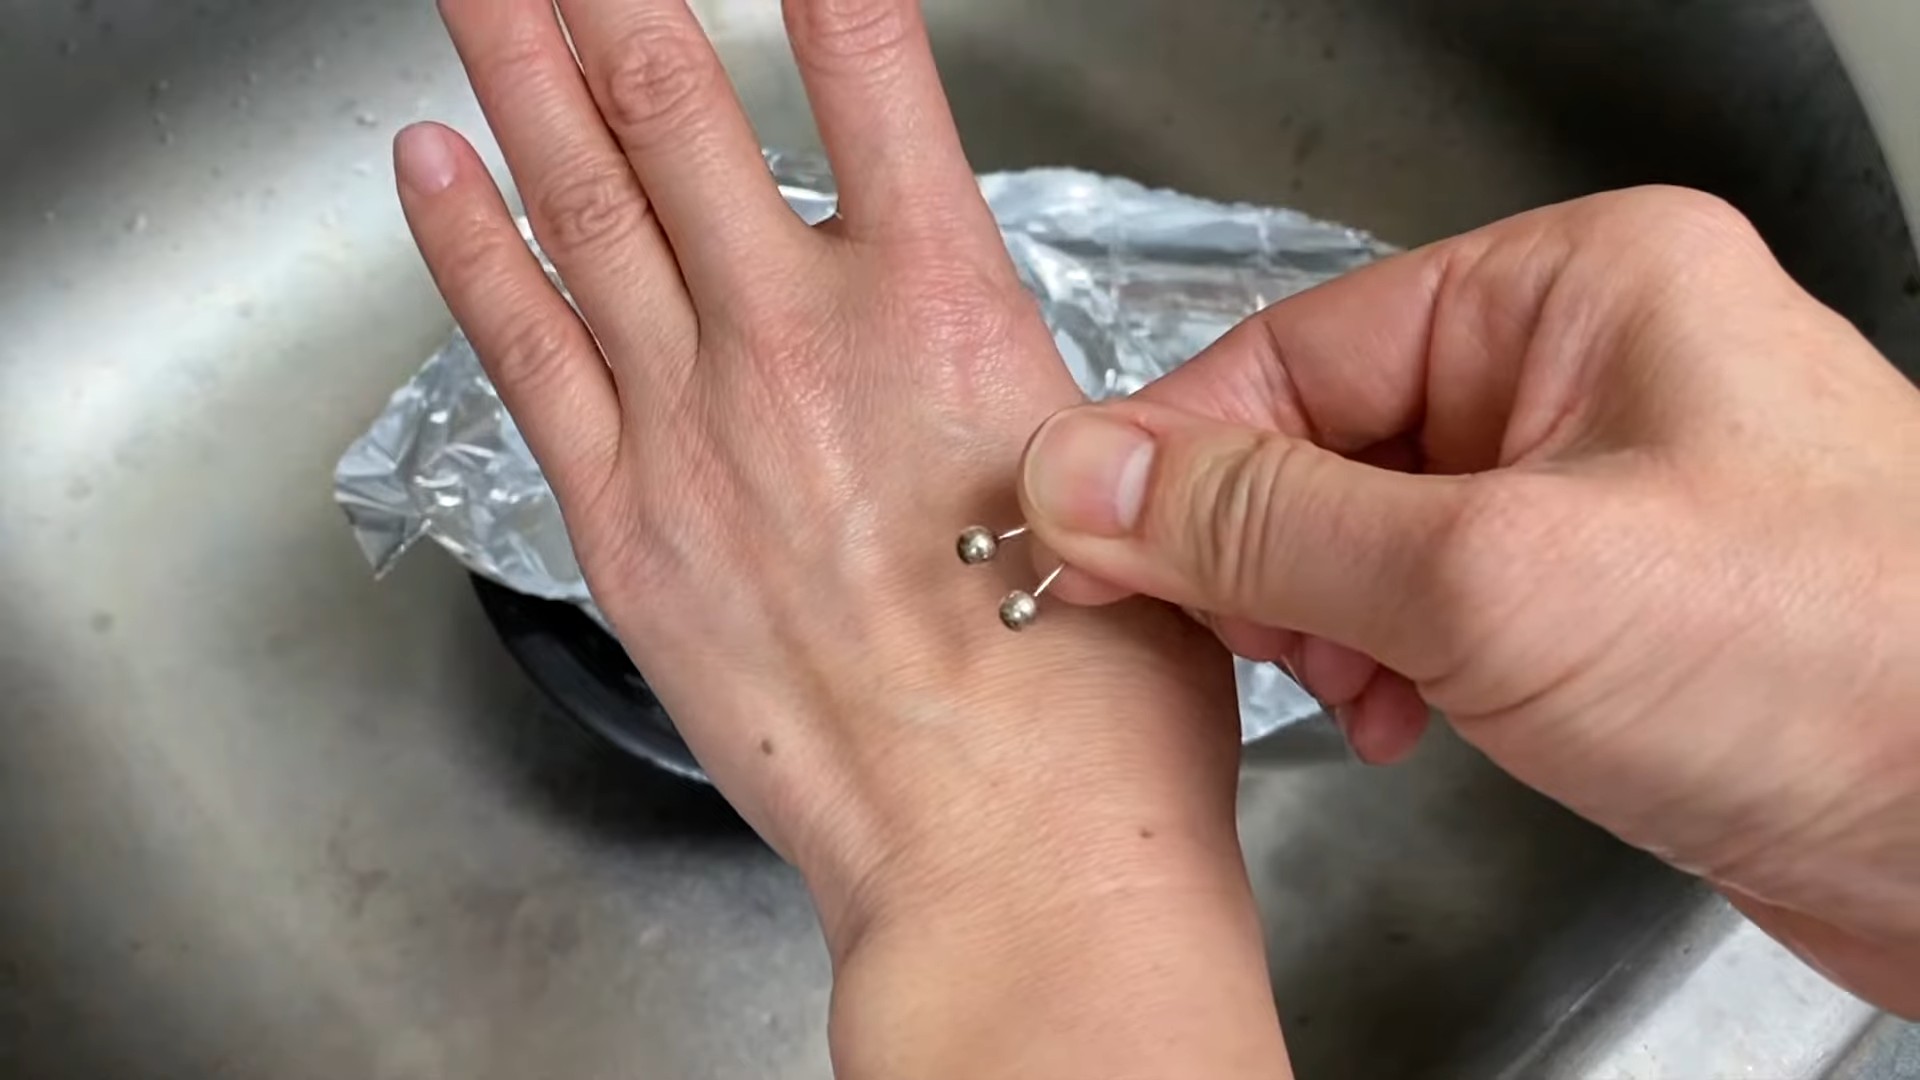
6. Submerge Your Silver: Now, gently place your tarnished silver items into the solution, making sure each piece is touching the aluminum foil. This contact is crucial for the chemical reaction to work. If you have a lot of silver, you might need to do this in batches to ensure everything gets good contact with the foil.
7. Wait and Watch the Magic Happen: This is the fun part! Let the silver sit in the solution for several minutes. You should start to see the tarnish disappearing almost immediately. The length of time needed depends on how tarnished your silver is. For lightly tarnished pieces, 2-3 minutes might be enough. For heavily tarnished items, you might need to wait 10-15 minutes, or even longer. Keep an eye on it and check periodically. You might even notice a slight sulfurous smell – that’s the tarnish being transferred to the foil!
8. Remove and Rinse: Once the tarnish is gone (or significantly reduced), carefully remove the silver pieces from the solution using tongs or a fork. Rinse them thoroughly under cool running water to remove any baking soda residue.
9. Dry and Buff: Use a soft, clean cloth to dry your silver thoroughly. As you dry it, you can also buff it to bring out the shine even more. I like to use a microfiber cloth for this.
10. Admire Your Sparkling Silver! That’s it! Your silver should now be beautifully clean and shiny. You’ll be amazed at the difference.
Dealing with Stubborn Tarnish: Troubleshooting Tips
Sometimes, you might encounter pieces with stubborn tarnish that doesn’t completely disappear after the first treatment. Don’t worry, here are a few things you can try:
* Repeat the Process: If the tarnish is particularly heavy, simply repeat the entire process with fresh foil, baking soda, and hot water.
* Increase the Baking Soda: For stubborn areas, try using a slightly higher concentration of baking soda in the water.
* Longer Soak Time: Let the silver soak in the solution for a longer period of time, up to 30 minutes or even an hour, checking it periodically.
* Direct Contact: Make sure the tarnished areas are in direct contact with the aluminum foil. You might need to reposition the silver pieces to ensure good contact.
* For Intricate Designs: If you have silver pieces with intricate designs or hard-to-reach areas, you can use a soft toothbrush dipped in the baking soda solution to gently scrub those areas. Be very gentle to avoid scratching the silver.
Important Considerations: What Not to Clean This Way
While this method is fantastic for most silver items, there are a few things you should avoid cleaning with it:
* Items with Glued Components: The hot water can loosen glue, so avoid cleaning items with glued-on stones, pearls, or other embellishments.
* Oxidized Silver: Some silver pieces are intentionally oxidized to create a darkened, antique look. This method will remove the oxidation, which you probably don’t want.
* Certain Gemstones: Some gemstones are porous and can be damaged by the baking soda solution. If you’re unsure, it’s best to avoid cleaning silver with gemstones using this method.
* Hollowware with Pitch Fillings: Antique silver pieces sometimes have pitch fillings to add weight or stability. The hot water can melt or damage the pitch.
Maintaining Your Sparkling Silver: Prevention is Key
Once you’ve cleaned your silver, you’ll want to keep it looking its best. Here are a few tips to prevent tarnish from forming in the first place:
* Store Silver Properly: Store your silver in airtight containers or tarnish-resistant bags. You can also add anti-tarnish strips to the containers.
* Avoid Contact with Sulfur: Sulfur compounds are the main culprit behind tarnish. Avoid storing silver near rubber bands, wool, or felt, as these materials can contain sulfur.
* Regular Use: Believe it or not, using your silver regularly can actually help prevent tarnish. The oils from your skin can create a protective barrier.
* Gentle Cleaning After Use: After using your silver, wash it gently with mild soap and water and dry it thoroughly.
A Note on Safety
While this DIY cleaning method is generally safe, it’s always a good idea to take a few precautions:
* Use Hot, Not Boiling, Water: Boiling water can damage some silver items and can also be dangerous to handle.
* Avoid Contact with Eyes: Baking soda can irritate your eyes. If you get any in your eyes, rinse them thoroughly with water.
* Ventilation: Work in a well-ventilated area, especially if you’re cleaning a lot of silver.
* Supervise Children: Keep children away from the hot water and baking soda solution.
Why I Love This Hack
I’ve tried so many different silver cleaning methods over the years, and this one is by far my favorite. It’s quick, easy, inexpensive, and incredibly effective. Plus, it’s so satisfying to watch the tarnish disappear before your eyes! I hope you find this hack as helpful as I have. Happy cleaning!
Conclusion
So, there you have it! This simple, yet incredibly effective, DIY silver cleaning trick using baking soda and foil is a game-changer for anyone who wants to restore the luster to their tarnished silverware without harsh chemicals or expensive cleaning products. We’ve shown you how easy it is to banish that dull, dark coating and bring back the brilliant shine you remember.
Why is this a must-try? Because it’s not just about aesthetics; it’s about convenience, cost-effectiveness, and environmental responsibility. Forget spending a fortune on specialized silver cleaners filled with potentially harmful ingredients. This method utilizes common household items – baking soda and aluminum foil – making it an accessible and budget-friendly solution for everyone. Plus, you’re reducing your reliance on harsh chemicals, which is a win for both your health and the planet.
Beyond the basic method, there are a few variations you can explore to tailor the process to your specific needs. For heavily tarnished items, you might want to increase the amount of baking soda or extend the soaking time. You can also use a plastic container instead of a glass one, although glass is generally preferred for its non-reactive properties. Another variation involves adding a small amount of salt to the solution, which can further enhance the cleaning power. Experiment and see what works best for your silver!
This DIY silver cleaning method is truly a revelation. It’s quick, easy, and delivers remarkable results. Imagine the satisfaction of transforming your dull, tarnished silverware into gleaming treasures with just a few simple steps. Think of the money you’ll save by avoiding expensive commercial cleaners. And consider the peace of mind knowing you’re using a safer, more environmentally friendly approach.
We wholeheartedly encourage you to give this DIY silver cleaning trick a try. Gather your tarnished silver, grab some baking soda and foil, and prepare to be amazed. The results speak for themselves.
But don’t just take our word for it! We want to hear about your experience. Did this method work wonders for your silverware? Did you discover any helpful variations or tips? Share your stories, photos, and feedback in the comments below. Let’s create a community of silver-cleaning enthusiasts and help each other keep our precious silverware sparkling for years to come. Your insights could be invaluable to others who are just discovering the magic of baking soda and foil for cleaning silver. So, go ahead, give it a try, and let us know what you think! We are confident that you will be thrilled with the results.
Frequently Asked Questions (FAQ)
Q: What kind of aluminum foil should I use?
A: You can use any standard aluminum foil you have on hand. Heavy-duty foil is perfectly fine, but regular household foil works just as well. The key is that the aluminum needs to be in contact with the silver and the solution to facilitate the chemical reaction that removes the tarnish. Don’t worry too much about the brand or thickness of the foil; the process is more about the chemical reaction than the specific type of foil.
Q: How much baking soda should I use?
A: A general guideline is to use about 1 tablespoon of baking soda per cup of hot water. However, you can adjust the amount depending on the severity of the tarnish. For heavily tarnished items, you might want to increase the baking soda to 2 tablespoons per cup of water. It’s better to start with a slightly weaker solution and increase the concentration if needed. Remember to dissolve the baking soda completely in the hot water before adding the silver.
Q: How long should I soak the silver?
A: The soaking time will vary depending on the level of tarnish. Start by checking the silver after a few minutes. You should begin to see the tarnish lifting off the silver and transferring to the aluminum foil. For lightly tarnished items, 5-10 minutes may be sufficient. For heavily tarnished items, you may need to soak them for up to 30 minutes or even longer. Keep an eye on the process and remove the silver when the tarnish is gone. If the tarnish is particularly stubborn, you can try gently rubbing the silver with a soft cloth while it’s still submerged in the solution.
Q: Can I use this method on all types of silver?
A: This method is generally safe for most sterling silver and silver-plated items. However, it’s always a good idea to test it on a small, inconspicuous area first, especially if you’re dealing with antique or delicate silver pieces. Avoid using this method on items with gemstones, pearls, or other delicate embellishments, as the hot water and baking soda could potentially damage them. Also, be cautious with items that have been intentionally oxidized for decorative purposes, as this method could remove the oxidation.
Q: What if the tarnish doesn’t come off completely?
A: If the tarnish is particularly stubborn, there are a few things you can try. First, make sure the aluminum foil is making good contact with the silver. You can try repositioning the silver or adding more foil to ensure better contact. Second, you can try increasing the concentration of baking soda in the solution. Third, you can try gently rubbing the silver with a soft cloth or sponge while it’s still submerged in the solution. Finally, if all else fails, you may need to repeat the process with a fresh batch of solution and foil.
Q: Why does this method work?
A: This method works due to a chemical reaction called an electrochemical reaction. Tarnish on silver is silver sulfide (Ag2S). When you place the tarnished silver in a solution of baking soda and hot water with aluminum foil, the aluminum acts as a sacrificial metal. The aluminum is more reactive than silver, so it donates electrons to the silver sulfide, converting it back to metallic silver. The sulfur then bonds with the aluminum, forming aluminum sulfide, which is deposited on the aluminum foil. In essence, the aluminum “steals” the tarnish from the silver.
Q: Is it safe to use baking soda and foil on my silver?
A: Yes, this method is generally considered safe for most silver items. Baking soda is a mild abrasive and is much gentler than many commercial silver cleaners. Aluminum foil is also relatively inert and shouldn’t damage the silver. However, as mentioned earlier, it’s always a good idea to test the method on a small, inconspicuous area first, especially if you’re dealing with antique or delicate silver pieces.
Q: Can I reuse the baking soda and foil?
A: No, it’s best to use fresh baking soda and foil for each cleaning session. The baking soda becomes less effective after it has been used, and the aluminum foil will be coated with silver sulfide, which will prevent it from working properly. Using fresh materials ensures the most effective cleaning.
Q: What should I do after cleaning my silver?
A: After cleaning your silver, rinse it thoroughly with clean water to remove any remaining baking soda residue. Then, dry it immediately with a soft, clean cloth. This will help prevent water spots and further tarnishing. You can also polish the silver with a silver polishing cloth to enhance its shine and provide a protective layer.
Q: How can I prevent my silver from tarnishing in the future?
A: There are several things you can do to prevent your silver from tarnishing. Store your silver in airtight containers or bags to protect it from exposure to air and moisture. You can also place anti-tarnish strips or cloths in the storage containers to absorb sulfur compounds that cause tarnish. Avoid storing silver near rubber bands, felt, or other materials that can accelerate tarnishing. Regularly polishing your silver with a silver polishing cloth can also help prevent tarnish from forming.


Leave a Comment