

Cleaning shortcuts you’ll wish you knew sooner? Absolutely! Let’s be honest, nobody *loves* cleaning, right? We all dream of sparkling homes, but the thought of spending hours scrubbing and scouring? Not so appealing. But what if I told you there were clever, time-saving tricks that could transform your cleaning routine from a dreaded chore into a breeze?
For centuries, people have been searching for ways to make household tasks easier. From ancient Roman bathhouses to Victorian-era cleaning contraptions, the quest for efficiency is timeless. Our grandmothers had their own secret cleaning recipes, passed down through generations, often relying on natural ingredients and ingenious methods.
In today’s fast-paced world, time is precious. We’re juggling work, family, and social lives, leaving little room for extensive cleaning sessions. That’s where these cleaning shortcuts you’ll wish you knew come in! Imagine reclaiming your weekends, spending less time scrubbing, and more time doing the things you truly enjoy. These DIY cleaning hacks are designed to save you time, money, and energy, making your home sparkle without the stress. So, let’s dive in and discover the secrets to a cleaner, happier home!

DIY Cleaning Shortcuts You’ll Wish You Knew Sooner!
Okay, friends, let’s be honest: cleaning isn’t exactly anyone’s favorite pastime. But a clean home is a happy home, right? So, I’ve compiled some of my absolute favorite DIY cleaning shortcuts that will save you time, money, and a whole lot of elbow grease. Get ready to transform your cleaning routine!
Cleaning Your Microwave Like a Pro (Without Scrubbing!)
This is a game-changer, trust me. No more spending ages scraping away dried-on food splatters.
* The Magic Ingredient: Lemon (or Vinegar!)
* Time Saver: Cuts microwave cleaning time in half (or more!)
* Effort Level: Super easy!
Step-by-Step Instructions:
1. Prepare Your Cleaning Solution: Fill a microwave-safe bowl with about 1 cup of water. Slice a lemon in half and squeeze the juice into the water. Then, drop the lemon halves into the bowl as well. If you don’t have a lemon, you can substitute with 2 tablespoons of white vinegar. Vinegar works just as well, but the lemon smells a little nicer, in my opinion.
2. Microwave the Solution: Place the bowl in the microwave and heat it on high for 3-5 minutes. You want the water to boil and create steam inside the microwave. The steam is what loosens all the grime.
3. Let it Sit (Important!): Once the timer goes off, DO NOT open the microwave door immediately. Let the bowl sit inside for another 5-10 minutes. This allows the steam to really work its magic.
4. Wipe it Clean: Carefully remove the bowl (it will be hot!). Use a damp cloth or sponge to easily wipe away all the loosened food particles. You’ll be amazed at how effortlessly everything comes off! For stubborn spots, you might need a little extra elbow grease, but it will still be significantly easier than scrubbing from the start.
5. Clean the Turntable: Remove the microwave turntable and wash it with warm, soapy water. Dry it thoroughly before placing it back in the microwave.
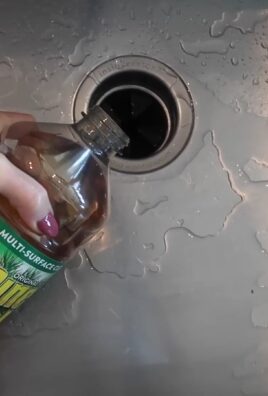
Unclogging Drains the Natural Way
Forget harsh chemicals! This method is safer for your pipes and the environment.
* The Power Duo: Baking Soda and Vinegar
* Eco-Friendly: No harsh chemicals needed.
* Cost-Effective: Uses ingredients you probably already have.
Step-by-Step Instructions:
1. Pour in the Baking Soda: Pour about 1 cup of baking soda down the clogged drain. Try to get as much of it down the drain as possible.
2. Add the Vinegar: Immediately follow the baking soda with 1 cup of white vinegar. You’ll hear a fizzing sound – that’s the chemical reaction working to break down the clog.
3. Let it Fizz: Let the mixture fizz and bubble for about 30 minutes. This is crucial for the baking soda and vinegar to effectively dissolve the clog.
4. Flush with Hot Water: After 30 minutes, flush the drain with a pot of boiling water. Be careful when pouring the boiling water to avoid splashing.
5. Repeat if Necessary: If the drain is still clogged, repeat the process. For particularly stubborn clogs, you might need to repeat it a couple of times.
Cleaning Your Showerhead for Better Water Pressure
Hard water buildup can wreak havoc on your showerhead. This simple trick will restore your water pressure in no time.
* The Solution: Vinegar Soak
* Improved Water Pressure: Enjoy a more powerful shower.
* Easy to Do: Minimal effort required.
Step-by-Step Instructions:
1. Prepare the Vinegar Solution: Fill a plastic bag (a Ziploc bag works great) with white vinegar. You’ll need enough vinegar to completely submerge the showerhead.
2. Attach the Bag: Carefully attach the bag to the showerhead, ensuring that the showerhead is fully submerged in the vinegar. Secure the bag with a rubber band or twist tie.
3. Soak Overnight: Let the showerhead soak in the vinegar overnight (or for at least a few hours). This allows the vinegar to dissolve the mineral deposits.
4. Remove and Rinse: Remove the bag and discard the vinegar. Turn on the shower and let the water run for a few minutes to flush out any remaining vinegar and loosened debris.
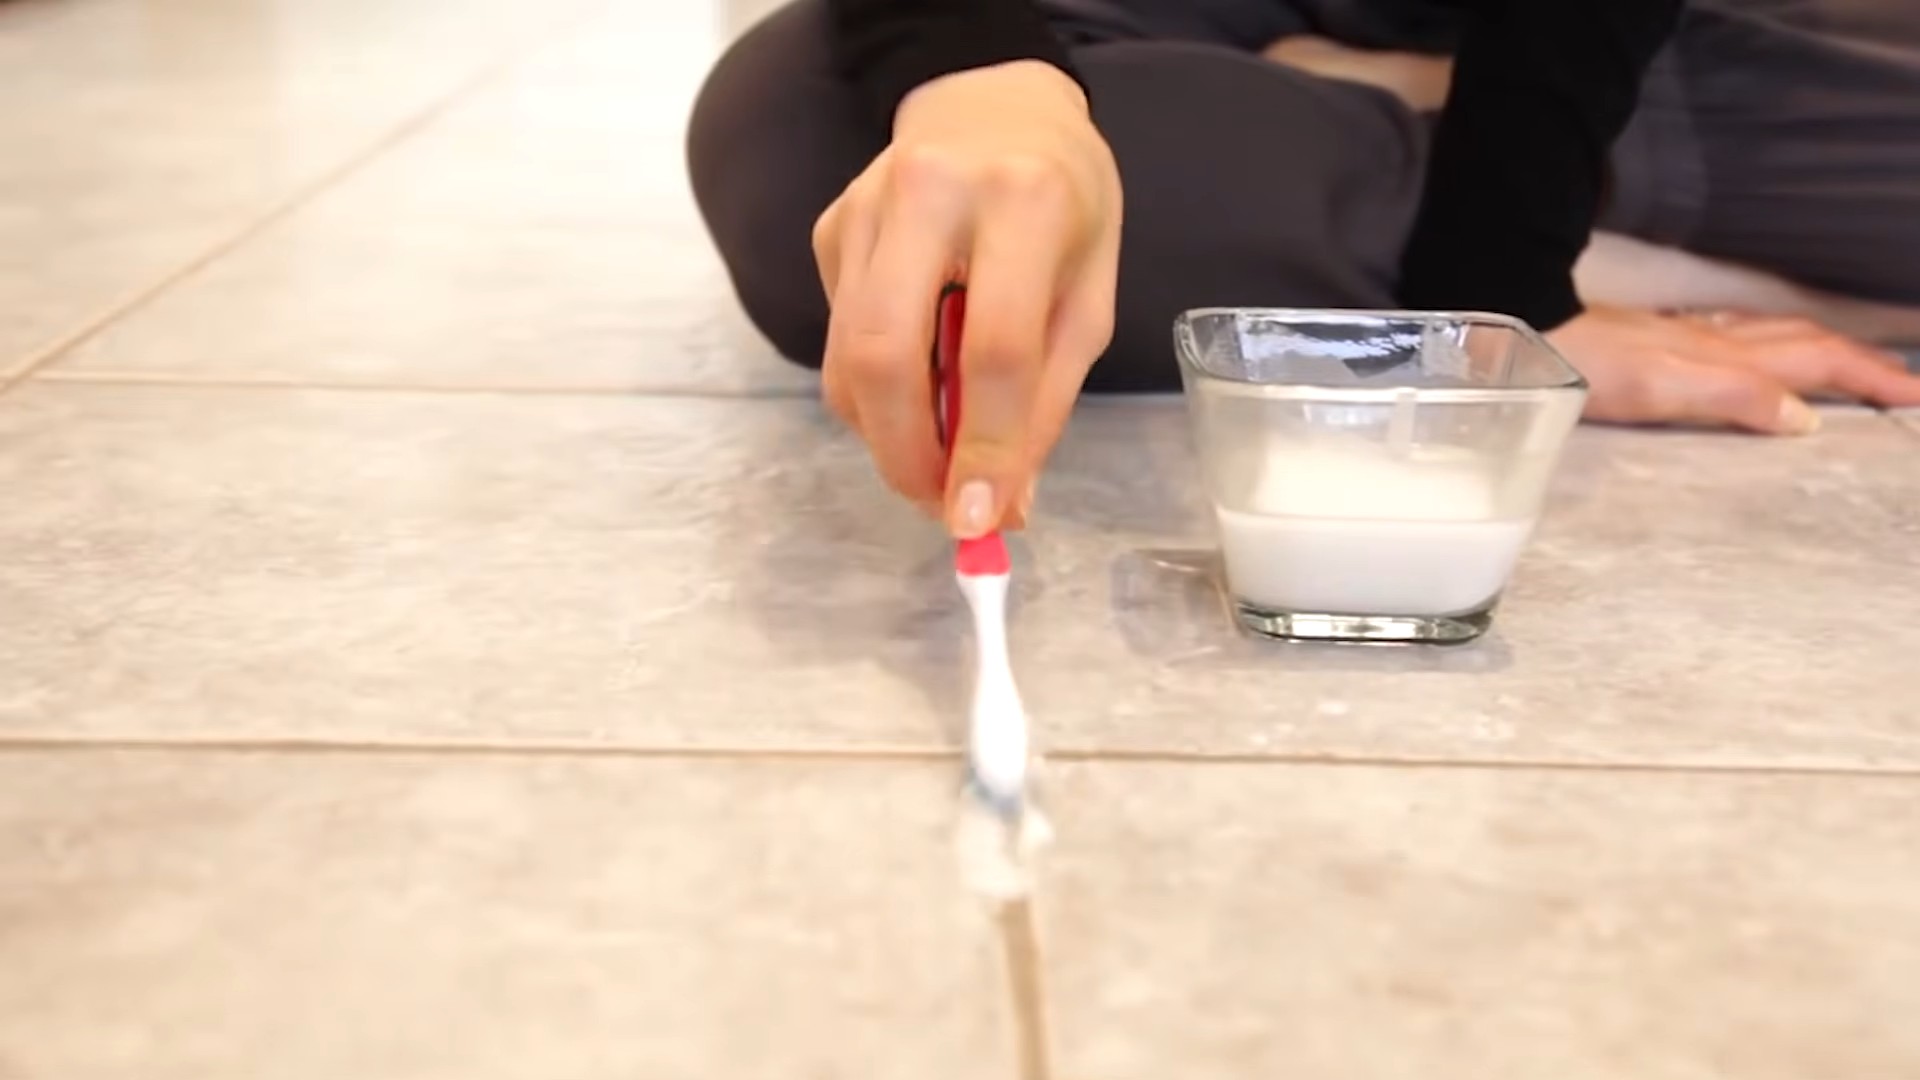
5. Wipe Clean: Use a damp cloth to wipe the showerhead clean. If there are any stubborn mineral deposits remaining, you can use an old toothbrush to gently scrub them away.
Making Your Own All-Purpose Cleaner
Why buy expensive cleaners when you can make your own with simple ingredients?
* Customizable: Adjust the scent to your liking.
* Non-Toxic: Safer for your family and pets.
* Budget-Friendly: Saves you money on cleaning supplies.
Step-by-Step Instructions:
1. Gather Your Ingredients: You’ll need:
* 1/4 cup white vinegar
* 1 tablespoon baking soda
* Water
* A few drops of your favorite essential oil (optional, but adds a nice scent!)
* A spray bottle
2. Mix the Ingredients: In a large bowl or measuring cup, combine the vinegar and baking soda. Be prepared for it to fizz!
3. Add Water: Slowly add water to the mixture until you have about 16 ounces (2 cups) of liquid.
4. Add Essential Oils (Optional): If you’re using essential oils, add a few drops to the mixture. Lemon, lavender, and tea tree oil are all great choices for cleaning.
5. Pour into Spray Bottle: Carefully pour the mixture into a spray bottle.
6. Use and Enjoy: Your all-purpose cleaner is ready to use! Spray it on surfaces and wipe clean with a cloth or sponge.
Cleaning Your Blender Like a Pro
No need to disassemble and scrub! This trick is quick and easy.
* Self-Cleaning: The blender does most of the work.
* Fast and Efficient: Cleans your blender in seconds.
* Prevents Bacteria Growth: Keeps your blender hygienic.
Step-by-Step Instructions:
1. Rinse the Blender: After using your blender, rinse it out with water to remove any large chunks of food.
2. Add Water and Soap: Fill the blender halfway with warm water and add a drop or two of dish soap.
3. Blend: Secure the lid and blend on high speed for about 30-60 seconds.
4. Rinse Again: Pour out the soapy water and rinse the blender thoroughly with clean water.
5. Dry: Let the blender air dry or dry it with a clean towel.
Freshening Your Mattress
Mattresses can harbor dust mites and odors. This simple trick will leave your mattress smelling fresh and clean.
* Deodorizes and Sanitizes: Eliminates odors and kills bacteria.
* Easy to Apply: Just sprinkle and vacuum.
* Improves Sleep Quality: A clean mattress promotes better sleep.
Step-by-Step Instructions:
1. Strip the Bed: Remove all bedding from your mattress, including sheets, blankets, and pillowcases. Wash them in hot water to kill any dust mites.
2. Sprinkle Baking Soda: Generously sprinkle baking soda over the entire surface of your mattress.
3. Let it Sit: Let the baking soda sit on the mattress for at least 30 minutes, or even better, for a few hours. The longer it sits, the more odors and moisture it will absorb.
4. Vacuum Thoroughly: Use a vacuum cleaner with an upholstery attachment to thoroughly vacuum the entire surface of the mattress. Make sure to get into all the crevices and seams.
5. Flip and Repeat: Flip the mattress over and repeat the process on the other side.
Cleaning Burnt Pots and Pans
Don’t throw away those burnt pots and pans! This method can save them.
* Saves Money: Extends the life of your cookware.
* Effective: Removes even stubborn burnt food.
* Uses Simple Ingredients: No need for harsh chemicals.
Step-by-Step Instructions:
1. Add Water and Baking Soda: Fill the burnt pot or pan with water and add 2 tablespoons of baking soda.
2. Boil the Mixture: Bring the mixture to a boil on the stovetop.
3. Simmer: Reduce the heat and let the mixture simmer for about 15-20 minutes.
4. Scrub: Remove the pot or pan from
Conclusion
So, there you have it! This simple yet incredibly effective DIY cleaning trick is a game-changer for anyone looking to streamline their cleaning routine and achieve sparkling results with minimal effort. We’ve all been there, staring down a mountain of grime and dreading the hours of scrubbing ahead. But with this method, those days are officially over.
The beauty of this cleaning shortcut lies in its simplicity and versatility. It’s not just about saving time; it’s about using readily available ingredients to create a powerful cleaning solution that’s both effective and environmentally conscious. Think about it: no more harsh chemicals, no more lingering fumes, and no more breaking the bank on expensive cleaning products. This DIY approach is a win-win for your home, your wallet, and the planet.
Why is this a must-try? Because it genuinely works! It tackles stubborn stains, cuts through grease, and leaves surfaces gleaming, all while being gentle enough for everyday use. It’s the kind of cleaning hack that makes you wonder why you haven’t been doing it all along.
But don’t just take our word for it. We encourage you to experiment and adapt the recipe to suit your specific needs. For instance, if you’re dealing with particularly tough stains, consider adding a bit more of the active ingredient. Or, if you prefer a specific scent, feel free to incorporate a few drops of your favorite essential oil. Lavender, lemon, and tea tree oil are all excellent choices for their cleaning properties and pleasant aromas.
Variations to consider:
* For extra degreasing power: Add a tablespoon of borax to the mixture. Borax is a natural mineral that helps to break down grease and grime.
* For a fresh scent: Infuse your cleaning solution with citrus peels. Simply add the peels of lemons, oranges, or grapefruits to the mixture and let it steep for a few days before straining.
* For disinfecting: Add a few drops of tea tree oil or eucalyptus oil. These essential oils have natural antibacterial and antiviral properties.
* For delicate surfaces: Dilute the solution with more water to prevent any potential damage. Always test on an inconspicuous area first.
We’re confident that once you try this DIY cleaning trick, you’ll be hooked. It’s a simple, effective, and affordable way to keep your home clean and fresh. So, gather your ingredients, mix up a batch, and prepare to be amazed by the results.
Now, we want to hear from you! Have you tried this cleaning shortcut? What variations did you use? What were your results? Share your experiences in the comments below. We’re eager to learn from your successes and help troubleshoot any challenges you may encounter. Let’s create a community of cleaning enthusiasts who are passionate about finding innovative and sustainable ways to keep our homes sparkling. Your feedback is invaluable, and together, we can make cleaning a little less of a chore and a lot more of a joy. Let us know how this cleaning shortcut has changed your cleaning routine!
FAQ
What exactly is the “active ingredient” you mentioned, and why is it so effective?
The “active ingredient” we refer to is typically either vinegar, baking soda, or a combination of both, depending on the specific cleaning task. Vinegar, specifically white distilled vinegar, is a mild acid that effectively cuts through grease, dissolves mineral deposits, and disinfects surfaces. Its acidity helps to break down grime and leave surfaces sparkling. Baking soda, on the other hand, is a mild alkali that acts as a gentle abrasive and deodorizer. It’s excellent for scrubbing away stains, absorbing odors, and polishing surfaces without scratching. When combined, vinegar and baking soda create a fizzing reaction that helps to loosen dirt and grime, making it easier to wipe away. The effectiveness of these ingredients lies in their ability to tackle a wide range of cleaning challenges without the need for harsh chemicals.
Is this DIY cleaning solution safe to use on all surfaces?
While this DIY cleaning solution is generally safe for most surfaces, it’s always a good idea to test it on an inconspicuous area first, especially on delicate or sensitive materials. Avoid using vinegar-based solutions on natural stone surfaces like marble or granite, as the acidity can etch and damage the stone. Similarly, be cautious when using baking soda on polished wood, as it can dull the finish. For delicate surfaces, dilute the solution with more water and use a soft cloth to avoid scratching. Always read the manufacturer’s instructions for cleaning specific surfaces and materials.
How long does this DIY cleaning solution last, and how should I store it?
The shelf life of this DIY cleaning solution depends on the ingredients used. Vinegar-based solutions can last for several months when stored in a cool, dark place. Baking soda solutions are best used within a few weeks, as the baking soda can settle and lose its effectiveness over time. To store the solution, use a clean, airtight spray bottle or container. Label the container clearly with the ingredients and date of preparation. Avoid storing the solution in direct sunlight or extreme temperatures, as this can affect its stability and effectiveness.
Can I use essential oils other than lavender, lemon, and tea tree oil?
Absolutely! Feel free to experiment with different essential oils to find your favorite scent and cleaning properties. Many essential oils have antibacterial, antiviral, and antifungal properties that can enhance the cleaning power of your DIY solution. Some popular options include eucalyptus oil, peppermint oil, orange oil, and grapefruit oil. When choosing essential oils, make sure to use high-quality, pure essential oils for the best results. Add a few drops of essential oil to your cleaning solution and adjust the amount to your preference. Be mindful of any allergies or sensitivities you may have to specific essential oils.
What if I don’t have vinegar or baking soda on hand? Are there any alternatives?
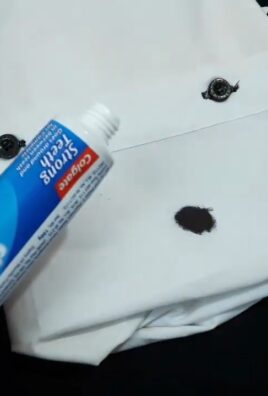
While vinegar and baking soda are the most common and effective ingredients for this DIY cleaning solution, there are a few alternatives you can use in a pinch. For vinegar, you can substitute lemon juice, which also contains citric acid and has similar cleaning properties. For baking soda, you can try using washing soda, which is a stronger alkali and can be used for tougher cleaning tasks. However, be cautious when using washing soda, as it can be more abrasive than baking soda. Always test on an inconspicuous area first.
My DIY cleaning solution seems to be leaving a residue on surfaces. What am I doing wrong?
If your DIY cleaning solution is leaving a residue, it could be due to a few factors. First, make sure you’re using the correct proportions of ingredients. Too much baking soda can leave a powdery residue, while too much vinegar can leave a sticky residue. Second, ensure you’re rinsing the surface thoroughly after cleaning. Use a clean, damp cloth to wipe away any excess solution. Third, the water you’re using could be hard water, which can leave mineral deposits on surfaces. Try using distilled water or adding a water softener to your cleaning solution.
How can I adapt this DIY cleaning solution for specific cleaning tasks, such as cleaning the oven or toilet?
This DIY cleaning solution can be adapted for various cleaning tasks by adjusting the ingredients and application method. For cleaning the oven, create a paste of baking soda and water and apply it to the interior surfaces. Let it sit overnight, then scrub away the grime with a sponge and rinse thoroughly. For cleaning the toilet, pour a cup of vinegar into the bowl and let it sit for 30 minutes. Then, scrub with a toilet brush and flush. You can also add a few drops of tea tree oil for extra disinfecting power. For tougher stains, you can create a stronger solution by increasing the concentration of vinegar or baking soda.
Is this DIY cleaning solution safe for pets and children?
While this DIY cleaning solution is generally safer than commercial cleaning products, it’s still important to take precautions when using it around pets and children. Keep the solution out of reach of children and pets, and avoid spraying it directly on them. If your pet or child ingests the solution, contact a veterinarian or poison control center immediately. When cleaning surfaces that pets and children come into contact with, rinse thoroughly with water to remove any residue. Consider using essential oils that are safe for pets and children, such as lavender or chamomile.

Leave a Comment