

Coffee Grinder Cleaning Tips: Are you tired of your morning brew tasting a little…off? Maybe it’s not the beans, but your grinder! I know, cleaning it can seem like a chore, but trust me, a clean coffee grinder is the secret weapon to unlocking the full potential of your favorite coffee beans. Think of it like this: your grinder is the unsung hero of your daily caffeine fix, and it deserves a little TLC.
For generations, coffee lovers have sought ways to perfect their brewing process. While fancy espresso machines get all the glory, the humble grinder often gets overlooked. But a buildup of coffee oils and grounds can quickly turn your grinder into a breeding ground for stale flavors, impacting the taste of every cup. Nobody wants that!
That’s why I’m sharing my favorite DIY coffee grinder cleaning tips. These simple hacks will not only improve the taste of your coffee but also extend the life of your grinder. From using everyday household items to quick and easy techniques, I’ll show you how to keep your grinder sparkling clean and your coffee tasting its absolute best. Let’s get grinding (and cleaning!)!
DIY Deep Clean: Revive Your Coffee Grinder Like New!
Okay, coffee lovers, let’s talk about something we often overlook: cleaning our beloved coffee grinders. I know, I know, it’s not the most glamorous task, but trust me, a clean grinder is crucial for consistently delicious coffee. Grinding coffee leaves behind oils and residue that can go rancid over time, affecting the flavor of your precious beans. Plus, a clogged grinder just doesn’t work as efficiently. So, let’s dive into how to deep clean your coffee grinder and bring it back to its former glory!
What You’ll Need
Before we get started, gather these supplies. Having everything ready will make the process smooth and efficient.
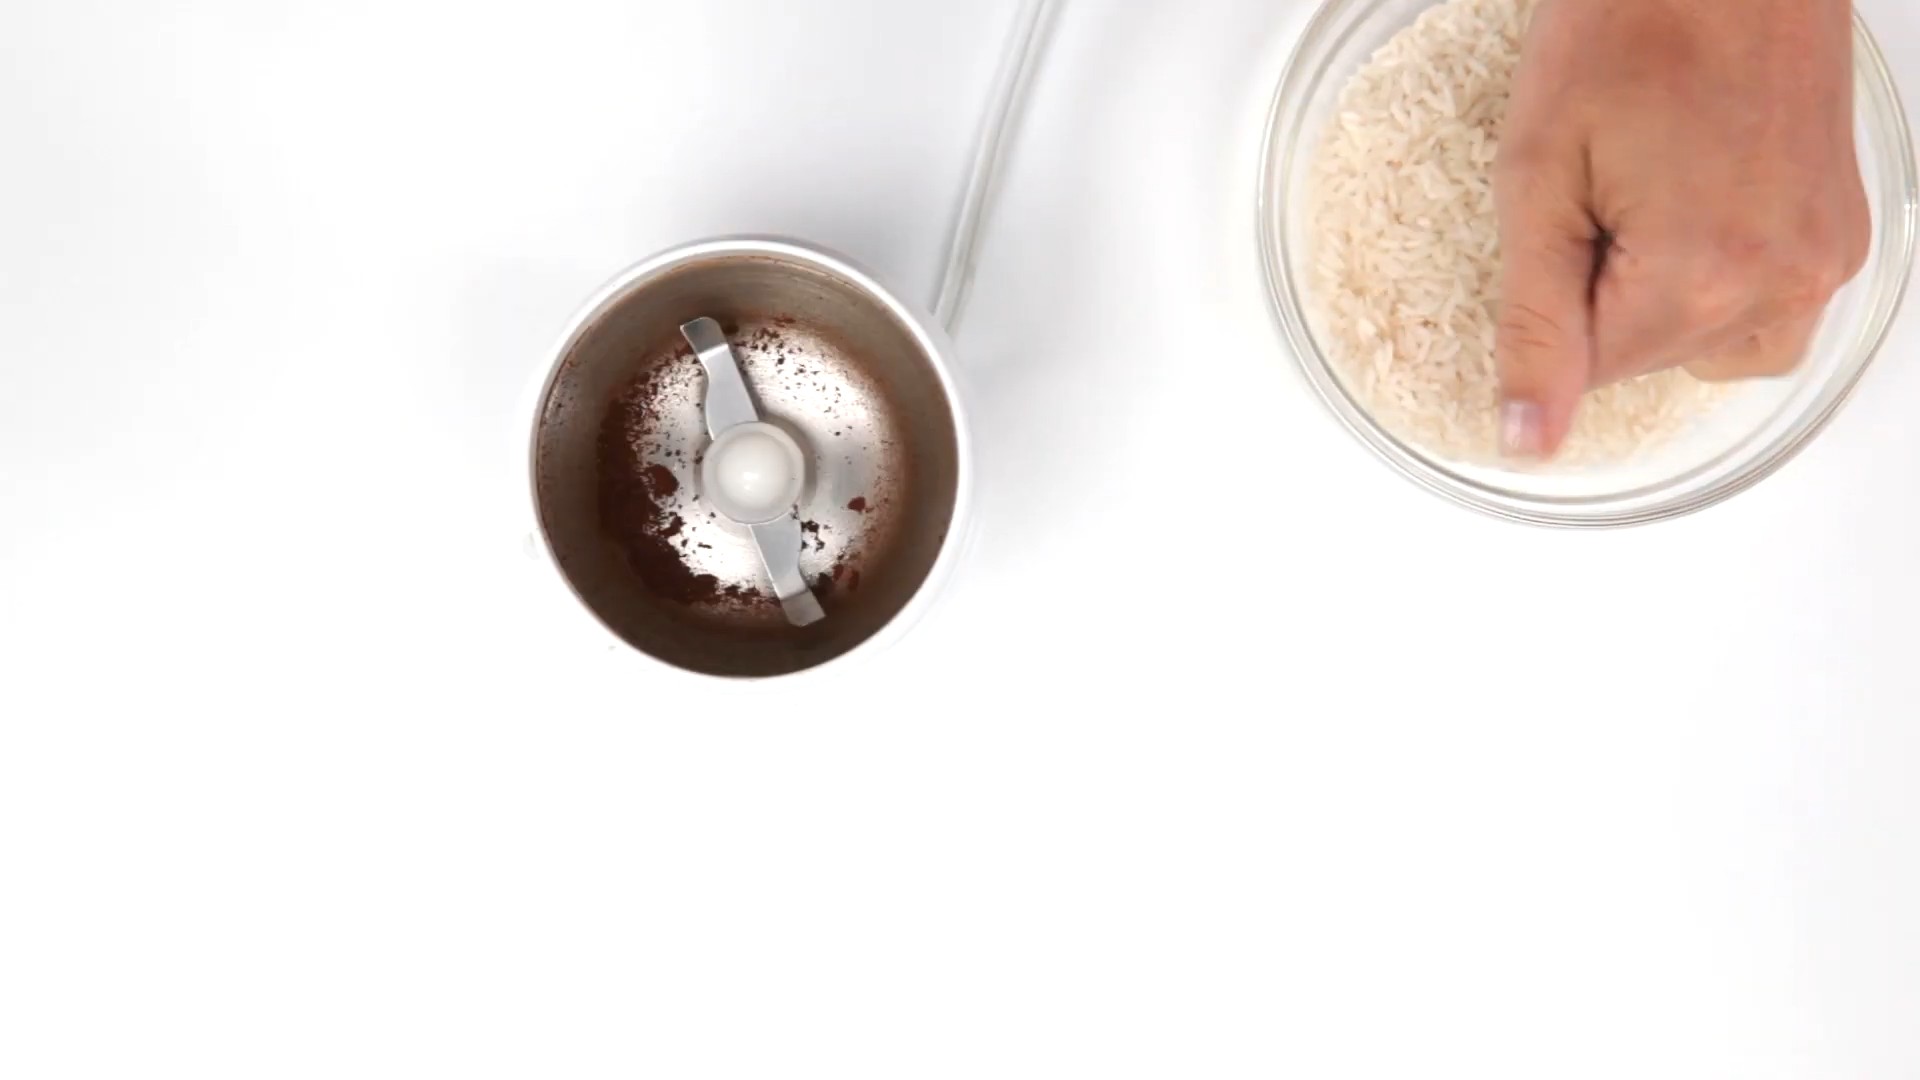
* Rice (White Rice is Best): This is our secret weapon! Uncooked white rice acts as a natural abrasive to dislodge old coffee grounds and oils.
* Small Brush (Cleaning Brush or Toothbrush): For scrubbing those hard-to-reach areas. An old toothbrush works perfectly!
* Microfiber Cloth or Paper Towels: To wipe down surfaces and remove debris.
* Small Screwdriver (If Needed): Some grinders require disassembly for a thorough clean. Check your grinder’s manual.
* Vacuum Cleaner with Brush Attachment (Optional): For sucking up loose grounds and dust.
* Dish Soap (Mild): For cleaning removable parts.
* Water (Warm): For rinsing.
* Coffee Grinder Manual (Highly Recommended): Always a good idea to consult the manual for specific instructions and warnings related to your grinder model.
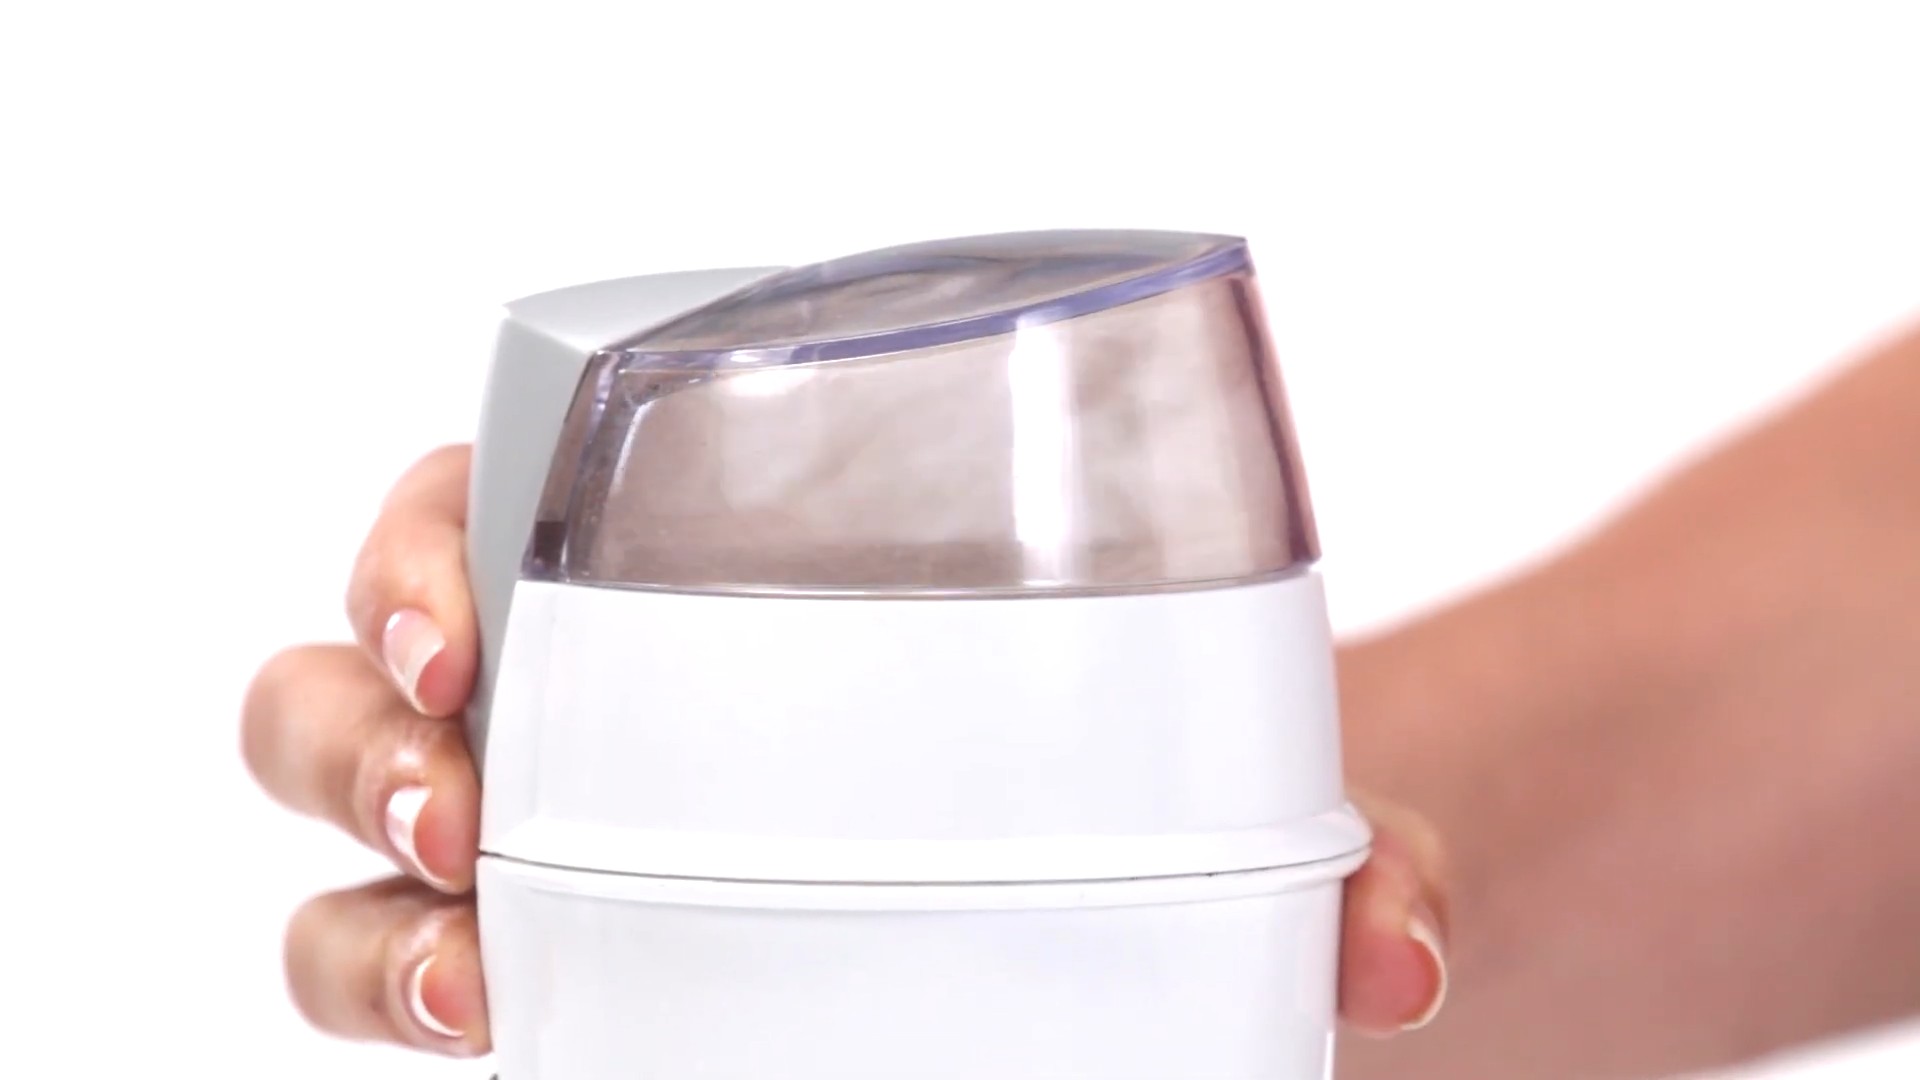
Cleaning Your Blade Grinder
Blade grinders are the simpler of the two types, making them easier to clean. Here’s how I tackle mine:
1. Unplug the Grinder: Safety first! Always unplug your grinder before cleaning to prevent accidental operation.
2. Empty the Grinder: Make sure there are no coffee beans or grounds left inside. I usually give it a good shake over the sink to dislodge any loose particles.
3. The Rice Trick: Pour about 1/4 cup of uncooked white rice into the grinder.
4. Grind the Rice: Grind the rice as you would coffee beans, for about 30-60 seconds. The rice will absorb the oils and dislodge any stuck-on grounds. You’ll probably notice the rice turning a brownish color – that’s all the gunk it’s picking up!
5. Empty the Rice: Pour out the ground rice. You’ll be surprised (and maybe a little disgusted) at how much residue comes out.
6. Brush It Out: Use your small brush to scrub the inside of the grinder, paying close attention to the blades and corners. This will loosen any remaining particles.
7. Wipe It Down: Use a microfiber cloth or paper towel to wipe down the inside of the grinder. Make sure to remove any remaining rice dust.
8. Clean the Lid: Wash the lid with warm, soapy water. Rinse thoroughly and dry completely before reattaching.
9. Vacuum (Optional): If you have a vacuum cleaner with a brush attachment, you can use it to suck up any remaining dust or debris.
10. Repeat if Necessary: If the grinder is particularly dirty, you may need to repeat the rice grinding process.
Cleaning Your Burr Grinder
Burr grinders are a bit more complex, but the effort is worth it for the superior coffee they produce. This process involves some disassembly, so be patient and organized!
Disassembly
1. Unplug the Grinder: Again, safety first! Unplug the grinder before you start.
2. Empty the Hopper: Remove any remaining coffee beans from the hopper.
3. Remove the Hopper: Most hoppers twist off or lift straight up. Consult your grinder’s manual if you’re unsure.
4. Remove the Burr: This is where things can vary depending on your grinder model. Typically, you’ll need to unscrew or unclip the burr. Some burrs are held in place with a locking mechanism. Refer to your grinder’s manual for specific instructions. Be careful not to force anything!
5. Remove the Lower Burr (If Possible): Some burr grinders allow you to remove the lower burr as well. Again, consult your manual.
Cleaning the Parts
1. Brush the Burr(s): Use your small brush to thoroughly clean the burrs, removing any coffee grounds or residue. Pay close attention to the grooves and crevices.
2. Clean the Hopper: Wash the hopper with warm, soapy water. Rinse thoroughly and dry completely.
3. Clean the Grinder Body: Use a damp microfiber cloth to wipe down the inside of the grinder body, removing any loose grounds or dust.
4. Vacuum (Optional): Use a vacuum cleaner with a brush attachment to suck up any remaining debris from the grinder body.
5. Wash Removable Parts (If Necessary): Some burr grinders have other removable parts, such as the grounds container or a distribution chute. Wash these parts with warm, soapy water, rinse thoroughly, and dry completely.
Reassembly
1. Reassemble the Burr(s): Carefully reassemble the burrs, following the instructions in your grinder’s manual. Make sure they are properly aligned and securely fastened.
2. Reattach the Hopper: Reattach the hopper to the grinder body.
3. Plug It In: Once everything is reassembled, plug the grinder back in.
Dealing with Stubborn Oils and Residue
Sometimes, the rice trick and brushing aren’t enough to remove all the stubborn oils and residue. Here are a few extra tips:
* Grinder Cleaning Tablets: There are commercially available grinder cleaning tablets that are specifically designed to remove coffee oils and residue. Follow the instructions on the package.
* Denture Tablets (Use with Caution): Some people swear by using denture tablets to clean their grinders. Dissolve a denture tablet in warm water and use a brush to scrub the grinder parts. Rinse thoroughly and dry completely. I recommend testing this method on a small, inconspicuous area first to ensure it doesn’t damage the grinder.
* Isopropyl Alcohol (Use with Extreme Caution): For extremely stubborn residue, you can try using isopropyl alcohol. However, use this method with extreme caution! Make sure to dilute the alcohol with water and only use it on non-plastic parts. Rinse thoroughly and dry completely before reassembling the grinder. Ensure all alcohol residue is gone before grinding coffee.
Preventative Maintenance
The best way to keep your coffee grinder clean is to prevent it from getting too dirty in the first place. Here are a few tips:
* Clean Regularly: Aim to clean your grinder at least once a month, or more often if you use it frequently.
* Use Fresh Beans: Fresh coffee beans contain less oil than stale beans.
* Store Beans Properly: Store your coffee beans in an airtight container in a cool, dark place.
* Don’t Grind Too Much at Once: Only grind the amount of coffee you need for each brew.
Important Considerations
* Always consult your coffee grinder’s manual before cleaning. Different models may have specific instructions or warnings.
* Never immerse the grinder motor in water. This can damage the motor and create a safety hazard.
* Be careful when handling sharp blades or burrs.
* Allow all parts to dry completely before reassembling the grinder.
* If you’re not comfortable disassembling your grinder, consider taking it to a professional for cleaning.
By following these steps, you can keep your coffee grinder clean and in good working order, ensuring that you enjoy delicious, flavorful coffee for years to come. Happy grinding!
Conclusion
So, there you have it! Mastering the art of cleaning your coffee grinder doesn’t require expensive products or complicated procedures. This simple, yet effective, DIY trick using rice is a game-changer for any coffee enthusiast. Why is it a must-try? Because it directly impacts the quality of your brew. Lingering coffee oils and grounds can turn rancid, imparting a bitter, stale taste to your freshly ground beans. Nobody wants that! This method is quick, easy, and uses an ingredient you likely already have in your pantry.
Beyond the improved taste, regularly cleaning your coffee grinder extends its lifespan. Built-up residue can strain the motor, leading to premature wear and tear. Think of it as preventative maintenance for your beloved coffee companion. A clean grinder is a happy grinder, and a happy grinder makes delicious coffee.
But wait, there’s more! While white rice is the standard recommendation, you can experiment with other options. Some people swear by using instant rice, claiming its smaller particles are even more effective at dislodging stubborn residue. Others suggest using dry bread, although this can be a bit messier. Feel free to explore and find what works best for your specific grinder and coffee bean type. Just remember to always thoroughly clean the grinder after using any alternative cleaning agent to remove any lingering residue.
Consider this: after cleaning with rice, follow up with a quick grind of a small amount of coffee beans. This “sacrificial grind” will help absorb any remaining rice dust and ensure your next batch of coffee is perfectly pure. You can then discard these grounds.
We wholeheartedly encourage you to give this DIY coffee grinder cleaning trick a try. It’s a small investment of time that yields significant rewards in terms of coffee quality and grinder longevity. Don’t just take our word for it – experience the difference for yourself!
Once you’ve tried it, we’d love to hear about your experience. Share your results, any variations you experimented with, and any tips you discovered in the comments below. Let’s build a community of coffee lovers who are passionate about brewing the perfect cup, starting with a clean coffee grinder. Your insights could help others elevate their coffee game! So go ahead, clean that grinder, brew a fresh pot, and savor the difference. You’ll be amazed at how much better your coffee tastes! This simple coffee grinder cleaning method is a true testament to the power of DIY solutions.
Frequently Asked Questions (FAQ)
Why use rice to clean a coffee grinder?
Rice acts as a natural abrasive that effectively dislodges coffee oils and grounds that accumulate inside the grinder. It’s a safe, food-grade material that won’t damage the grinder’s burrs or blades. The rice absorbs the oils and residue, leaving the grinder cleaner and fresher. It’s also a cost-effective and readily available alternative to specialized cleaning products.
How often should I clean my coffee grinder with rice?
The frequency depends on how often you use your grinder. For daily users, cleaning every 2-4 weeks is recommended. If you only use your grinder occasionally, cleaning it every 1-2 months should suffice. You’ll know it’s time to clean when you notice a build-up of coffee grounds, a change in the taste of your coffee, or if the grinder seems to be working harder than usual.
Can I use brown rice instead of white rice?
While white rice is generally recommended due to its lower oil content, you can use brown rice. However, be aware that brown rice contains more oils, which could potentially leave a slight residue. If you choose to use brown rice, make sure to thoroughly clean the grinder afterward, perhaps with a second round of white rice, to remove any lingering oils.
Will cleaning with rice damage my coffee grinder?
When done correctly, cleaning with rice is perfectly safe for most coffee grinders. However, it’s crucial to use plain, uncooked rice. Avoid using flavored rice or rice that has been cooked, as these can leave unwanted residue and potentially damage the grinder. Also, avoid using excessive force when grinding the rice. Let the grinder do the work. If you have a particularly delicate or expensive grinder, consult the manufacturer’s instructions before using this method.
What if I don’t have rice? Are there any other alternatives?
While rice is the most commonly recommended option, some people have had success with other alternatives. As mentioned earlier, instant rice or dry bread can be used, but these may require more thorough cleaning afterward. Some specialty coffee cleaning tablets are also available, but they tend to be more expensive. Always research and choose an alternative that is safe for your specific grinder model.
How do I know if I’ve cleaned the grinder thoroughly enough?
After grinding the rice, inspect the grinder’s burrs or blades. They should be free of visible coffee grounds and oils. You can also wipe the inside of the grinder with a clean cloth or paper towel to check for any remaining residue. If the cloth comes away clean, you’ve likely done a good job. As a final step, grind a small amount of coffee beans and discard them to absorb any remaining rice dust.
My grinder is very dirty. Will this method still work?
For heavily soiled grinders, you may need to repeat the cleaning process several times. You can also try using a small brush or vacuum cleaner attachment to remove loose grounds before grinding the rice. If the grinder is still not clean after multiple attempts, consider disassembling it (if possible and safe) and cleaning the individual parts with a brush and mild detergent. Always ensure all parts are completely dry before reassembling the grinder.
Can I use this method for all types of coffee grinders?
This method is generally safe for most blade grinders and burr grinders. However, it’s always best to consult the manufacturer’s instructions for your specific grinder model before using any cleaning method. Some grinders may have specific cleaning recommendations or warnings.
What should I do if rice gets stuck in my grinder?
If rice gets stuck, unplug the grinder and try gently dislodging it with a small brush or toothpick. Avoid using metal objects, as these could damage the grinder’s components. You can also try using a vacuum cleaner attachment to suck out the stuck rice. If you’re unable to remove the rice, consult a professional appliance repair technician.
After cleaning, my coffee tastes slightly different. Is this normal?
It’s normal for your coffee to taste slightly different after cleaning your grinder. This is because the cleaning process removes old coffee oils and residue that were affecting the flavor. The new taste is likely the true flavor of your coffee beans, unadulterated by stale residue. Give it a few brews, and you’ll likely find that you prefer the cleaner, more vibrant taste.


Leave a Comment