

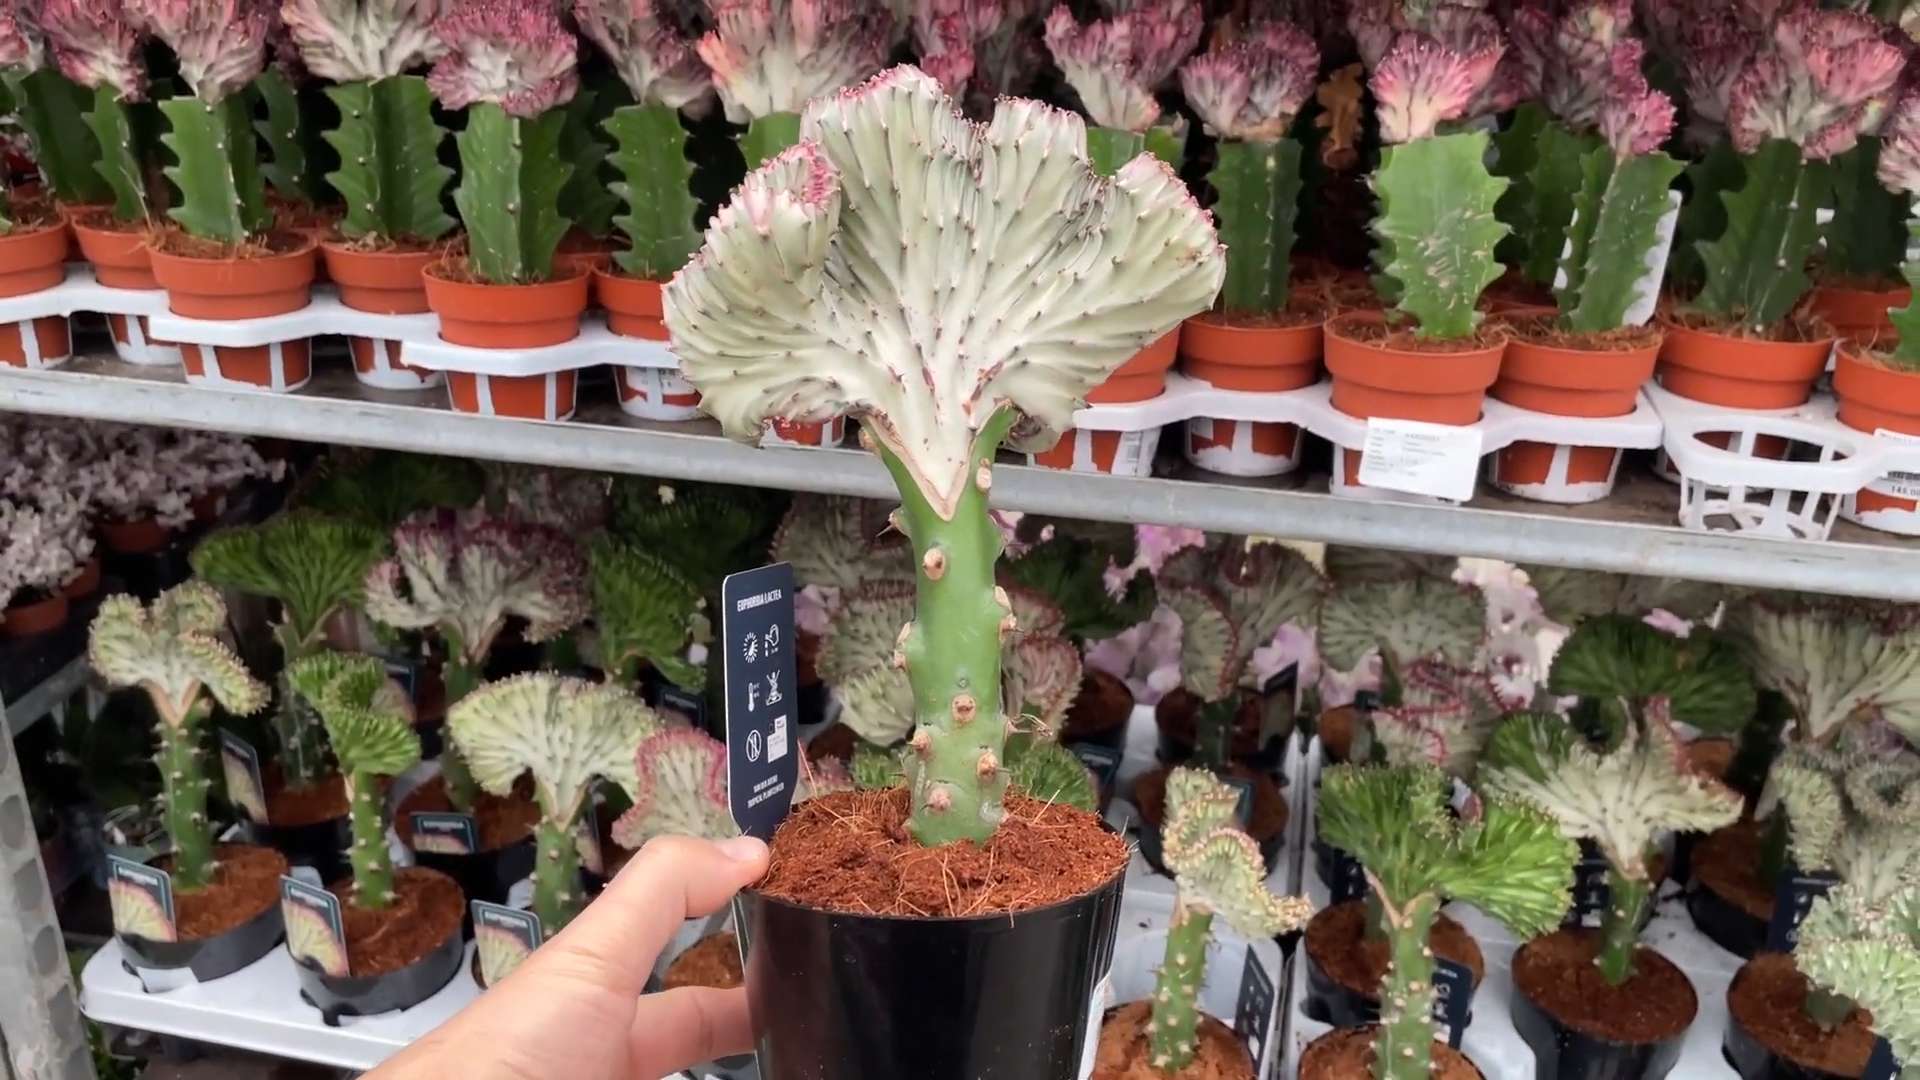
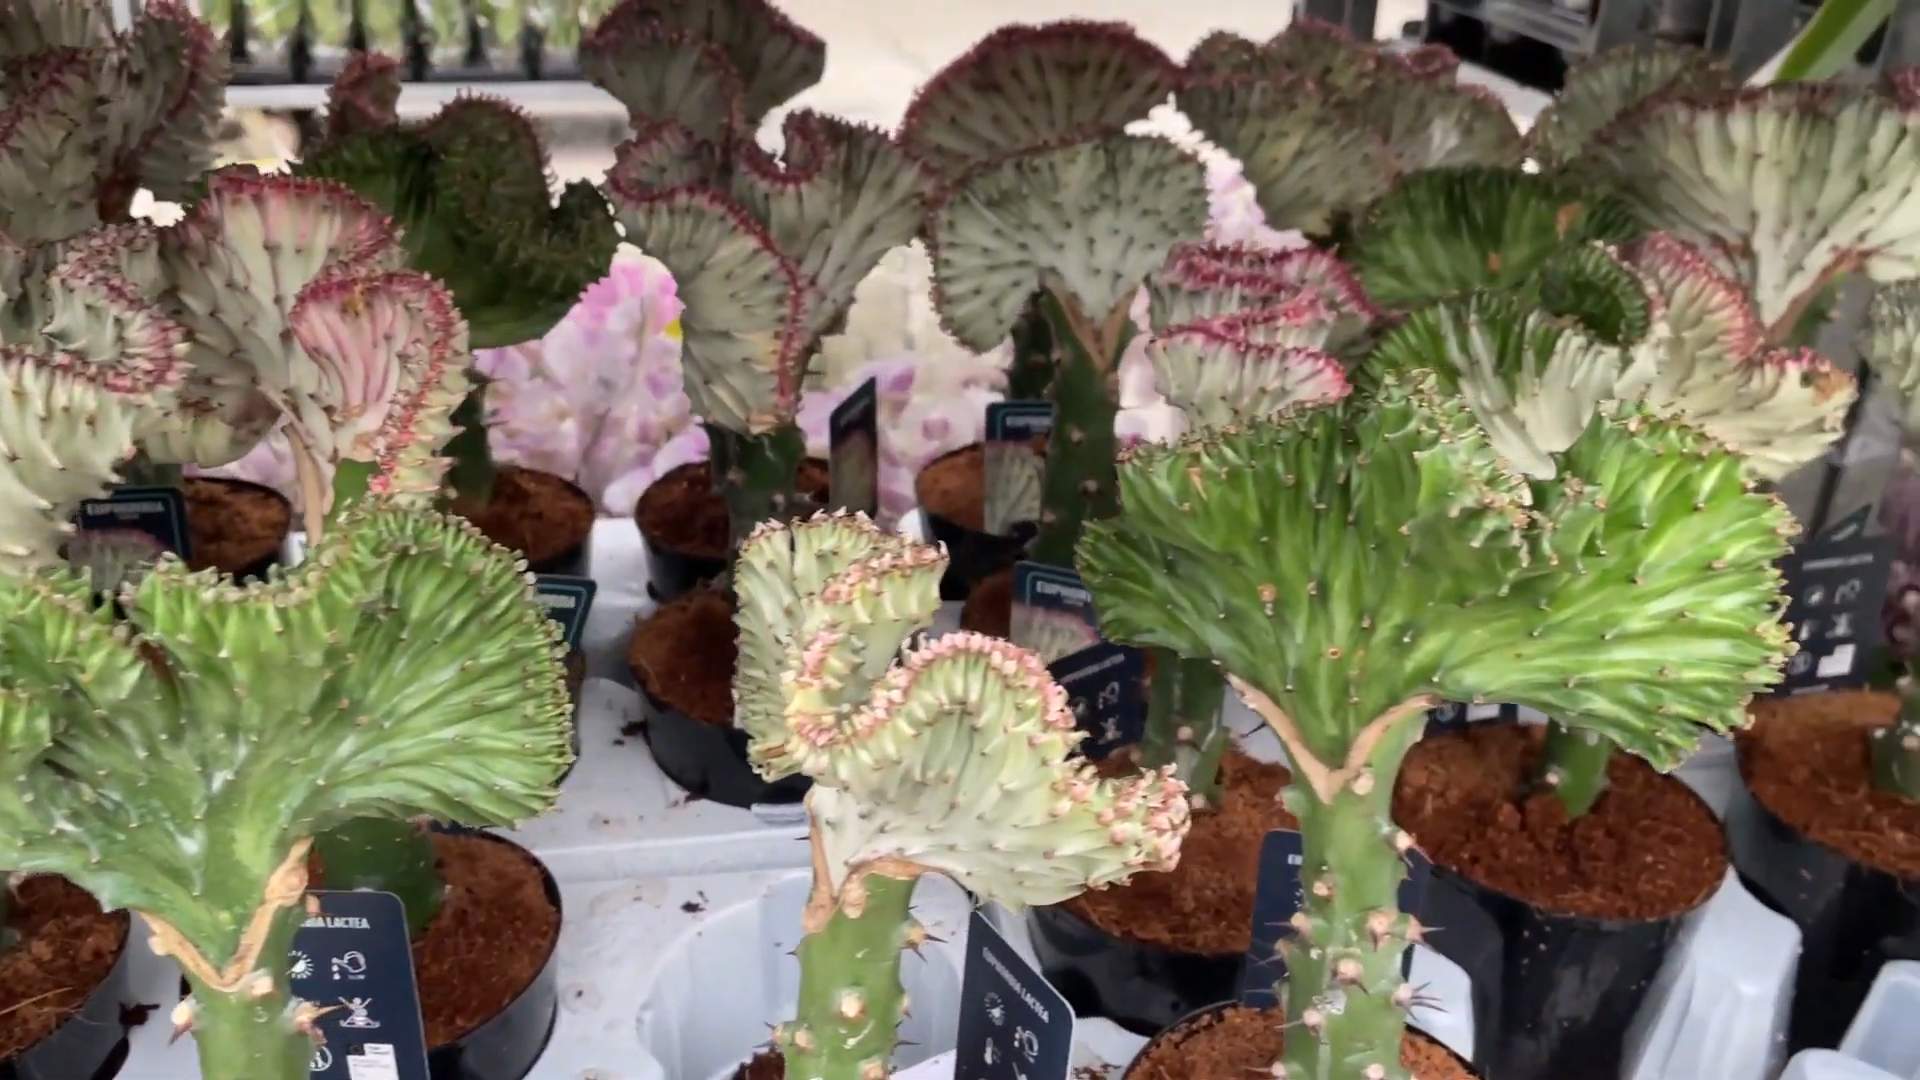
Coral Cactus Care: Ever wondered if you could bring a touch of the exotic and bizarre into your home without needing a greenhouse or a botanist’s degree? Well, you absolutely can! I’m so excited to share some fantastic DIY tricks and hacks that will help you cultivate a thriving Coral Cactus, also known as Euphorbia lactea cristata. This fascinating plant, resembling an underwater coral reef, has been captivating plant lovers for decades with its unique, fan-like crests and intriguing forms.
While the exact origins of the Coral Cactus are a bit murky, its parent species, Euphorbia lactea, hails from Asia. Grafting techniques, a practice with roots stretching back centuries, are what give the Coral Cactus its distinctive appearance. This grafting process, where two plants are joined to grow as one, is not just a horticultural technique; it’s an art form!
But why should you bother with these DIY tricks? Because let’s face it, sometimes these quirky beauties can be a little finicky. Many people struggle with providing the right conditions for their Coral Cactus to flourish. They might encounter issues like root rot, etiolation (stretching due to lack of light), or simply a lack of vibrant growth. That’s where these simple, yet effective, Coral Cactus care hacks come in. I’m going to show you how to avoid common pitfalls and unlock the secrets to keeping your Coral Cactus happy, healthy, and looking its absolute best. Get ready to transform your thumb from brown to green, one easy trick at a time!
DIY: Propagating Your Coral Cactus for a Thriving Collection
Okay, plant lovers, let’s talk Coral Cactus! These funky, grafted succulents are real showstoppers, but sometimes they need a little help to stay happy and healthy. One of the best ways to ensure you always have these beauties around is through propagation. Don’t worry, it’s not as intimidating as it sounds! I’m going to walk you through everything you need to know to successfully propagate your Coral Cactus.
Understanding the Coral Cactus Graft
Before we dive into the how-to, let’s quickly understand what we’re working with. A Coral Cactus isn’t actually a single plant. It’s a graft, meaning two different plants are joined together. Typically, you’ll have:
* The Base (Rootstock): Usually *Euphorbia neriifolia* or *Euphorbia resinifera*. This provides the roots and stability.
* The Crested Top (Scion): This is the “coral” part, usually *Euphorbia lactea cristata*. It’s the eye-catching, fan-shaped part.
Knowing this is important because it affects how we propagate. We’re primarily focusing on propagating the *Euphorbia lactea cristata* (the coral part) through cuttings.
What You’ll Need
Gathering your supplies beforehand will make the whole process smoother. Here’s what I recommend:
* Healthy Coral Cactus: Obviously! Choose a plant with healthy, mature growth.
* Sharp, Clean Knife or Pruning Shears: Sterilize these with rubbing alcohol to prevent infection.
* Rooting Hormone (Optional but Recommended): This encourages root growth.
* Well-Draining Soil Mix: A cactus or succulent mix is ideal. You can also make your own by mixing potting soil with perlite and coarse sand.
* Small Pots or Containers: Choose pots with drainage holes.
* Gloves: Euphorbia sap can be irritating, so protect your hands.
* Rubbing Alcohol: For sterilizing your tools.
* Watering Can or Spray Bottle: For gentle watering.
* Paper Towels: For cleaning up any sap.
* A Bright, Indirect Light Source: For your new cuttings to thrive.
Taking Cuttings: The Heart of Propagation
This is where the magic happens! Follow these steps carefully:
1. Prepare Your Tools and Workspace: Sterilize your knife or pruning shears with rubbing alcohol. Lay down some paper towels to protect your work surface. Put on your gloves!
2. Select a Healthy Cutting: Look for a healthy, mature section of the “coral” part of your cactus. Avoid any areas that are damaged, discolored, or showing signs of disease. A cutting that’s a few inches long is a good size to aim for.
3. Make the Cut: Using your sterilized knife or shears, make a clean, angled cut at the base of the section you’ve chosen. A clean cut is crucial for preventing infection and promoting root growth.
4. Let the Cutting Callus: This is a super important step! Euphorbia sap is irritating and can prevent rooting. Place your cutting in a dry, well-ventilated area for several days (usually 3-7 days) until the cut end forms a callus. The callus will look like a dry, hardened layer over the cut surface. This prevents rot when you plant it.
5. Apply Rooting Hormone (Optional): Once the cutting has callused, you can dip the cut end in rooting hormone powder. This will encourage root growth, but it’s not strictly necessary. Follow the instructions on the rooting hormone package.
Planting Your Cuttings: Giving Them a Home
Now that your cuttings are ready, it’s time to plant them!
1. Prepare Your Pots: Fill your small pots or containers with well-draining cactus or succulent mix. Make a small hole in the center of the soil.
2. Plant the Cutting: Gently insert the callused end of the cutting into the hole you made in the soil. Make sure the cutting is stable and upright. You can use small pebbles or toothpicks to support it if needed.
3. Water Sparingly: Water the soil lightly, just enough to moisten it. Avoid overwatering, as this can lead to rot.
4. Provide Bright, Indirect Light: Place your newly planted cuttings in a location that receives bright, indirect sunlight. Avoid direct sunlight, which can scorch the cuttings.
Caring for Your New Cuttings: Nurturing Growth
Patience is key! It can take several weeks or even months for your cuttings to root. Here’s how to care for them in the meantime:
1. Watering: Water sparingly, only when the soil is completely dry. Overwatering is the biggest killer of succulent cuttings.
2. Humidity: Coral Cactus cuttings prefer moderate humidity. You can increase humidity by placing a humidity tray near the cuttings or by misting them lightly with water occasionally.
3. Temperature: Maintain a warm temperature, ideally between 70-80°F (21-27°C).
4. Fertilizing: Once the cuttings have rooted and started to grow, you can start fertilizing them with a diluted cactus or succulent fertilizer. Follow the instructions on the fertilizer package.
5. Checking for Roots: After a few weeks, you can gently tug on the cutting to see if it has rooted. If it resists, it likely has roots! You can also gently unpot one to check.
Troubleshooting: Common Issues and Solutions
Even with the best care, you might encounter some problems. Here are a few common issues and how to address them:
* Rot: This is usually caused by overwatering. If you notice any signs of rot, such as soft, mushy spots, remove the affected areas immediately. Let the cutting callus again before replanting in fresh, dry soil.
* Lack of Rooting: If your cuttings aren’t rooting, make sure they’re receiving enough light and warmth. You can also try using a rooting hormone to encourage root growth. Ensure the cutting has callused properly.
* Yellowing Leaves: This can be caused by overwatering, underwatering, or lack of nutrients. Adjust your watering schedule and fertilize as needed.
* Pests: Keep an eye out for pests such as mealybugs or spider mites. Treat infestations with insecticidal soap or neem oil.
Grafting (Advanced): For the Truly Adventurous
While propagating from cuttings is the easiest method, you can also try grafting your own Coral Cactus. This is a more advanced technique, but it can be rewarding.
1. Choose Your Rootstock: Select a healthy *Euphorbia neriifolia* or *Euphorbia resinifera* plant to use as your rootstock.
2. Prepare the Rootstock: Make a clean, horizontal cut across the top of the rootstock.
3. Prepare the Scion: Take a cutting of your *Euphorbia lactea cristata* (the coral part) and make a clean, angled cut at the base.
4. Join the Scion and Rootstock: Carefully place the cut end of the scion onto the cut surface of the rootstock. Make sure the vascular cambium (the green layer just under the bark) of both plants are aligned as closely as possible.
5. Secure the Graft: Use grafting tape or rubber bands to hold the scion and rootstock together tightly.
6. Provide Humidity: Place the grafted plant in a humid environment, such as a plastic bag or a humidity dome.
7. Wait for the Graft to Take: It can take several weeks for the graft to take. Gradually remove the humidity and the grafting tape as the plants fuse together.
Important Note: Grafting success rates can vary. It takes practice and patience. Don’t be discouraged if your first attempt isn’t successful.
Final Thoughts
Propagating Coral Cactus is a fun and rewarding way to expand your succulent collection. With a little patience and care, you can create new plants from your existing ones. Remember to always use clean tools, avoid overwatering, and provide bright, indirect light. Happy growing!
Conclusion
So, there you have it! Mastering coral cactus care doesn’t have to be intimidating. By understanding its unique needs and implementing these simple yet effective DIY tricks, you can transform your coral cactus from a struggling succulent into a vibrant, eye-catching centerpiece. This isn’t just about keeping a plant alive; it’s about unlocking its full potential and enjoying the rewarding experience of nurturing something beautiful.
Why is this DIY approach a must-try? Because it empowers you to take control of your plant’s environment. Instead of relying solely on generic care instructions, you’re actively tailoring your approach to meet the specific needs of your coral cactus. This hands-on method fosters a deeper connection with your plant and allows you to troubleshoot problems proactively. Plus, it’s incredibly satisfying to see the positive results of your efforts.
Think about the possibilities! You could experiment with different potting mixes to find the perfect balance of drainage and moisture retention. Perhaps you’ll discover that your coral cactus thrives under a specific type of grow light, resulting in even more vibrant colors. Or maybe you’ll develop your own unique watering schedule based on your local climate and the plant’s individual needs.
Variations and Suggestions:
* Grafting Experiments: For the adventurous gardener, consider experimenting with grafting different types of Euphorbia onto the base of your coral cactus. This can create unique and visually stunning combinations.
* Custom Potting Mixes: Tailor your potting mix even further by adding ingredients like horticultural charcoal to improve drainage and aeration, or worm castings for added nutrients.
* Humidity Control: If you live in a particularly dry climate, consider using a pebble tray or humidifier to increase the humidity around your coral cactus.
* Propagation Techniques: While coral cacti are typically grafted, research and experiment with alternative propagation methods like stem cuttings (though success rates may vary).
Don’t be afraid to get creative and personalize your coral cactus care routine. The key is to observe your plant closely, listen to its needs, and adapt your approach accordingly. Remember, every plant is unique, and what works for one may not work for another.
We wholeheartedly encourage you to try these DIY tricks and embark on your own coral cactus care journey. Share your experiences, successes, and even your challenges with us! Let’s build a community of passionate plant lovers who are dedicated to helping each other grow and thrive. Post pictures of your thriving coral cacti, share your favorite tips and tricks, and ask questions. Together, we can unlock the secrets to successful coral cactus care and create a world filled with beautiful, healthy plants. So, grab your gardening gloves, gather your supplies, and get ready to witness the transformative power of DIY!
Frequently Asked Questions (FAQ)
Q: How often should I water my coral cactus?
A: Watering frequency is crucial for coral cactus care. Overwatering is a common killer. Generally, water thoroughly only when the top inch or two of the soil is completely dry. During the active growing season (spring and summer), this might be every 1-2 weeks. In the dormant season (fall and winter), reduce watering significantly, perhaps to once a month or even less. Always err on the side of underwatering rather than overwatering. The best way to determine if your plant needs water is to check the soil moisture with your finger or a moisture meter.
Q: What kind of soil is best for a coral cactus?
A: Coral cacti need well-draining soil to prevent root rot. A cactus or succulent potting mix is ideal. You can also create your own mix by combining equal parts of potting soil, perlite, and coarse sand. The key is to ensure that the soil doesn’t retain too much moisture. Avoid using heavy, clay-based soils. Adding horticultural charcoal to the mix can further improve drainage and aeration.
Q: How much sunlight does a coral cactus need?
A: Coral cacti thrive in bright, indirect sunlight. They can tolerate some direct sunlight, especially in the morning, but avoid exposing them to intense afternoon sun, which can scorch their delicate stems. An east-facing window is often a good choice. If you’re growing your coral cactus indoors, consider supplementing with a grow light, especially during the winter months when natural light is limited. Insufficient light can lead to etiolation (stretching) and a loss of vibrant color.
Q: Why is my coral cactus turning yellow or brown?
A: Yellowing or browning can indicate several problems. Overwatering is a common cause, leading to root rot. Check the soil moisture and ensure that the pot has adequate drainage. Underwatering can also cause discoloration, so make sure you’re watering thoroughly when the soil is dry. Other potential causes include sunburn (too much direct sunlight), nutrient deficiencies, or pest infestations. Inspect your plant carefully for any signs of pests and adjust your care routine accordingly.
Q: How do I fertilize my coral cactus?
A: Fertilize your coral cactus sparingly during the active growing season (spring and summer). Use a balanced, water-soluble fertilizer diluted to half strength. Avoid fertilizing during the dormant season (fall and winter). Over-fertilizing can lead to salt buildup in the soil, which can damage the roots. Look for a fertilizer specifically formulated for cacti and succulents.
Q: My coral cactus is leaning or falling over. What should I do?
A: Leaning or falling over can be caused by several factors. The most common is insufficient light, causing the plant to stretch towards the light source. Rotate your plant regularly to ensure even growth. Another possibility is that the plant has become top-heavy. In this case, you may need to repot it into a larger, more stable pot. You can also use stakes or supports to help prop up the plant. If the base of the plant is rotting, it may be necessary to take cuttings and propagate new plants.
Q: How do I repot my coral cactus?
A: Repot your coral cactus every 1-2 years, or when it becomes root-bound. Choose a pot that is slightly larger than the current one and has good drainage holes. Use a well-draining cactus or succulent potting mix. Gently remove the plant from its old pot, being careful not to damage the roots. Loosen any circling roots and place the plant in the new pot. Fill in around the roots with fresh potting mix and water thoroughly. Avoid fertilizing for a few weeks after repotting.
Q: Are coral cacti toxic to pets?
A: Yes, coral cacti are toxic to pets if ingested. The sap contains irritants that can cause skin irritation, vomiting, and diarrhea. Keep your coral cactus out of reach of pets and children. If you suspect that your pet has ingested part of a coral cactus, contact your veterinarian immediately.
Q: How do I deal with pests on my coral cactus?
A: Common pests that can affect coral cacti include mealybugs, spider mites, and scale. Inspect your plant regularly for signs of infestation. Mealybugs look like small, cottony masses, while spider mites are tiny and create webs. Scale insects are small, armored bumps that attach to the stems. Treat infestations with insecticidal soap or neem oil. You can also try wiping the pests off with a cotton swab dipped in rubbing alcohol. Isolate the affected plant to prevent the pests from spreading to other plants.
Q: Can I propagate my coral cactus?
A: Coral cacti are typically propagated by grafting, as the top crest (the “coral”) is unable to root on its own. The base is usually a different type of Euphorbia that is easier to root. While you can attempt to take stem cuttings, success rates may vary. Grafting is the most reliable method for propagating coral cacti and preserving the unique characteristics of the crest. Research grafting techniques specific to Euphorbia for best results.

Leave a Comment