

Deep clean your kitchen: it’s a phrase that might send shivers down your spine, but trust me, it doesn’t have to be a daunting task! Imagine your kitchen, sparkling clean, smelling fresh, and a joy to cook in. That’s the promise of a truly deep clean, and this article is your ultimate DIY guide to achieving just that.
For generations, a clean kitchen has been the heart of the home. From ancient hearths to modern marvels, the kitchen has been a place of nourishment, gathering, and connection. Cultures around the world have emphasized the importance of cleanliness in food preparation, not just for hygiene, but also for creating a positive and welcoming atmosphere. Think of the meticulous cleaning rituals in Japanese kitchens or the emphasis on a spotless hearth in traditional European homes. These practices highlight the deep-seated connection between cleanliness and well-being.
Let’s face it, life gets busy, and regular cleaning often only scratches the surface. Grime builds up, spills linger, and before you know it, your kitchen needs more than just a quick wipe-down. That’s where this DIY deep cleaning guide comes in. I’m going to share my favorite tricks and hacks to tackle those tough spots, banish hidden dirt, and leave your kitchen feeling brand new. You’ll learn how to effectively deep clean your kitchen using simple, affordable methods, saving you time, money, and the stress of a perpetually messy space. So, grab your gloves, put on some music, and let’s get started on transforming your kitchen into a sparkling sanctuary!
Deep Cleaning Your Kitchen: A DIY Guide to Sparkling Surfaces
Okay, let’s face it. Kitchens get messy. Really messy. Between splattered sauces, greasy fingerprints, and the occasional forgotten science experiment lurking in the back of the fridge, our kitchens can quickly become a breeding ground for grime. But fear not! I’m here to guide you through a deep clean that will leave your kitchen sparkling and feeling brand new. This isn’t just a surface wipe-down; we’re going deep!
What You’ll Need
Before we dive in, let’s gather our supplies. Having everything on hand will make the process much smoother.
* Cleaning Solutions:
* All-purpose cleaner (I prefer a natural, citrus-based one)
* Dish soap
* Baking soda
* White vinegar
* Glass cleaner
* Oven cleaner (choose one appropriate for your oven type)
* Degreaser (optional, but helpful for stubborn grease)
* Tools:
* Microfiber cloths (lots of them!)
* Sponges (including a scrubby one)
* Scrub brush (for grout and tough spots)
* Spray bottles
* Rubber gloves (protect those hands!)
* Old toothbrush (for getting into tight corners)
* Paper towels
* Trash bags
* Vacuum cleaner with attachments
* Bucket
* Screwdriver (for removing vent covers and other hardware)
* Putty knife or scraper (for removing stuck-on food)
* Step stool (if needed to reach high areas)
* Optional but Helpful:
* Essential oils (for a fresh scent)
* Lemon halves (for garbage disposal cleaning)
* Dishwasher cleaner
* Refrigerator deodorizer
Phase 1: Clearing the Decks
Before we can even think about cleaning, we need to declutter. This is crucial for a truly deep clean.
1. Clear the Countertops: Remove everything from your countertops – appliances, utensils, canisters, everything! This gives you a blank canvas to work with and allows you to clean every inch. Place items in boxes or on the dining table for now.
2. Empty the Sink: Wash any dishes in the sink or load them into the dishwasher. A clean sink is essential for the rest of the cleaning process.
3. Remove Everything from the Refrigerator: This is the big one! Take everything out of your refrigerator and freezer. Check expiration dates and toss anything that’s past its prime. Group similar items together (condiments, produce, etc.) to make it easier to put everything back later. Place perishable items in a cooler with ice packs to keep them cold.
4. Empty the Pantry: Similar to the refrigerator, remove everything from your pantry shelves. Check expiration dates and discard anything that’s expired or stale. Wipe down the shelves with a damp cloth to remove any dust or crumbs.
5. Take Out the Trash and Recycling: Empty all trash and recycling bins in the kitchen. This will eliminate any lingering odors and prevent attracting pests.
Phase 2: Tackling the Appliances
Now that we’ve decluttered, let’s focus on the appliances.
1. Cleaning the Refrigerator:
* Remove Shelves and Drawers: Take out all removable shelves, drawers, and bins. Wash them in warm, soapy water. For stubborn stains, soak them in a solution of baking soda and water.
* Wipe Down the Interior: Mix a solution of warm water and baking soda (about 1 tablespoon of baking soda per quart of water). Use a clean cloth or sponge to wipe down the interior walls, ceiling, and floor of the refrigerator. Pay special attention to spills and stains.
* Clean the Door Seals: Use a damp cloth to clean the rubber seals around the refrigerator door. These can accumulate dirt and mildew.
* Clean the Exterior: Wipe down the exterior of the refrigerator with all-purpose cleaner. Pay attention to fingerprints and smudges.
* Replace Shelves and Drawers: Once the shelves and drawers are dry, replace them in the refrigerator.
* Organize and Restock: Put all the food items back into the refrigerator, organizing them by category. Use clear containers to store leftovers and produce to keep them fresh longer.
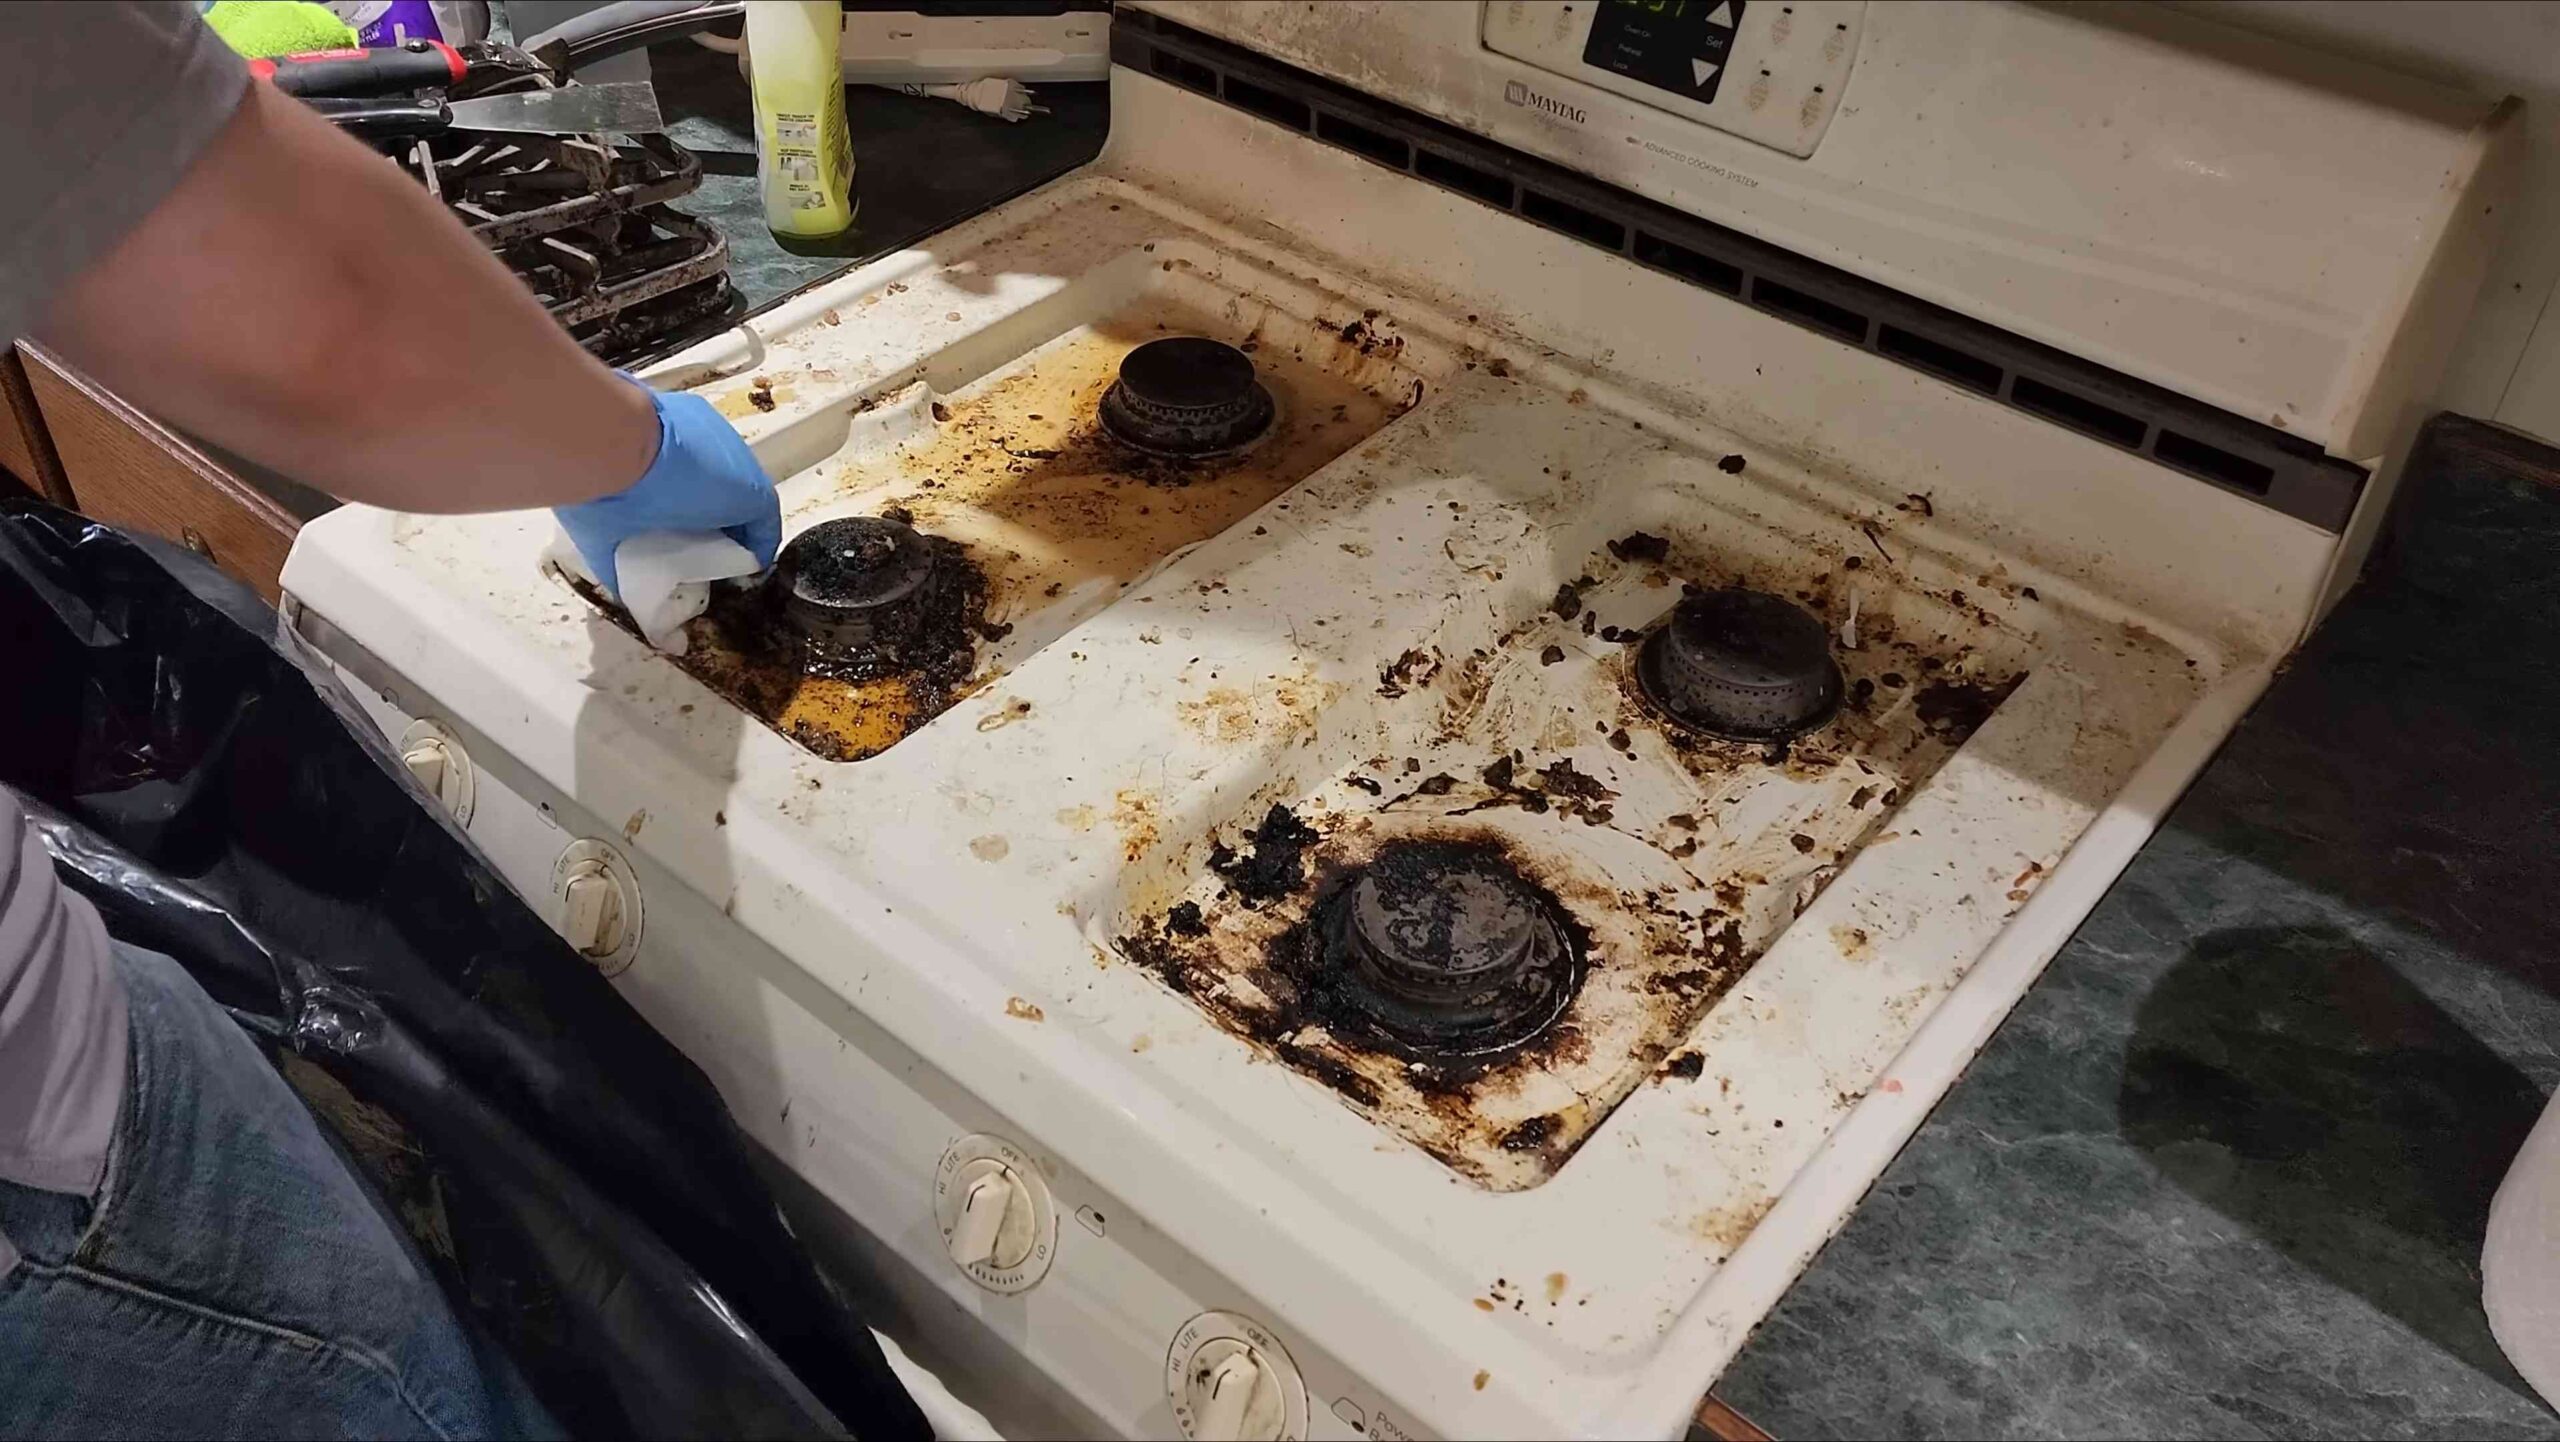
2. Cleaning the Oven:
* Self-Cleaning Oven: If your oven has a self-cleaning function, follow the manufacturer’s instructions. Be aware that this process can generate a lot of heat and smoke, so make sure to ventilate your kitchen well.
* Manual Cleaning: If your oven doesn’t have a self-cleaning function, or if you prefer to clean it manually, follow these steps:
* Remove Racks: Take out the oven racks and soak them in hot, soapy water.
* Apply Oven Cleaner: Apply oven cleaner to the interior of the oven, following the manufacturer’s instructions. Be sure to wear gloves and protect your eyes.
* Let it Sit: Allow the oven cleaner to sit for the recommended amount of time (usually several hours or overnight).
* Scrub and Rinse: Use a scrub brush or sponge to scrub away the loosened grime. Rinse thoroughly with clean water.
* Clean the Racks: Scrub the oven racks with a scrub brush or sponge to remove any remaining grime. Rinse thoroughly with clean water.
* Dry and Replace: Dry the oven interior and racks with a clean cloth. Replace the racks in the oven.
3. Cleaning the Microwave:
* Steam Clean: Place a microwave-safe bowl filled with water and a few slices of lemon or a tablespoon of vinegar in the microwave. Heat on high for 2-3 minutes, or until the water boils and the microwave is steamy.
* Wipe Down: Carefully remove the bowl (it will be hot!) and use a clean cloth or sponge to wipe down the interior of the microwave. The steam will have loosened any splattered food, making it easy to remove.
* Clean the Exterior: Wipe down the exterior of the microwave with all-purpose cleaner.
4. Cleaning the Dishwasher:
* Remove Food Debris: Check the dishwasher filter and remove any food debris.
* Run a Cleaning Cycle: Place a dishwasher cleaner tablet or cup of white vinegar in the dishwasher and run a cleaning cycle.
* Wipe Down the Interior: Wipe down the interior of the dishwasher with a damp cloth.
* Clean the Exterior: Wipe down the exterior of the dishwasher with all-purpose cleaner.
Phase 3: Countertops, Sink, and Backsplash
Now that the appliances are sparkling, let’s move on to the countertops, sink, and backsplash.
1. Cleaning the Countertops:
* Choose the Right Cleaner: Use a cleaner that is appropriate for your countertop material. For example, granite countertops require a special granite cleaner, while laminate countertops can be cleaned with all-purpose cleaner.
* Spray and Wipe: Spray the countertops with the appropriate cleaner and wipe them down with a clean microfiber cloth.
* Remove Stubborn Stains: For stubborn stains, make a paste of baking soda and water and apply it to the stain. Let it sit for a few minutes, then scrub gently and rinse with clean water.
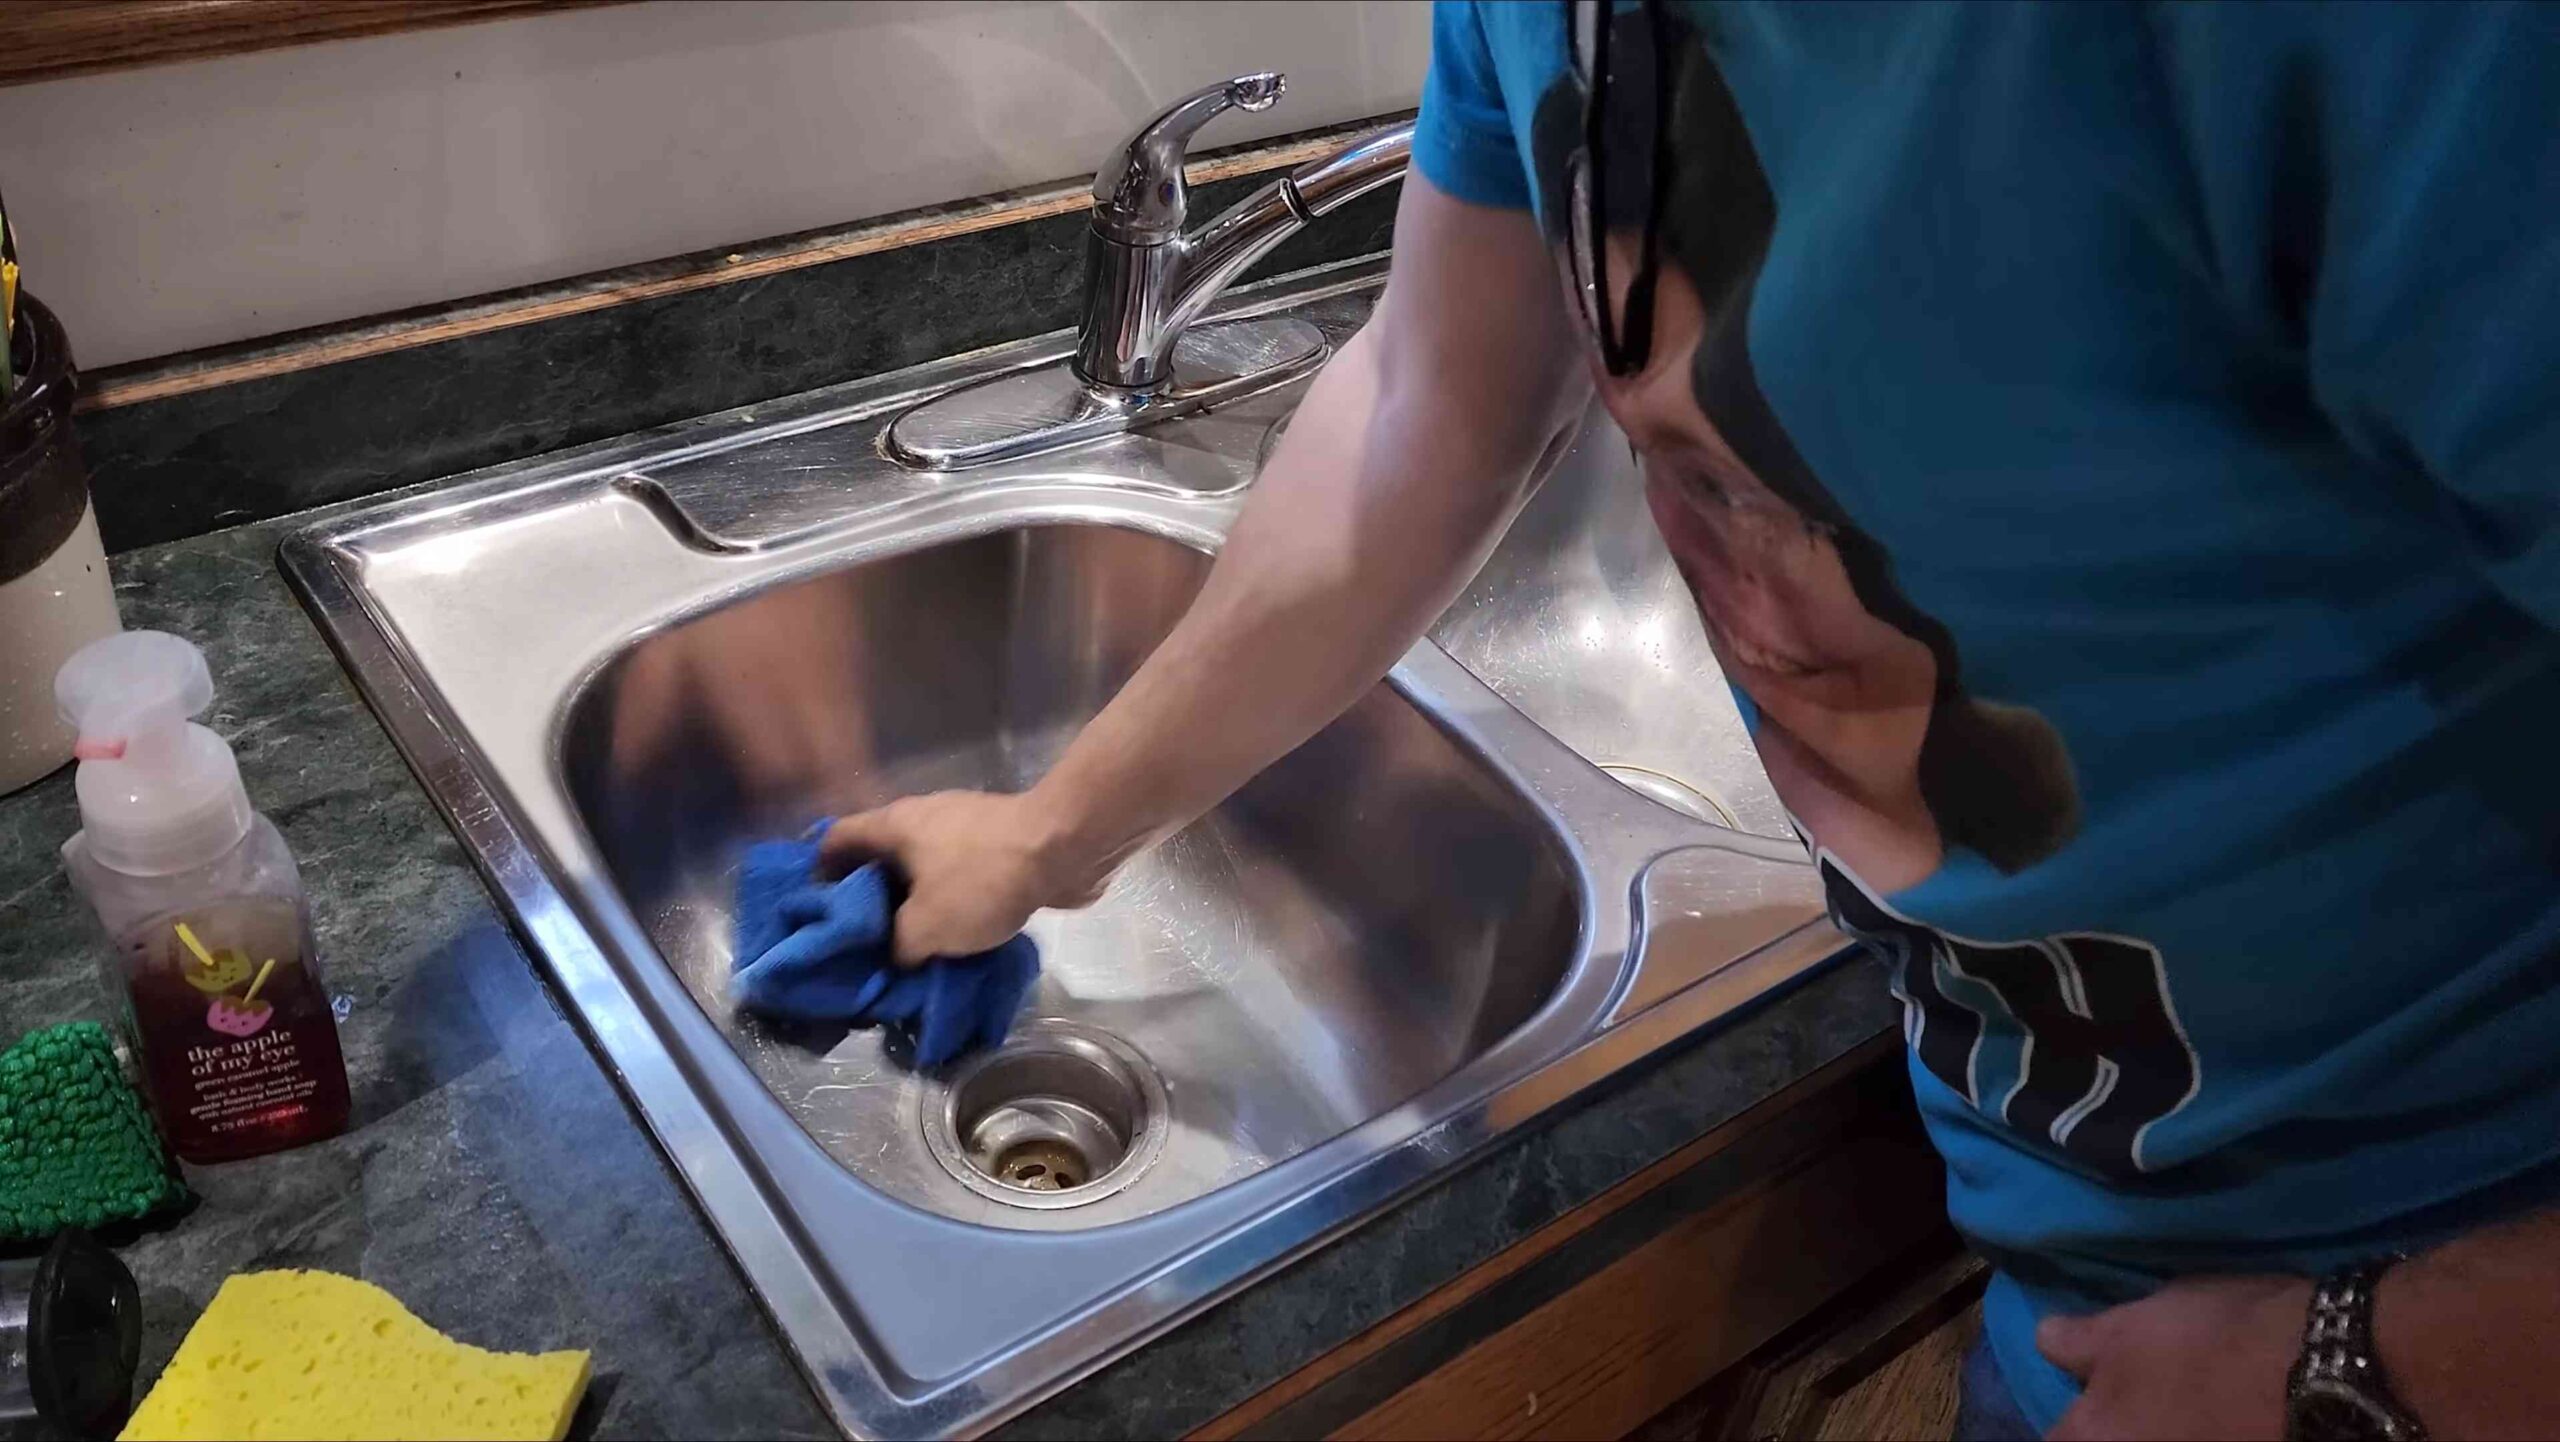
2. Cleaning the Sink:
* Rinse and Scrub: Rinse the sink with warm water and scrub it with a scrub brush or sponge and dish soap.
* Remove Water Spots: To remove water spots, wipe the sink with a cloth dampened with white vinegar.
* Clean the Drain: Pour a cup of baking soda down the drain, followed by a cup of white vinegar. Let it fizz for a few minutes, then flush with hot water.
* Shine the Faucet: Wipe down the faucet with a cloth dampened with glass cleaner to remove water spots and fingerprints.
3. Cleaning the Backsplash:
* Spray and Wipe: Spray the backsplash with all-purpose cleaner and wipe it down with a clean microfiber cloth.
* Clean the Grout: For grout that is stained or discolored, use a grout brush and a solution of baking soda and water or a commercial grout cleaner.
Phase 4: Floors, Cabinets, and Finishing Touches
Almost there! Let’s finish up with the floors, cabinets, and a few final touches.
1. Cleaning the Floors:
* Sweep or Vacuum: Sweep or vacuum the floors to remove any loose dirt or debris.
* Mop: Mop the floors with a floor cleaner that is appropriate for your floor type. Be sure to follow the manufacturer’s instructions.
Conclusion
So, there you have it! Mastering the art of deep cleaning your kitchen doesn’t require a professional cleaning service or a cabinet full of harsh chemicals. This DIY deep cleaning trick is a game-changer for anyone looking to revitalize their kitchen space, making it not only sparkling clean but also a healthier and more enjoyable environment to cook and spend time in.
Why is this a must-try? Because it’s effective, affordable, and customizable. You’re using ingredients you likely already have in your pantry, avoiding the expense and potential environmental impact of store-bought cleaners. Plus, you’re in complete control of the process, ensuring every nook and cranny receives the attention it deserves.
Beyond the Basics: Exploring Variations
While the core method we’ve outlined is incredibly effective, don’t be afraid to experiment and tailor it to your specific needs and preferences. Here are a few variations to consider:
* Essential Oil Boost: Add a few drops of your favorite essential oil to your cleaning solutions for an extra burst of freshness and potential antibacterial benefits. Lemon, tea tree, and lavender are all excellent choices.
* Vinegar Infusion: For particularly stubborn grease or grime, consider infusing your vinegar with citrus peels (lemon, orange, grapefruit) for a week or two before using it. This will enhance its cleaning power and leave a pleasant scent.
* Baking Soda Paste Power: For burnt-on food residue in your oven or on your stovetop, create a thick paste of baking soda and water. Apply it to the affected area, let it sit for several hours (or even overnight), and then scrub away.
* Dish Soap Alternative: If you prefer a different type of dish soap, feel free to substitute it. Just be sure to choose one that is gentle and effective at cutting through grease.
* Microfiber Magic: Invest in high-quality microfiber cloths. They are incredibly absorbent, lint-free, and effective at trapping dirt and grime.
Your Kitchen Transformation Awaits!
We wholeheartedly encourage you to give this DIY deep cleaning trick a try. The results will speak for themselves – a kitchen that is not only visually appealing but also hygienically clean and ready for culinary adventures.
Don’t just take our word for it! We want to hear about your experience. Share your before-and-after photos, your favorite variations, and any tips or tricks you discover along the way. Let’s create a community of sparkling clean kitchens! Use the hashtag #DIYDeepCleanKitchen on social media to share your success stories and inspire others.
Remember, a clean kitchen is a happy kitchen. And a happy kitchen leads to delicious meals and cherished memories. So, roll up your sleeves, gather your supplies, and get ready to transform your kitchen into a space you’ll love spending time in. Happy cleaning!
Frequently Asked Questions (FAQ)
Q: How often should I deep clean my kitchen?
A: The frequency of deep cleaning depends on how often you cook and the level of activity in your kitchen. Generally, a deep clean every 3-6 months is recommended. However, if you cook frequently or have a busy household, you might consider deep cleaning every 2-3 months. Regular maintenance cleaning, such as wiping down surfaces and sweeping the floor, should be done daily or weekly.
Q: What if I don’t have all the ingredients listed? Can I substitute anything?
A: Absolutely! The beauty of this DIY method is its flexibility. If you don’t have white vinegar, you can use lemon juice as a substitute, although vinegar is generally more effective for disinfecting. If you don’t have baking soda, you can use a mild abrasive cleaner, but be careful not to scratch delicate surfaces. For dish soap, any gentle dish soap will work. The key is to use ingredients that are safe for your surfaces and effective at cutting through grease and grime.
Q: I have granite countertops. Is it safe to use vinegar on them?
A: It’s generally not recommended to use vinegar on granite countertops, as it can etch the surface over time. Instead, use a pH-neutral cleaner specifically designed for granite. You can also use a mixture of warm water and a mild dish soap. Always test any cleaner in an inconspicuous area first to ensure it doesn’t damage the surface.
Q: How do I clean my stainless steel appliances without leaving streaks?
A: To clean stainless steel appliances without streaks, use a microfiber cloth dampened with warm water and a small amount of dish soap. Wipe in the direction of the grain. Then, use a clean, dry microfiber cloth to buff the surface. You can also use a stainless steel cleaner specifically designed for appliances. Avoid using abrasive cleaners or scrub brushes, as they can scratch the surface.
Q: My oven is heavily soiled. Will this method be effective for cleaning it?
A: For heavily soiled ovens, you might need a more intensive cleaning method. Start by removing any loose debris. Then, create a paste of baking soda and water and apply it to the interior of the oven, avoiding the heating elements. Let it sit overnight. The next day, scrub the oven with a sponge or scrub brush and wipe away the baking soda paste. For stubborn stains, you can use a commercial oven cleaner, but be sure to follow the manufacturer’s instructions carefully.
Q: How do I get rid of lingering odors in my kitchen?
A: To eliminate lingering odors in your kitchen, try these tips:
* Boil a pot of water with lemon slices or cinnamon sticks.
* Place a bowl of baking soda in the refrigerator and freezer to absorb odors.
* Clean your garbage disposal by running cold water and adding lemon or lime peels.
* Ventilate your kitchen by opening windows and doors.
* Consider using an air purifier to remove odors and allergens.
Q: What’s the best way to clean my kitchen sink?
A: The best way to clean your kitchen sink depends on the material. For stainless steel sinks, use a mixture of baking soda and water to scrub away stains and grime. For porcelain sinks, use a mild dish soap and a soft sponge. Avoid using abrasive cleaners on either type of sink, as they can scratch the surface. To disinfect your sink, pour a cup of white vinegar down the drain and let it sit for 30 minutes before flushing with hot water.
Q: How can I prevent my kitchen from getting so dirty in the first place?
A: Prevention is key to keeping your kitchen clean. Here are a few tips:
* Wipe up spills immediately.
* Wash dishes after each meal.
* Sweep or vacuum the floor regularly.
* Clean countertops and stovetop after cooking.
* Empty the garbage can frequently.
* Store food properly to prevent spoilage.
By following these tips and incorporating regular maintenance cleaning into your routine, you can keep your kitchen sparkling clean and avoid the need for frequent deep cleans. Remember, a little effort each day can go a long way in maintaining a clean and healthy kitchen environment. And when it’s time for a deep clean, this DIY deep cleaning trick will be your secret weapon!


Leave a Comment