

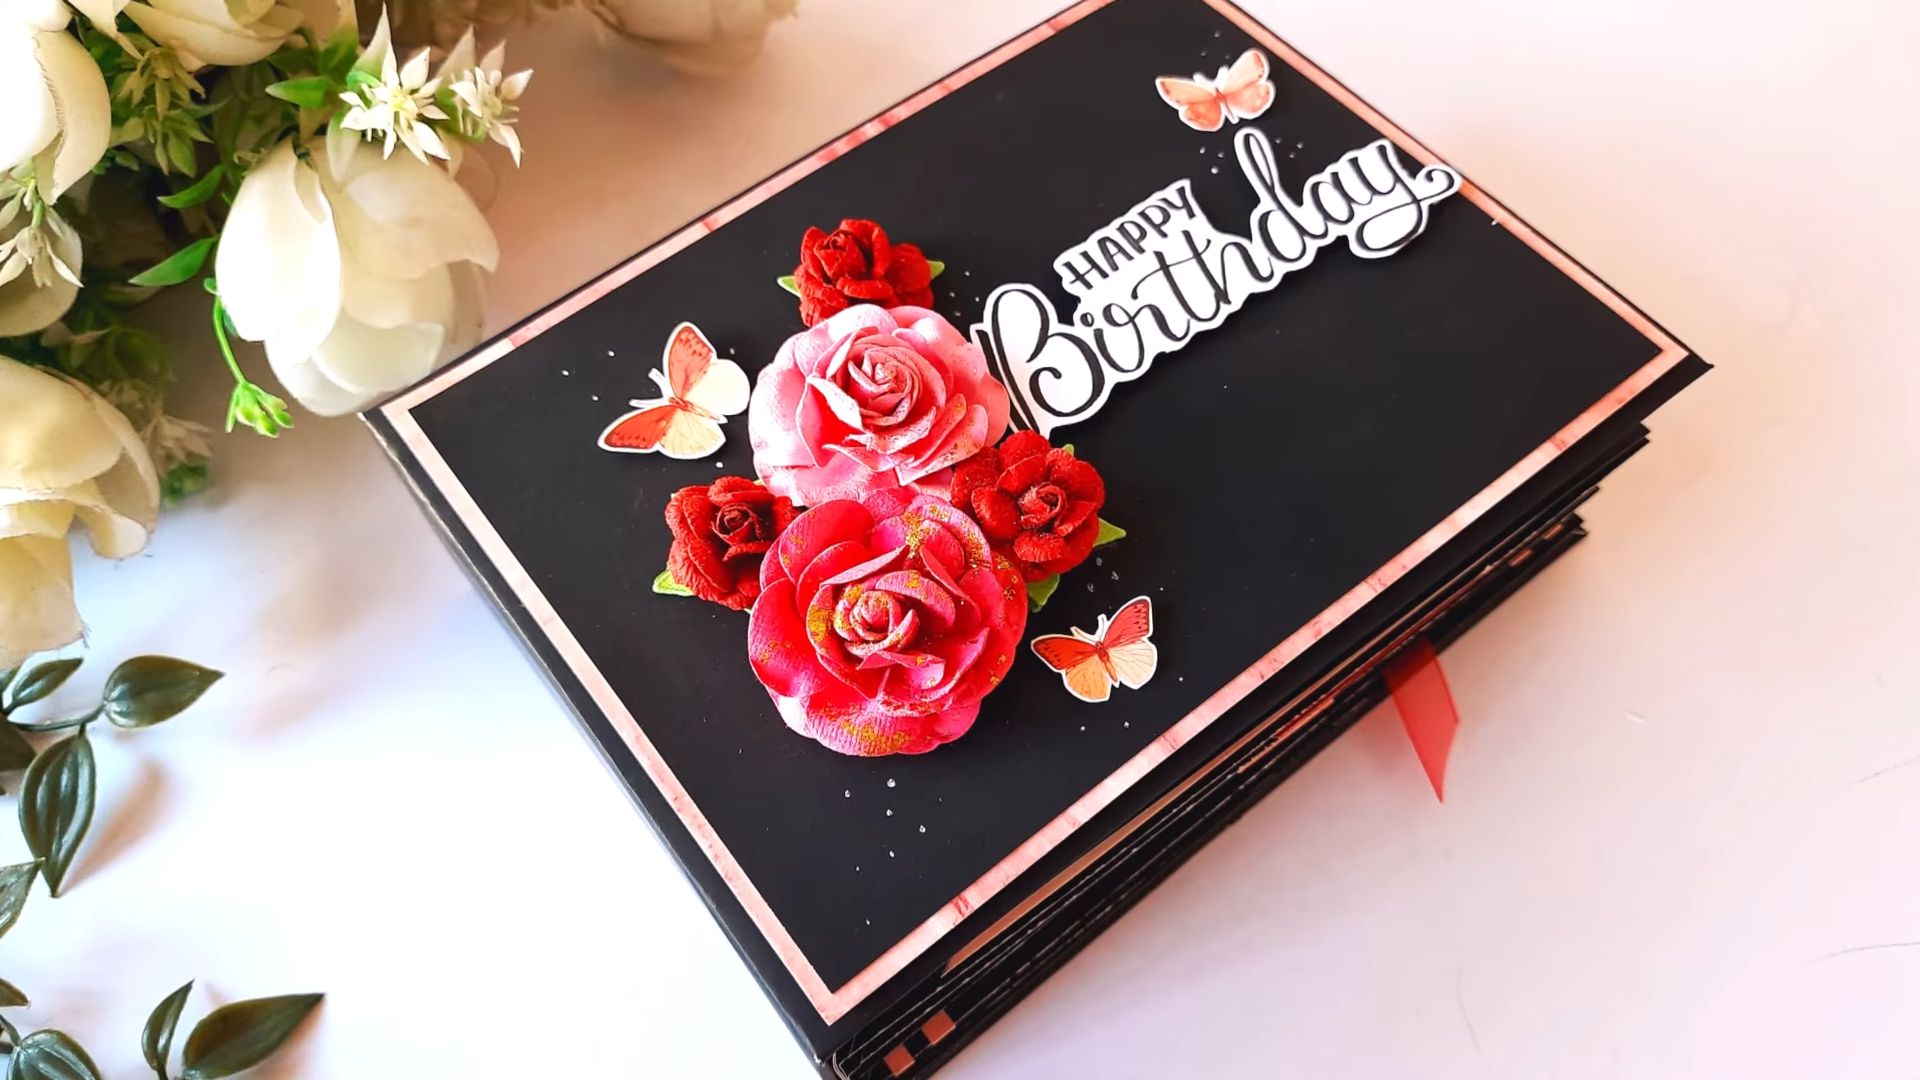
DIY Birthday Card: More than just paper and ink, a handmade birthday card is a heartfelt expression of love and care. In a world dominated by digital greetings, crafting a DIY birthday card offers a unique and personal touch that truly stands out.
Have you ever felt that generic store-bought cards just don’t quite capture the sentiment you want to convey? I know I have! That’s where the magic of DIY comes in. For centuries, people have poured their creativity into handmade gifts, and birthday cards are no exception. From Victorian-era paper lace cards to modern mixed-media masterpieces, the tradition of crafting personalized greetings has deep roots in our desire to connect with loved ones on a deeper level.
But why bother with DIY when you can simply click and send an e-card? Because a handmade card speaks volumes. It shows the recipient that you invested time, effort, and thought into creating something special just for them. In today’s fast-paced world, taking the time to create something tangible is a powerful way to show someone you care. Plus, let’s be honest, it’s incredibly rewarding to unleash your inner artist and create something beautiful with your own two hands! This article will guide you through some simple yet stunning DIY birthday card ideas that will make your loved ones feel truly cherished. Get ready to spread some birthday joy, one handmade card at a time!
DIY Pop-Up Birthday Cake Card: A Step-by-Step Guide
Hey there, crafty friends! Birthdays are always a great excuse to get creative, and what’s more personal than a handmade card? Today, I’m going to walk you through creating an adorable pop-up birthday cake card that’s sure to impress. Don’t worry if you’re not a seasoned crafter; this project is totally doable with a little patience and these easy-to-follow instructions. Let’s get started!
What You’ll Need:
Before we dive in, let’s gather our supplies. Having everything on hand will make the process much smoother.
* Cardstock: You’ll need several sheets in different colors for the card base, cake layers, candles, and decorations. I recommend using heavier cardstock for durability. Think about a main color for the card itself, and then fun, bright colors for the cake.
* Scissors: A good pair of scissors is essential for precise cutting.
* Craft Knife (Optional): A craft knife and cutting mat can be helpful for intricate details, but scissors will work just fine too.
* Ruler: For measuring and creating straight lines.
* Pencil: For sketching and marking measurements.
* Glue Stick or Double-Sided Tape: To adhere the different elements together. I prefer a glue stick for less mess, but double-sided tape works great too.
* Markers or Colored Pencils: For adding details and coloring the candles.
* Embellishments (Optional): Glitter, sequins, small beads, stickers – anything to add some extra sparkle and personality!
* Cutting Mat (Optional): If you are using a craft knife.
* Printable Template (Optional): I’ll provide instructions for creating your own, but you can also find templates online if you prefer.
Creating the Card Base
First, we need to make the foundation of our masterpiece – the card base.
1. Cut the Cardstock: Take a sheet of cardstock (I’m using a light blue for mine) and cut it to 8.5 x 5.5 inches. This will be the size of your folded card.
2. Score the Center: Use a ruler and a scoring tool (or the dull edge of your scissors) to create a crease down the center of the cardstock at 4.25 inches. This will help you fold it neatly.
3. Fold the Card: Carefully fold the cardstock along the scored line to create the card base. Make sure the fold is crisp and clean.
Building the Pop-Up Cake Structure
This is where the magic happens! We’ll create the mechanism that makes the cake pop up when the card is opened.
1. Prepare the Pop-Up Strips: Cut two strips of cardstock (I’m using white) that are 1 inch wide and 4 inches long.
2. Fold the Strips: Fold each strip in half. Then, fold each half in half again, creating a “W” shape. These folds need to be crisp.
3. Attach the First Strip: Open the card base. Apply glue to one of the folded ends of the first strip. Attach it to the inside of the card, near the fold, about 1 inch from the bottom. Make sure the folded edge of the strip is aligned with the fold of the card.
4. Attach the Second Strip: Repeat the process with the second strip, attaching it to the other side of the card, mirroring the first strip. Ensure both strips are aligned and equidistant from the bottom of the card.
5. Test the Pop-Up: Gently close the card. The strips should fold flat. Open the card again. The strips should pop up, creating a platform for the cake. If they don’t, double-check your folds and the placement of the strips.
Crafting the Cake Layers
Now for the fun part – designing and creating the cake!
1. Cut the Cake Layers: Cut out three different sized rectangles from different colored cardstock (I’m using pink, yellow, and purple). These will be the cake layers. I recommend the following sizes:
* Bottom Layer (Pink): 3 inches wide x 1.5 inches high
* Middle Layer (Yellow): 2.5 inches wide x 1.25 inches high
* Top Layer (Purple): 2 inches wide x 1 inch high
2. Round the Edges (Optional): If you want a more rounded cake look, carefully round the corners of each rectangle with your scissors.
3. Add Frosting Details: Cut thin strips of white cardstock to create “frosting” for each layer. You can use scalloped scissors for a fancier look, or simply cut wavy lines with regular scissors.
4. Attach the Frosting: Glue the frosting strips to the top edges of each cake layer. Let your creativity flow here! You can add multiple layers of frosting or create different patterns.
5. Assemble the Cake: Glue the middle layer (yellow) on top of the bottom layer (pink), centering it. Then, glue the top layer (purple) on top of the middle layer, again centering it. You now have a tiered cake!
Adding the Candles and Decorations
No birthday cake is complete without candles and decorations!
1. Create the Candles: Cut out small rectangles of colored cardstock (I’m using red, orange, and yellow) to create the candles. Make them about 0.5 inches wide and 1 inch high.
2. Add Flames: Cut out small flame shapes from yellow or orange cardstock and glue them to the top of each candle.
3. Attach the Candles: Glue the candles to the top layer of the cake. You can arrange them in a row or scatter them around for a more whimsical look.
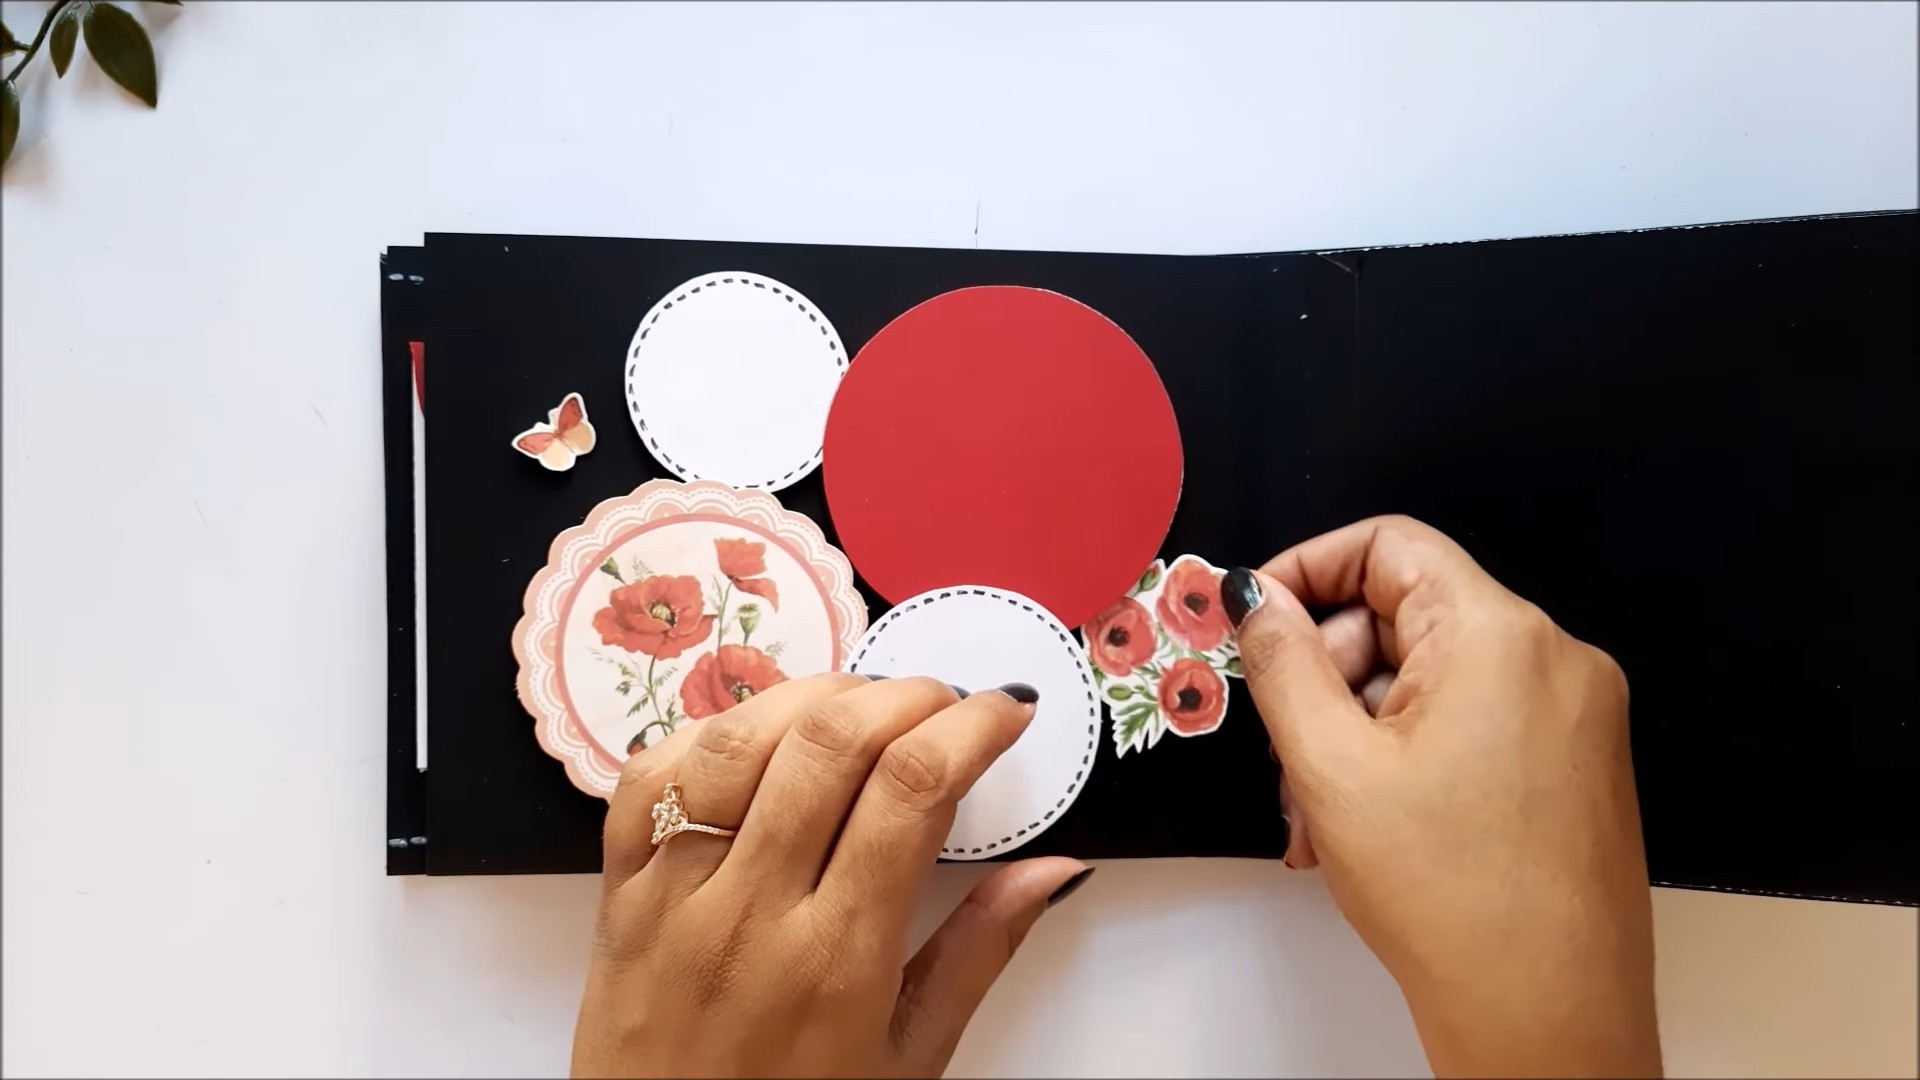
4. Add Decorations: This is where you can really personalize your card! Use markers, colored pencils, glitter, sequins, beads, or stickers to decorate the cake. I’m adding some small glitter dots to look like sprinkles.
5. Create a Birthday Message: Cut out a small rectangle of cardstock and write “Happy Birthday!” on it. You can use a marker, pen, or even print it out and glue it on.
Attaching the Cake to the Pop-Up Mechanism
Almost there! Now we need to attach the cake to the pop-up strips so it pops up when the card is opened.
1. Position the Cake: Open the card and position the cake in the center of the pop-up strips.
2. Attach the Cake: Apply glue to the bottom of the bottom cake layer. Carefully attach it to the top of the pop-up strips, ensuring it’s centered and aligned. Press down gently to secure it.
3. Let it Dry: Allow the glue to dry completely before closing the card. This will prevent the cake from shifting or falling off.
Finishing Touches
Now for the final details to make your card extra special.
1. Add a Background: You can add a background to the inside of the card to make the cake stand out even more. Cut a piece of cardstock that’s slightly smaller than the inside of the card and glue it in place. I’m using a light green color.
2. Write Your Message: Write a heartfelt birthday message inside the card. This is the perfect opportunity to express your love and appreciation for the birthday person.
3. Decorate the Front of the Card: Don’t forget to decorate the front of the card! You can use the same embellishments you used on the cake, or create a completely different design. I’m adding some balloons and stars to mine.
4. Attach the Birthday Message: Glue the “Happy Birthday!” message you created earlier to the front of the card.
Tips and Tricks for Success
* Use Quality Materials: Using good quality cardstock and glue will make a big difference in the final product.
* Take Your Time: Don’t rush the process. Take your time and pay attention to detail.
* Be Precise: Accurate measurements and precise cutting are essential for a well-made pop-up card.
* Test the Pop-Up Mechanism: Before attaching the cake, test the pop-up mechanism to make sure it works smoothly.
* Get Creative: Don’t be afraid to experiment with different colors, patterns, and embellishments.
* Personalize It: Add personal touches that reflect the birthday person’s interests and personality.
* Practice Makes Perfect: If you’re new to pop-up cards, don’t be discouraged if your first attempt isn’t perfect. Keep practicing, and you’ll get better with each card you make.
* Consider the Recipient: Think about the person you’re giving the card to. What are their favorite
Conclusion
So, there you have it! Crafting your own DIY birthday card isn’t just about saving a few dollars; it’s about pouring your heart and soul into a tangible expression of love and appreciation. In a world saturated with mass-produced greetings, a handmade card stands out as a beacon of thoughtfulness, a testament to the time and effort you invested in making someone’s special day even brighter.
Think about the impact: a store-bought card, while convenient, often lacks that personal touch. It’s a generic sentiment, easily forgotten amidst the flurry of birthday celebrations. But a DIY birthday card? That’s a keepsake, a memento that can be cherished for years to come. It’s a reminder of your unique bond with the recipient, a symbol of the care and attention you dedicated to creating something truly special.
This DIY birthday card trick is a must-try because it empowers you to personalize every aspect of the card, from the colors and patterns to the message and embellishments. You’re not limited by pre-set designs or generic phrases; you have the freedom to create a card that perfectly reflects the recipient’s personality and your relationship with them.
And the best part? It’s incredibly versatile! Feeling adventurous? Experiment with different paper textures, like textured cardstock or handmade paper. Add a touch of elegance with calligraphy or hand-lettering. Incorporate pressed flowers, dried leaves, or even small photographs to create a truly unique and memorable card.
For the tech-savvy crafter, consider incorporating digital elements. Design your card layout on a computer or tablet, then print it onto cardstock and add hand-crafted embellishments. You can even create a QR code that links to a personalized video message or a slideshow of cherished memories.
If you’re short on time, don’t worry! Even a simple, hand-drawn card can be incredibly meaningful. A heartfelt message, a few colorful doodles, and a touch of creativity are all you need to create a card that will warm the recipient’s heart.
Consider these variations to elevate your DIY birthday card game:
* Pop-Up Cards: Add a three-dimensional element with a pop-up design. There are countless tutorials online for creating simple and complex pop-up mechanisms.
* Shaker Cards: Fill a clear window with glitter, sequins, or beads for a fun and interactive card.
* Embossed Cards: Use an embossing folder and a die-cutting machine to create a textured design on your cardstock.
* Watercolor Cards: Experiment with watercolor paints to create beautiful and ethereal backgrounds or floral designs.
* Upcycled Cards: Give old magazines, newspapers, or fabric scraps a new life by incorporating them into your card design.
No matter your skill level or available resources, there’s a DIY birthday card project that’s perfect for you. So, ditch the store-bought cards and embrace the joy of creating something truly special.
We wholeheartedly encourage you to try this DIY birthday card trick. Unleash your inner artist, gather your supplies, and let your creativity flow. We’re confident that you’ll be amazed at the beautiful and meaningful cards you can create.
But don’t just take our word for it! We want to hear about your experiences. Share your DIY birthday card creations with us on social media using #DIYBirthdayCardMagic. We can’t wait to see what you come up with! Let’s spread the joy of handmade greetings and inspire others to embrace the art of DIY card making. Your unique creations could be the inspiration someone else needs to start their own crafting journey. So go ahead, get crafting, and share the love!
Frequently Asked Questions (FAQ)
What kind of paper should I use for my DIY birthday card?
The best type of paper for your DIY birthday card depends on the techniques you plan to use. For simple cards with minimal embellishments, standard cardstock (65-110 lb) is a great option. It’s sturdy enough to hold its shape and can be easily folded and written on. If you plan to use watercolor paints or other wet media, opt for watercolor paper or mixed media paper, which is designed to absorb moisture without buckling or bleeding. For a more luxurious feel, consider using textured cardstock or handmade paper. These options add visual interest and a tactile element to your card. Remember to consider the weight of any embellishments you add; heavier embellishments may require a sturdier cardstock.
I’m not very artistic. Can I still make a good DIY birthday card?
Absolutely! You don’t need to be a professional artist to create a beautiful and meaningful DIY birthday card. The key is to focus on personalization and heartfelt sentiment. Even a simple, hand-drawn card with a sincere message can be incredibly touching. Start with a basic card design and add simple embellishments like stickers, washi tape, or pre-cut shapes. You can also use stencils or templates to create more intricate designs without having to draw freehand. Remember, the most important thing is that the card comes from the heart. Don’t be afraid to experiment and have fun! There are tons of free resources online, including printable templates and step-by-step tutorials, that can help you get started.
What are some easy embellishments I can use for my DIY birthday card?
There are countless easy embellishments you can use to add personality and flair to your DIY birthday card. Here are a few ideas:
* Stickers: Stickers are a quick and easy way to add color, patterns, and characters to your card.
* Washi Tape: Washi tape comes in a variety of colors, patterns, and widths, making it perfect for creating borders, accents, or even entire card designs.
* Ribbon and Twine: Add a touch of elegance or rustic charm with ribbon or twine. Tie a bow, create a banner, or simply wrap it around the card.
* Buttons: Buttons are a fun and whimsical embellishment that can be used to create patterns, add texture, or even serve as the center of a flower.
* Glitter: Add a touch of sparkle with glitter. Use it sparingly to highlight certain areas or create a dazzling background.
* Die-Cut Shapes: Use a die-cutting machine or pre-cut shapes to add intricate designs to your card.
* Pressed Flowers: Add a natural and delicate touch with pressed flowers or leaves.
* Photographs: Incorporate small photographs of the recipient or shared memories to make the card extra special.
How can I personalize my DIY birthday card?
Personalization is what makes a DIY birthday card truly special. Here are some ways to personalize your card:
* Use the Recipient’s Favorite Colors and Patterns: Incorporate the recipient’s favorite colors, patterns, and themes into your card design.
* Include a Handwritten Message: Write a heartfelt message that expresses your love, appreciation, and best wishes.
* Share a Special Memory: Reminisce about a shared memory or inside joke to make the card more personal and meaningful.
* Incorporate Their Hobbies and Interests: Reflect their hobbies and interests in the card’s design or message. For example, if they love gardening, you could create a card with floral embellishments or a gardening theme.
* Use Their Name: Incorporate the recipient’s name into the card design or message.
* Add a Personal Touch: Include a small, handmade gift or token of appreciation along with the card.
How can I make a pop-up birthday card?
Creating a pop-up birthday card might seem intimidating, but there are many simple techniques you can use to achieve a stunning effect. Start by searching online for easy pop-up card tutorials. Many tutorials provide step-by-step instructions and templates for creating basic pop-up mechanisms. The most common technique involves cutting and folding the cardstock to create a spring-loaded effect. You can then attach images, shapes, or messages to the pop-up element to create a three-dimensional scene. Experiment with different pop-up techniques and designs to find what works best for you. Don’t be afraid to start with a simple design and gradually increase the complexity as you gain confidence.
What if I make a mistake?
Don’t worry about making mistakes! Mistakes are a natural part of the creative process. If you make a mistake, try to embrace it and find a way to incorporate it into your design. Sometimes, mistakes can lead to unexpected and beautiful results. If you can’t salvage the mistake, simply start over with a fresh piece of cardstock. Remember, the goal is to have fun and create something meaningful. Don’t let perfectionism get in the way of your creativity.

Leave a Comment