

DIY Cardboard Wardrobe: Tired of clothes overflowing from your closet? Feeling the pinch of expensive furniture? I get it! We’ve all been there, staring at a mountain of clothes with nowhere to put them. But what if I told you there’s a surprisingly simple, budget-friendly, and eco-conscious solution right under your nose?
For centuries, resourceful individuals have found creative ways to repurpose materials. Think of the early settlers building homes from the land or ancient civilizations crafting tools from stone. This spirit of ingenuity lives on in the modern DIY movement, and today, we’re channeling that energy into creating a functional and stylish DIY Cardboard Wardrobe.
Why cardboard, you ask? Well, besides being readily available (hello, online shopping!), cardboard is surprisingly sturdy and incredibly versatile. This project isn’t just about saving money; it’s about reducing waste, embracing creativity, and customizing a storage solution that perfectly fits your needs. Imagine the satisfaction of building something useful and beautiful from something that would otherwise end up in the recycling bin! Plus, it’s a fantastic project for renters, students, or anyone looking for a temporary or portable storage solution. So, let’s ditch the clutter and embrace the cardboard revolution! Get ready to transform those discarded boxes into a chic and practical wardrobe that will have your clothes (and your wallet) thanking you.
DIY Cardboard Wardrobe: Build Your Own Sustainable Storage Solution!
Hey there, fellow DIY enthusiasts! Are you short on closet space? Need a temporary storage solution for clothes? Or maybe you’re just looking for a fun and eco-friendly project? Well, you’ve come to the right place! I’m going to walk you through building your very own cardboard wardrobe. It’s surprisingly sturdy, customizable, and a fantastic way to repurpose those extra cardboard boxes piling up in your garage. Let’s get started!
Materials You’ll Need
Before we dive in, let’s gather our supplies. This is crucial for a smooth building process. Trust me, running out of tape halfway through is no fun!
* Cardboard Boxes: This is the heart of our wardrobe! You’ll need several large, sturdy cardboard boxes. The size and number will depend on how big you want your wardrobe to be. Think appliance boxes, furniture boxes, or even large moving boxes. The more uniform the size, the easier it will be. I recommend at least 4-6 boxes for a decent-sized wardrobe.
* Packing Tape: Lots and lots of packing tape! Invest in a good quality, wide tape for maximum strength. Clear or brown tape works fine.
* Utility Knife or Box Cutter: A sharp utility knife or box cutter is essential for cutting and shaping the cardboard. Be extremely careful when using these tools! Always cut away from yourself and use a cutting mat or protected surface.
* Ruler or Measuring Tape: Accuracy is key! A ruler or measuring tape will help you make precise cuts and ensure your wardrobe is square and stable.
* Pencil or Marker: For marking cutting lines and measurements.
* Cutting Mat or Protected Surface: Protect your floors and furniture from scratches while cutting.
* Optional: Cardboard Tubes (from paper towels or wrapping paper): These can be used as supports for shelves or hanging rods.
* Optional: Paint, Wrapping Paper, or Fabric: For decorating and personalizing your wardrobe.
* Optional: Hot Glue Gun and Glue Sticks: For extra reinforcement or attaching decorative elements.
* Optional: Dowel Rod or Sturdy Branch: For a hanging rod. Make sure it’s strong enough to hold your clothes!
Planning Your Wardrobe Design
Before you start cutting and taping, take some time to plan your wardrobe’s design. This will save you time and frustration in the long run.
* Determine the Size: How tall, wide, and deep do you want your wardrobe to be? Consider the space you have available and the amount of storage you need.
* Decide on the Configuration: Do you want shelves, a hanging rod, or a combination of both? Think about the types of clothes you’ll be storing and how you want to organize them.
* Sketch a Diagram: Draw a rough sketch of your wardrobe, including the dimensions and placement of shelves and hanging rods. This will help you visualize the finished product and ensure you have enough materials.
* Consider Reinforcements: Think about areas that might need extra support, such as the bottom of the wardrobe or the shelves. You can reinforce these areas with extra layers of cardboard or cardboard tubes.
Building the Base
The base is the foundation of your wardrobe, so it needs to be strong and stable.
1. Choose Your Base Box(es): Select the largest and sturdiest box(es) you have for the base. If you’re using multiple boxes, make sure they are the same height.
2. Reinforce the Bottom: Open the flaps of the box(es) and fold them inwards. Tape them securely in place with packing tape. Add extra layers of cardboard to the bottom for added strength. You can cut pieces of cardboard from other boxes and tape them inside the base.
3. Create a Solid Foundation: If your base box has any weak spots or holes, reinforce them with extra cardboard and tape. You want a solid, flat surface to build upon.
4. Secure the Sides: Tape all the seams of the box(es) securely with packing tape. Make sure the tape is applied smoothly and evenly for maximum strength.
Creating the Walls
Now we’ll build the walls of the wardrobe by stacking and securing the remaining boxes.
1. Prepare the Wall Boxes: If necessary, cut the flaps off the top of the boxes you’ll be using for the walls. This will create a clean, open space inside the wardrobe.
2. Stack the Boxes: Carefully stack the wall boxes on top of the base. Align the edges of the boxes as precisely as possible.
3. Secure the Boxes Together: Use packing tape to securely attach the wall boxes to each other and to the base. Apply tape generously to all the seams and edges. Make sure the boxes are aligned and stable before taping them together.
4. Reinforce the Corners: The corners of the wardrobe are particularly vulnerable to damage. Reinforce them with extra layers of cardboard and tape. You can cut strips of cardboard and tape them along the corners for added strength.
5. Check for Stability: Once the walls are in place, check the stability of the wardrobe. If it feels wobbly or unstable, add more tape and reinforcement to the weak areas.
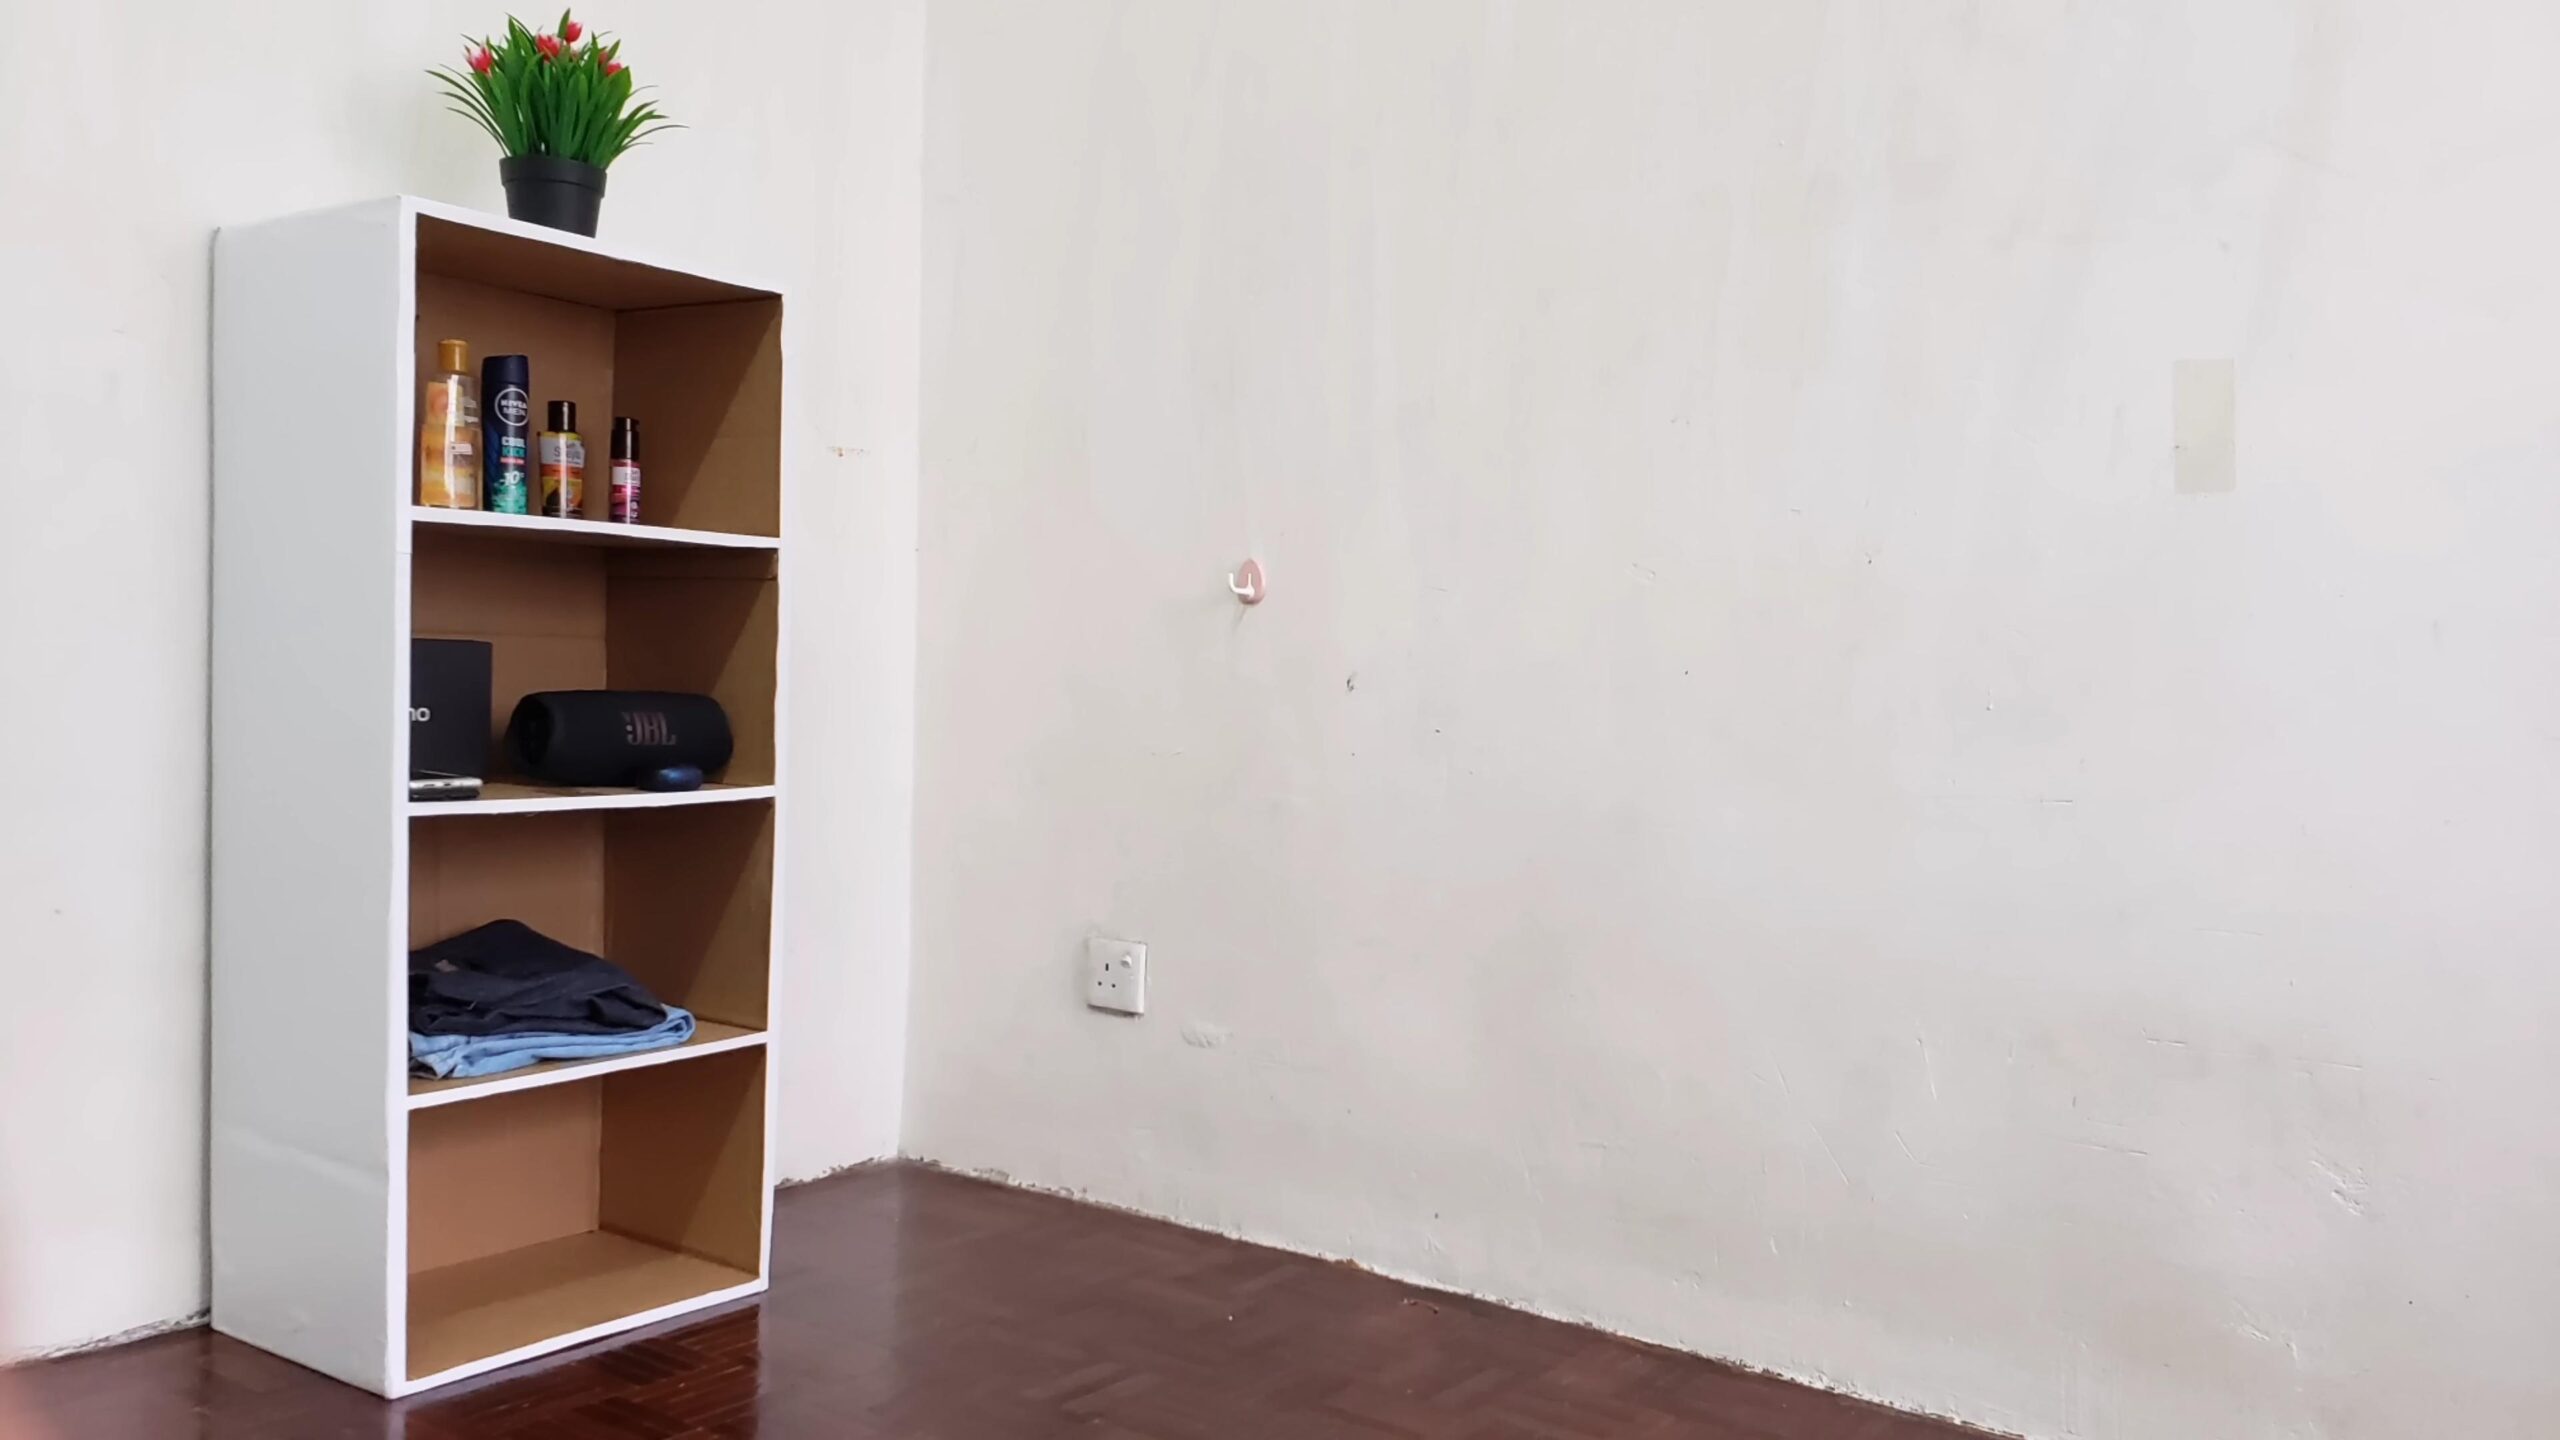
Adding Shelves (Optional)
If you want to add shelves to your wardrobe, follow these steps:
1. Measure and Cut the Shelves: Measure the inside width and depth of the wardrobe. Cut pieces of cardboard to fit these dimensions. Make sure the shelves are slightly smaller than the inside dimensions to allow for easy insertion and removal.
2. Create Shelf Supports: You can use cardboard tubes, strips of cardboard, or even small boxes as shelf supports. Cut the supports to the desired height and attach them to the inside walls of the wardrobe with packing tape or hot glue.
3. Install the Shelves: Carefully slide the shelves into place, resting them on the supports. Make sure the shelves are level and stable.
4. Reinforce the Shelves: If the shelves are sagging or bending, reinforce them with extra layers of cardboard or cardboard tubes. You can also add supports underneath the shelves for added strength.
Creating a Hanging Rod (Optional)
For hanging clothes, you’ll need to create a hanging rod.
1. Choose Your Hanging Rod: Select a dowel rod, sturdy branch, or even a cardboard tube that is strong enough to hold your clothes. Make sure the rod is long enough to span the width of the wardrobe.
2. Create Hanging Rod Supports: You can use cardboard tubes, strips of cardboard, or even small boxes as hanging rod supports. Cut the supports to the desired height and attach them to the inside walls of the wardrobe with packing tape or hot glue. Make sure the supports are strong enough to hold the weight of the hanging rod and your clothes.
3. Install the Hanging Rod: Carefully place the hanging rod on the supports. Make sure the rod is level and stable.
4. Reinforce the Hanging Rod Supports: If the hanging rod supports are weak or unstable, reinforce them with extra layers of cardboard or cardboard tubes. You can also add supports underneath the hanging rod for added strength.
Creating Doors (Optional)
Adding doors can help keep your clothes dust-free and out of sight.
1. Measure and Cut the Doors: Measure the opening of the wardrobe and cut pieces of cardboard to fit. Make sure the doors are slightly larger than the opening to allow for overlap.
2. Attach Hinges: You can use packing tape or fabric hinges to attach the doors to the wardrobe. Apply tape or fabric to the edge of the door and the edge of the wardrobe, creating a hinge.
3. Create a Closure Mechanism: You can use Velcro, magnets, or even a simple cardboard latch to keep the doors closed. Attach the closure mechanism to the doors and the wardrobe.
4. Reinforce the Doors: If the doors are flimsy or bending, reinforce them with extra layers of cardboard.
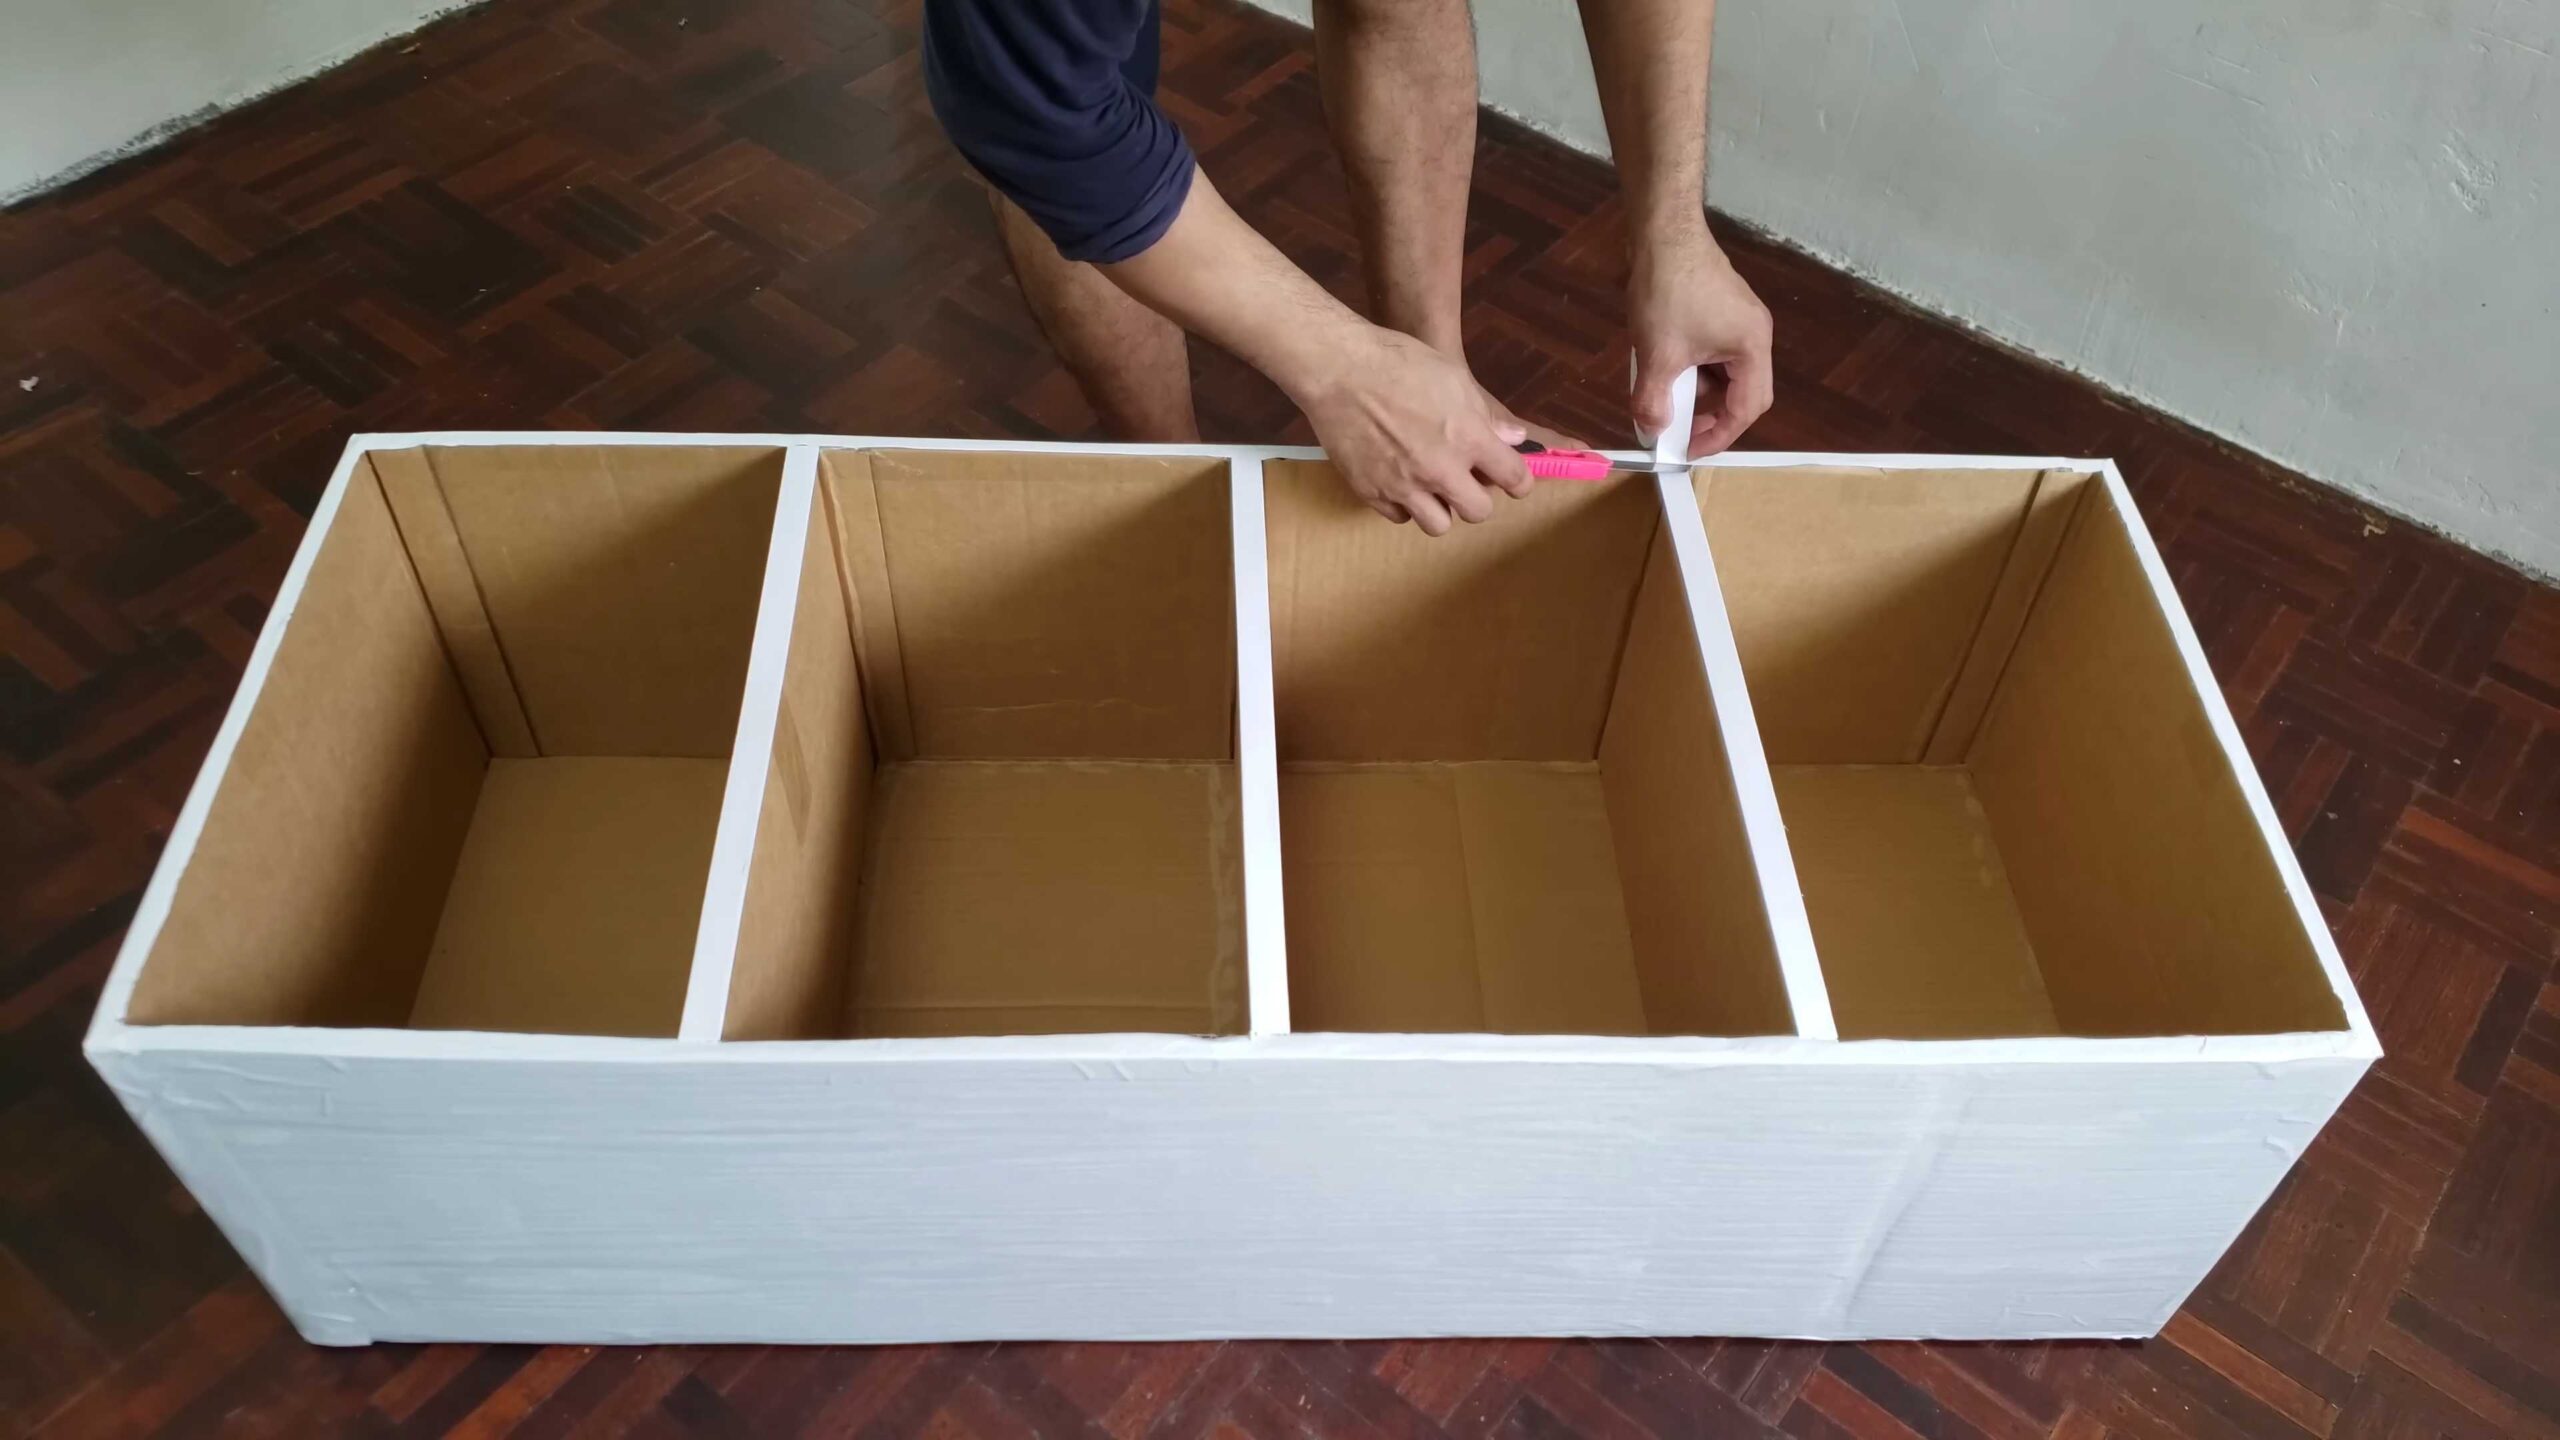
Finishing Touches and Decoration
Now for the fun part! Let’s personalize your cardboard wardrobe.
1. Cover the Cardboard: If you want to hide the cardboard, you can cover it with paint, wrapping paper, or fabric. Use paint that is suitable for cardboard, such as acrylic paint. Apply wrapping paper or fabric with glue or tape.
2. Add Decorative Elements: Get creative with decorative elements such as stickers, stencils, or even hand-painted designs.
3. Label the Shelves: Label the shelves with the contents of each shelf to help you stay organized.
4. Add Handles or Knobs: If you added doors, consider adding handles or knobs for easy opening and closing. You can use cardboard, wood, or even repurposed hardware.
Important Considerations
* Weight Limit: Remember that cardboard is not as strong as wood or metal. Be mindful of the weight you place inside the wardrobe. Avoid overloading the shelves or hanging rod.
* Moisture: Cardboard
Conclusion
So, there you have it! Building your own DIY cardboard wardrobe isn’t just a fun weekend project; it’s a genuinely practical and surprisingly stylish solution to your storage woes. We’ve walked you through the steps, highlighted the benefits, and hopefully, inspired you to ditch the expensive furniture store and embrace your inner maker.
Why is this a must-try? Because it’s incredibly budget-friendly. Forget forking out hundreds (or even thousands!) on a pre-made wardrobe. With a little creativity and some readily available cardboard boxes, you can create a functional and personalized storage space for a fraction of the cost. It’s also eco-friendly. Reusing cardboard boxes is a fantastic way to reduce waste and give these materials a new lease on life. You’re not just organizing your clothes; you’re contributing to a more sustainable lifestyle.
But the real magic lies in the customization. This isn’t a one-size-fits-all solution. You can tailor the size, shape, and design of your DIY cardboard wardrobe to perfectly fit your space and your needs. Need extra shelves for shoes? Add them! Want a hanging rod for your dresses and shirts? Easy peasy! Feeling artistic? Decorate your wardrobe with paint, fabric, or even wallpaper scraps to create a truly unique piece of furniture.
Consider these variations to truly make it your own:
* The Minimalist Wardrobe: For those who prefer a clean and simple look, opt for a single, large box with a hanging rod. Keep the exterior plain or paint it a neutral color for a sleek and modern aesthetic.
* The Shoe Organizer Extraordinaire: Dedicate a section of your wardrobe specifically to shoe storage. Create individual compartments using smaller cardboard pieces to keep your shoes organized and easily accessible.
* The Kid-Friendly Wardrobe: Get your kids involved in the building and decorating process! Use bright colors, fun patterns, and add playful elements like cut-out shapes or painted characters. This is a great way to teach them about recycling and DIY projects.
* The Walk-In Closet Hack: If you have a small, unused space, transform it into a walk-in closet using multiple cardboard wardrobes. Arrange them strategically to maximize storage and create a dedicated dressing area.
* The Rolling Wardrobe: Attach casters to the bottom of your wardrobe for easy mobility. This is perfect for small spaces or for those who like to rearrange their furniture frequently.
We’re confident that you’ll be amazed at what you can create with a little cardboard and some elbow grease. Don’t be afraid to experiment, get creative, and most importantly, have fun!
Now, we want to hear from you! Have you tried building your own DIY cardboard wardrobe? What challenges did you face? What creative solutions did you come up with? Share your photos, tips, and experiences in the comments below. Let’s inspire each other to create beautiful and sustainable storage solutions! We can’t wait to see what you come up with.
FAQ
What kind of cardboard should I use?
The best type of cardboard to use for your DIY cardboard wardrobe is sturdy, double-walled cardboard. This type of cardboard is thicker and more durable than single-walled cardboard, making it better able to support the weight of your clothes and other items. Look for boxes that have been used to ship heavy items, such as appliances or furniture. Avoid using cardboard that is damaged, wet, or flimsy, as it will not be strong enough to hold up over time. If you are unsure about the quality of the cardboard, it’s always better to err on the side of caution and choose a sturdier option. You can often find suitable boxes at local grocery stores, appliance stores, or recycling centers. Remember to flatten the boxes before you start building to make them easier to work with.
How do I make the wardrobe more stable?
Stability is key for a long-lasting DIY cardboard wardrobe. Several techniques can significantly enhance its structural integrity. First, reinforce the corners and edges with strong packing tape. Apply multiple layers of tape, ensuring that it adheres firmly to the cardboard. Consider using corner protectors made from cardboard or plastic for added support. These can be easily attached with glue or tape.
Internally, you can add cardboard supports, such as vertical or horizontal braces, to distribute the weight more evenly. These supports can be glued or taped into place. For the base of the wardrobe, consider adding a solid cardboard platform to prevent it from collapsing under the weight of your clothes. You can also use wooden planks or even a sturdy piece of plywood for the base for extra stability.
Another important factor is the way you distribute the weight inside the wardrobe. Avoid overloading any single shelf or hanging rod. Spread the weight evenly to prevent the cardboard from buckling or collapsing. Finally, if you are concerned about the wardrobe tipping over, you can anchor it to the wall using straps or brackets.
How do I decorate my cardboard wardrobe?
Decorating your DIY cardboard wardrobe is where you can really let your creativity shine! There are countless ways to personalize your wardrobe and make it a stylish addition to your room.
Painting is a popular option. Use acrylic paints for best results, as they adhere well to cardboard and are available in a wide range of colors. Before painting, consider applying a primer to the cardboard to create a smooth surface and prevent the paint from soaking in too much.
Another great option is to cover the wardrobe with fabric. You can use fabric scraps, old clothes, or even wallpaper to create a unique and textured look. Simply cut the fabric to size and adhere it to the cardboard using fabric glue or double-sided tape.
For a more decorative touch, consider adding embellishments such as stencils, stickers, or even decoupage. You can also use washi tape to create patterns and designs on the cardboard.
Don’t forget about the hardware! Replacing the cardboard handles with decorative knobs or pulls can instantly elevate the look of your wardrobe.
Finally, consider adding some personal touches, such as photos, artwork, or even fairy lights, to make your wardrobe truly your own.
How long will a cardboard wardrobe last?
The lifespan of your DIY cardboard wardrobe depends on several factors, including the quality of the cardboard, the construction techniques used, and the weight of the items stored inside. With proper construction and care, a well-built cardboard wardrobe can last for several months or even a year or more.
To maximize the lifespan of your wardrobe, use sturdy, double-walled cardboard and reinforce the corners and edges with strong packing tape. Avoid overloading the wardrobe with too much weight, and distribute the weight evenly to prevent the cardboard from buckling or collapsing.
Protect the wardrobe from moisture, as cardboard can easily become damaged when wet. Avoid placing the wardrobe in damp or humid areas, and be careful not to spill any liquids on it.
If you notice any signs of wear and tear, such as tears or dents, repair them promptly with tape or glue to prevent further damage.
While a cardboard wardrobe may not be as durable as a traditional wooden wardrobe, it is a cost-effective and eco-friendly storage solution that can last for a surprisingly long time with proper care.
Can I use this wardrobe for heavy items?
While a DIY cardboard wardrobe is a fantastic budget-friendly solution, it’s important to be realistic about its weight-bearing capacity. It’s generally not recommended for storing extremely heavy items. Think lightweight clothing, accessories, and perhaps some folded sweaters. Avoid storing heavy books, shoes (unless you reinforce the shelves specifically for them), or bulky winter coats.
If you absolutely need to store heavier items, reinforce the structure significantly. Use multiple layers of cardboard for the shelves and base, and add extra supports to the corners and edges. Consider using wooden planks or plywood for the shelves to provide additional support. However, even with these reinforcements, it’s still best to err on the side of caution and avoid overloading the wardrobe. Remember, safety first!


Leave a Comment