

DIY fruit crate closet: Ever dream of a stylish, organized closet without breaking the bank? I know I have! Forget those expensive, pre-fabricated systems. We’re diving into a fun, budget-friendly project that’s as practical as it is charming: building your own closet using repurposed fruit crates!
Fruit crates have a surprisingly rich history. Originally designed for the safe transport of precious produce, these sturdy wooden containers have been a staple in agriculture for generations. Think of the vibrant orchards and bustling markets where these crates once played a vital role. Now, we’re giving them a second life, transforming them from humble carriers into the building blocks of a unique and personalized storage solution.
Why a DIY fruit crate closet, you ask? Well, let’s face it, closet space is often at a premium. Whether you’re dealing with a cramped apartment, a growing wardrobe, or simply a desire for a more organized life, this project offers a customizable and affordable alternative. Plus, it’s a fantastic way to embrace sustainable living by upcycling materials that might otherwise end up in a landfill. I’m excited to show you how to create a functional and beautiful closet that reflects your personal style, all while saving money and reducing waste. Let’s get started!
DIY Fruit Crate Closet: Rustic Charm Meets Organized Storage
Okay, so you’re tired of overflowing drawers and clothes piled on chairs? Me too! That’s why I decided to tackle a super fun and surprisingly easy project: building a closet using fruit crates! It’s a fantastic way to add some rustic charm to your space while getting seriously organized. Plus, it’s budget-friendly and totally customizable. Let’s get started!
Gathering Your Supplies
Before we dive into the building process, let’s make sure we have everything we need. This is crucial for a smooth and enjoyable DIY experience. Trust me, running to the hardware store mid-project is never fun!
* **Fruit Crates:** This is the heart of our project! You’ll need to decide how big you want your closet to be. I used 8 crates for mine, creating a decent-sized storage unit. Source them from local farms, farmers markets, or even online marketplaces. Look for sturdy crates in good condition. Don’t worry too much about minor imperfections; they add to the rustic character.
* **Sandpaper (Various Grits):** We’ll need to smooth out any rough edges and splinters. I recommend having a coarse grit (80-120) for initial sanding and a finer grit (220-320) for finishing.
* **Wood Stain or Paint (Optional):** This is where you can really personalize your closet! Choose a stain to enhance the natural wood grain or paint them in your favorite colors. I went with a light walnut stain to complement my room’s decor.
* **Paintbrushes or Rags:** For applying the stain or paint. I prefer using rags for staining as it gives a more even and controlled application.
* **Wood Screws:** These will hold the crates together securely. Choose screws that are long enough to penetrate both pieces of wood but not so long that they poke through the other side. I used 1 1/4 inch screws.
* **Drill with Drill Bits:** A drill is essential for pre-drilling pilot holes and driving in the screws. Make sure you have drill bits that are slightly smaller than the diameter of your screws.
* **Measuring Tape:** For accurate measurements and ensuring your closet is level.
* **Level:** Absolutely crucial for making sure your closet is straight and stable.
* **Safety Glasses:** Protect your eyes from dust and debris while sanding and drilling.
* **Work Gloves:** Protect your hands from splinters and stain.
* **Wood Glue (Optional):** For extra stability, you can apply wood glue to the joints before screwing them together.
* **Polyurethane or Varnish (Optional):** To seal and protect the stained or painted wood.
* **Clamps (Optional):** To hold the crates together while the glue dries.
* **Backing Material (Optional):** Plywood, beadboard, or even fabric can be used to create a back for the closet, adding stability and a more finished look.
* **Shelf Liner (Optional):** To protect the inside of the crates and prevent snags on your clothes.
* **Clothes Rod (Optional):** If you want to hang clothes, you’ll need a clothes rod and brackets to attach it to the crates.
Preparing the Crates
This step is all about getting the crates ready for assembly. We want them to be smooth, clean, and ready for their new life as a closet!
1. **Sanding:** Put on your safety glasses and gloves. Using the coarse-grit sandpaper, sand all surfaces of the crates, paying special attention to any rough edges, splinters, or sharp corners. Switch to the finer-grit sandpaper for a smoother finish. Remember to sand with the grain of the wood.
2. **Cleaning:** Once you’re done sanding, wipe down the crates with a damp cloth to remove any sanding dust. Let them dry completely before moving on to the next step.
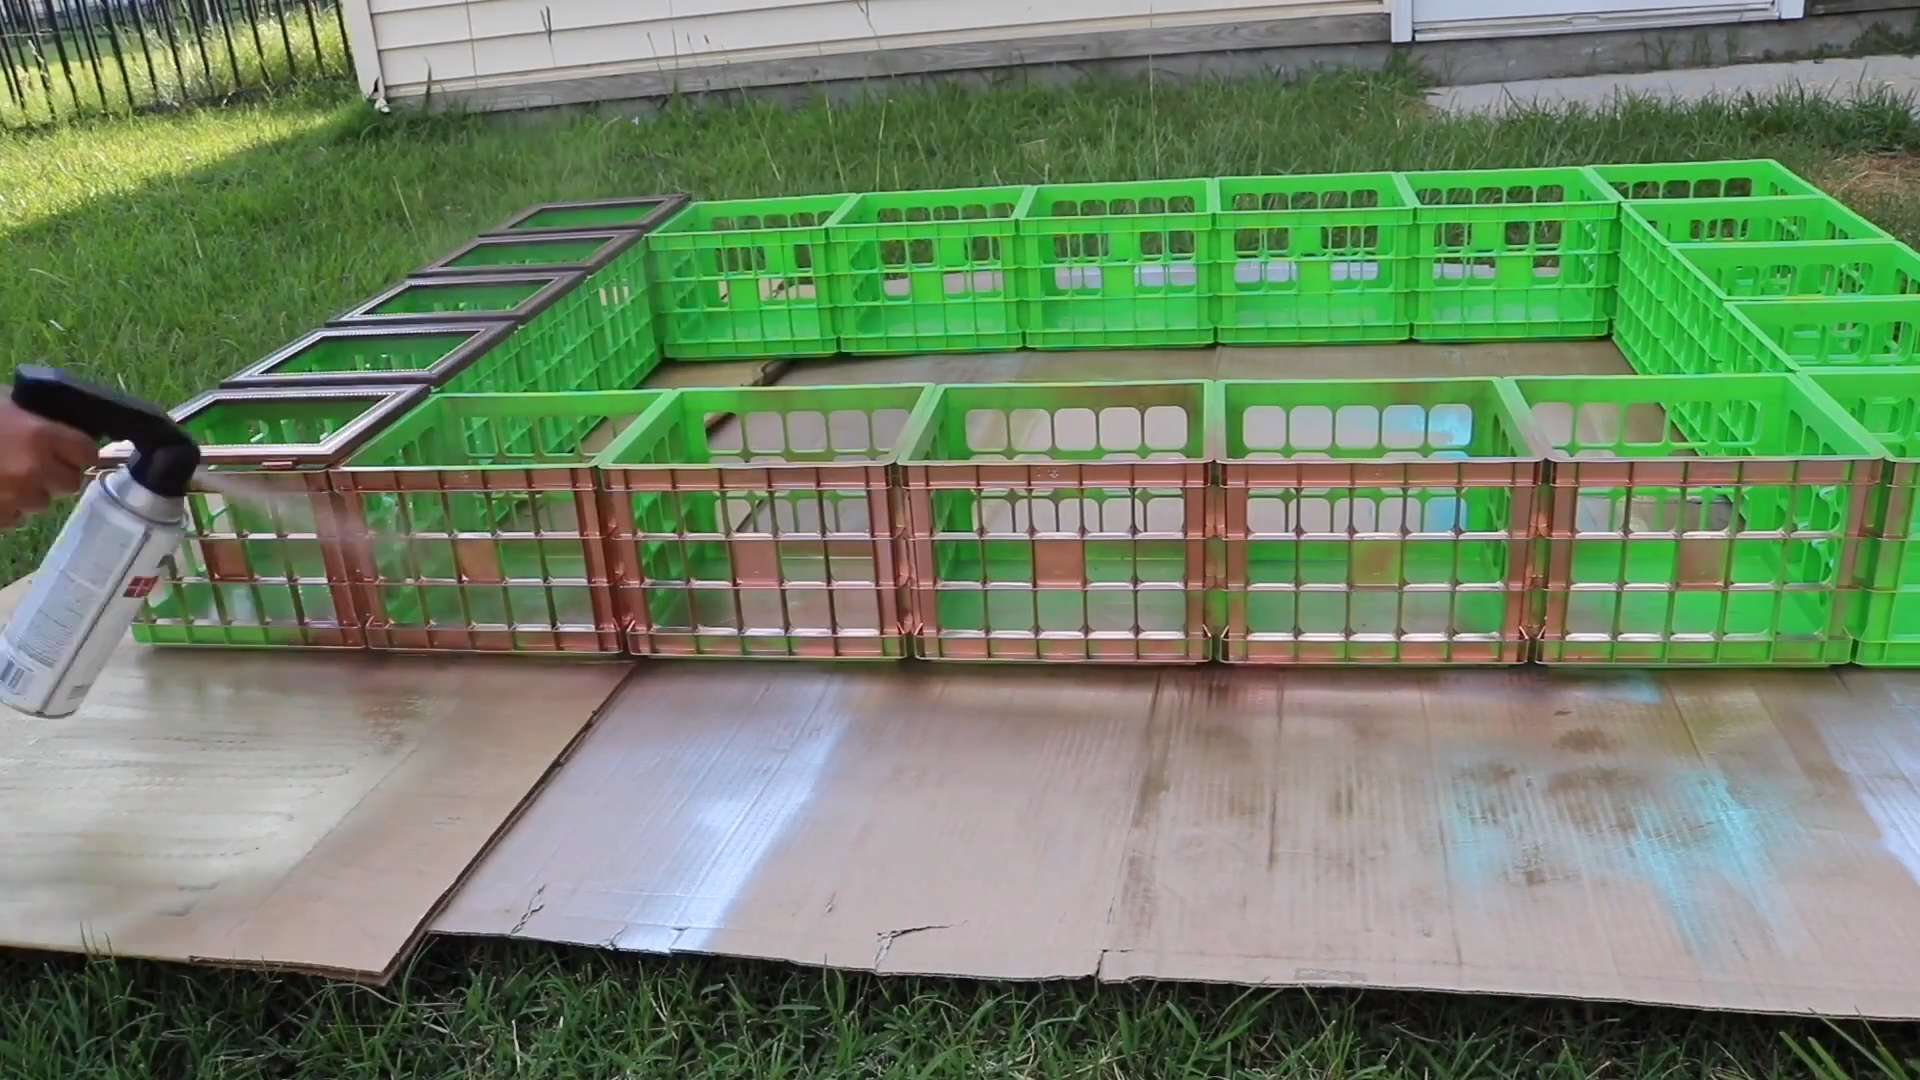
3. **Staining or Painting (Optional):** If you’re staining, apply the stain evenly with a rag or brush, following the manufacturer’s instructions. Wipe off any excess stain with a clean rag. If you’re painting, apply thin, even coats, allowing each coat to dry completely before applying the next. I usually do two coats for good coverage.
4. **Sealing (Optional):** If you’ve stained or painted your crates, consider applying a coat of polyurethane or varnish to protect the finish and make it more durable. Follow the manufacturer’s instructions for application and drying time.
Assembling the Closet
Now for the fun part – putting it all together! This is where your vision starts to take shape.
1. **Planning Your Layout:** Before you start screwing things together, take some time to plan your layout. Consider the size and shape of your space, the amount of storage you need, and the overall look you’re going for. I laid out my crates on the floor in different configurations until I found one that I liked.
2. **Building the Base (Optional):** If you want your closet to be off the ground, you can build a simple base using some extra wood. This will also help to level the closet if your floor is uneven.
3. **Connecting the Crates:** Start by connecting the crates that will form the bottom row of your closet. Apply wood glue (optional) to the surfaces that will be joined together. Clamp the crates together to hold them in place while the glue dries.
4. **Pre-Drilling Pilot Holes:** Before driving in the screws, pre-drill pilot holes through the wood. This will prevent the wood from splitting and make it easier to drive in the screws. Use a drill bit that is slightly smaller than the diameter of your screws.
5. **Screwing the Crates Together:** Drive the screws through the pilot holes to secure the crates together. Make sure the screws are flush with the surface of the wood.
6. **Building Upwards:** Repeat steps 3-5 to connect the remaining crates, building upwards to create the desired height and configuration of your closet.
7. **Adding a Backing (Optional):** If you want to add a back to your closet, measure the dimensions of the back and cut a piece of plywood, beadboard, or fabric to size. Attach the backing to the crates using screws or staples.
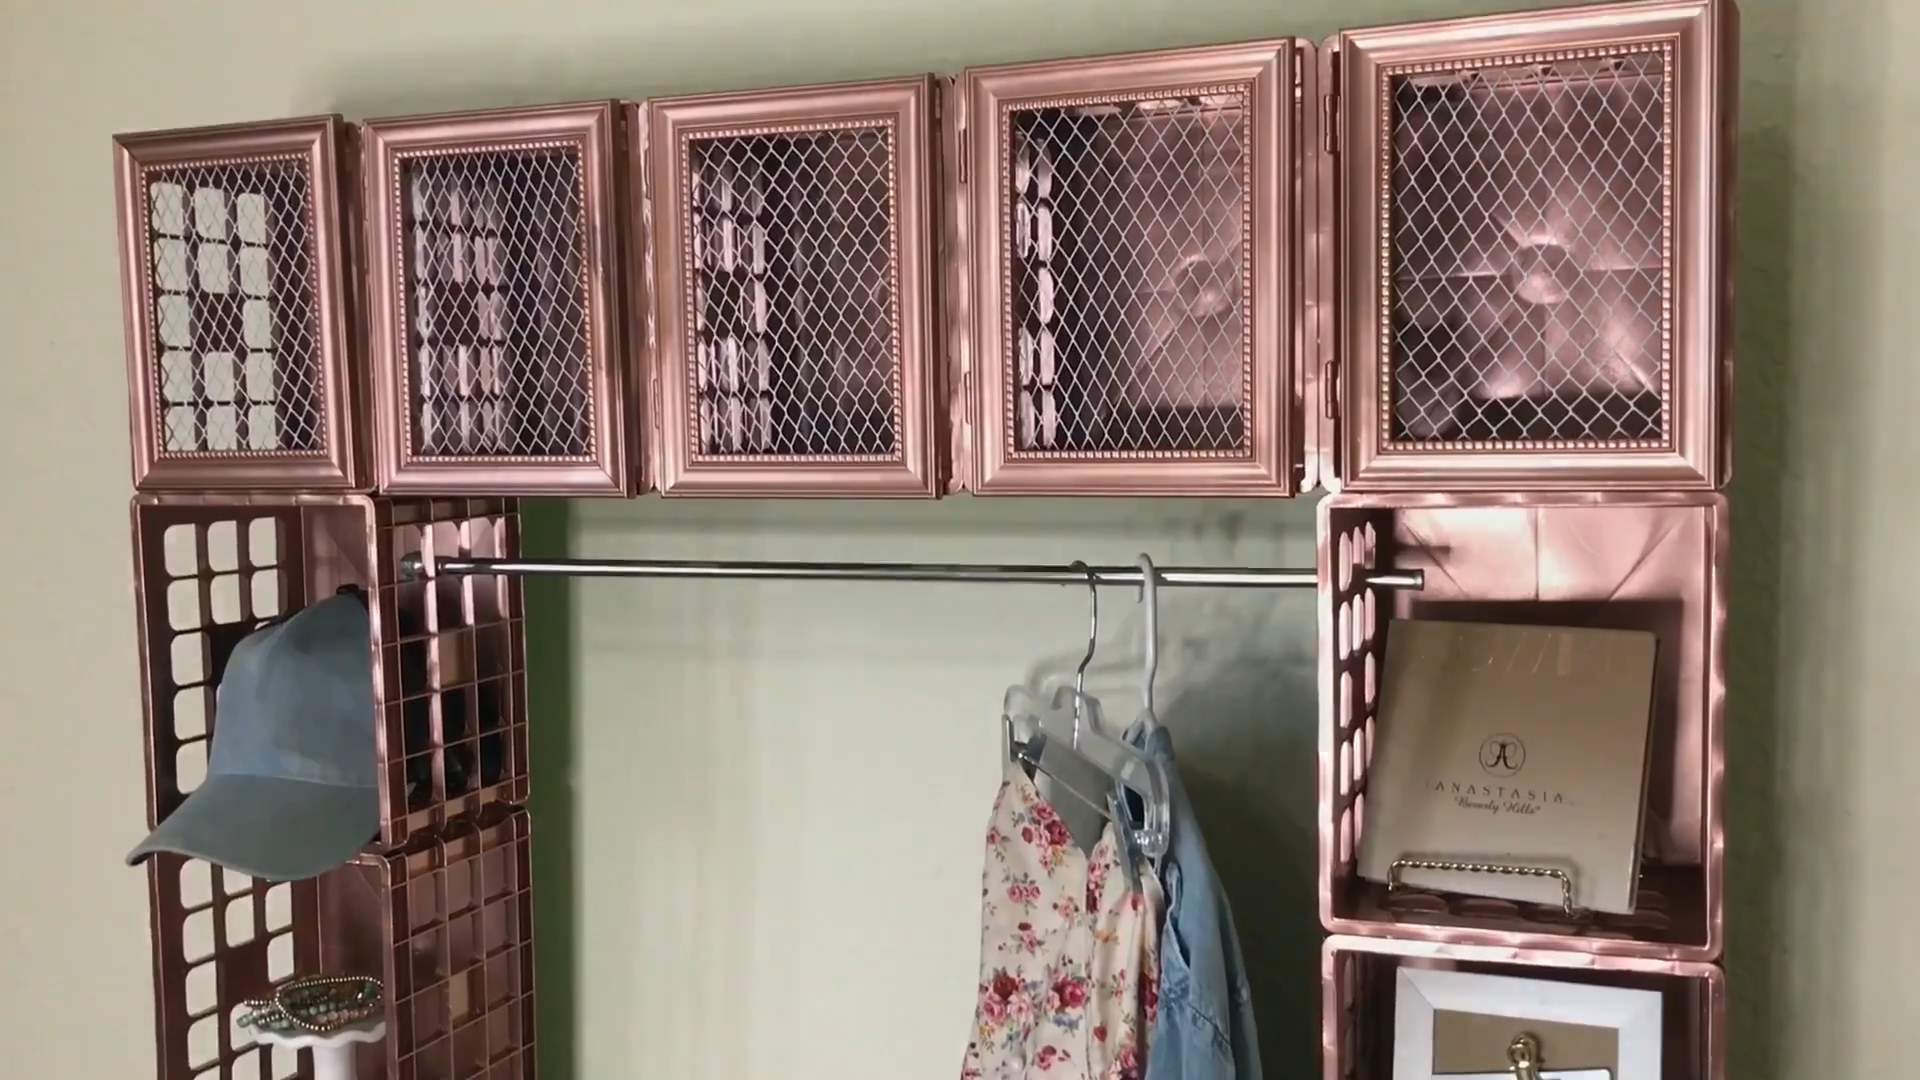
8. **Installing a Clothes Rod (Optional):** If you want to hang clothes, install a clothes rod by attaching brackets to the inside of the crates and inserting the rod. Make sure the rod is strong enough to support the weight of your clothes.
9. **Adding Shelf Liner (Optional):** Cut pieces of shelf liner to fit the inside of the crates and attach them with adhesive or double-sided tape. This will protect the inside of the crates and prevent snags on your clothes.
Finishing Touches
These little details can make a big difference in the overall look and functionality of your new fruit crate closet.
1. **Sanding and Smoothing:** Once the closet is assembled, give it one last sanding to smooth out any rough edges or imperfections.
2. **Touch-Up Painting or Staining:** If necessary, touch up any areas that need additional paint or stain.
3. **Adding Hardware (Optional):** Consider adding hardware such as knobs, pulls, or handles to the crates to make them easier to open and close.
4. **Organizing Your Clothes:** Now for the best part – filling your new closet with your clothes! Organize your clothes by type, color, or season to make it easier to find what you’re looking for.
5. **Adding Decorative Touches:** Personalize your closet with decorative touches such as plants, photos, or artwork.
Securing Your Closet (Important!)
This is a crucial step, especially if you have children or pets. We want to make sure our beautiful new closet is safe and secure.
1. **Wall Anchors:** The best way to secure your fruit crate closet is to anchor it to the wall. You can use furniture straps or L-brackets to attach the closet to the wall studs.
2. **Finding Wall Studs:** Use a stud finder to locate the wall studs behind your closet.
3. **Attaching Straps or Brackets:** Attach one end of the furniture straps or L-brackets to the back of the closet and the other end to the wall studs. Make sure the straps or brackets are securely fastened to both the closet and the wall.
4. **Testing for Stability:** Once the closet is anchored to the wall, test it for stability by gently pushing and pulling on it. If it feels wobbly, tighten the straps or brackets or add additional anchors.
Tips and Tricks for Success
* **Don’t be afraid to experiment!** This is your project, so feel free to get creative and customize it to your own taste.
* **Measure twice, cut once!** This is a classic DIY saying for a reason. Accurate measurements are essential for a successful project.
* **Take your time!** Don’t rush through the process. Enjoy the journey and take pride in your work.
* **Ask for help!** If you’re feeling overwhelmed or unsure about something, don’t hesitate to
Conclusion
So, there you have it! Transforming humble fruit crates into a stylish and functional closet is not only achievable but also incredibly rewarding. This DIY fruit crate closet project offers a unique blend of rustic charm and practical storage, making it a must-try for anyone looking to add character and organization to their space without breaking the bank.
Why is this a must-try? Because it’s more than just a closet; it’s a statement piece. It’s a testament to your creativity and resourcefulness. It’s a sustainable solution that repurposes materials and reduces waste. And most importantly, it’s a personalized storage solution tailored to your specific needs and aesthetic preferences. Forget cookie-cutter closets from big box stores; this is a closet with soul.
The beauty of this project lies in its versatility. Feel free to experiment with different crate sizes and arrangements to create a closet that perfectly fits your space and storage requirements. Consider painting the crates in vibrant colors to add a pop of personality, or stain them for a more sophisticated and cohesive look. You could even line the inside of the crates with fabric or wallpaper to create a more luxurious feel.
Variations and Suggestions:
* Add Wheels: Attach casters to the bottom of the crates for a mobile closet that can be easily moved around.
* Incorporate Shelves: Add wooden shelves inside the crates to create more organized storage for folded clothes, shoes, or accessories.
* Create a Hanging Rod: Install a metal rod across the top of the crates to create a hanging space for clothes.
* Use Different Types of Crates: Explore different types of wooden crates, such as wine crates or vintage crates, to add unique character to your closet.
* Accessorize: Add decorative knobs, pulls, or labels to the crates to personalize your closet and make it even more functional.
* Consider a Backing: For a more finished look, attach a piece of plywood or beadboard to the back of the crates. This will also help to stabilize the structure.
* Lighting: Install LED strip lights inside or around the crates to illuminate your closet and make it easier to find your belongings.
We encourage you to embrace your inner DIYer and give this project a try. It’s a fantastic way to express your creativity, add unique storage to your home, and contribute to a more sustainable lifestyle. Don’t be afraid to experiment and personalize the design to make it your own.
Once you’ve completed your DIY fruit crate closet, we’d love to see your creation! Share your photos and experiences with us on social media using #DIYFruitCrateCloset. We can’t wait to see what you come up with! Let’s inspire others to transform ordinary materials into extraordinary storage solutions. This is your chance to showcase your skills and inspire others to embark on their own DIY adventures. So, grab some fruit crates, unleash your creativity, and build the closet of your dreams!
FAQ
What kind of fruit crates should I use?
The best fruit crates for this project are sturdy wooden crates that are in good condition. Look for crates that are free of splinters, cracks, and excessive damage. You can often find fruit crates at farmers’ markets, produce stores, or online marketplaces. Consider the size and shape of the crates when planning your closet design. Standard-sized fruit crates are generally easier to work with, but you can also incorporate crates of different sizes to add visual interest.
How do I clean the fruit crates before using them?
Cleaning the fruit crates is essential to remove any dirt, debris, or residue. Start by brushing off any loose dirt or debris with a stiff brush. Then, wash the crates with warm soapy water and a scrub brush. Rinse thoroughly with clean water and allow the crates to dry completely before using them. You can also use a mild bleach solution (1 part bleach to 10 parts water) to disinfect the crates, especially if they were previously used to store food. Be sure to rinse thoroughly after using bleach.
Do I need to sand the fruit crates?
Sanding the fruit crates is recommended to smooth out any rough edges or splinters and to prepare the surface for painting or staining. Use a medium-grit sandpaper to sand the crates, paying particular attention to the edges and corners. If you plan to paint the crates, you may want to use a finer-grit sandpaper for a smoother finish. After sanding, wipe the crates clean with a damp cloth to remove any sanding dust.
How do I assemble the fruit crate closet?
There are several ways to assemble your DIY fruit crate closet. One option is to simply stack the crates on top of each other, creating a modular storage system. You can secure the crates together using wood screws or construction adhesive. Another option is to build a frame out of wood and attach the crates to the frame. This will provide a more stable and secure structure. Consider the size and layout of your space when deciding on the best assembly method.
What kind of paint or stain should I use?
The type of paint or stain you use will depend on the look you want to achieve. For a rustic look, consider using a wood stain or a chalk paint. For a more modern look, you can use a latex paint in a bright color. Be sure to choose a paint or stain that is suitable for use on wood. Before painting or staining, prime the crates with a wood primer to ensure proper adhesion and a smooth finish.
How do I secure the fruit crate closet to the wall?
Securing the fruit crate closet to the wall is essential for safety, especially if you have children or pets. Use wall anchors and screws to attach the crates to the wall studs. Make sure the screws are long enough to penetrate the wall studs securely. You can also use L-brackets to provide additional support. If you are unsure how to properly secure the closet to the wall, consult a professional.
Can I use this DIY fruit crate closet in a small space?
Absolutely! The DIY fruit crate closet is a great storage solution for small spaces. You can customize the size and layout of the closet to fit your specific needs. Consider stacking the crates vertically to maximize vertical space. You can also use smaller crates to create shelves or drawers.
How much weight can a fruit crate hold?
The amount of weight a fruit crate can hold will depend on the quality and construction of the crate. Generally, a well-built wooden fruit crate can hold up to 50 pounds. However, it’s always best to err on the side of caution and avoid overloading the crates. Distribute the weight evenly across the crates to prevent them from collapsing.
Where can I find inspiration for my DIY fruit crate closet?
There are many online resources where you can find inspiration for your DIY fruit crate closet. Check out Pinterest, Instagram, and home decor blogs for ideas and inspiration. You can also search for “DIY fruit crate closet” on Google Images to see a variety of different designs.
How can I make my DIY fruit crate closet more stylish?
There are many ways to make your DIY fruit crate closet more stylish. Consider painting or staining the crates in a color that complements your decor. Add decorative knobs or pulls to the crates. Line the inside of the crates with fabric or wallpaper. Use baskets or bins to organize your belongings. And don’t forget to accessorize with decorative items such as plants, picture frames, or candles.


Leave a Comment