

DIY Gift Bag Wall Art: Transform Trash into Treasure!
Have you ever looked at a pile of beautiful gift bags after a celebration and thought, “There has to be a better use for these than just tossing them?” I know I have! For centuries, humans have found creative ways to repurpose materials, from ancient mosaics made of broken pottery to quilts crafted from scraps of fabric. This innate desire to create something beautiful from the mundane is deeply ingrained in our culture.
That’s where DIY Gift Bag Wall Art comes in! In this article, I’m going to show you how to take those gorgeous gift bags and turn them into stunning, personalized wall art. Why should you bother? Well, not only is it a fantastic way to reduce waste and be eco-friendly, but it’s also an incredibly affordable way to add a unique touch to your home decor. Forget expensive store-bought art; with a few simple steps, you can create something truly one-of-a-kind that reflects your personal style and memories. Plus, it’s a fun and rewarding project that anyone can do, regardless of their artistic skills. So, grab those gift bags, and let’s get crafting!
DIY Gift Bag Wall Art: Turning Trash into Treasure!
Hey there, fellow crafters! Are you drowning in a sea of beautiful gift bags after the holidays or a birthday bash? Don’t toss them! I’m going to show you how to transform those gorgeous bags into stunning, personalized wall art. This project is super budget-friendly, surprisingly easy, and a fantastic way to add a unique touch to your home decor. Plus, it’s a great way to recycle and reduce waste – win-win!
Materials You’ll Need:
Before we dive in, let’s gather our supplies. Here’s what you’ll need:
* Gift bags (various sizes, colors, and designs – the more variety, the better!)
* Canvas panels or stretched canvases (any size you like, depending on the size of your gift bags and the space you want to fill)
* Scissors or a craft knife
* Ruler or measuring tape
* Pencil
* Mod Podge or other decoupage glue
* Foam brush or paintbrush
* Optional: Embellishments like glitter, ribbon, buttons, or paint
Choosing Your Gift Bags:
* Consider the Colors and Patterns: Think about the overall color scheme and style you want for your wall art. Do you want a cohesive look with similar colors, or a more eclectic and vibrant mix?
* Vary the Sizes: Using gift bags of different sizes will add visual interest to your finished piece.
* Look for Interesting Details: Pay attention to any unique elements on the bags, such as metallic accents, embossed patterns, or interesting typography. These details can really elevate your artwork.
* Don’t Be Afraid to Mix and Match: The beauty of this project is that there are no rules! Experiment with different combinations of bags to see what you like best.
Preparing Your Gift Bags:
This is where we get down to business! We need to prep the gift bags so they’re ready to be glued onto the canvas.
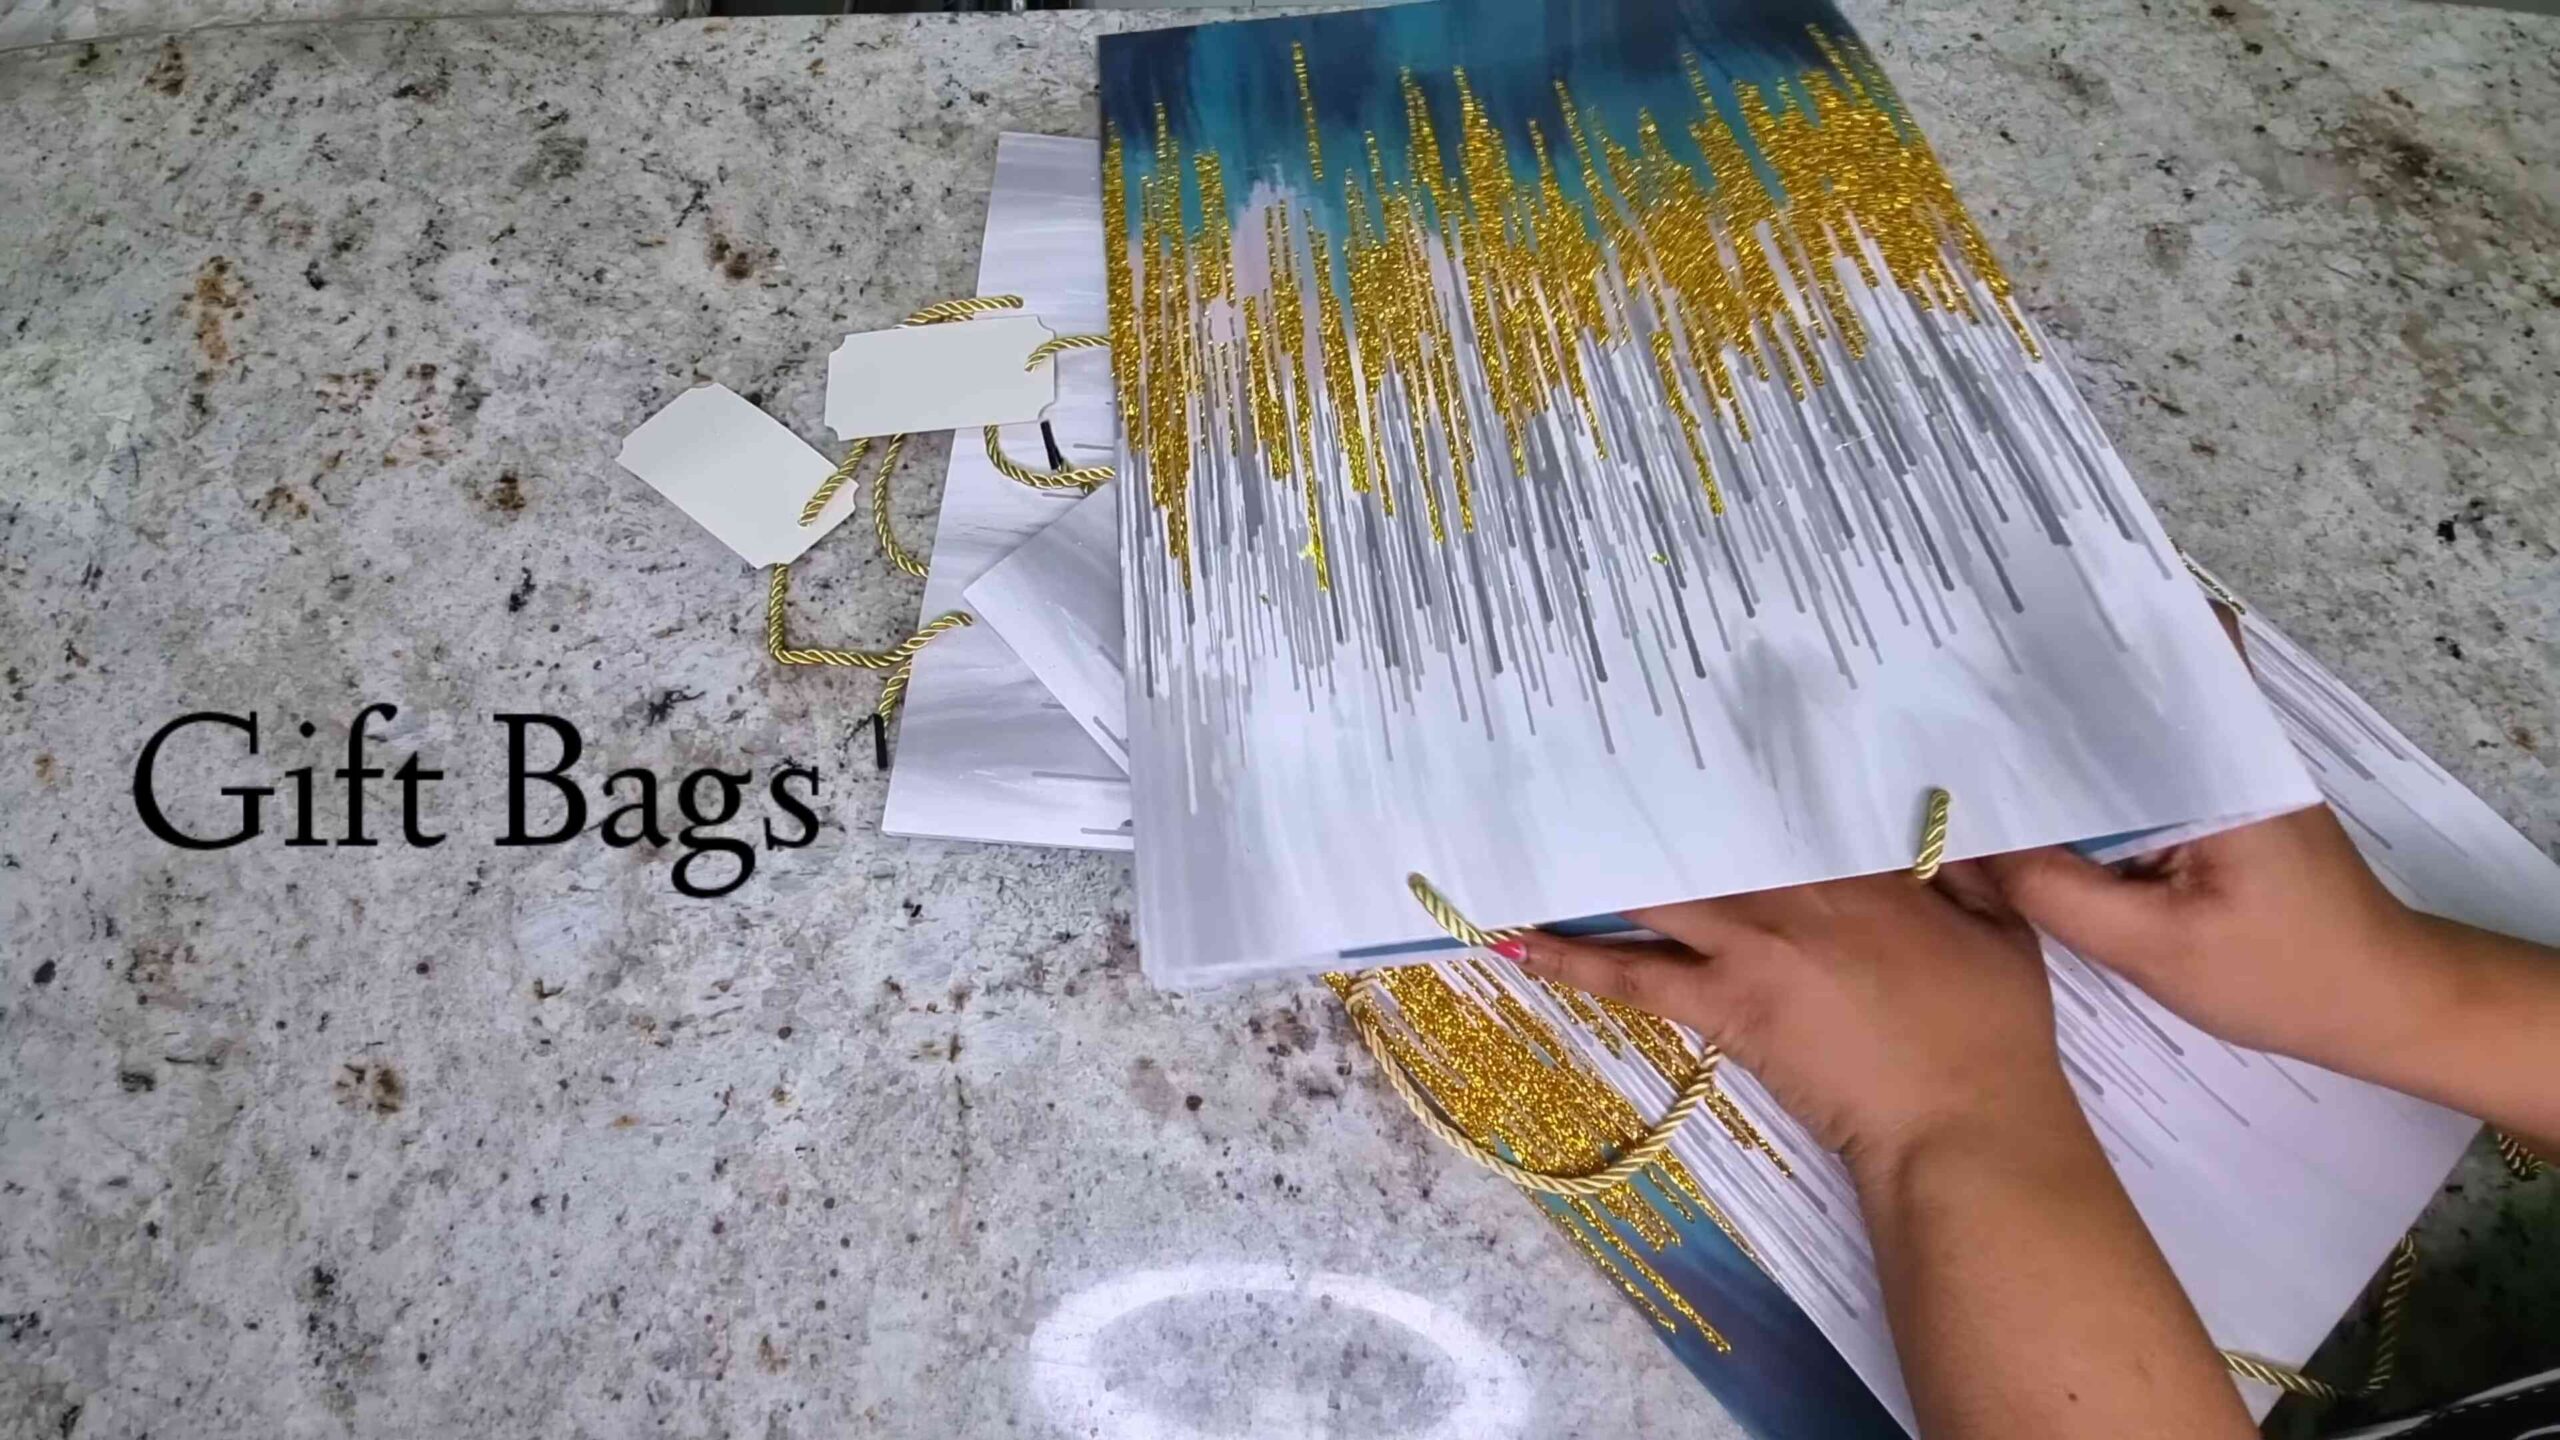
1. Flatten the Bags: Carefully flatten each gift bag, removing any creases or wrinkles. You can use a bone folder or the edge of a ruler to smooth them out.
2. Cut Off Handles and Excess Material: Use scissors or a craft knife to remove the handles and any excess material around the edges of the bag. You want to end up with flat sheets of paper.
3. Decide on Your Design: Before you start cutting, take some time to plan your design. Will you use the entire bag on the canvas, or will you cut out specific sections or shapes? Consider the size and shape of your canvas and how you want the different elements to fit together.
4. Cut Out Shapes or Sections: Using your scissors or craft knife, carefully cut out the shapes or sections you want to use for your artwork. You can cut out geometric shapes, floral motifs, words, or any other elements that catch your eye.
5. Arrange Your Pieces: Lay out the cut pieces on your canvas to get a sense of how they will look. Experiment with different arrangements until you find one you like. This is a crucial step, so don’t rush it! Take your time and play around with different options.
Applying the Gift Bags to the Canvas:
Now for the fun part – gluing everything down!
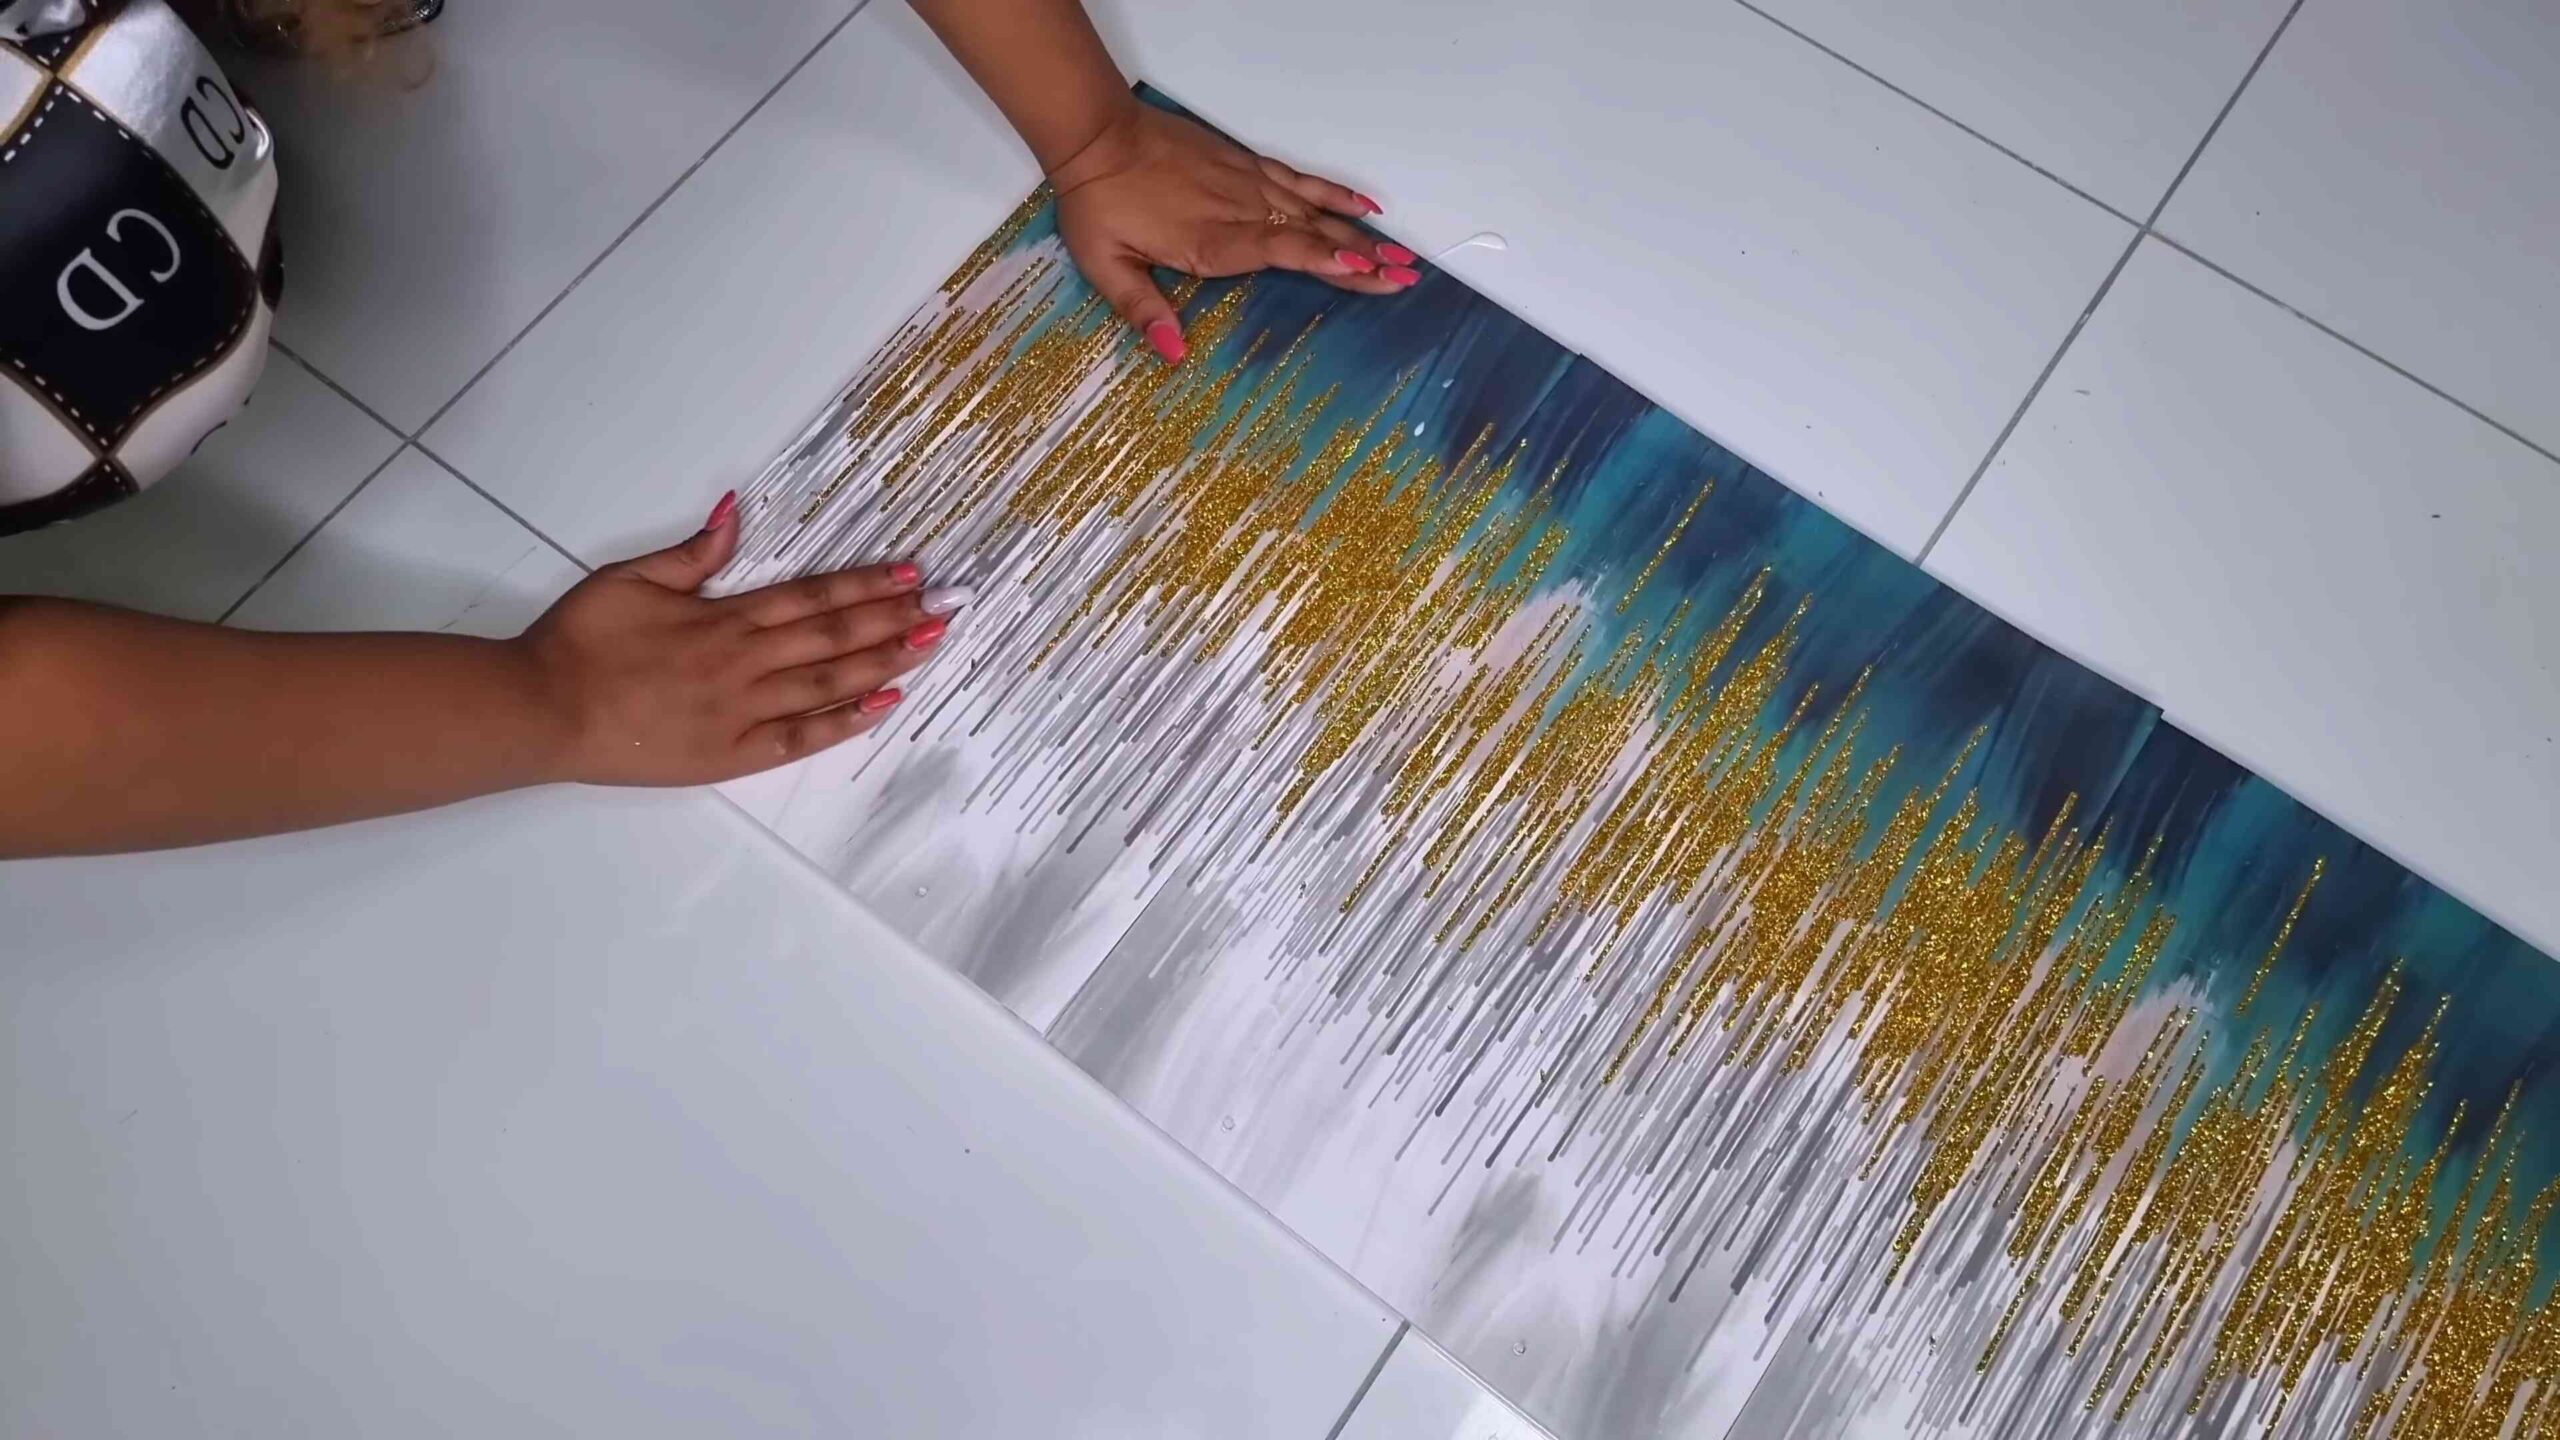
1. Apply Mod Podge to the Canvas: Using your foam brush or paintbrush, apply a thin, even layer of Mod Podge to the area of the canvas where you want to place your first piece of gift bag.
2. Position the Gift Bag Piece: Carefully position the gift bag piece onto the Mod Podge-covered area.
3. Smooth Out Wrinkles: Gently smooth out any wrinkles or air bubbles with your fingers or a bone folder. Work from the center outwards to avoid trapping air.
4. Apply Mod Podge Over the Gift Bag Piece: Once the piece is in place, apply another thin layer of Mod Podge over the top of the gift bag piece. This will seal it and protect it from damage.
5. Repeat for All Pieces: Repeat steps 1-4 for all of the gift bag pieces, working your way across the canvas. Overlap the pieces slightly to create a layered effect.
6. Let it Dry: Once you’ve applied all of the gift bag pieces, let the Mod Podge dry completely. This may take several hours, depending on the humidity.
Adding Embellishments (Optional):
If you want to add even more personality to your wall art, now’s the time to add some embellishments!
1. Glitter: Sprinkle glitter onto wet Mod Podge for a sparkly effect.
2. Ribbon: Glue ribbon or lace around the edges of the canvas or onto specific areas of the design.
3. Buttons: Add buttons for a whimsical touch.
4. Paint: Use acrylic paint to add details or highlights to your design. You can use stencils to create patterns or freehand paint your own designs.
5. Other Embellishments: Get creative and use any other embellishments you like, such as beads, sequins, or charms.
Sealing and Finishing:
To protect your artwork and give it a polished look, it’s important to seal it properly.
1. Apply a Final Coat of Mod Podge: Once all of the embellishments are dry, apply a final coat of Mod Podge over the entire canvas. This will seal everything in and protect it from dust and moisture.
2. Let it Dry Completely: Let the Mod Podge dry completely. This may take several hours.
3. Hang and Enjoy! Once the Mod Podge is dry, your wall art is ready to hang! Find a spot on your wall where it will look great and enjoy your unique creation.
Tips and Tricks for Success:
* Work in Small Sections: When applying Mod Podge, work in small sections to prevent it from drying out before you can apply the gift bag pieces.
* Use a Light Touch: When smoothing out wrinkles, use a light touch to avoid tearing the gift bag paper.
* Don’t Be Afraid to Experiment: This project is all about creativity, so don’t be afraid to experiment with different techniques and materials.
* Protect Your Work Surface: Cover your work surface with newspaper or a drop cloth to protect it from spills and messes.
* Clean Your Brushes Immediately: Clean your brushes with soap and water immediately after use to prevent the Mod Podge from drying and hardening.
* Consider the Weight of the Canvas: If you’re using a large canvas, make sure it’s lightweight enough to hang easily.
* Use a Level: When hanging your wall art, use a level to ensure that it’s straight.
* Personalize It: Add personal touches to your wall art to make it even more special. You can incorporate photos, quotes, or other meaningful elements.
* Have Fun! Most importantly, have fun with this project! It’s a great way to relax, get creative, and create something beautiful.
Troubleshooting:
* Wrinkles: If you get wrinkles in your gift bag paper, try smoothing them out with a bone folder or the edge of a ruler. If the wrinkles are too severe, you may need to remove the piece and start over.
* Air Bubbles: If you get air bubbles under the gift bag paper, try pricking them with a needle and then smoothing them out.
* Tears: If you accidentally tear the gift bag paper, you can try patching it with another piece of paper or covering it with Mod Podge.
* Mod Podge Streaks: If you get Mod Podge streaks on your finished artwork, you can try buffing them out with a soft cloth.
* Uneven Surface: If your canvas has an uneven surface, you may need to apply several coats of Mod Podge to create a smooth finish.
Alternative Ideas:
* Use Different Materials: Instead of gift bags, you can use other materials like scrapbook paper, fabric scraps, or magazine clippings.
* Create a Collage: Create a collage by layering different pieces of gift bag paper and other materials.
* Make a Mosaic: Cut the gift bag paper into small pieces and create a mosaic pattern.
* Use Different Shapes: Instead of using rectangular canvases, try using different shapes like circles, squares, or triangles.
* Add Texture: Add texture to your wall art by incorporating materials like sand, pebbles, or dried flowers.
Displaying Your Wall Art:
* Create a Gallery Wall: Hang several pieces of gift bag wall art together to create a gallery wall.
* Hang it in a Focal Point: Hang your wall art in a focal point of the room, such as above a fireplace or sofa.
* Use it as a Headboard: Hang a large piece of gift bag wall art
Conclusion
So, there you have it! Transforming those beautiful, often discarded, gift bags into stunning wall art is not just a craft project; it’s a statement. It’s a statement about resourcefulness, about appreciating beauty in unexpected places, and about injecting your personality into your home decor without breaking the bank. This DIY gift bag wall art project is a must-try for several compelling reasons.
Firstly, it’s incredibly budget-friendly. Instead of purchasing expensive artwork, you’re repurposing materials you likely already have on hand. Gift bags, especially those from higher-end stores, often boast exquisite designs, textures, and colors that rival professionally created art. Why let that beauty languish in a drawer when you can showcase it on your walls?
Secondly, it’s a fantastic way to personalize your space. You get to curate the designs, colors, and arrangements to perfectly complement your existing decor and reflect your unique style. Whether you prefer a minimalist aesthetic with clean lines and muted tones or a vibrant, eclectic gallery wall bursting with color and pattern, this project allows you to express yourself creatively.
Thirdly, it’s surprisingly easy and quick to execute. With just a few basic supplies and a little bit of time, you can transform a collection of gift bags into a captivating piece of art. The process is therapeutic and rewarding, offering a welcome break from the stresses of daily life.
But the benefits don’t stop there. This project is also incredibly versatile. Consider these variations to further customize your DIY gift bag wall art:
* Frame it up: Instead of simply adhering the gift bag panels to a canvas or board, frame them individually for a more polished and sophisticated look. You can use matching frames for a cohesive feel or mix and match different frame styles for an eclectic vibe.
* Add embellishments: Incorporate other decorative elements, such as beads, sequins, ribbons, or even dried flowers, to add texture and dimension to your artwork.
* Create a mosaic: Cut the gift bags into smaller pieces and arrange them in a mosaic pattern for a truly unique and eye-catching design.
* Decoupage delight: Use Mod Podge to decoupage the gift bag panels onto furniture, boxes, or other surfaces for a cohesive and personalized look throughout your home.
* Seasonal switch-up: Create different sets of gift bag wall art for different seasons or holidays, allowing you to easily update your decor throughout the year. Imagine a festive display of holiday-themed gift bags during the Christmas season or a vibrant collection of floral prints for spring.
We wholeheartedly encourage you to give this DIY gift bag wall art project a try. It’s a fun, affordable, and creative way to add personality and style to your home. Don’t be afraid to experiment with different designs, colors, and techniques to create something truly unique and special.
Once you’ve completed your masterpiece, we’d love to see it! Share your creations with us on social media using [Your Hashtag] and let us know what you think of this DIY trick. We can’t wait to see your inspiring and imaginative interpretations! Let your creativity shine and transform those forgotten gift bags into stunning works of art.
Frequently Asked Questions (FAQ)
What kind of gift bags work best for this project?
The best gift bags for this project are those made from sturdy paper or cardstock with attractive designs. Bags from higher-end stores often feature beautiful patterns, textures, and colors that translate well into wall art. Avoid bags that are heavily creased, torn, or faded, as these may not produce the desired results. Glossy or matte finishes both work well, depending on your personal preference. Consider the overall aesthetic you’re aiming for when selecting your gift bags.
What kind of adhesive should I use to attach the gift bag panels to the canvas or board?
A good quality craft glue or Mod Podge is ideal for adhering the gift bag panels to the canvas or board. These adhesives provide a strong and durable bond without damaging the paper. Avoid using hot glue, as it can create unsightly bumps and may not adhere properly to the paper. When applying the adhesive, be sure to spread it evenly across the back of the gift bag panel to prevent wrinkles or bubbles.
How do I prevent the gift bag panels from wrinkling or bubbling when I attach them?
To prevent wrinkling or bubbling, apply the adhesive in a thin, even layer across the back of the gift bag panel. Use a brayer or rolling pin to smooth out the panel and remove any air pockets. Work quickly and efficiently to prevent the adhesive from drying before you have a chance to smooth out the panel. If you’re using Mod Podge, apply a thin layer to the top of the panel as well to seal it and protect it from moisture.
Can I use gift bags with glitter or other embellishments?
Yes, you can use gift bags with glitter or other embellishments, but keep in mind that these elements may shed or flake off over time. To minimize shedding, consider applying a sealant, such as Mod Podge, to the surface of the gift bag panel. Alternatively, you can carefully remove the embellishments before attaching the panel to the canvas or board.
How do I protect my finished DIY gift bag wall art from dust and damage?
To protect your finished artwork from dust and damage, consider applying a sealant, such as Mod Podge or a clear acrylic spray. This will create a protective barrier that will help to prevent fading, scratching, and moisture damage. You can also frame your artwork behind glass or acrylic for added protection. Regularly dust your artwork with a soft cloth to keep it looking its best.
What if I don’t have a canvas or board? What else can I use as a base?
If you don’t have a canvas or board, you can use a variety of other materials as a base for your DIY gift bag wall art. Some alternatives include:
* Cardboard: Cut a piece of cardboard to the desired size and shape.
* Foam board: Foam board is lightweight and easy to cut, making it a great option for larger pieces of art.
* Wood panel: A wood panel provides a sturdy and durable base for your artwork.
* Old picture frames: Remove the glass and backing from an old picture frame and use the frame as a base for your gift bag wall art.
* Upcycled materials: Get creative and use upcycled materials, such as old book covers, cereal boxes, or even pieces of furniture.
How do I create a gallery wall with my DIY gift bag wall art?
Creating a gallery wall is a great way to showcase your DIY gift bag wall art. Here are a few tips for creating a visually appealing gallery wall:
* Plan your layout: Before you start hanging your artwork, plan your layout on the floor or on a piece of paper. Experiment with different arrangements until you find one that you like.
* Mix and match sizes and shapes: Incorporate artwork of different sizes and shapes to create visual interest.
* Use a consistent color palette: Choose a color palette that complements your existing decor and stick to it when selecting your gift bags.
* Leave some space between the pieces: Don’t overcrowd your gallery wall. Leave some space between the pieces to allow each one to stand out.
* Hang at eye level: Hang your artwork at eye level for the best viewing experience.
Can I sell my DIY gift bag wall art?
Yes, you can sell your DIY gift bag wall art, but be mindful of any copyright restrictions that may apply to the designs on the gift bags. If the designs are copyrighted, you may need to obtain permission from the copyright holder before selling your artwork. You can also create your own original designs using plain gift bags or other materials.
How can I make this project more sustainable?
To make this project more sustainable, focus on using gift bags that you already have or that you can source from friends and family. Avoid purchasing new gift bags specifically for this project. You can also use recycled or upcycled materials for the base of your artwork, such as cardboard or old picture frames. When purchasing adhesive, choose a water-based, non-toxic option. Finally, consider donating or selling any leftover materials to reduce waste.
Leave a Comment