

DIY globe chandelier: Ever dreamt of illuminating your space with a touch of wanderlust and a whole lot of personal flair? Forget those generic, mass-produced light fixtures! I’m about to show you how to craft a stunning chandelier that’s not only a conversation starter but also a reflection of your adventurous spirit.
Globes, as symbols of exploration and discovery, have captivated us for centuries. From ancient cartographers meticulously mapping the world to modern-day travelers charting their next adventure, the globe represents our innate desire to understand and connect with the world around us. Now, imagine transforming that iconic symbol into a dazzling light fixture!
Let’s be honest, finding unique and affordable home decor can be a real challenge. That’s where this DIY globe chandelier project comes in. Not only will you save money by creating your own statement piece, but you’ll also have the satisfaction of knowing you built something truly special. Plus, it’s a fantastic way to upcycle an old globe that might otherwise be gathering dust. Ready to embark on this illuminating adventure with me? Let’s get started!
DIY Globe Chandelier: Light Up Your World!
Okay, globe lovers and DIY enthusiasts, gather ’round! I’m about to show you how to transform a simple globe into a stunning, one-of-a-kind chandelier. This project is surprisingly easy, budget-friendly, and guaranteed to be a conversation starter. Get ready to add a touch of wanderlust and illumination to your space!
Materials You’ll Need:
Before we dive in, let’s make sure you have everything you need. This is crucial for a smooth and enjoyable crafting experience.
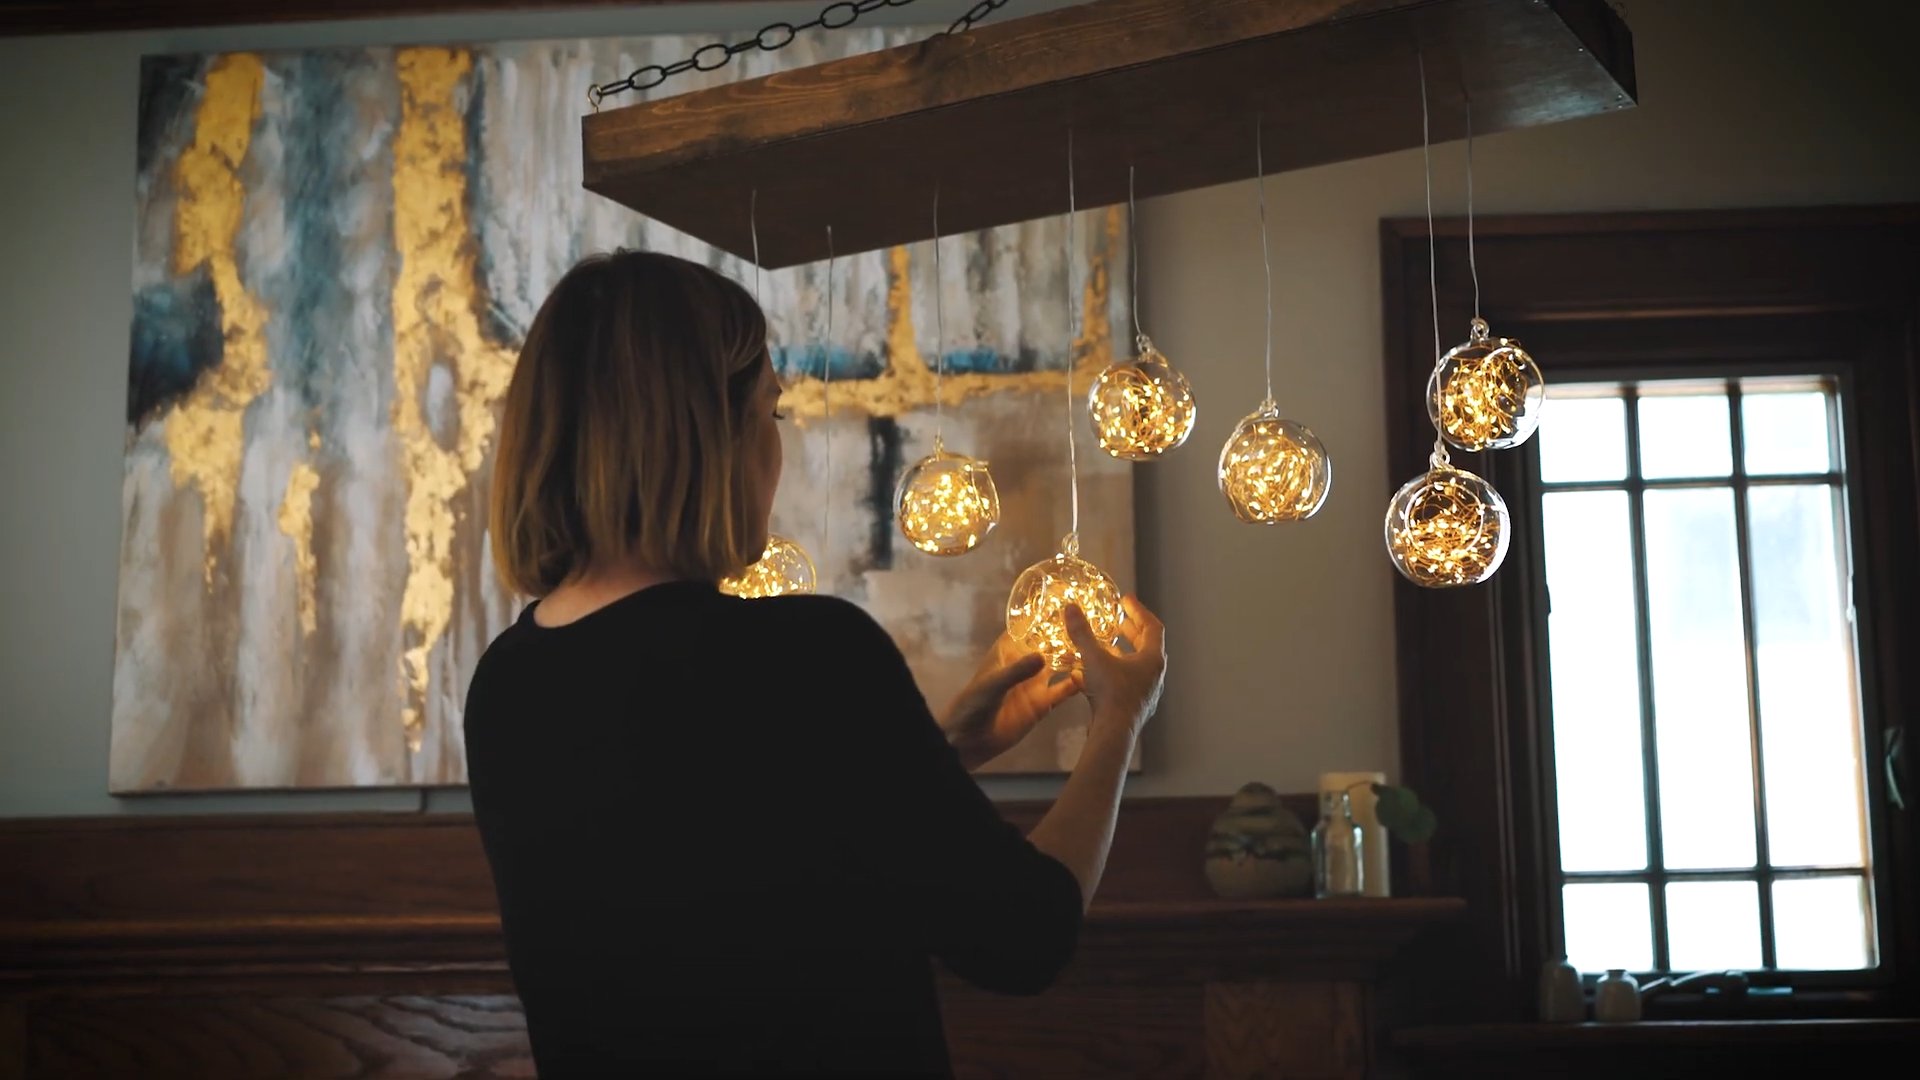
* A Globe: This is the star of the show! You can use an old globe you already have, find one at a thrift store, or even purchase a new one. Consider the size of your space when choosing the globe’s diameter. A larger globe will make a bolder statement, while a smaller one is perfect for cozy corners. I found mine at a flea market for a steal!
* Pendant Light Kit: You’ll need a pendant light kit that includes a light socket, cord, ceiling canopy, and all the necessary hardware for installation. These are readily available at most hardware stores or online retailers. Make sure the cord length is appropriate for your ceiling height.
* Light Bulb: Choose a light bulb that complements the globe’s aesthetic. I recommend an Edison-style bulb for a vintage vibe or an LED bulb for energy efficiency. Consider the wattage to achieve your desired brightness.
* Drill with Drill Bits: You’ll need a drill to create holes in the globe for the light cord and ventilation. Select drill bits appropriate for the material of your globe (plastic, cardboard, etc.). Start with a small drill bit and gradually increase the size as needed.
* Utility Knife or Scissors: For cutting the globe (if necessary). A sharp utility knife or sturdy scissors will do the trick. Be careful when using sharp tools!
* Safety Glasses: Protect your eyes from debris while drilling and cutting. Safety first!
* Gloves: To protect your hands.
* Pencil or Marker: For marking the drilling points.
* Ruler or Measuring Tape: For accurate measurements.
* Wire Strippers: For working with the electrical wires in the pendant light kit.
* Screwdriver: For tightening screws during assembly.
* Optional: Sandpaper: For smoothing any rough edges after cutting.
* Optional: Paint or Stain: If you want to customize the globe’s appearance.
Preparing the Globe:
This is where we get our hands dirty! We need to prep the globe to accommodate the light fixture.
1. Clean the Globe: Start by cleaning the globe with a damp cloth to remove any dust or dirt. This will ensure a clean surface for drilling and cutting.
2. Mark the Entry Point: Decide where you want the light cord to enter the globe. This is usually at the bottom, near the South Pole. Use a pencil or marker to mark the spot.
3. Drill the Entry Hole: Using your drill and an appropriately sized drill bit, carefully drill a hole at the marked point. Start with a small pilot hole and gradually increase the size until the hole is large enough to accommodate the light cord. Be patient and avoid applying too much pressure, as this could crack the globe.
4. Create Ventilation Holes (Optional but Recommended): To prevent heat buildup inside the globe, it’s a good idea to create a few ventilation holes. These can be small and discreet, placed near the top of the globe. Mark the locations for the ventilation holes and drill them using a small drill bit. I usually do about 3-4 small holes.
5. Cutting the Globe (If Necessary): Depending on the type of globe you have and the design you’re going for, you might need to cut the globe in half or create a larger opening at the bottom. If your globe is made of plastic, you can use a utility knife or scissors to carefully cut along the desired line. If it’s made of cardboard, a utility knife will work best. Remember to wear safety glasses and gloves during this step.
6. Smooth the Edges (Optional): If you’ve cut the globe, use sandpaper to smooth any rough edges. This will prevent you from getting scratched and give the chandelier a more polished look.
Assembling the Chandelier:
Now for the fun part – putting it all together!
1. Prepare the Pendant Light Kit: Follow the instructions that came with your pendant light kit to prepare the wiring. This usually involves stripping the ends of the wires and connecting them to the light socket. If you’re not comfortable working with electrical wiring, it’s best to consult a qualified electrician.
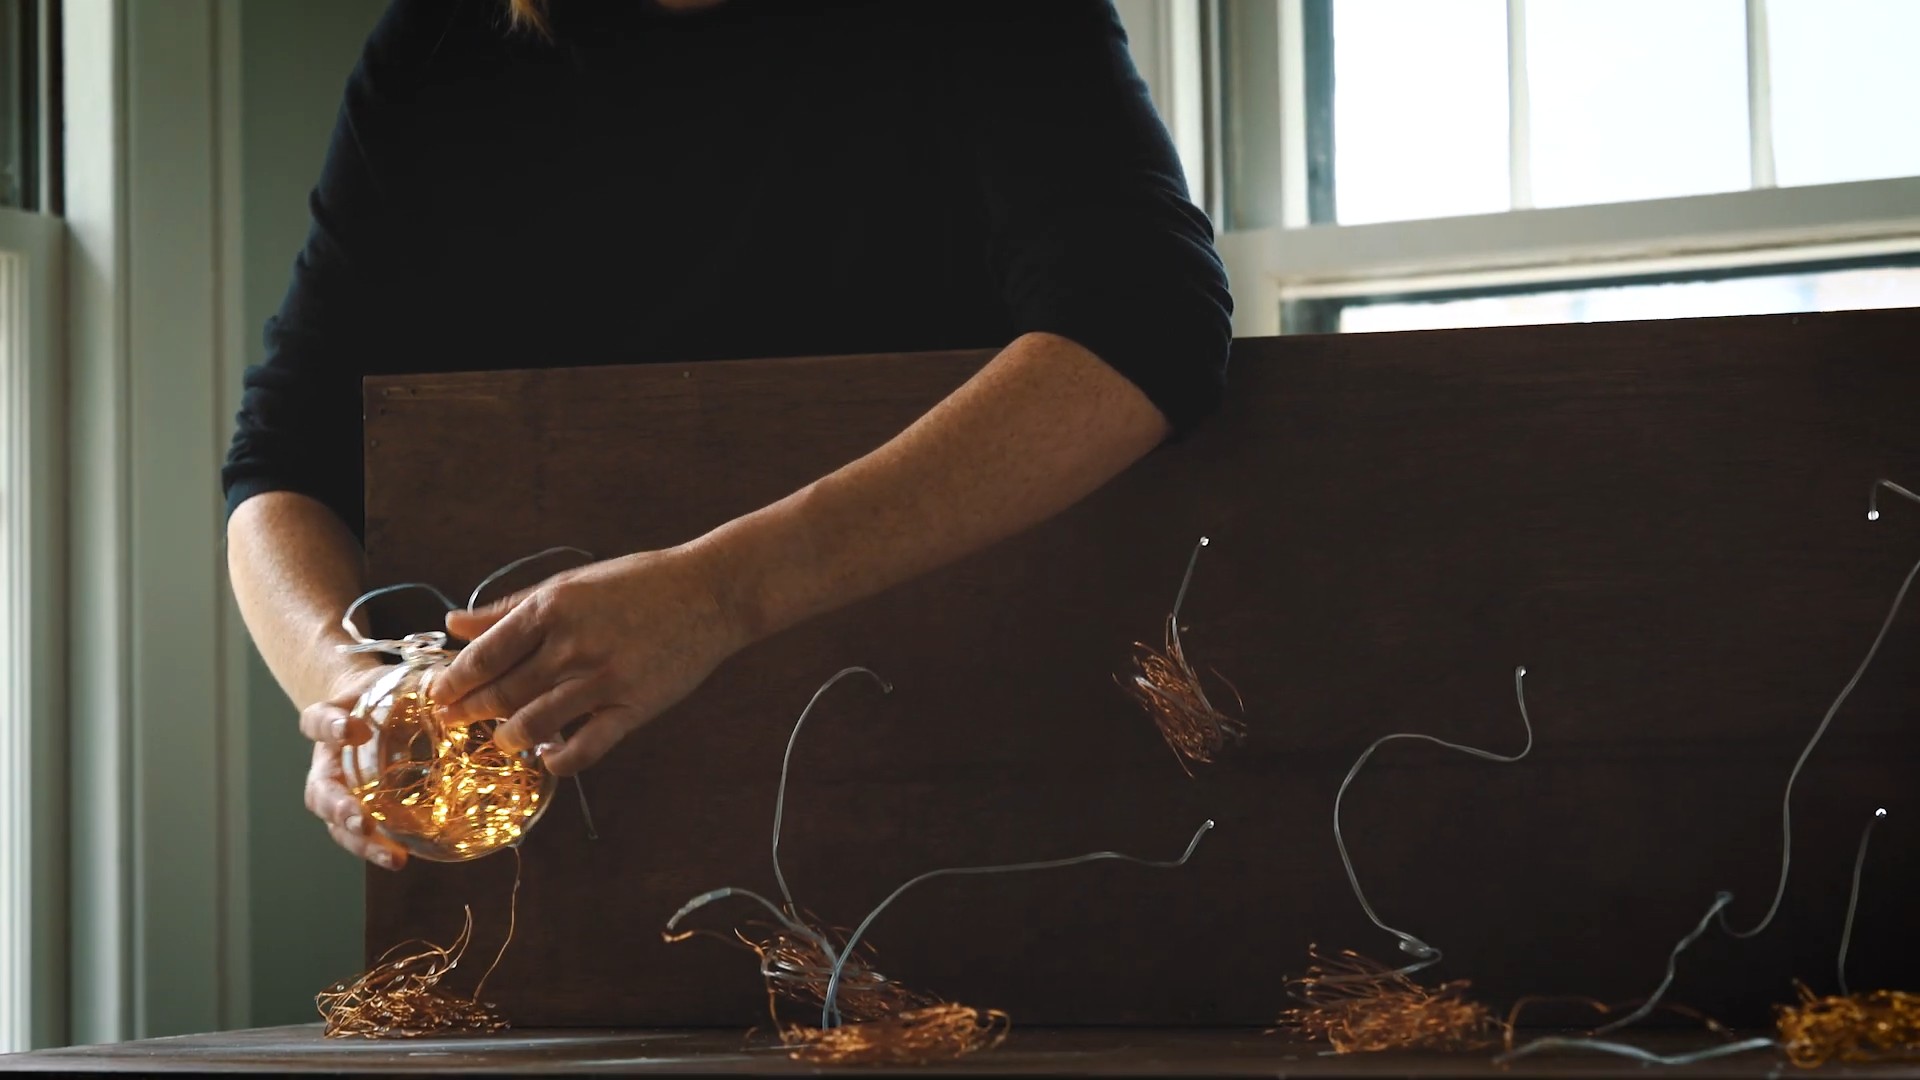
2. Thread the Cord Through the Globe: Carefully thread the light cord through the hole you drilled at the bottom of the globe. Gently guide the cord through until the light socket is inside the globe.
3. Secure the Light Socket: Depending on your pendant light kit, you might need to use screws or other hardware to secure the light socket inside the globe. Make sure the socket is firmly attached and won’t move around.
4. Install the Light Bulb: Screw in your chosen light bulb into the light socket. Be careful not to overtighten the bulb.
5. Attach the Ceiling Canopy: Follow the instructions that came with your pendant light kit to attach the ceiling canopy to the light cord. The canopy will cover the wiring in the ceiling and provide a clean, finished look.
6. Hang the Chandelier: Now it’s time to hang your beautiful globe chandelier! Turn off the power at the breaker box before you begin. Use the hardware provided with your pendant light kit to attach the canopy to the ceiling. Make sure the chandelier is securely hung and won’t fall. If you’re not comfortable with electrical work, please consult a professional electrician.
Customization Ideas:
Want to make your globe chandelier even more unique? Here are a few ideas:
* Paint or Stain the Globe: Give your globe a fresh new look by painting it with your favorite color or staining it for a more rustic feel. You can use acrylic paint, spray paint, or wood stain, depending on the material of your globe.
* Add Decoupage: Decorate the globe with decoupage using maps, vintage photos, or other interesting images. This is a great way to personalize your chandelier and add a touch of your own style.
* Embellish with Beads or Crystals: Add some sparkle to your chandelier by embellishing it with beads or crystals. You can glue them onto the globe or hang them from the bottom for a glamorous effect.
* Use Different Types of Bulbs: Experiment with different types of light bulbs to create different lighting effects. Edison-style bulbs provide a warm, vintage glow, while LED bulbs offer energy efficiency and a variety of colors.
* Create a Cluster Chandelier: Hang multiple globe chandeliers at different heights to create a stunning cluster effect. This is a great way to fill a large space and make a bold statement.
Safety Tips:
Before you start, let’s go over some important safety tips:
* Always turn off the power at the breaker box before working with electrical wiring.
* Wear safety glasses and gloves when drilling and cutting.
* Be careful when using sharp tools.
* If you’re not comfortable working with electrical wiring, consult a qualified electrician.
* Make sure the chandelier is securely hung and won’t fall.
* Do not exceed the maximum wattage rating of the light socket.
* Keep flammable materials away from the light bulb.
Troubleshooting:
Sometimes things don’t go exactly as planned. Here are a few common problems and how to fix them:
* The light bulb doesn’t turn on: Check the light bulb to make sure it’s not burned out. Also, check the wiring connections to make sure they’re secure.
* The chandelier is wobbly: Make sure the ceiling canopy is securely attached to the ceiling. If the chandelier is still wobbly, you might need to use a different type of mounting hardware.
* The globe is getting too hot: Make sure you have adequate ventilation holes in the globe. Also, use a lower wattage light bulb.
* The light cord is too short: You can purchase a longer light cord at most hardware stores.
Final Thoughts:
And there you have it! Your very own DIY globe chandelier. I hope you enjoyed this project as much as I did. It’s a fun and rewarding way to add a unique and personal touch to your home decor. Now, go forth and light up your world! Remember to take your time, be patient, and most importantly, have fun! I can’t wait to see what you create! Happy crafting!
Conclusion
So, there you have it! Transforming ordinary globes into a stunning, one-of-a-kind chandelier is not only achievable but surprisingly simple and incredibly rewarding. This DIY globe chandelier project is more than just a craft; it’s an opportunity to inject personality, travel memories, and a touch of global sophistication into your home decor. Forget bland, mass-produced lighting fixtures – this project allows you to create a statement piece that truly reflects your unique style and adventurous spirit.
Why is this a must-try? Because it’s budget-friendly, eco-conscious (repurposing old globes!), and undeniably impressive. Imagine the conversations sparked by this unique lighting fixture. Guests will be captivated by its charm and intrigued by the story behind each globe. Plus, the soft, diffused light emanating from the globes creates a warm and inviting ambiance, perfect for dining rooms, living rooms, or even a whimsical bedroom.
But the beauty of this project lies in its versatility. Feel free to experiment with different globe sizes, colors, and arrangements. Consider using vintage globes for a more antique aesthetic, or opt for modern, minimalist globes for a sleek and contemporary look. You could even incorporate string lights or fairy lights inside the globes for an extra touch of magic.
Here are a few more ideas to get your creative juices flowing:
* Themed Chandelier: Focus on a specific region or continent for your globe selection. Imagine a chandelier featuring only European globes or one showcasing the diverse landscapes of Africa.
* Color-Coordinated Globes: Paint the landmasses of your globes in a cohesive color palette to match your existing decor. This creates a more unified and sophisticated look.
* Mixed Media: Incorporate other materials into your chandelier, such as beads, crystals, or metal accents. This adds texture and visual interest to the design.
* Mobile Chandelier: Instead of a fixed chandelier, create a globe mobile that hangs from the ceiling. This is a great option for smaller spaces or for adding a playful touch to a nursery.
* Solar Powered: For outdoor use, consider using solar powered lights inside the globes. This is an eco-friendly and energy-efficient way to illuminate your patio or garden.
Don’t be intimidated by the thought of creating your own chandelier. With a little patience, creativity, and the right tools, you can transform ordinary globes into a breathtaking work of art. We encourage you to embrace the challenge and embark on this exciting DIY adventure.
We’re confident that you’ll be thrilled with the results. And most importantly, we want to hear about your experience! Share your photos, tips, and variations on social media using the hashtag #DIYGlobeChandelier. Let’s inspire each other and celebrate the joy of creating something beautiful and unique. So, gather your globes, unleash your inner artist, and get ready to illuminate your world with a stunning DIY globe chandelier!
Frequently Asked Questions (FAQ)
What kind of globes are best for this project?
The best globes for a DIY globe chandelier are lightweight and easy to work with. Paper mache globes are ideal because they are easy to cut and drill. Plastic globes are also a good option, but you may need to use a stronger drill bit. Avoid using heavy glass globes, as they can be difficult to suspend and may pose a safety hazard. Consider the size of the globes as well. Smaller globes are generally easier to work with and create a more delicate chandelier, while larger globes make a bolder statement. You can find globes at thrift stores, antique shops, or online retailers. Don’t be afraid to mix and match different sizes and styles for a more eclectic look.
How do I safely drill holes in the globes?
Safety is paramount when drilling holes in globes. Always wear safety glasses to protect your eyes from debris. Use a drill bit that is appropriate for the material of your globe (paper mache, plastic, etc.). Start with a small pilot hole and gradually increase the size of the hole as needed. Drill slowly and steadily to avoid cracking or shattering the globe. If you are using a plastic globe, you may want to apply masking tape to the area where you will be drilling to prevent the plastic from chipping. For paper mache globes, reinforce the area around the hole with glue or tape to prevent tearing. Remember to unplug the drill when changing drill bits or making adjustments.
What type of wiring and lighting fixtures should I use?
When it comes to wiring and lighting fixtures, safety is again the top priority. Use UL-listed (Underwriters Laboratories) components to ensure that they meet safety standards. Choose a wiring gauge that is appropriate for the wattage of the light bulbs you will be using. Consider using a chandelier wiring kit, which includes all the necessary components, such as wires, sockets, and a canopy. For light bulbs, LED bulbs are a great option because they are energy-efficient, long-lasting, and produce less heat than traditional incandescent bulbs. Choose bulbs with a warm color temperature (2700K-3000K) for a cozy and inviting ambiance. If you are not comfortable working with electrical wiring, it is best to consult a qualified electrician.
How do I hang the chandelier securely?
Hanging the chandelier securely is crucial for safety. Make sure that the ceiling junction box is properly installed and can support the weight of the chandelier. Use a sturdy chain or cable to suspend the chandelier from the junction box. Ensure that the chain or cable is long enough to allow the chandelier to hang at the desired height. If you are using a chain, you may need to remove some links to adjust the length. Use appropriate hardware, such as S-hooks or carabiners, to connect the chain or cable to the chandelier and the junction box. Double-check that all connections are secure before releasing the chandelier. If you are unsure about how to hang the chandelier safely, consult a qualified electrician or handyman.
Can I customize the design of my globe chandelier?
Absolutely! Customization is what makes this DIY project so special. You can personalize your globe chandelier in countless ways. Consider painting the landmasses of the globes in different colors to match your decor. You can also add embellishments, such as beads, crystals, or metal accents. Experiment with different globe arrangements to create a unique shape and silhouette. You can even incorporate other materials into the design, such as driftwood or branches. The possibilities are endless! Let your creativity guide you and create a chandelier that is truly one-of-a-kind.
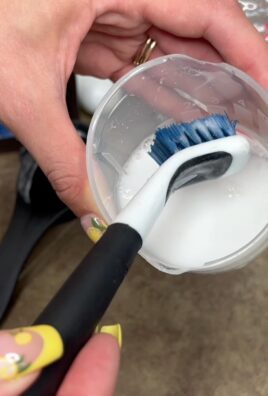
How do I clean and maintain my globe chandelier?
To keep your globe chandelier looking its best, regular cleaning is essential. Dust the globes regularly with a soft cloth or duster. For more stubborn dirt or grime, you can use a damp cloth with a mild soap solution. Be careful not to get the electrical components wet. Avoid using harsh chemicals or abrasive cleaners, as they can damage the globes. If your globes are made of paper mache, be extra careful when cleaning them, as they can be easily damaged by water. Periodically check the wiring and connections to ensure that they are still secure. Replace any burnt-out light bulbs promptly. With proper care and maintenance, your globe chandelier will continue to brighten your home for years to come.
Leave a Comment