

DIY Jean Hemming No Cut: Are your jeans too long? Do you dread the thought of sewing or, even worse, chopping off the perfectly good hem? I get it! We’ve all been there, staring at a pile of jeans that are just begging to be worn, but are dragging on the ground. But what if I told you there’s a super simple, no-sew, no-cut solution that will have you rocking your favorite denim in minutes?
Throughout history, resourceful individuals have always found clever ways to adapt and mend clothing, and this no-cut hemming trick is a modern take on that age-old ingenuity. While the history of denim itself is fascinating, rooted in practicality and workwear, the need to alter and customize our clothes is a timeless human endeavor.
In today’s fast-fashion world, it’s more important than ever to extend the life of our garments. This DIY Jean Hemming No Cut method is not only a time-saver but also a fantastic way to reduce textile waste and save money. Plus, it’s perfect for those of us who aren’t exactly sewing pros (myself included!). I’m going to show you how to achieve a perfectly hemmed look without sacrificing the original hem or needing any special skills. Get ready to transform your jeans and step out in style!
DIY: The No-Cut Jean Hemming Hack – Keep Your Original Hem!
Okay, so you’ve got a killer pair of jeans, but they’re just a tad too long. We’ve all been there! The worst part? The thought of chopping off that perfect, original hem. Fear not, my friend! I’m going to show you a super easy, no-cut jean hemming hack that lets you keep that beautiful, factory-finished hem intact. This method is perfect if you’re not confident with a sewing machine or just want a quick and easy solution.
What You’ll Need:
Before we dive in, let’s gather our supplies. This is a pretty low-key project, so you probably already have most of this stuff lying around:
* **Your Jeans:** Obviously!
* **Measuring Tape or Ruler:** Accuracy is key!
* **Pins:** Ball head pins are my personal favorite.
* **Iron and Ironing Board:** For crisp, clean folds.
* **Sewing Machine (Optional):** While this is a “no-cut” method, a few stitches can add extra security.
* **Matching Thread (Optional):** If you choose to use a sewing machine.
* **Scissors (Optional):** Only if you need to trim excess fabric *inside* the hem.
* **Seam Ripper (Optional):** For fixing any mistakes (we all make them!).
* **Chalk or Fabric Marker (Optional):** For marking your hemline.
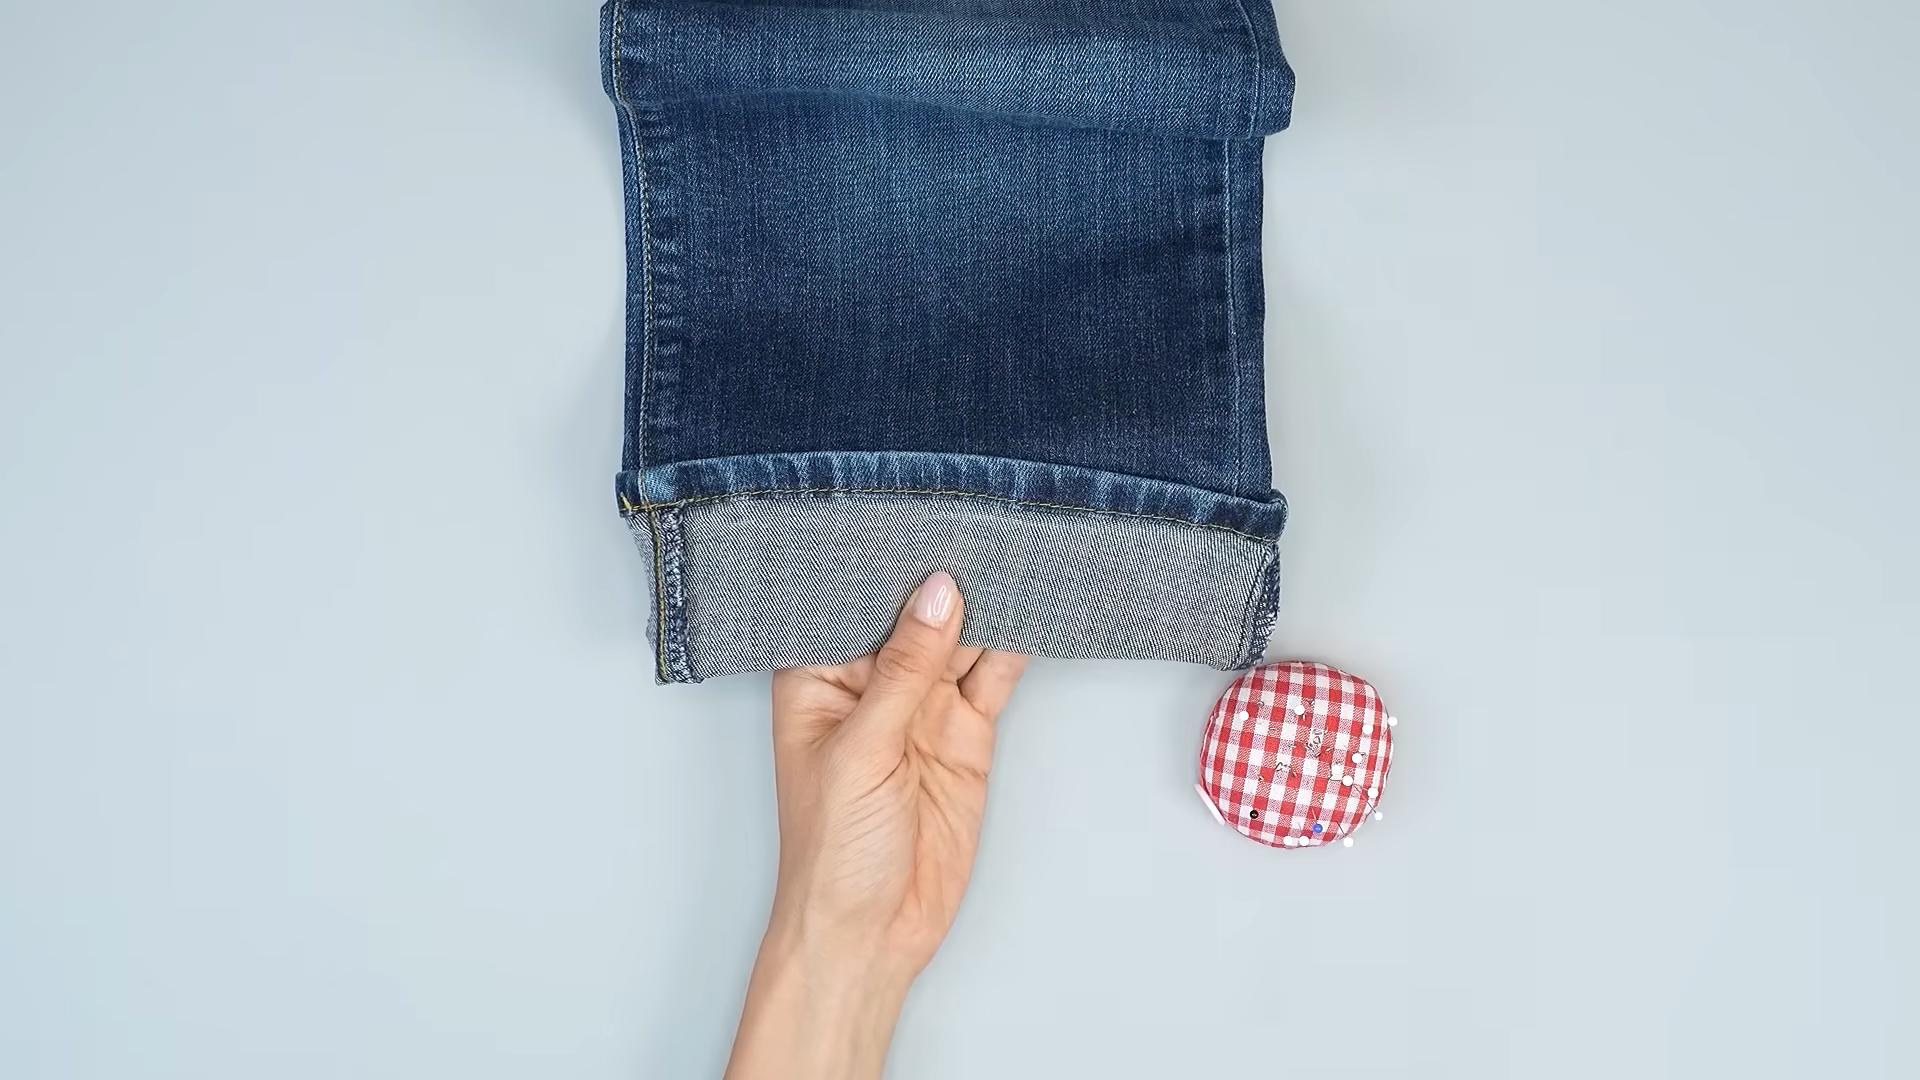
Understanding the Goal: The Inside Fold
The basic idea behind this hack is to fold the excess length of your jeans *inside* the existing hem. This creates a new, shorter hemline without actually cutting anything off. It’s like a secret, hidden hem! The key is to make the fold neat and secure so it doesn’t unravel or look bulky.
Step-by-Step Instructions: Let’s Get Hemming!
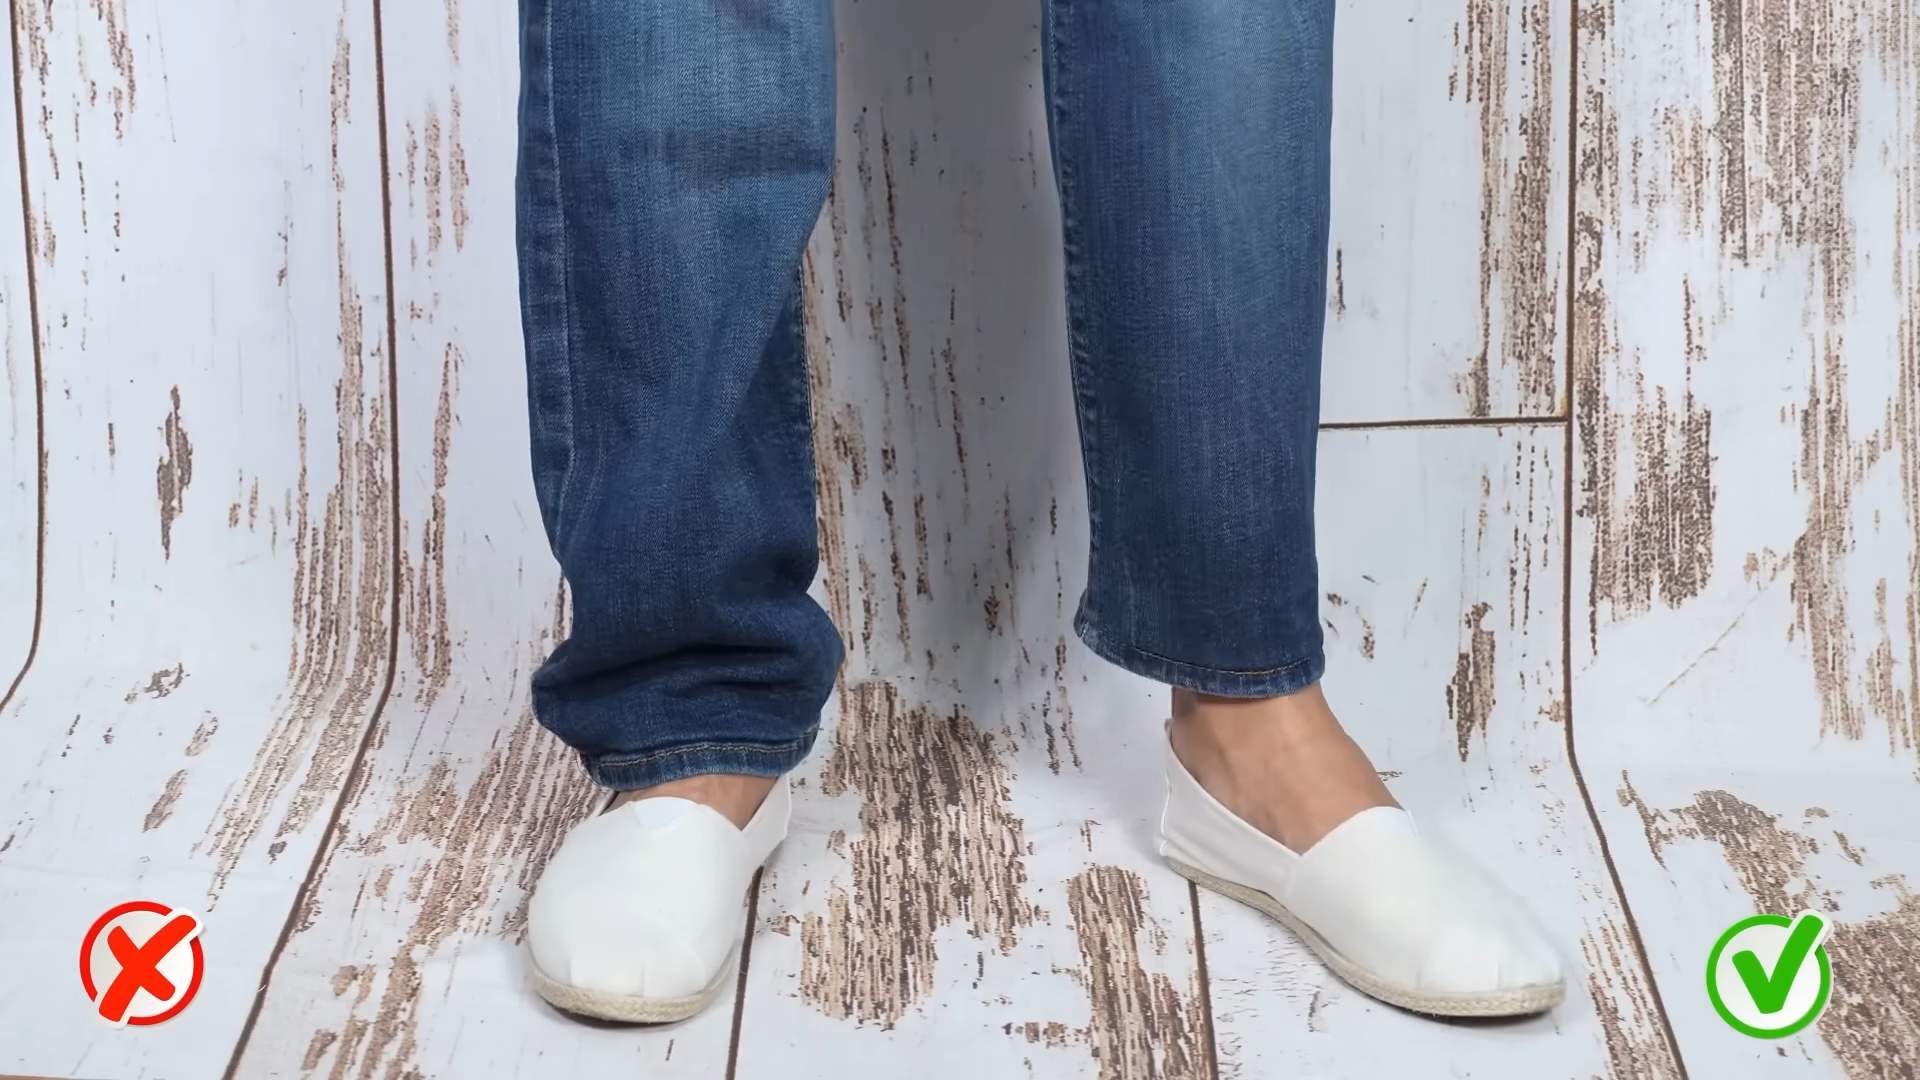
1. **Try on Your Jeans with the Shoes You’ll Usually Wear:** This is crucial! You want to hem your jeans to the perfect length for your favorite shoes. Have a friend help you if needed to get an accurate measurement.
2. **Determine Your Desired Hem Length:** While wearing the jeans, carefully fold up the hem until it reaches the length you want. Use pins to secure the fold in place all the way around each leg. Make sure the fold is even and consistent.
3. **Measure the Excess Fabric:** Take off the jeans and lay them flat on a table. Use your measuring tape or ruler to measure the distance between the original hem and the pinned fold. This measurement is how much fabric you’ll be folding up inside the hem. Write this number down!
4. **Prepare to Fold:** Turn your jeans inside out. This will make it easier to work with the fabric and hide the folded hem.
5. **Create the First Fold:** Starting at the inseam of one leg, fold the raw edge of the jean leg up towards the inside of the jean, using the measurement you took in step 3. So, if you measured 1.5 inches, fold the fabric up 1.5 inches. Pin this fold in place as you go, keeping the fold even and consistent all the way around the leg.
6. **Iron the First Fold:** This is where the magic happens! Use your iron on a medium-high setting (check the care label of your jeans first!) to press the fold firmly. This will create a sharp crease and help the fold stay in place. Iron all the way around each leg.
7. **Create the Second Fold (The Hidden Hem):** Now, fold the pressed edge *up again*, towards the original hem. This second fold should meet the bottom edge of the original hem. Basically, you’re tucking the raw edge of the fabric inside the original hem. Pin this second fold in place, making sure the fabric is smooth and even.
8. **Iron the Second Fold:** Just like before, use your iron to press the second fold firmly. This will create a clean, finished look and help the hem stay in place. Iron all the way around each leg.
9. **Pin, Pin, Pin!:** Make sure you have plenty of pins securing the folded hem in place. The more pins, the less likely it is to shift while you’re securing it. Pay special attention to the side seams, as these can be a bit thicker and harder to fold neatly.
Securing the Hem: Options for a Lasting Finish
Now that you’ve folded and pinned your hem, it’s time to secure it. You have a few options here, depending on your skill level and how much security you want:
Option 1: Iron-On Hem Tape (The Easiest Option)
This is the simplest and quickest method. Iron-on hem tape is a fusible adhesive that bonds fabric together when heated.
* **Cut the Hem Tape:** Cut a length of hem tape that’s slightly shorter than the circumference of your jean leg.
* **Place the Hem Tape:** Place the hem tape between the folded hem and the original hem, making sure it’s positioned correctly.
* **Iron the Hem:** Use your iron on a medium setting to press the hem firmly, following the instructions on the hem tape packaging. The heat will melt the adhesive and bond the fabric together.
* **Let it Cool:** Allow the hem to cool completely before wearing your jeans.
Option 2: Hand Sewing (A Little More Secure)
If you want a bit more security than iron-on hem tape, hand sewing is a great option. A simple slip stitch or blind stitch will do the trick.
* **Thread Your Needle:** Choose a thread that matches the color of your jeans.
* **Slip Stitch or Blind Stitch:** Use a slip stitch or blind stitch to sew the folded hem to the inside of the original hem. These stitches are designed to be invisible from the outside of the jeans.
* **Secure the Thread:** Tie off the thread securely and trim the excess.
Option 3: Sewing Machine (The Most Durable Option)
If you’re comfortable with a sewing machine, this is the most durable option. You can use a straight stitch or a zigzag stitch to secure the hem.
* **Set Up Your Sewing Machine:** Use a needle appropriate for denim and thread that matches the color of your jeans.
* **Sew Close to the Edge:** Sew close to the edge of the folded hem, catching both the folded fabric and the inside of the original hem.
* **Backstitch at the Beginning and End:** Backstitch at the beginning and end of your stitching to secure the thread.
Finishing Touches: Making it Perfect
1. **Remove the Pins:** Once you’ve secured the hem, carefully remove all the pins.
2. **Trim Excess Fabric (Optional):** If there’s a lot of excess fabric inside the folded hem, you can carefully trim it with scissors. Be careful not to cut the original hem or the stitching! I usually leave a little bit of fabric just in case.
3. **Give it One Last Press:** Give the hem one last press with the iron to ensure it’s smooth and flat.
4. **Try Them On!** Turn your jeans right side out and try them on with your shoes. Admire your handiwork!
Troubleshooting Tips: Because Things Don’t Always Go as Planned
* **Bulky Hem:** If your hem is too bulky, try trimming some of the excess fabric inside the fold. Also, make sure you’re using a thin, flexible fabric for the hem tape (if using).
* **Hem Unraveling:** If the hem starts to unravel, reinforce it with more stitching or hem tape.
* **Uneven Hem:** If your hem is uneven, use a seam ripper to remove the stitching or hem tape and start over. It’s better to take the time to do it right!
* **Fabric Too Thick:** If your denim is very thick, you may need to use a heavier needle and thread on your sewing machine. Hand sewing might be a better option in this case.
Enjoy Your Perfectly Hemmed Jeans!
And there you have it! A super easy, no-cut jean hemming hack that lets you keep your original hem intact. Now you can rock your favorite jeans with confidence, knowing they’re the perfect length. Happy hemming!
Conclusion
So, there you have it! Mastering the art of DIY jean hemming no cut is not just a clever trick; it’s a game-changer for your wardrobe and your wallet. Forget expensive tailoring appointments and the anxiety of potentially ruining your favorite pair of jeans with a miscalculated cut. This method offers a simple, reversible, and incredibly effective way to achieve the perfect length without sacrificing the original hem – a detail that often contributes to the unique character of your denim.
Why is this a must-try? Because it empowers you to take control of your style. No longer are you bound by the standard inseam lengths offered in stores. Whether you’ve found the perfect vintage jeans that are just a tad too long, or you want to switch up your look from boots to flats without investing in multiple pairs of the same style, this technique provides the flexibility you need. It’s also a fantastic solution for growing kids whose jeans seem to shrink overnight!
But the beauty of this DIY approach lies not only in its practicality but also in its adaptability. Feel free to experiment with different hemming tapes or fusible adhesives to find the one that best suits your denim’s weight and texture. For a more subtle finish, consider using a thread that closely matches the original hem’s color. And if you’re feeling adventurous, why not try adding a decorative stitch along the new hemline for a personalized touch? Think a contrasting color, a simple running stitch, or even a delicate embroidery detail.
This method is particularly well-suited for raw denim, where preserving the original hem is crucial for maintaining its value and aesthetic. However, it works equally well on pre-washed or distressed jeans, offering a seamless and professional-looking result every time.
We encourage you to embrace this simple yet transformative technique and unlock a world of sartorial possibilities. Don’t be intimidated – it’s far easier than it looks! Gather your supplies, follow the steps outlined, and prepare to be amazed by the results.
Once you’ve tried your hand at DIY jean hemming no cut, we’d love to hear about your experience! Share your tips, tricks, and variations in the comments below. Did you discover a particularly effective type of hemming tape? Did you add a unique decorative element? Your insights could help other readers achieve even better results and inspire them to take on this empowering DIY project. Let’s build a community of denim-loving DIYers who are unafraid to customize their wardrobes and express their individual style! So go ahead, give it a try, and let us know how it goes! We can’t wait to see what you create.
FAQ
What types of jeans work best with the no-cut hemming method?
This method is incredibly versatile and works well with most types of jeans. However, it’s particularly effective on:
* **Raw denim:** Preserves the original hem, which is important for maintaining the value and aesthetic of raw denim.
* **Selvedge denim:** Allows you to showcase the selvedge edge even after hemming.
* **Jeans with a unique or distressed hem:** Avoids altering or damaging the original hem detail.
* **Stretch denim:** The fusible hemming tape provides enough flexibility to accommodate the stretch without puckering.
* **Heavyweight denim:** Choose a stronger fusible hemming tape or consider using a combination of tape and fabric glue for added security.
While it works on most jeans, very thin or delicate fabrics might require extra care and a lighter fusible tape to prevent damage.
How durable is the no-cut hem? Will it hold up to regular washing and wear?
The durability of the no-cut hem depends on the quality of the fusible hemming tape or adhesive used and how well it’s applied. Here are some tips to ensure a long-lasting hem:
* **Choose a high-quality hemming tape:** Look for tapes specifically designed for denim or heavy fabrics.
* **Follow the manufacturer’s instructions carefully:** Pay attention to the recommended ironing temperature and pressing time.
* **Pre-wash your jeans:** This will help prevent shrinkage after hemming.
* **Reinforce the hem:** For added security, you can add a few hand stitches or machine stitches along the hemline, especially in high-stress areas like the side seams.
* **Turn your jeans inside out before washing:** This will protect the hem from abrasion in the washing machine.
* **Avoid using harsh detergents or bleach:** These can weaken the adhesive.
* **Air dry your jeans:** High heat from the dryer can also damage the adhesive.
With proper application and care, a no-cut hem can last for many washes and wears. However, it’s always a good idea to check the hem periodically and reapply the tape or adhesive if needed.
What if the hemming tape doesn’t hold? What are some troubleshooting tips?
If your hemming tape isn’t holding, here are some common causes and solutions:
* **Insufficient heat:** Make sure your iron is set to the correct temperature for the type of hemming tape you’re using. Use a pressing cloth to protect your jeans from scorching.
* **Insufficient pressing time:** Press the hem for the recommended amount of time, applying firm and even pressure.
* **Dirty or oily fabric:** Clean the area where you’ll be applying the tape with a damp cloth and let it dry completely.
* **Incorrect type of hemming tape:** Choose a hemming tape that is appropriate for the weight and type of fabric you’re using.
* **Uneven application:** Make sure the hemming tape is applied evenly and smoothly, without any wrinkles or bubbles.
* **Too much steam:** Excessive steam can interfere with the adhesive. Use a dry iron or a low steam setting.
* **Washing too soon:** Wait at least 24 hours after hemming before washing your jeans.
If you’ve tried these troubleshooting tips and the hemming tape still isn’t holding, consider using a stronger adhesive, such as fabric glue, or reinforcing the hem with stitches.
Can I use fabric glue instead of hemming tape?
Yes, fabric glue can be used as an alternative to hemming tape for a no-cut hem. However, it’s important to choose a high-quality fabric glue that is specifically designed for denim and is washable and flexible.
Here are some tips for using fabric glue:
* **Choose the right glue:** Look for a fabric glue that is permanent, washable, and flexible.
* **Apply the glue sparingly:** Too much glue can make the fabric stiff and uncomfortable.
* **Follow the manufacturer’s instructions:** Pay attention to the recommended drying time and washing instructions.
* **Use a toothpick or small brush to apply the glue:** This will help you apply it evenly and precisely.
* **Press the hem firmly:** Use your fingers or a pressing cloth to press the hem firmly in place while the glue dries.
* **Allow the glue to dry completely:** Before wearing or washing your jeans, allow the glue to dry completely according to the manufacturer’s instructions.
Fabric glue can provide a strong and durable hem, but it’s important to use it carefully and follow the instructions to avoid making a mess or damaging your jeans.
What are some creative variations I can try with this no-cut hemming technique?
Beyond simply shortening your jeans, this technique opens up possibilities for creative customization:
* **Decorative Stitching:** Add a contrasting color thread, a blanket stitch, or even a simple embroidery design along the new hemline for a personalized touch.
* **Faux Cuff:** Create the illusion of a cuffed jean by folding the excess fabric inward and securing it with hemming tape or glue. This is great for a temporary style change.
* **Ribbon or Lace Trim:** Attach a ribbon or lace trim along the new hemline for a feminine or bohemian look.
* **Reflective Tape:** Add reflective tape for increased visibility when cycling or walking at night.
* **Color Blocking:** Use a contrasting fabric to create a color-blocked hem. This is a great way to add a pop of color to your jeans.
* **Distressed Hem:** After hemming, gently fray the edge of the new hemline for a more relaxed and worn-in look.
The possibilities are endless! Let your creativity guide you and experiment with different materials and techniques to create a unique and personalized look.

Leave a Comment