

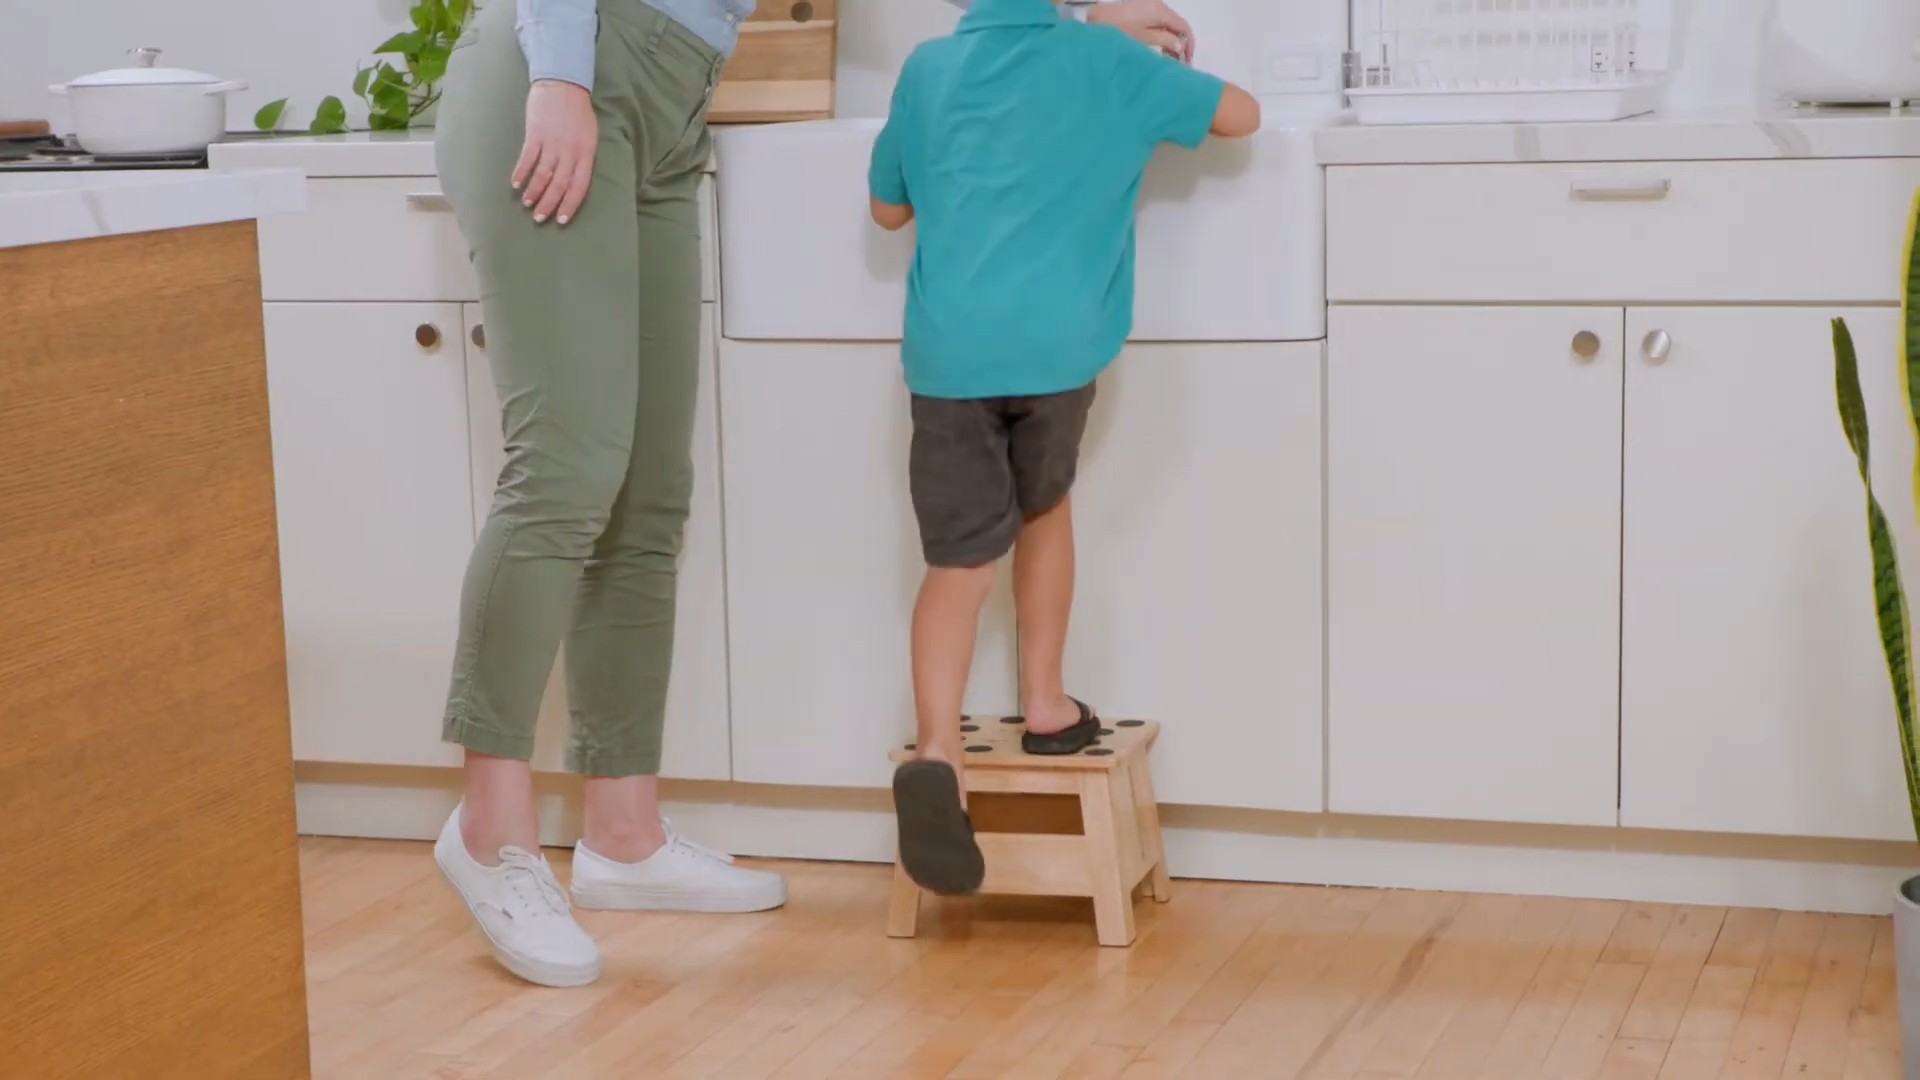
DIY Kids Step Stool: Ever feel like your little ones are constantly asking for help reaching things? I know I do! From grabbing a snack from the top shelf to washing their hands at the sink, it seems like they’re always needing a boost. That’s why I decided to tackle a fun and practical project: building a DIY kids step stool.
Step stools have been around for ages, evolving from simple wooden blocks to beautifully crafted pieces of furniture. Historically, they’ve been essential tools in households, allowing children and adults alike to access higher spaces. Think about it – even in ancient times, a small stool could have been the key to reaching precious supplies or assisting with daily tasks.
But why build one yourself? Well, store-bought step stools can be expensive and often lack the charm and personalization that a handmade item offers. Plus, creating a DIY kids step stool is a fantastic way to spend quality time with your children, teaching them valuable skills and fostering their creativity. Imagine the pride they’ll feel using something they helped build! This project isn’t just about convenience; it’s about empowerment, skill-building, and adding a personal touch to your home. So, let’s get started and create a sturdy and stylish step stool that your kids will love for years to come!
DIY Kids Step Stool: A Weekend Project for Little Helpers
Alright, let’s build a super sturdy and adorable step stool for your little ones! This project is perfect for a weekend and will give your kids a boost when they need to reach the sink, help in the kitchen, or grab a book from a slightly higher shelf. I’ll walk you through every step, making it easy even if you’re a beginner woodworker.
Materials You’ll Need
Before we get started, let’s gather all the necessary materials. This will save you time and frustration later.
* Wood:
* One 1″ x 12″ x 8′ pine board (This will give you enough for all the pieces, but you can adjust based on your desired dimensions).
* Fasteners:
* 1 1/4″ wood screws
* Wood glue
* Finishing:
* Sandpaper (various grits: 80, 120, 220)
* Primer (optional, but recommended for a smoother finish)
* Paint or stain (choose a kid-friendly, non-toxic option)
* Polyurethane or varnish (for added protection)
* Tools:
* Measuring tape
* Pencil
* Saw (circular saw, miter saw, or hand saw)
* Drill
* Screwdriver (or drill with screwdriver bit)
* Sander (optional, but makes sanding much faster)
* Clamps
* Safety glasses
* Dust mask
* Paintbrushes or rollers
* Rags
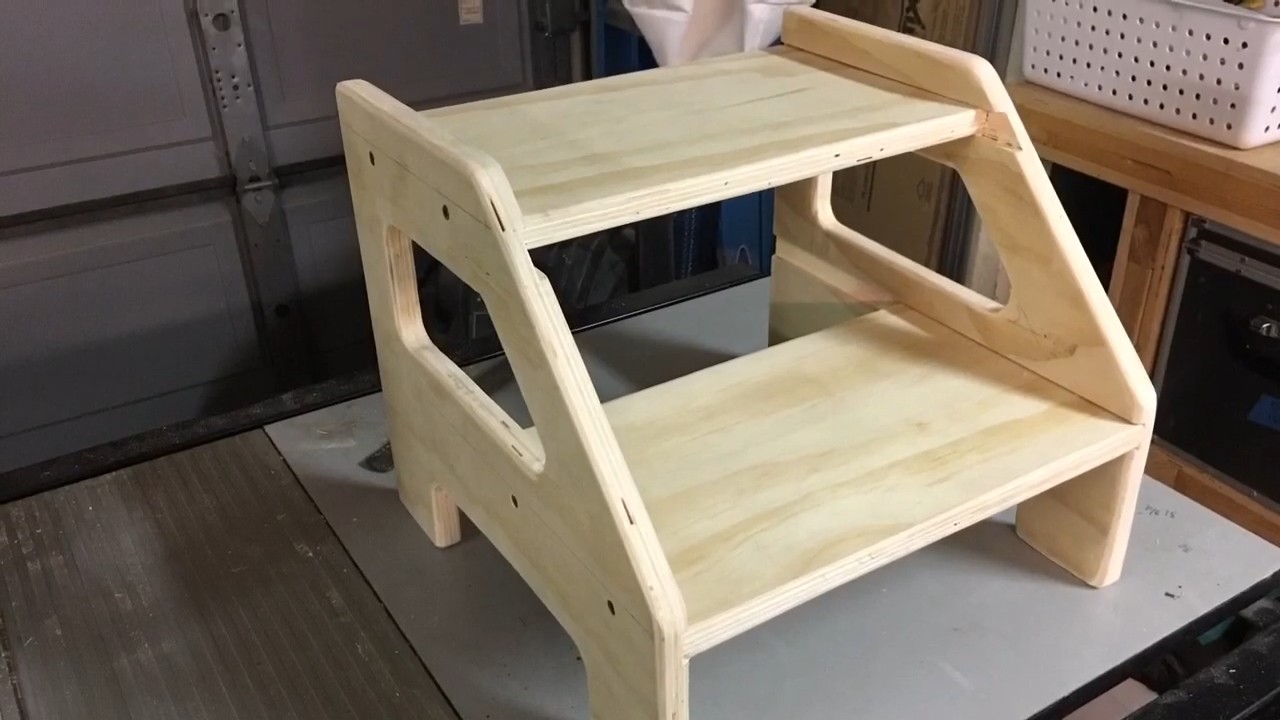
Cutting the Wood
This is where we transform the long board into the individual pieces for our step stool. Accuracy is key here, so take your time and double-check your measurements.
1. Measure and Mark: Using your measuring tape and pencil, carefully measure and mark the following pieces on your 1″ x 12″ board:
* Top Step: 12″ x 10″ (1 piece)
* Bottom Step: 12″ x 8″ (1 piece)
* Sides: 11 1/2″ (height) x 11″ (bottom depth) x 7″ (top depth) (2 pieces). These need to be trapezoids.
* Support Braces: 1″ x 10″ (2 pieces)
2. Cut the Pieces: Now, carefully cut along the marked lines using your saw. Remember to wear your safety glasses and dust mask.
* For the sides, you’ll need to make angled cuts to create the trapezoid shape. If you’re using a miter saw, set the angle to achieve the desired taper. If you’re using a circular saw or hand saw, you can draw the angle on the wood and follow the line.
* Important: Double-check that the two side pieces are mirror images of each other!
3. Sand the Edges: Use 80-grit sandpaper to smooth any rough edges or splinters from the cutting process. This will make the stool safer and easier to handle.
Assembling the Step Stool
Now comes the fun part – putting all the pieces together! We’ll use wood glue and screws to create a strong and durable step stool.
1. Attach the Sides to the Top Step:
* Apply a generous amount of wood glue to the top edge of one side piece.
* Position the side piece flush with the edge of the top step, ensuring it’s centered.
* Clamp the side piece to the top step to hold it in place.
* Pre-drill pilot holes through the top step and into the side piece. This will prevent the wood from splitting when you drive in the screws.
* Drive in the 1 1/4″ wood screws to secure the side piece to the top step.
* Repeat this process for the other side piece.
2. Attach the Sides to the Bottom Step:
* Apply wood glue to the bottom edge of one side piece.
* Position the bottom step flush with the edge of the side piece, ensuring it’s centered.
* Clamp the bottom step to the side piece.
* Pre-drill pilot holes and drive in the wood screws to secure the bottom step to the side piece.
* Repeat this process for the other side piece.
3. Add the Support Braces:
* These braces will add extra strength and stability to the step stool.
* Apply wood glue to the ends of one support brace.
* Position the brace between the two side pieces, underneath the top step. Make sure it’s centered and flush with the bottom edge of the top step.
* Clamp the brace in place.
* Pre-drill pilot holes and drive in the wood screws to secure the brace to the side pieces.
* Repeat this process for the second support brace, positioning it between the side pieces underneath the bottom step.
4. Let the Glue Dry: Allow the wood glue to dry completely according to the manufacturer’s instructions (usually 24 hours). This is crucial for a strong and lasting bond.
Sanding and Finishing
This is where we transform the rough step stool into a smooth, beautiful, and kid-friendly piece of furniture.
1. Sanding:
* Start with 120-grit sandpaper to smooth out any imperfections and blend the joints.
* Then, use 220-grit sandpaper for a final, smooth finish.
* Pay special attention to the edges and corners, rounding them slightly to make them safer for kids.
* Remember to wear your dust mask during sanding!
2. Priming (Optional):
* If you’re planning to paint the step stool, applying a primer first will help the paint adhere better and create a more even finish.
* Apply a thin, even coat of primer using a paintbrush or roller.
* Let the primer dry completely according to the manufacturer’s instructions.
* Lightly sand the primed surface with 220-grit sandpaper to remove any imperfections.
3. Painting or Staining:
* Choose a kid-friendly, non-toxic paint or stain in your desired color.
* Apply the paint or stain in thin, even coats, following the manufacturer’s instructions.
* Allow each coat to dry completely before applying the next.
* You may need to apply multiple coats to achieve the desired color and coverage.
4. Sealing (Optional):
* Applying a coat of polyurethane or varnish will protect the painted or stained surface from scratches, spills, and wear and tear.
* Choose a water-based polyurethane or varnish for easy cleanup and low odor.
* Apply the sealant in thin, even coats, following the manufacturer’s instructions.
* Allow each coat to dry completely before applying the next.
* Lightly sand the sealed surface with 320-grit sandpaper between coats for an ultra-smooth finish.
Adding Extra Touches (Optional)
Want to personalize your step stool even further? Here are a few ideas:
* Non-Slip Pads: Attach non-slip pads to the bottom of the legs to prevent the stool from sliding on hard floors.
* Personalized Design: Paint your child’s name or favorite characters on the step stool.
* Decorative Accents: Add decorative accents like stencils, decals, or wood carvings.
* Rounded Edges: Use a router with a rounding-over bit to create even smoother and safer edges.
Safety First!
Before letting your child use the step stool, double-check that all the screws are tight and that the stool is stable. Supervise your child when they’re using the step stool to prevent accidents.
And there you have it! A beautiful, sturdy, and safe step stool that your kids will love. Enjoy the satisfaction of building something with your own hands, and watch your little ones reach new heights!
Conclusion
So, there you have it! Creating your own DIY Kids Step Stool isn’t just a fun project; it’s a practical solution that empowers your little ones and adds a personal touch to your home. Forget those flimsy, mass-produced plastic stools that crack under pressure or the generic wooden ones that lack character. This DIY approach allows you to craft a sturdy, safe, and stylish step stool tailored to your child’s needs and your home’s aesthetic.
Why is this a must-try? Because it’s more than just a step stool. It’s an opportunity to bond with your child, teaching them valuable skills and fostering their creativity. It’s a chance to recycle materials, reducing waste and contributing to a more sustainable lifestyle. And most importantly, it’s a way to provide your child with a tool that helps them reach new heights, both literally and figuratively.
Think about the possibilities! You could paint the stool in their favorite colors, add their name or initials for a personalized touch, or even incorporate storage compartments for their toys or books. Consider using different types of wood for a unique look, or adding non-slip treads for extra safety. For a more whimsical design, you could shape the sides like animals or vehicles. The only limit is your imagination!
We’ve provided a solid foundation with this guide, but don’t be afraid to experiment and adapt the instructions to suit your specific needs and preferences. Perhaps you want to make a taller stool, or one with a wider base. Maybe you want to incorporate a handle for easier carrying. The beauty of DIY is that you have complete control over the final product.
This project isn’t just about building a step stool; it’s about building confidence, creativity, and connection. It’s about creating something tangible and useful with your own hands. It’s about showing your child that you care and that you’re willing to invest time and effort into making their lives a little easier and a little more fun.
We are confident that you’ll find this DIY project rewarding and enjoyable. So, gather your materials, roll up your sleeves, and get ready to create a DIY Kids Step Stool that your child will cherish for years to come.
We encourage you to try this DIY trick and share your experience with us! Post photos of your finished step stool on social media using #DIYKidsStepStool and tag us so we can see your amazing creations. We can’t wait to see what you come up with! Let us know in the comments below if you have any questions or tips to share with other readers. Your feedback is invaluable and helps us improve our guides for future DIY enthusiasts. Happy building!
Frequently Asked Questions (FAQ)
What tools do I absolutely need to build this step stool?
The essential tools include a saw (hand saw, circular saw, or jigsaw), a drill with various drill bits, a measuring tape, a pencil, sandpaper, clamps, and safety glasses. A square is also highly recommended for ensuring accurate cuts and assembly. While other tools can be helpful, these are the core items you’ll need to get the job done safely and effectively.
What type of wood is best for a kids step stool?
The best type of wood depends on your budget and desired aesthetic. Pine is a cost-effective and readily available option that’s easy to work with. However, it’s a softer wood and may be more prone to dents and scratches. Hardwoods like maple, oak, or birch are more durable and offer a more premium look, but they are also more expensive and require more effort to cut and sand. Plywood is another good option, especially for the stool’s platform, as it’s strong and resistant to warping. Consider using pressure-treated lumber if the stool will be used outdoors.
How can I make the step stool extra safe for my child?
Safety is paramount when building anything for children. First, ensure all edges and corners are rounded and sanded smooth to prevent splinters and injuries. Apply a non-toxic finish that’s safe for children and resistant to chipping. Add non-slip treads or rubber feet to the bottom of the stool to prevent it from sliding. Regularly inspect the stool for any signs of damage or wear and tear, and repair or replace it as needed. Always supervise your child when they are using the step stool, especially if they are very young.
What kind of finish should I use on the step stool?
Choose a non-toxic, child-safe finish that’s durable and easy to clean. Water-based paints and varnishes are generally a good choice, as they are low in VOCs (volatile organic compounds) and dry quickly. Milk paint is another natural and eco-friendly option. Avoid using finishes that contain lead or other harmful chemicals. Always follow the manufacturer’s instructions for application and drying times. Consider applying multiple coats of finish for added protection and durability.
Can I customize the step stool with different colors or designs?
Absolutely! Customization is one of the best parts of DIY. You can paint the stool in your child’s favorite colors, add stencils or decals, or even decoupage it with fabric or paper. Consider using chalkboard paint on one side so your child can draw on it. You can also personalize the stool with their name or initials. Get creative and let your child help with the decorating process to make it a truly unique and special piece.
How much weight can the step stool hold?
The weight capacity of the step stool depends on the type of wood used, the thickness of the wood, and the construction methods. As a general guideline, a well-built step stool made from solid wood should be able to hold at least 100 pounds. However, it’s always best to err on the side of caution and avoid exceeding the recommended weight limit. If you’re concerned about weight capacity, consider using thicker wood or adding extra supports to the stool’s frame.
How long will it take to build the step stool?
The time it takes to build the step stool depends on your skill level and the complexity of the design. A simple step stool can be completed in a few hours, while a more elaborate design may take a day or two. Be sure to factor in time for cutting, sanding, assembling, and finishing. It’s always better to take your time and do the job right than to rush and make mistakes.
What if I don’t have all the tools listed?
If you don’t have all the tools listed, you can try borrowing them from a friend or neighbor, renting them from a tool rental shop, or purchasing them online or at a hardware store. Alternatively, you can adapt the design to use tools that you already have. For example, you can use a hand saw instead of a circular saw, or a screwdriver instead of a drill. Just be sure to take extra care and attention to detail when using alternative tools.
Where can I find the materials for this project?
You can find the materials for this project at most hardware stores, lumber yards, or home improvement centers. You may also be able to find some of the materials online. Be sure to shop around to compare prices and find the best deals. Consider using recycled or reclaimed materials to save money and reduce waste.
What if I make a mistake during the building process?
Everyone makes mistakes, especially when learning new skills. Don’t get discouraged if you make a mistake during the building process. Simply take a deep breath, assess the situation, and try to fix it. You may be able to patch up a small mistake with wood filler or glue. If the mistake is more serious, you may need to replace the affected piece of wood. The important thing is to learn from your mistakes and keep trying.


Leave a Comment