

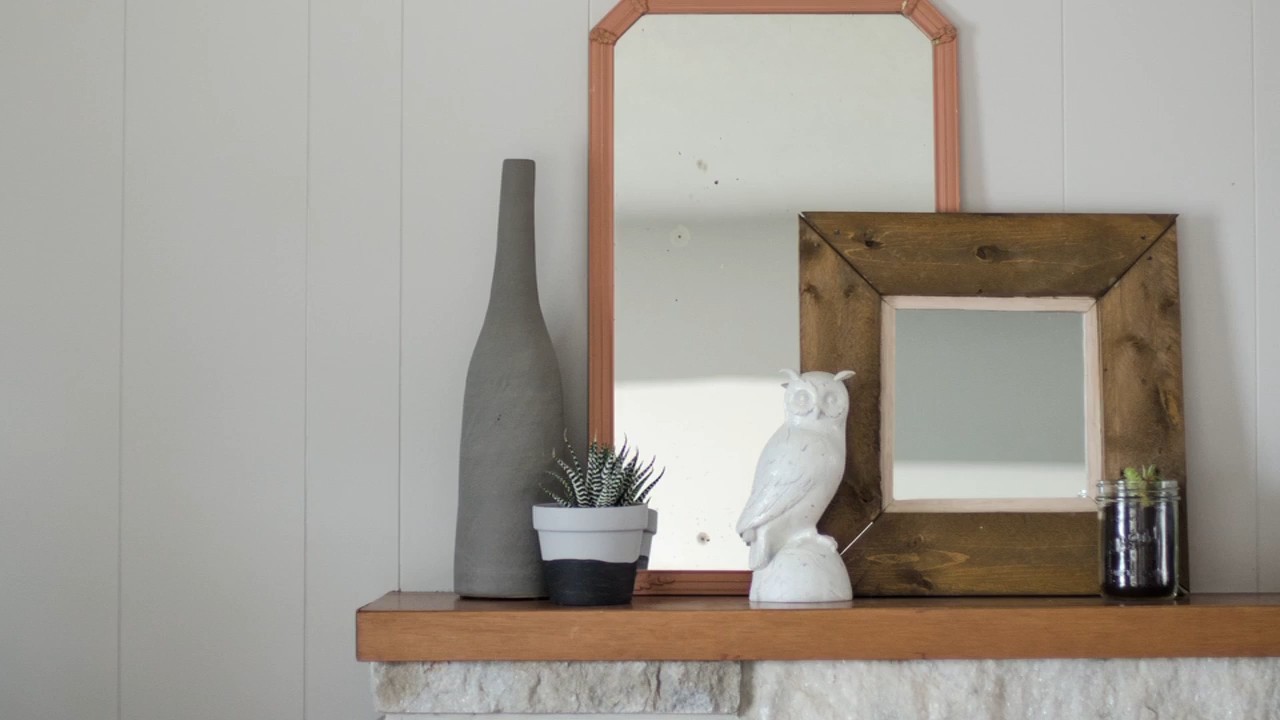
DIY Pallet Wood Mirror: Transform your space with rustic charm! Have you ever looked at a plain, boring mirror and thought, “This needs some serious personality”? I know I have! That’s why I’m so excited to share this fantastic DIY project that not only adds character to your home but also repurposes materials in a sustainable way.
Pallet wood, with its weathered texture and unique imperfections, has become a favorite among DIY enthusiasts for a good reason. Historically, pallets were simply functional tools for shipping and storage. Now, they’re being reimagined as everything from furniture to wall art, bringing a touch of industrial chic into our homes. This project taps into that trend, allowing you to create a stunning DIY Pallet Wood Mirror that reflects your personal style.
Why do you need this DIY trick in your life? Well, besides being incredibly budget-friendly, this project is a fantastic way to add a personalized touch to your décor. Store-bought mirrors can be expensive and often lack the unique character that a handmade piece offers. Plus, learning how to create your own DIY Pallet Wood Mirror empowers you to customize the size, shape, and finish to perfectly match your space. Let’s get started and turn those discarded pallets into a beautiful and functional piece of art!
DIY Pallet Wood Mirror: Rustic Charm for Your Home
Hey there, fellow DIY enthusiasts! Today, I’m super excited to share a project that’s close to my heart: creating a stunning mirror framed with reclaimed pallet wood. This project is not only budget-friendly but also adds a touch of rustic charm to any room. Plus, it’s a fantastic way to upcycle those old pallets that might otherwise end up in a landfill. Let’s get started!
Materials You’ll Need
Before we dive in, let’s gather all the necessary materials. Trust me, having everything on hand will make the process much smoother.
* A pallet (look for heat-treated pallets marked “HT” to avoid chemically treated ones)
* A mirror (the size depends on your preference; I used a 24×36 inch mirror)
* Safety glasses
* Work gloves
* Pry bar or pallet buster
* Hammer
* Circular saw or hand saw
* Measuring tape
* Pencil
* Sandpaper (various grits, from coarse to fine)
* Wood glue
* Clamps
* Wood screws (1 1/4 inch)
* Drill with drill bits
* Wood stain (optional)
* Polyurethane or sealant (optional)
* Mirror mastic or construction adhesive
* D-rings or picture hanging hardware
* Level
Section 1: Pallet Disassembly and Preparation
Okay, the first step is to break down the pallet and prepare the wood. This can be a bit labor-intensive, but it’s totally worth it!
1. Safety First! Put on your safety glasses and work gloves. Pallet wood can be splintery and dusty, so protection is key.
2. Disassemble the Pallet: Use your pry bar or pallet buster to carefully separate the planks from the pallet frame. Work slowly and methodically to avoid splitting the wood. If you’re using a hammer, gently tap the pry bar under the planks to loosen them.
3. Remove Nails and Staples: Once the planks are removed, use a hammer and nail punch to drive any remaining nails through the wood. You can also use pliers to pull out staples. Be thorough; you don’t want any sharp surprises later!
4. Inspect the Wood: Take a good look at each plank. Discard any pieces that are severely damaged, rotten, or have excessive splitting. Choose the best-looking planks for your mirror frame.
5. Clean the Wood: Use a stiff brush to remove any dirt, debris, or loose splinters from the wood. You can also use a damp cloth to wipe down the planks. Let them dry completely before moving on.
6. Cut the Planks to Size: Measure the dimensions of your mirror. You’ll need to cut the pallet planks to create the frame. I recommend adding a few inches to each side to allow for an overlap and a rustic look. For example, if your mirror is 24×36 inches, you might cut the top and bottom pieces to 30 inches and the side pieces to 42 inches.
* Important Tip: Measure twice, cut once! Accuracy is crucial for a professional-looking frame.
7. Sand the Wood: This is where you’ll transform the rough pallet wood into something beautiful. Start with a coarse grit sandpaper (like 80 grit) to remove any major imperfections and smooth out the surface. Then, gradually move to finer grits (like 120, 180, and finally 220 grit) to achieve a smooth, even finish.
* Sanding Tip: Sand with the grain of the wood to avoid scratching.
Section 2: Building the Mirror Frame
Now comes the fun part: assembling the frame!
1. Arrange the Planks: Lay out the cut planks on a flat surface in the arrangement you want for your frame. Experiment with different plank widths and orientations to find a look you love. I like to alternate the grain direction for a more visually interesting effect.
2. Apply Wood Glue: Apply a generous amount of wood glue to the edges of the planks that will be joined together.
3. Clamp the Frame: Use clamps to hold the planks tightly together while the glue dries. Make sure the frame is square by measuring the diagonals. They should be equal.
* Clamping Tip: Use corner clamps to ensure the frame stays square.
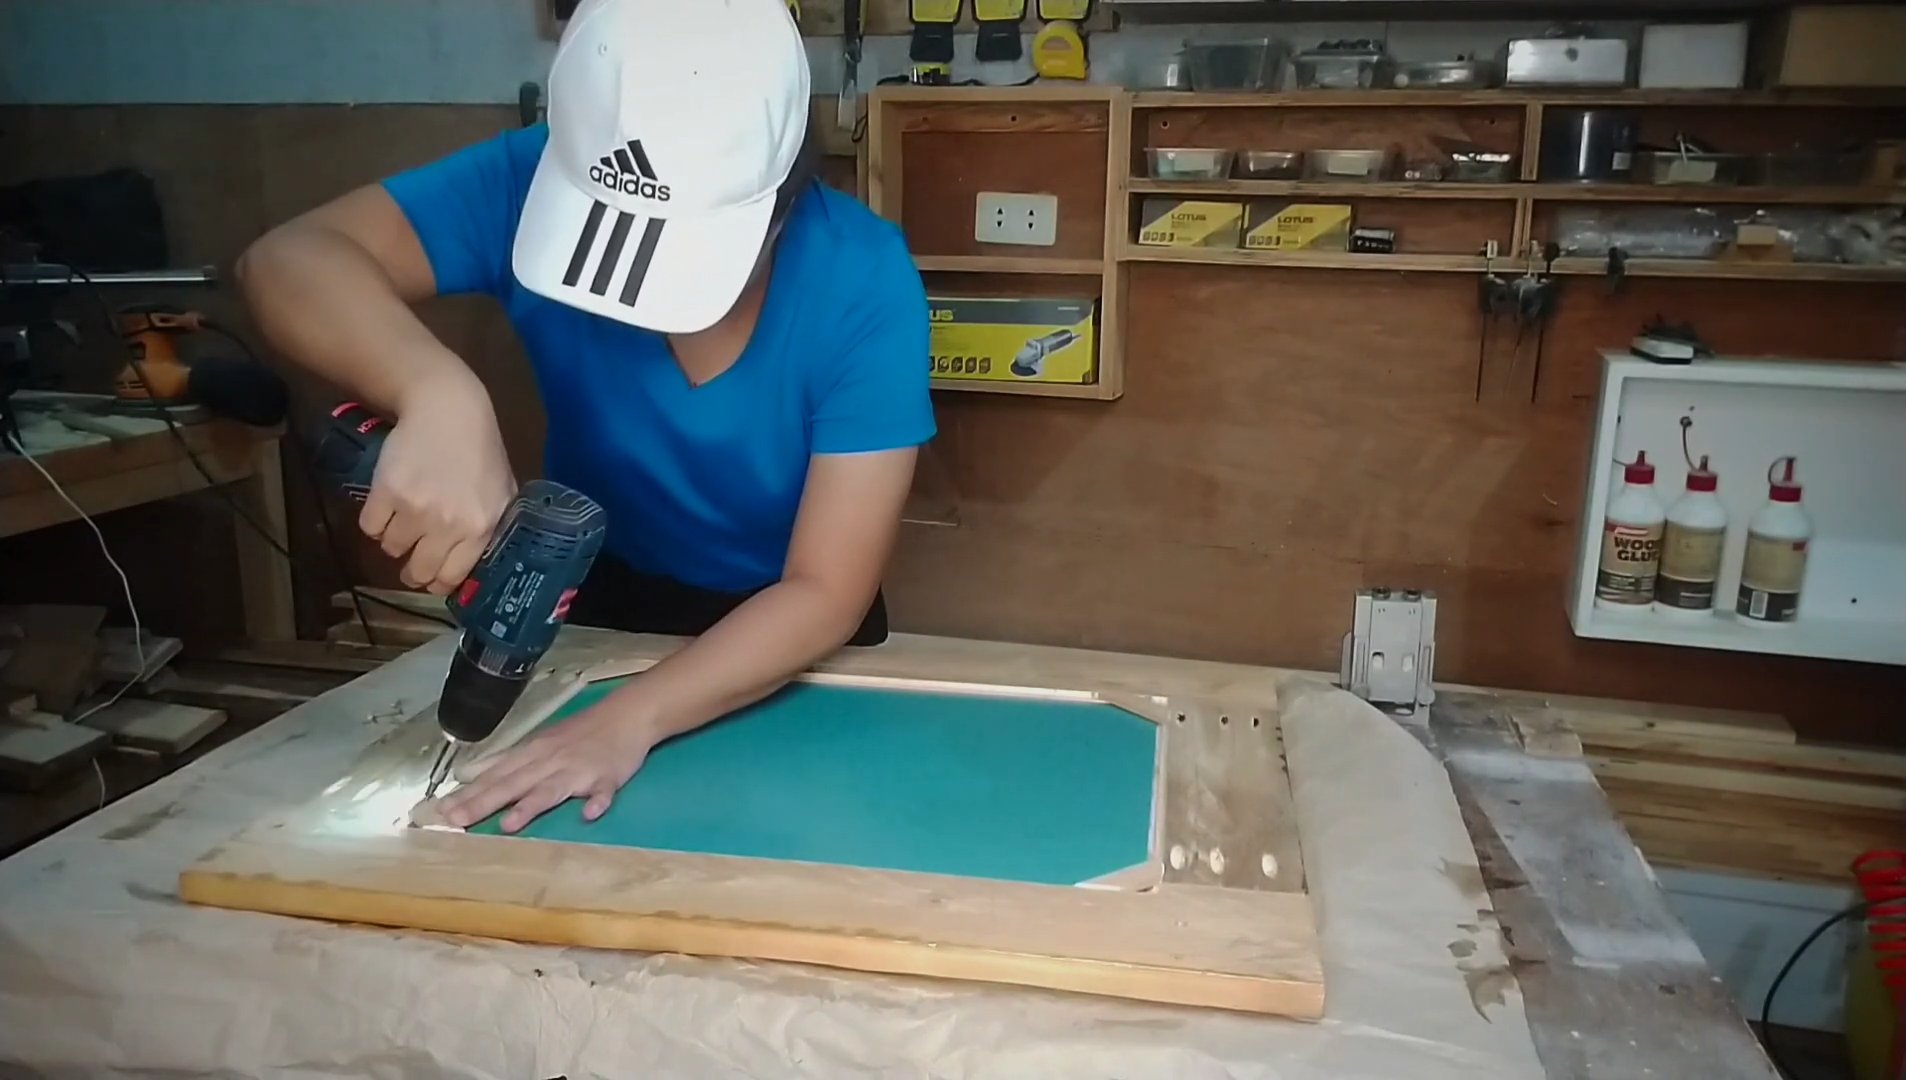
4. Reinforce with Screws: Once the glue has dried for at least 24 hours, reinforce the joints with wood screws. Pre-drill pilot holes to prevent the wood from splitting. Drive the screws in at an angle for maximum strength.
* Screwing Tip: Countersink the screws so they are flush with the surface of the wood.
5. Check for Squareness: Double-check that the frame is still square after adding the screws. Make any necessary adjustments before moving on.
Section 3: Finishing Touches and Mirror Installation
Almost there! Now it’s time to add the finishing touches and install the mirror.
1. Stain or Paint (Optional): If you want to change the color of the wood, now is the time to apply stain or paint. I personally love the natural look of pallet wood, so I often skip this step. But if you want a more polished or modern look, go for it!
* Staining Tip: Apply stain in thin, even coats and wipe off any excess.
2. Apply Sealant (Optional): To protect the wood and enhance its durability, apply a coat of polyurethane or sealant. This will also make the frame easier to clean.
* Sealing Tip: Apply sealant in a well-ventilated area and allow it to dry completely before handling the frame.
3. Attach the Mirror: This is a crucial step, so take your time and be careful. Apply mirror mastic or construction adhesive to the back of the mirror in a zigzag pattern.
4. Position the Mirror: Carefully center the mirror within the frame. Press it firmly against the wood and hold it in place for a few minutes to allow the adhesive to grab.
5. Secure the Mirror (Optional): For added security, you can use small pieces of wood or mirror clips to hold the mirror in place while the adhesive dries completely.
6. Let it Dry: Allow the adhesive to dry completely according to the manufacturer’s instructions. This usually takes at least 24 hours.
7. Attach Hanging Hardware: Once the adhesive is dry, attach D-rings or picture hanging hardware to the back of the frame. Make sure the hardware is strong enough to support the weight of the mirror.
* Hanging Tip: Use a level to ensure the mirror hangs straight.
8. Hang Your Masterpiece! Find the perfect spot for your new pallet wood mirror and hang it with pride. Step back and admire your handiwork!
Extra Tips and Considerations
* Pallet Selection: Not all pallets are created equal. Look for pallets that are in good condition and free from excessive damage or rot. Avoid pallets that have been treated with chemicals.
* Wood Variations: Pallet wood can vary in color and texture. Embrace these variations; they add to the rustic charm of the piece.
* Customization: Feel free to customize this project to your liking. You can add decorative elements, such as rope, metal accents, or painted designs.
* Safety: Always wear safety glasses and work gloves when working with pallet wood. Be careful when using power tools.
* Alternative Adhesives: If you don’t have mirror mastic, you can use a high-quality construction adhesive that is specifically designed for mirrors.
* Frame Design Variations: You can experiment with different frame designs. For example, you could create a frame with overlapping planks or a frame with a more intricate pattern.
* Mirror Size: The size of the mirror is entirely up to you. Choose a size that complements the space where you plan to hang the mirror.
* Distressing Techniques: If you want to add even more character to the wood, you can use distressing techniques, such as sanding edges, hammering dents, or applying a dry brush technique with paint.
* Sealing Options: Consider using a matte sealant to maintain the rustic look or a glossy sealant for a more polished finish.
* Hanging Location: Before hanging the mirror, consider the weight of the mirror and the type of wall you’re hanging it on. Use appropriate anchors for drywall or plaster walls.
I hope you enjoyed this DIY project! Creating this pallet wood mirror was a blast, and I’m thrilled with the rustic touch it adds to my home. Remember to have fun and let your creativity shine! Happy crafting!
Conclusion
So, there you have it! Transforming discarded pallet wood into a stunning, rustic mirror is not only achievable but also incredibly rewarding. This DIY pallet wood mirror project is more than just a craft; it’s an opportunity to inject personality and sustainable style into your home decor. Forget mass-produced, cookie-cutter mirrors – this project allows you to create a truly unique piece that reflects your individual taste and commitment to upcycling.
Why is this a must-try? Because it’s budget-friendly, environmentally conscious, and allows for unparalleled creative expression. You’re rescuing materials from landfills, saving money on expensive store-bought mirrors, and ending up with a conversation starter that guests will admire. The satisfaction of creating something beautiful and functional with your own hands is simply unmatched.
But the fun doesn’t stop there! Feel free to experiment with different stains and finishes to achieve your desired aesthetic. Want a more modern look? Try a sleek, dark stain and a minimalist frame design. Prefer a farmhouse vibe? Embrace the natural imperfections of the wood and opt for a whitewashed finish. You could even incorporate decorative elements like rope, metal accents, or painted designs to further personalize your creation. Consider adding small shelves to the bottom of the mirror for a functional and stylish touch, perfect for holding small plants or decorative items. Another variation could involve creating a mosaic effect by cutting the pallet wood into smaller pieces and arranging them in a unique pattern around the mirror.
Don’t be intimidated if you’re new to woodworking. This project is beginner-friendly, and the imperfections of the pallet wood actually add to its charm. Embrace the rustic aesthetic and don’t strive for absolute perfection. The beauty of this DIY project lies in its unique character and handmade appeal.
We wholeheartedly encourage you to give this DIY pallet wood mirror project a try. It’s a fantastic way to unleash your creativity, add a touch of rustic elegance to your home, and contribute to a more sustainable lifestyle. Once you’ve completed your masterpiece, we’d love to see it! Share your creations with us on social media using #DIYPalletMirror and inspire others to embark on their own upcycling adventures. We can’t wait to see the amazing and unique mirrors you create! Let us know what challenges you faced and what creative twists you added to the project. Your feedback will help other DIY enthusiasts and inspire even more innovative variations. So, grab your pallet wood, gather your tools, and get ready to transform something old into something beautiful!
Frequently Asked Questions (FAQ)
What kind of pallet wood should I use?
The best pallet wood for this project is heat-treated (HT) pallet wood. Avoid pallets marked with “MB” (methyl bromide), as this is a toxic fumigant. Look for pallets that are clean, dry, and free from excessive damage or rot. Hardwood pallets are generally more durable and aesthetically pleasing, but softwood pallets can also work well. Consider the overall look you’re aiming for when selecting your pallet wood. Remember to always wear gloves and a mask when handling pallet wood to protect yourself from splinters and dust.
How do I safely disassemble a pallet?
Disassembling a pallet can be tricky, but there are a few methods you can use. A reciprocating saw with a metal-cutting blade is often the most efficient way to cut through the nails holding the pallet together. You can also use a pry bar and hammer to carefully separate the boards, but this method can be more time-consuming and may result in some splitting or damage to the wood. There are also specialized pallet buster tools available that are designed to make disassembly easier and safer. Regardless of the method you choose, always wear safety glasses and gloves to protect yourself from flying debris and sharp edges.
What kind of mirror should I use?
You can use any size or shape of mirror that you prefer for this project. A standard rectangular or square mirror is a good starting point, but you could also use a round or oval mirror for a more unique look. Consider the size of your pallet wood frame when choosing your mirror. You can purchase mirrors at most home improvement stores or online retailers. You can also repurpose an old mirror from a thrift store or garage sale. If you’re cutting the mirror yourself, be sure to use appropriate safety precautions and tools.
What type of adhesive should I use to attach the mirror to the frame?
A construction adhesive specifically designed for mirrors is the best choice for attaching the mirror to the pallet wood frame. This type of adhesive is formulated to be safe for use on mirrors and will provide a strong, permanent bond. Avoid using adhesives that contain solvents, as these can damage the mirror’s reflective coating. Follow the manufacturer’s instructions carefully when applying the adhesive. You may also want to use temporary supports, such as painter’s tape or clamps, to hold the mirror in place while the adhesive dries.
How do I finish the pallet wood to protect it and enhance its appearance?
There are many different ways to finish pallet wood, depending on the look you want to achieve. You can use a stain to add color and depth to the wood, or you can use a clear sealant to protect the wood without altering its natural color. Polyurethane is a durable and water-resistant finish that is ideal for protecting the mirror from moisture. You can also use paint to create a more colorful and decorative finish. Before applying any finish, be sure to sand the pallet wood smooth to remove any rough edges or splinters. Always follow the manufacturer’s instructions when applying any finish, and allow it to dry completely before handling the mirror.
How do I hang the finished mirror?
The best way to hang your DIY pallet wood mirror will depend on its size and weight. For smaller, lighter mirrors, you can use heavy-duty D-rings and picture wire. Attach the D-rings to the back of the frame, making sure they are securely fastened. Then, thread the picture wire through the D-rings and hang the mirror on a sturdy hook or nail in the wall. For larger, heavier mirrors, you may need to use a French cleat system. This involves attaching a cleat to the back of the mirror and another cleat to the wall. The two cleats interlock to provide a secure and stable hanging solution. Always use appropriate wall anchors to ensure that the mirror is securely mounted to the wall.
What if my pallet wood has imperfections?
Embrace them! The imperfections in pallet wood are part of its rustic charm. Knots, nail holes, and variations in color and texture all add to the unique character of the finished mirror. If you want to minimize the appearance of imperfections, you can fill them with wood filler before sanding and finishing the wood. However, we encourage you to leave some of the imperfections visible to showcase the wood’s natural beauty and history.
Can I use this technique for other projects?
Absolutely! The techniques you learn while creating this DIY pallet wood mirror can be applied to a wide range of other projects. You can use pallet wood to build furniture, shelving, wall art, and more. The possibilities are endless! Once you’ve mastered the basics of working with pallet wood, you’ll be able to create all sorts of unique and sustainable home decor items.


Leave a Comment