

DIY plastic wash basin coffee table – sounds a bit crazy, right? But trust me, you’re about to discover a surprisingly chic and budget-friendly way to upcycle something you might have otherwise tossed out! I’m always on the lookout for creative ways to furnish my home without breaking the bank, and this project is a total game-changer.
Upcycling, in general, has a rich history. Think about the “make do and mend” mentality of past generations, turning old clothes into quilts or repurposing food containers. It’s a tradition rooted in resourcefulness and a deep respect for materials. Today, it’s even more relevant as we strive for sustainable living and reducing waste.
Let’s face it, buying new furniture can be expensive and often contributes to environmental problems. This DIY plastic wash basin coffee table project offers a fantastic alternative. Not only will you save money, but you’ll also create a unique conversation piece that reflects your personality and commitment to sustainability. Plus, who doesn’t love a good DIY project that’s both fun and functional? I’m excited to show you how to transform a simple plastic wash basin into a stylish and practical coffee table that will impress your friends and family!
Turn a Plastic Wash Basin into a Chic Coffee Table: A DIY Guide
Hey there, fellow DIY enthusiasts! Ever looked at a discarded plastic wash basin and thought, “There’s gotta be something more I can do with this?” Well, I have! Today, I’m going to walk you through transforming a simple (and often overlooked) plastic wash basin into a stylish and functional coffee table. It’s a surprisingly easy project that’s perfect for adding a unique touch to your living room, patio, or even a dorm room. Plus, it’s a fantastic way to upcycle and reduce waste. Let’s get started!
What You’ll Need
Before we dive in, let’s gather our supplies. This project is relatively inexpensive, and you might even have some of these items lying around already.
* **Plastic Wash Basin:** The star of the show! Choose one that’s sturdy and the size you want for your coffee table. Consider the color too, as it will influence the overall aesthetic. I’m using a large, round, blue one I found at a garage sale.
* **Wooden Table Legs (4):** You can find these at most hardware stores or online. Consider the height you want your coffee table to be when choosing the legs. Pre-tapered legs often look more sophisticated.
* **Mounting Plates (4):** These are essential for attaching the legs securely to the plastic basin. Make sure they are compatible with the type of legs you choose.
* **Screws:** You’ll need screws to attach the mounting plates to the basin and the legs to the mounting plates. Ensure you have the correct size and type for both plastic and wood. I recommend self-tapping screws for the plastic.
* **Drill:** A power drill is a must-have for this project.
* **Drill Bits:** You’ll need drill bits suitable for both plastic and wood.
* **Measuring Tape or Ruler:** Accuracy is key!
* **Pencil or Marker:** For marking measurements.
* **Sandpaper (Optional):** If your basin has any rough edges or you want to prep it for painting.
* **Paint or Spray Paint (Optional):** If you want to change the color of the basin. Choose a paint suitable for plastic.
* **Primer (Optional):** If you’re painting the basin, a primer will help the paint adhere better.
* **Protective Sealer (Optional):** To protect the painted surface and add durability.
* **Safety Glasses:** Always protect your eyes!
* **Gloves (Optional):** To protect your hands, especially if painting.
* **Clamps (Optional):** To hold the mounting plates in place while you screw them in.
Phase 1: Preparing the Wash Basin
This phase is all about getting the wash basin ready for its transformation.
1. **Clean the Basin:** Start by thoroughly cleaning the plastic wash basin with soap and water. Remove any dirt, grime, or stickers. Let it dry completely. This ensures proper adhesion if you plan to paint.
2. **Sand the Surface (Optional):** If the basin has any rough edges or you plan to paint it, lightly sand the surface with fine-grit sandpaper. This will create a smoother surface for painting and help the paint adhere better. Wipe away any sanding dust with a damp cloth.
3. **Painting the Basin (Optional):** If you want to change the color of the basin, now’s the time.
* Apply Primer: Apply a thin, even coat of plastic primer to the entire surface of the basin. Let it dry completely according to the manufacturer’s instructions. This is crucial for paint adhesion.
* Paint the Basin: Apply one or two coats of your chosen paint, allowing each coat to dry completely before applying the next. Use light, even strokes to avoid drips and runs. I’m going with a matte black spray paint for a modern look.
* Apply Sealer (Optional): Once the paint is completely dry, apply a protective sealer to protect the painted surface and add durability. This is especially important if the coffee table will be used outdoors.
Phase 2: Attaching the Mounting Plates
This is where we start turning the basin into a table!
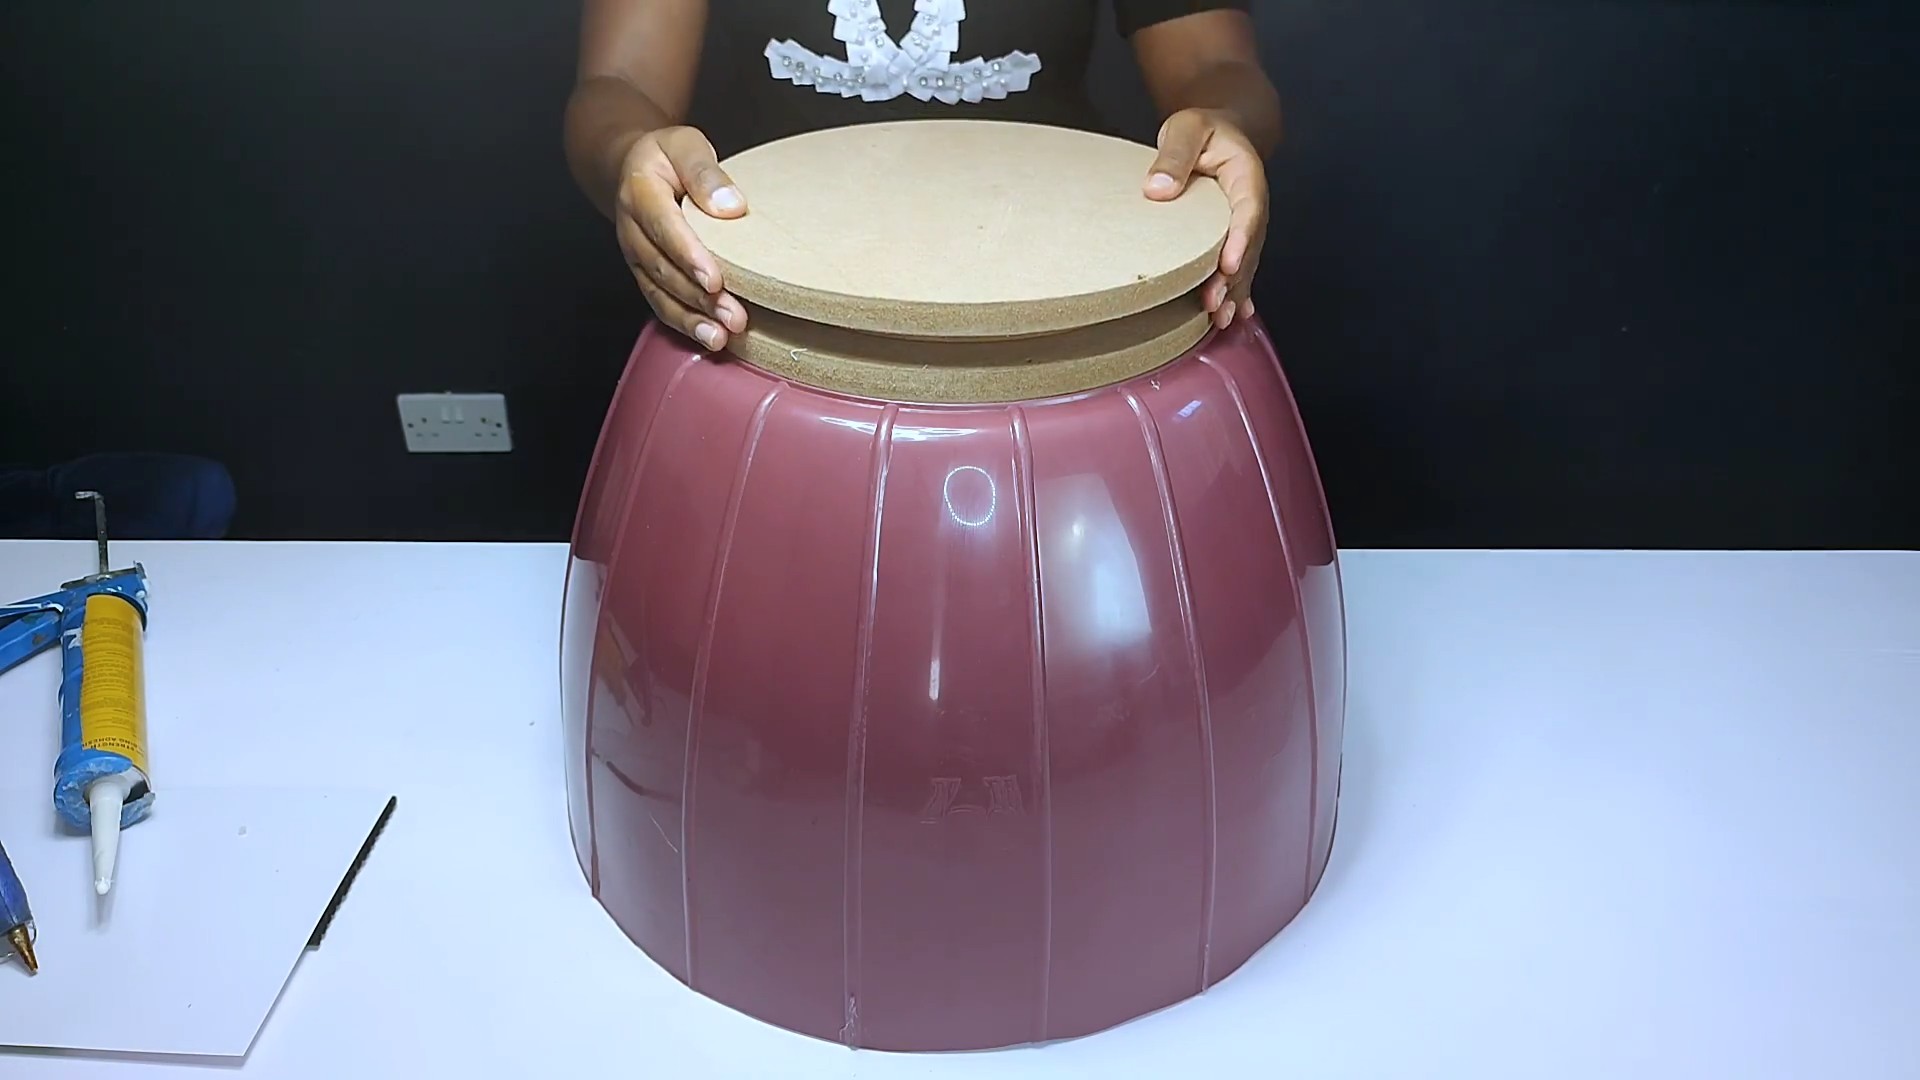
1. **Determine Leg Placement:** Flip the wash basin upside down. Decide where you want to position the legs. Evenly space them around the perimeter of the basin. Use a measuring tape to ensure they are equidistant from each other. This is important for stability.
2. Mark the Mounting Plate Positions:** Place the mounting plates at the desired locations. Use a pencil or marker to trace around the mounting plates. This will give you a guide for drilling.
3. Drill Pilot Holes:** Using a drill bit slightly smaller than the screws you’ll be using, drill pilot holes through the plastic at the marked locations inside the traced areas. Pilot holes prevent the plastic from cracking when you insert the screws. Be careful not to drill all the way through the basin!
4. Attach the Mounting Plates:** Align the mounting plates with the pilot holes you just drilled. Use screws to securely attach the mounting plates to the plastic basin. Make sure the screws are tight, but don’t overtighten them, as this could strip the plastic. Clamps can be helpful here to hold the plates in place while you screw them in.
Phase 3: Attaching the Table Legs
Almost there! This is the final step in creating your coffee table.
1. Attach the Legs to the Mounting Plates:** Screw the wooden table legs into the mounting plates. Make sure they are securely attached and tightened.
2. Check for Stability:** Flip the coffee table right-side up. Check to make sure it’s stable and doesn’t wobble. If it does, you may need to adjust the legs or mounting plates.
Phase 4: Finishing Touches (Optional)
These are some extra steps you can take to personalize your coffee table.
1. Add a Glass Top:** For a more sophisticated look, consider adding a custom-cut glass top to the coffee table. This will also protect the painted surface and make it easier to clean.
2. Add Decorative Elements:** You can add decorative elements to the inside of the basin, such as plants, stones, or fairy lights. This will add a personal touch to your coffee table.
3. Protect the Legs:** Add felt pads to the bottom of the legs to protect your floors from scratches.
Tips and Tricks
* Choose the Right Basin:** Opt for a basin made of thicker, more durable plastic for better stability.
* Pre-Drill Everything:** Always pre-drill pilot holes to prevent the plastic from cracking.
* Use the Right Screws:** Use self-tapping screws for attaching the mounting plates to the plastic basin.
* Don’t Overtighten:** Be careful not to overtighten the screws, as this could strip the plastic or wood.
* Get Creative with Paint:** Experiment with different colors and painting techniques to create a unique look. Consider using stencils or adding decorative patterns.
* Consider the Height:** Think about the height of your sofa or chairs when choosing the height of the table legs.
* Safety First:** Always wear safety glasses when drilling and sanding.
Troubleshooting
* Screws Won’t Stay in the Plastic:** If the screws are stripping the plastic, try using slightly longer screws or adding a small amount of glue to the pilot holes before inserting the screws.
* Table is Wobbly:** If the table is wobbly, check to make sure the legs are evenly spaced and securely attached. You may need to adjust the legs or mounting plates.
* Paint is Peeling:** If the paint is peeling, make sure you properly prepped the surface by sanding and applying primer. Use a paint specifically designed for plastic.
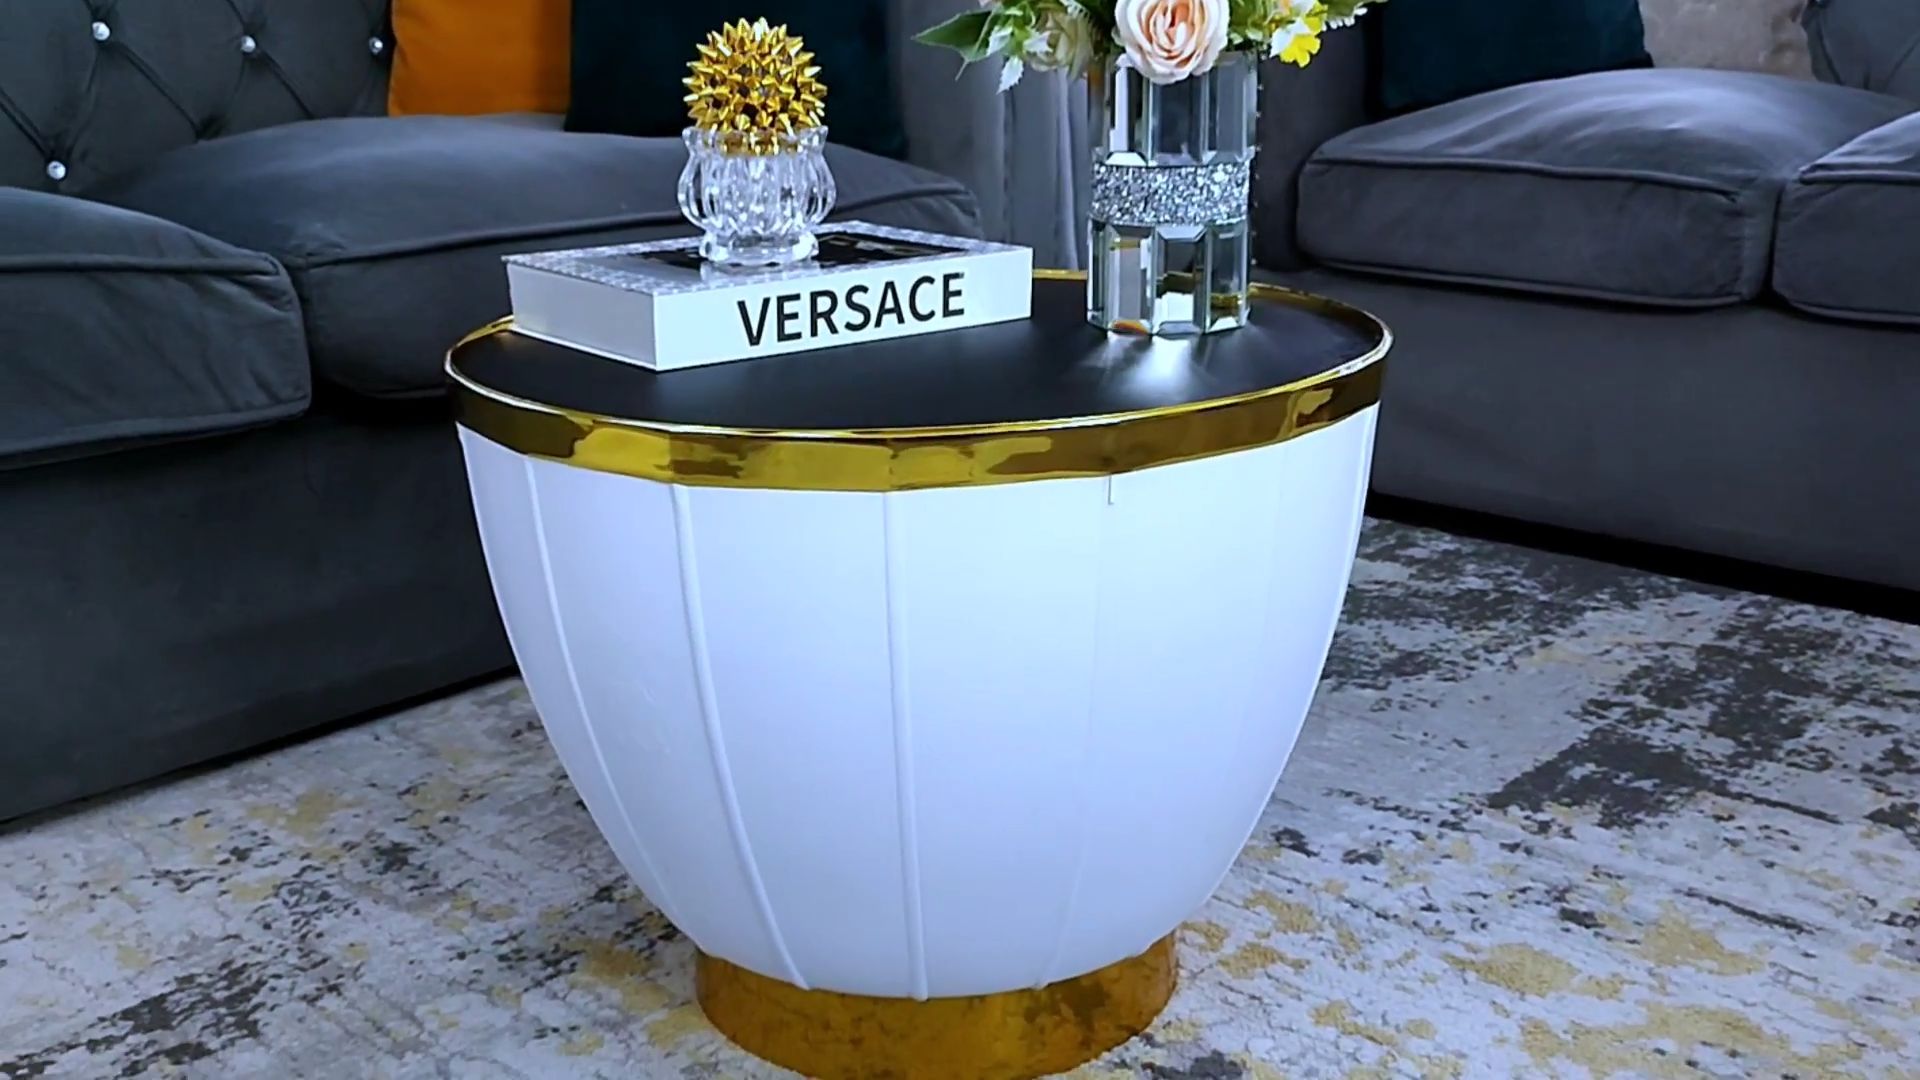
And there you have it! You’ve successfully transformed a simple plastic wash basin into a stylish and functional coffee table. I hope you enjoyed this DIY project as much as I did. Now, go ahead and show off your creation to your friends and family! Remember to have fun and get creative. Happy crafting!
Conclusion
So, there you have it! Transforming an old plastic wash basin into a stylish and functional coffee table is not just a clever upcycling project; it’s a testament to the power of creativity and resourcefulness. This DIY plastic wash basin coffee table project offers a unique blend of affordability, sustainability, and personalized design, making it a must-try for anyone looking to add a touch of character to their living space without breaking the bank.
Why is this a must-try? Because it addresses several key needs and desires. First, it provides a solution for those unwanted plastic wash basins that might otherwise end up in a landfill. Second, it offers a budget-friendly alternative to expensive store-bought coffee tables. Third, it allows you to express your individual style and create a piece of furniture that is truly one-of-a-kind. And finally, it’s a fun and rewarding project that you can complete in a weekend!
But the beauty of this DIY project lies in its versatility. Feel free to experiment with different colors, patterns, and finishes to match your existing decor. Consider adding mosaic tiles to the tabletop for a more intricate and artistic look. You could also incorporate storage by adding a shelf inside the basin or attaching small baskets to the sides. For a more rustic feel, try using reclaimed wood for the legs. If you’re feeling adventurous, you could even create a multi-tiered coffee table by stacking several wash basins of different sizes.
Don’t be afraid to get creative and personalize your DIY plastic wash basin coffee table to reflect your unique taste and style. The possibilities are endless!
We encourage you to give this project a try. It’s a fantastic way to reduce waste, save money, and create a beautiful and functional piece of furniture for your home. And most importantly, we want to hear about your experience! Share your photos and stories with us in the comments below. Let us know what variations you tried, what challenges you faced, and what you learned along the way. Your feedback will not only inspire others but also help us improve this DIY guide for future readers. So, grab that old plastic wash basin, gather your supplies, and get ready to transform it into a stunning coffee table that will be the envy of all your friends! We can’t wait to see what you create!
Frequently Asked Questions (FAQ)
What kind of plastic wash basin is best for this project?
Ideally, you want a sturdy plastic wash basin that is in relatively good condition. Avoid basins that are cracked or severely damaged, as they may not be able to support the weight of the tabletop and legs. The size of the basin will depend on your desired coffee table dimensions. Larger basins will result in larger coffee tables, while smaller basins will create more compact tables. Consider the thickness of the plastic as well; thicker plastic will generally be more durable. You can use any color basin, as you can always paint it to match your decor.
What type of legs should I use for the coffee table?
The choice of legs depends on the style you’re going for and your budget. Wooden legs are a popular option, as they are readily available and can be easily painted or stained. Metal legs offer a more modern and industrial look. You can purchase pre-made table legs from hardware stores or online retailers. Alternatively, you can create your own legs using wood, metal pipes, or even repurposed materials. Consider the height of the legs as well; standard coffee table height is typically between 16 and 18 inches. Make sure the legs are strong enough to support the weight of the tabletop and anything you plan to place on the coffee table.
How do I attach the legs to the plastic wash basin?
There are several ways to attach the legs to the plastic wash basin. One common method is to use screws and washers. Drill pilot holes through the bottom of the basin and into the legs, then secure them with screws and washers. Make sure the screws are long enough to provide a secure hold but not so long that they poke through the top of the basin. Another option is to use construction adhesive. Apply a generous amount of adhesive to the bottom of the legs and press them firmly onto the basin. Allow the adhesive to dry completely before using the coffee table. For added stability, you can also use both screws and adhesive.
What kind of tabletop should I use?
The tabletop can be made from a variety of materials, depending on your desired look and budget. Wood is a popular choice, as it is durable and can be easily customized. You can use a solid piece of wood or create a tabletop from reclaimed wood planks. Glass is another option, offering a sleek and modern look. You can purchase a pre-cut glass tabletop or have one custom-made. Other options include metal, tile, or even a mosaic made from broken dishes or glass. Consider the size and shape of the tabletop as well; it should be proportional to the size of the wash basin.
How do I finish the coffee table?
The finishing touches will depend on the materials you used and the look you’re going for. If you used wood for the tabletop or legs, you can paint, stain, or varnish it to protect it and enhance its appearance. If you used metal, you can paint it or leave it unfinished for a more industrial look. You can also add decorative elements, such as stencils, decals, or mosaic tiles. Consider adding a sealant to the tabletop to protect it from spills and stains. Finally, make sure all screws are tightened and all surfaces are smooth and free of sharp edges.
Is this coffee table durable enough for everyday use?
The durability of the coffee table will depend on the materials you used and the quality of your construction. If you used sturdy materials and followed the instructions carefully, the coffee table should be durable enough for everyday use. However, it’s important to avoid placing excessive weight on the table or subjecting it to rough treatment. Regularly inspect the table for any signs of damage and make repairs as needed. With proper care, your DIY plastic wash basin coffee table should provide years of enjoyment.
Can I use this DIY trick for other furniture projects?
Absolutely! The principles of this DIY project can be applied to a variety of other furniture projects. You can use plastic wash basins to create side tables, plant stands, or even storage containers. The key is to be creative and think outside the box. Consider the size, shape, and durability of the basin, and choose materials and construction methods that are appropriate for the intended use. With a little imagination, you can transform unwanted plastic wash basins into a variety of functional and stylish pieces of furniture.


Leave a Comment