

DIY Raffia Wall Hanging: Ready to transform your living space with a touch of bohemian charm? I’m so excited to share this incredibly easy and rewarding DIY project with you! Forget expensive store-bought decor; we’re diving into the world of crafting a stunning raffia wall hanging that will add texture, warmth, and personality to any room.
The art of weaving and fiber art has been around for centuries, with different cultures using natural materials like raffia to create everything from baskets and mats to intricate wall decorations. Raffia, derived from the raffia palm tree, is a sustainable and versatile material that brings a natural, earthy vibe to any space. Think of it as bringing a little piece of the tropics indoors!
In today’s fast-paced world, creating something with your own hands is incredibly therapeutic. This DIY raffia wall hanging project is not only a fun and creative outlet, but it’s also a fantastic way to personalize your home and express your unique style. Plus, it’s a budget-friendly alternative to pricey art pieces. Who doesn’t love saving money while creating something beautiful? So, grab your raffia, and let’s get crafting! I promise, you’ll be amazed at how simple and satisfying this project is.
DIY Raffia Wall Hanging: A Boho Dream Come True!
Hey there, fellow crafters! I’m so excited to share this super fun and surprisingly easy DIY project with you: a gorgeous raffia wall hanging! It’s the perfect way to add a touch of bohemian flair to any room, and trust me, it’s way more affordable than buying one from a store. Plus, you get the satisfaction of saying, “I made that!”
Here’s what we’ll be covering:
* Materials You’ll Need: A complete list of everything you need to gather before you start.
* Preparing the Base: Getting your dowel rod or branch ready for the raffia.
* Creating the Raffia Bundles: The secret to a full and textured look.
* Attaching the Raffia: Step-by-step instructions for knotting the raffia onto the base.
* Trimming and Shaping: Giving your wall hanging its final, polished look.
* Adding Embellishments (Optional): Taking your creation to the next level with beads, feathers, or other fun details.
Let’s dive in!
Materials You’ll Need
Okay, before we get started, let’s make sure you have everything you need. This is my go-to list, but feel free to get creative and substitute materials based on what you have on hand or what fits your personal style.
* Raffia: This is the star of the show! You can find raffia in natural colors or dyed in a variety of shades. I usually buy a large bundle because I tend to get carried away with these projects. You can find it at most craft stores or online.
* Dowel Rod or Branch: This will be the base of your wall hanging. A wooden dowel rod is a classic choice, but I also love using a cool-looking branch I find on a nature walk. Just make sure it’s clean and dry! The length will depend on how wide you want your wall hanging to be. I usually go for something between 12 and 24 inches.
* Scissors: A good pair of sharp scissors is essential for trimming the raffia.
* Measuring Tape or Ruler: This will help you cut the raffia to the desired length.
* Yarn or Twine: For hanging your masterpiece! Choose a color that complements your raffia.
* Comb or Brush: This is optional, but it can help to separate the raffia strands and create a fluffier texture.
* Embellishments (Optional): Beads, feathers, shells, macrame cord – anything you want to add a personal touch!
* Hot Glue Gun (Optional): For attaching embellishments securely.
Preparing the Base
This step is pretty straightforward, but it’s important to get it right.
1. Clean Your Branch (If Using): If you’re using a branch, make sure to clean it thoroughly with soap and water. Let it dry completely before moving on. You might even want to sand it down a bit to remove any rough edges.
2. Sand Your Dowel Rod (Optional): If you’re using a dowel rod, you can lightly sand it to make it smoother. This isn’t strictly necessary, but it can give it a more polished look.
3. Decide on the Hanging Method: Before you start attaching the raffia, decide how you want to hang your wall hanging. You can tie yarn or twine to either end of the dowel rod or branch, creating a loop for hanging. Make sure the knots are secure! I usually double-knot them just to be safe.
Creating the Raffia Bundles
This is where the magic happens! The size and thickness of your raffia bundles will determine the overall look of your wall hanging.
1. Decide on Your Raffia Length: Think about how long you want your wall hanging to be. Double that length, and add a few extra inches for good measure. This is the length you’ll cut your raffia strands. For example, if you want your wall hanging to be 18 inches long, cut your raffia strands to 36 inches (plus a few extra).
2. Cut the Raffia: Using your scissors and measuring tape or ruler, cut a bunch of raffia strands to the desired length. I usually cut a large batch at once to save time.
3. Create the Bundles: Gather a handful of the cut raffia strands. The number of strands you use will determine the thickness of your bundles. I like to experiment with different thicknesses to create a more textured look. Just make sure each bundle has roughly the same number of strands.
Attaching the Raffia
Now for the fun part – attaching the raffia to your base! I’m going to show you my favorite knotting technique, which is super easy and creates a beautiful, secure hold.
1. Fold the Bundle in Half: Take one of your raffia bundles and fold it in half, creating a loop at the top.
2. Position the Loop: Place the loop behind the dowel rod or branch, with the ends of the raffia bundle hanging down in front.
3. Bring the Ends Through the Loop: Reach through the loop from the front and grab the ends of the raffia bundle. Pull the ends through the loop, creating a knot around the dowel rod or branch.
4. Tighten the Knot: Gently pull the ends of the raffia bundle downwards to tighten the knot. Make sure the knot is snug but not too tight, as you don’t want to damage the raffia.
5. Repeat: Repeat steps 1-4 with the remaining raffia bundles, working your way across the dowel rod or branch. I like to pack the bundles close together to create a full and dense look. You can also vary the spacing between the bundles to create different patterns.
6. Maintain Consistency: Try to keep the knots consistent as you go. This will help to create a more uniform and professional-looking wall hanging.
7. Check for Gaps: As you’re attaching the raffia, periodically check for any gaps or sparse areas. If you find any, simply add more raffia bundles to fill them in.
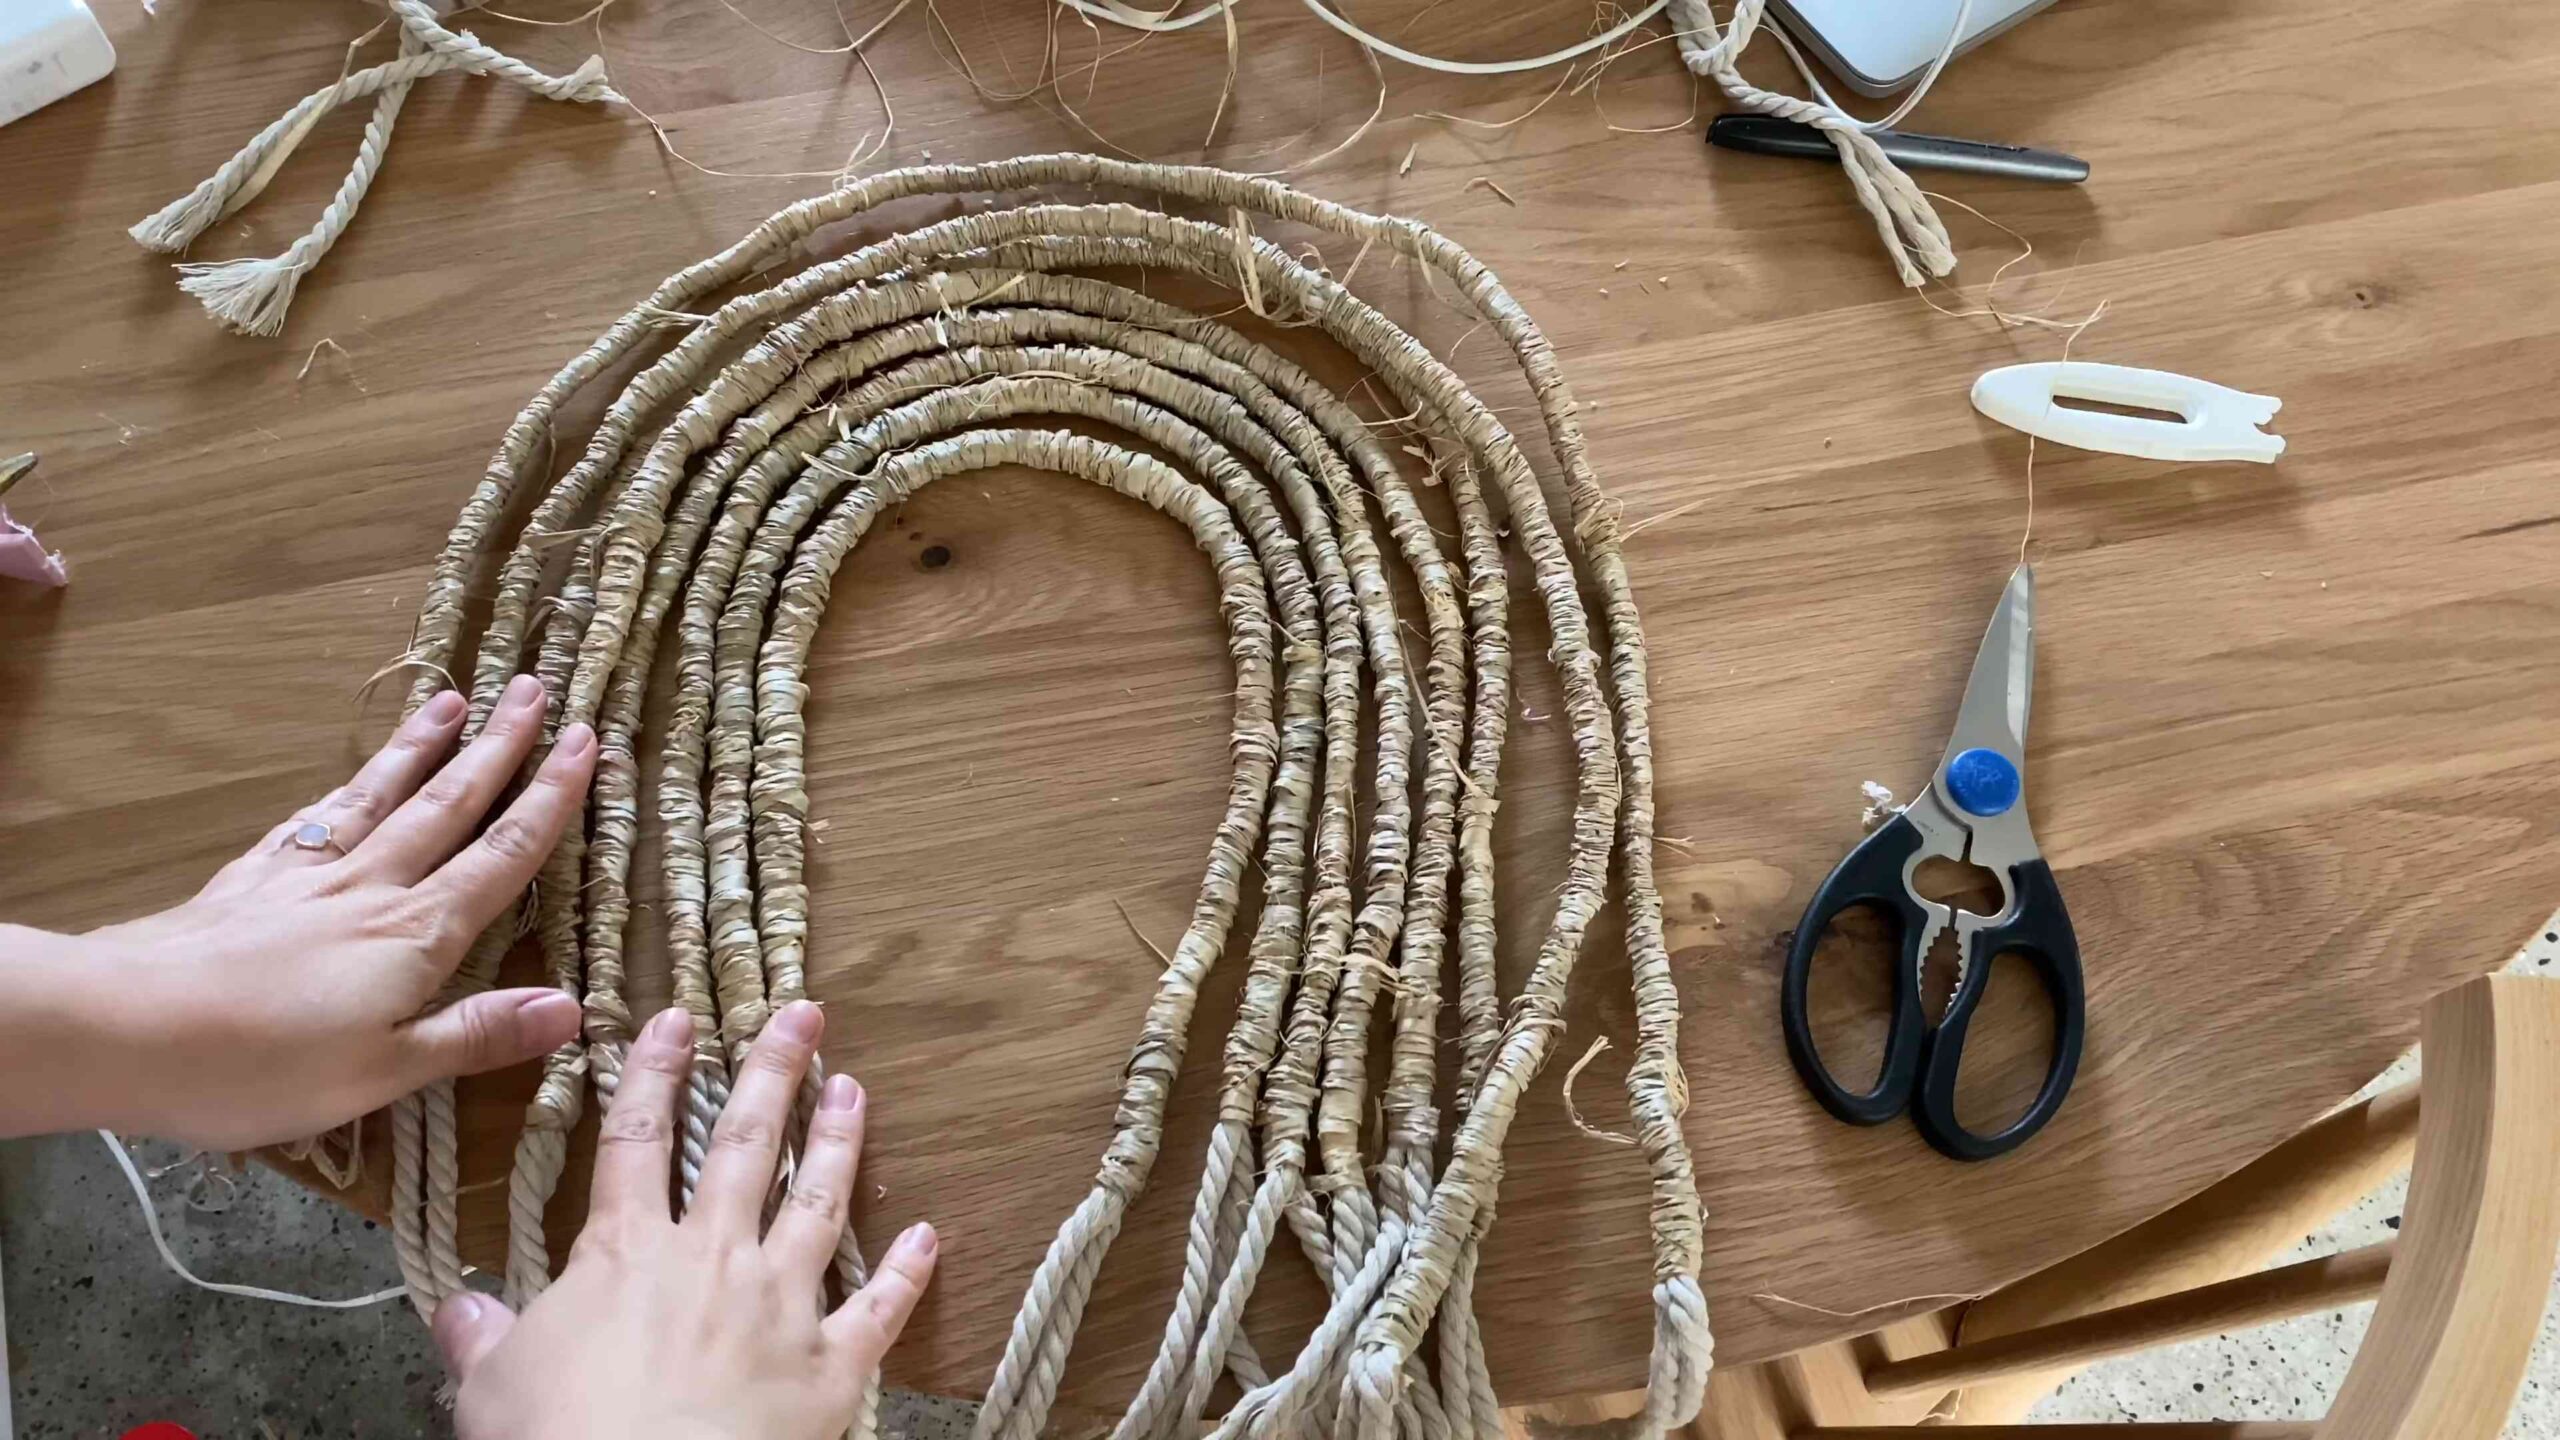
Trimming and Shaping
This is where you get to customize the shape and style of your wall hanging!
1. Hang Your Wall Hanging: Hang your wall hanging on a wall or door so you can see it from a distance. This will help you get a better sense of the overall shape and balance.
2. Trim the Raffia: Using your scissors, trim the raffia to the desired length and shape. You can create a straight line, an angled line, a curved line, or any other shape you can imagine! I personally love the look of a slightly uneven, organic shape.
3. Create Layers (Optional): You can create layers by trimming the raffia at different lengths. This will add depth and dimension to your wall hanging.
4. Comb or Brush the Raffia (Optional): If you want to create a fluffier texture, use a comb or brush to gently separate the raffia strands. This will also help to remove any knots or tangles.
5. Refine the Shape: Step back and take a look at your wall hanging. Make any final adjustments to the shape and trim any stray strands of raffia.
Adding Embellishments (Optional)
This is where you can really let your creativity shine! Adding embellishments is a great way to personalize your wall hanging and make it truly unique.
1. Gather Your Embellishments: Gather any beads, feathers, shells, macrame cord, or other embellishments you want to use.
2. Experiment with Placement: Before you start attaching anything, experiment with different placements to see what looks best. You can lay the embellishments on top of the raffia and move them around until you find a design you like.
3. Attach the Embellishments: Use a hot glue gun or other adhesive to attach the embellishments to the raffia. Be careful not to use too much glue, as it can seep through the raffia and create a messy look.
4. Secure the Embellishments: Make sure the embellishments are securely attached before you hang your wall hanging. You may need to add a little extra glue to some of the more delicate items.
5. Consider Different Techniques: You can also incorporate macrame knots, braids, or other techniques to add texture and interest to your wall hanging.
6. Less is More: Remember, sometimes less is more! Don’t feel like you have to add a ton of embellishments. A few well-placed details can be just as effective.
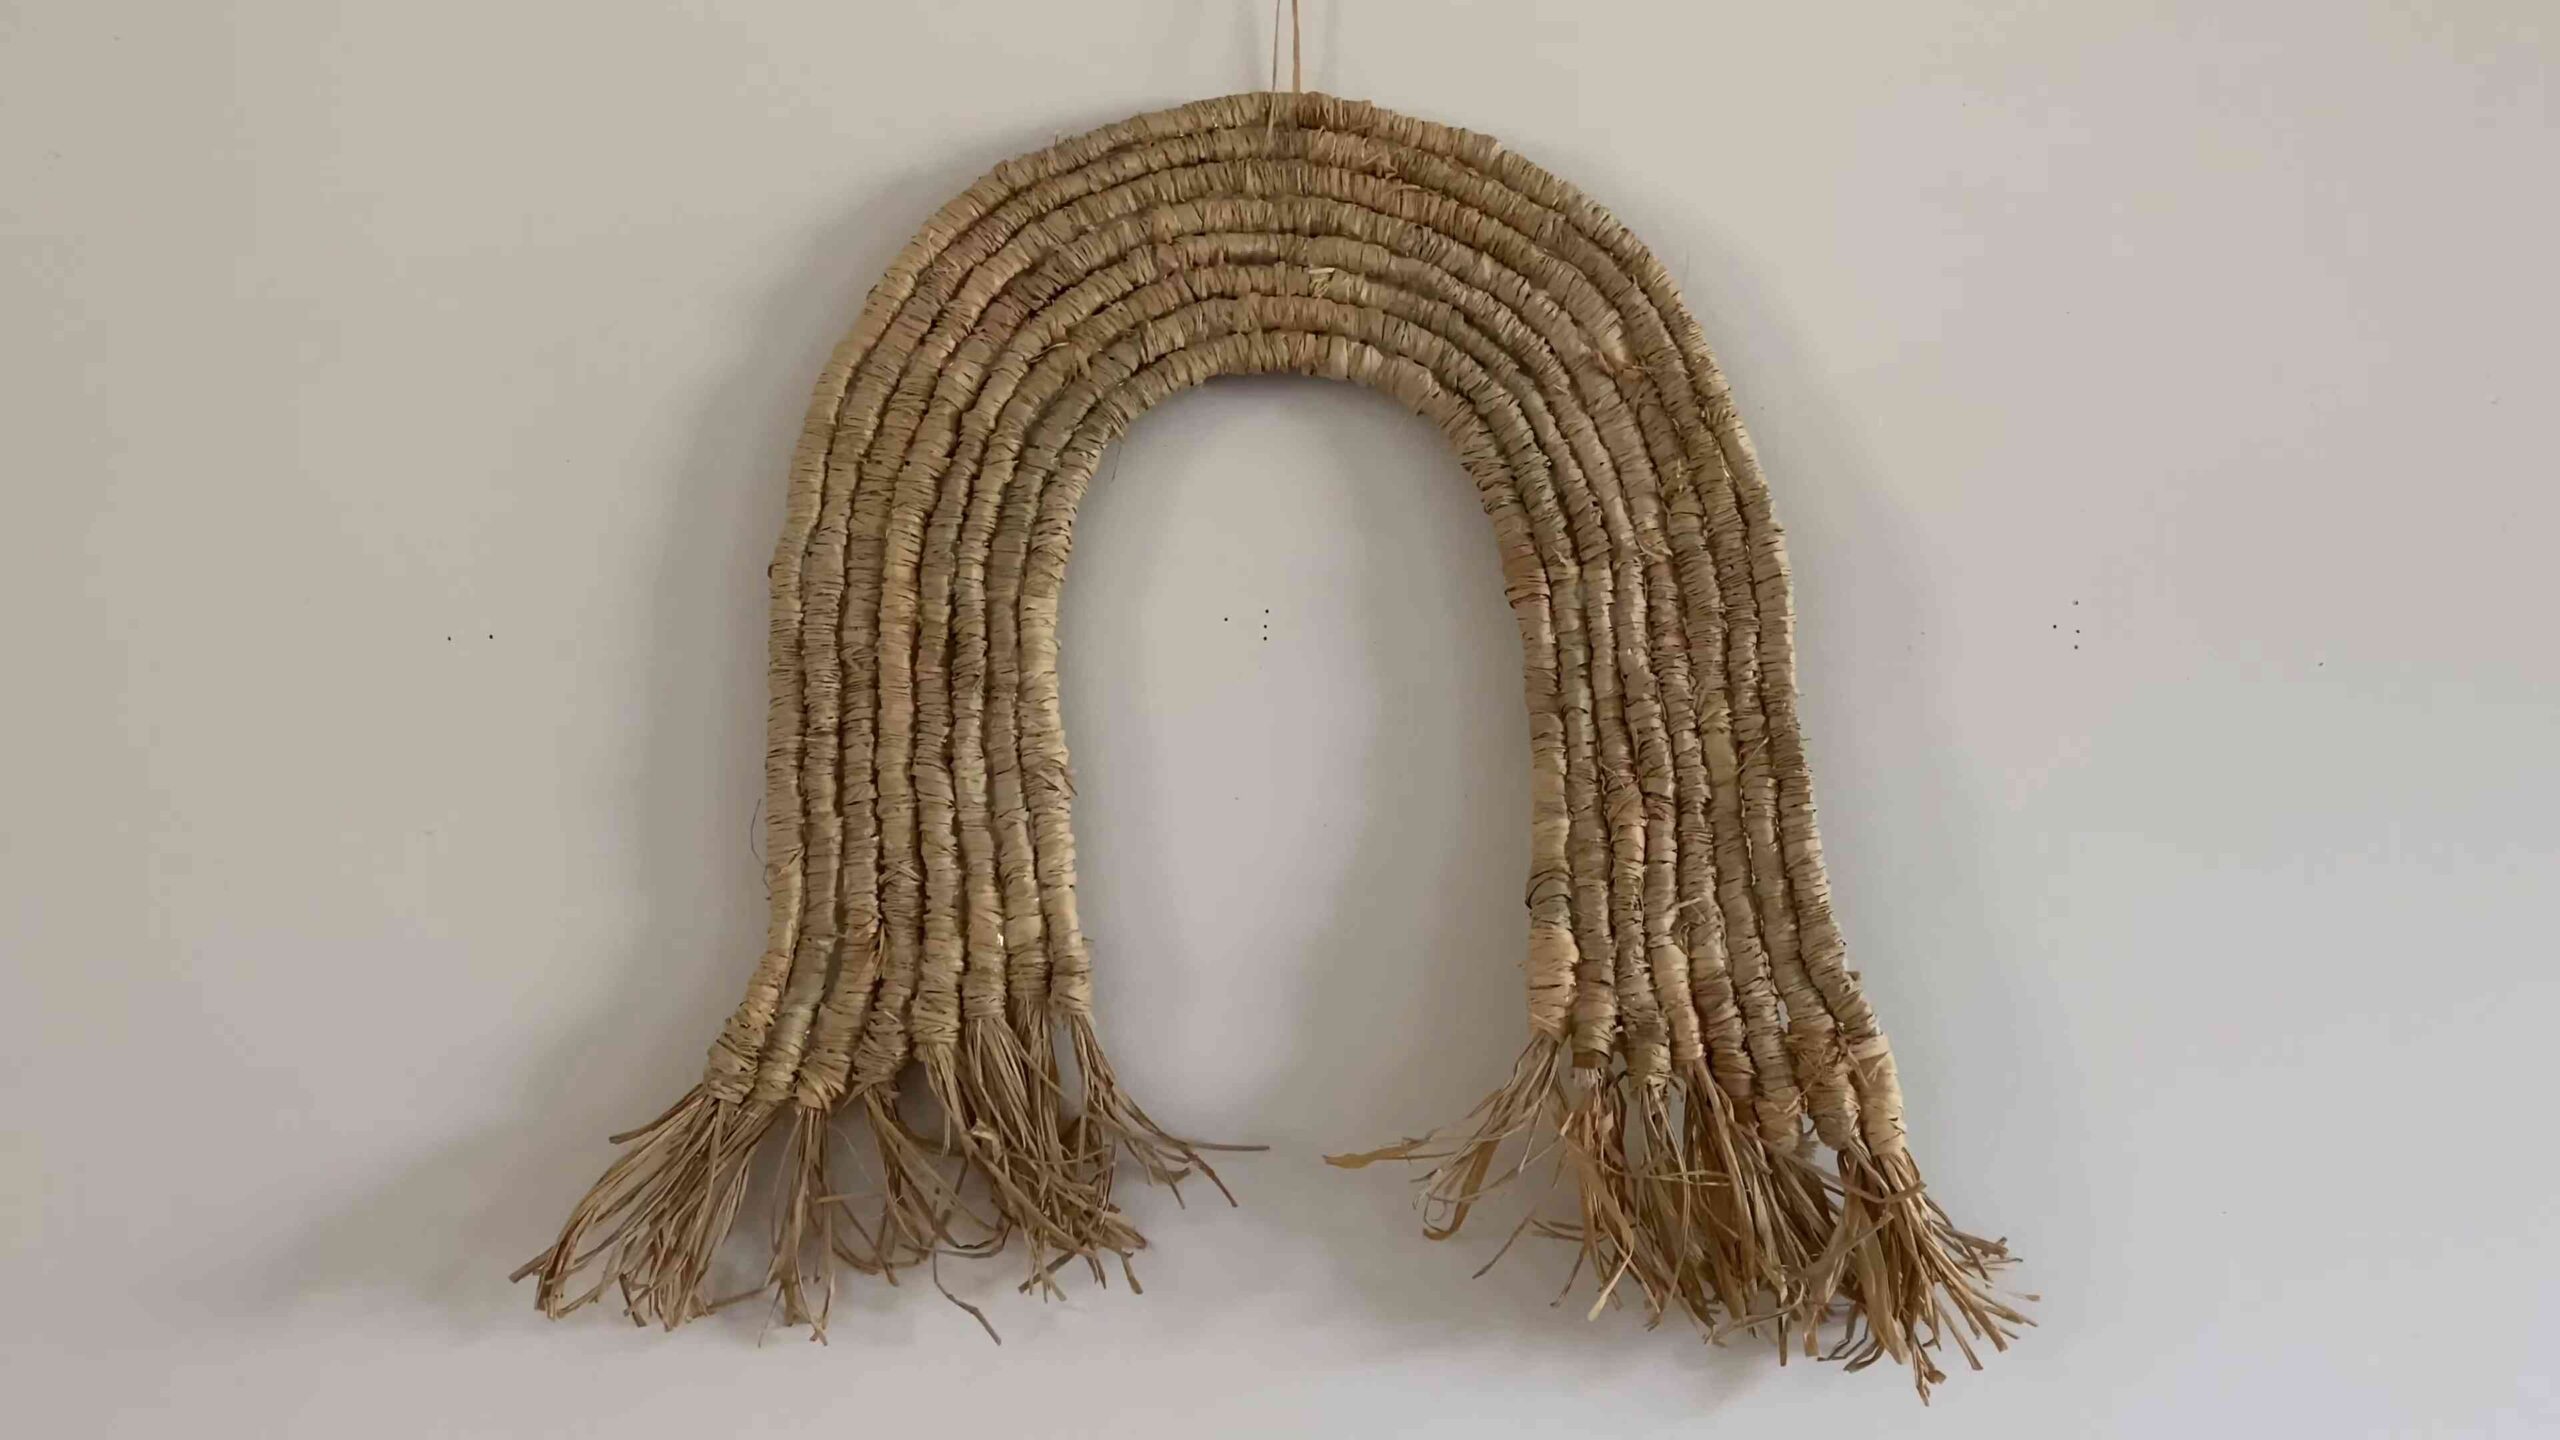
And there you have it! Your very own DIY raffia wall hanging. I hope you had as much fun making it as I did sharing the process with you. Now go find the perfect spot to hang your masterpiece and enjoy the bohemian vibes! Don’t forget to show off your creation
Conclusion
So, there you have it! Creating your own DIY raffia wall hanging is not just a craft project; it’s an opportunity to infuse your space with warmth, texture, and a touch of bohemian charm. We’ve walked you through the steps, from gathering your materials to adding those final, personalized flourishes. But why should you dedicate your time to this particular DIY endeavor?
Firstly, the sheer versatility of a raffia wall hanging is undeniable. It seamlessly complements a wide range of interior design styles, from minimalist and Scandinavian to coastal and eclectic. Whether you’re looking to add a focal point to your living room, a textural element to your bedroom, or a unique piece of art to your entryway, a raffia wall hanging delivers. It’s a statement piece that doesn’t scream for attention but subtly elevates the overall aesthetic of your space.
Secondly, the process itself is incredibly therapeutic. In a world dominated by screens and constant connectivity, engaging in a hands-on craft like this allows you to disconnect, focus, and tap into your creative energy. The repetitive motions of knotting and weaving can be surprisingly meditative, providing a welcome respite from the stresses of daily life. Plus, the satisfaction of creating something beautiful with your own two hands is truly rewarding.
Thirdly, and perhaps most importantly, crafting your own raffia wall hanging allows for complete customization. You’re not limited by the designs or sizes available in stores. You have the freedom to choose the colors, patterns, and overall aesthetic that perfectly matches your personal style and existing decor. Want to incorporate beads, feathers, or other embellishments? Go for it! The possibilities are truly endless.
Ready to take your DIY raffia wall hanging to the next level? Consider these variations:
* Color Blocking: Experiment with different shades of raffia to create bold color blocks or subtle ombre effects.
* Geometric Patterns: Incorporate geometric shapes into your design by strategically knotting and weaving the raffia.
* Mixed Media: Combine raffia with other natural materials like driftwood, macrame cord, or even dried flowers for a unique textural contrast.
* Miniature Wall Hangings: Create a series of smaller raffia wall hangings to create a gallery wall effect.
* Adding Lights: Weave in some fairy lights for a magical, ambient glow.
We truly believe that anyone can create a stunning raffia wall hanging, regardless of their crafting experience. It’s a project that’s both accessible and rewarding, and the end result is a beautiful piece of art that you can proudly display in your home.
So, what are you waiting for? Gather your supplies, unleash your creativity, and embark on this exciting DIY adventure. We’re confident that you’ll love the process and the finished product.
And most importantly, we want to see your creations! Share your DIY raffia wall hanging projects with us on social media using [Your Hashtag Here]. We can’t wait to see what you come up with! Let’s inspire each other and celebrate the beauty of handmade art.
FAQ
What kind of raffia should I use?
The best type of raffia for a wall hanging is natural raffia fiber. It’s durable, flexible, and has a beautiful, organic texture. You can find it in most craft stores or online. Avoid synthetic raffia, as it doesn’t have the same natural look and feel. Also, consider the thickness of the raffia. Thicker raffia will create a chunkier, more textured look, while thinner raffia will result in a more delicate and refined appearance. Experiment with different thicknesses to see what you prefer.
How much raffia will I need?
The amount of raffia you’ll need depends on the size and complexity of your wall hanging. As a general rule of thumb, it’s always better to have more than you think you’ll need. For a small wall hanging (approximately 12 inches wide and 24 inches long), you’ll likely need at least 100-200 grams of raffia. For a larger wall hanging, you may need significantly more. It’s also a good idea to purchase extra raffia in case you make mistakes or want to add more embellishments.
What kind of frame or support should I use?
You can use a variety of frames or supports for your raffia wall hanging. A wooden dowel is a popular choice, as it’s sturdy and easy to work with. You can also use a metal hoop, a branch of driftwood, or even a piece of reclaimed wood. The key is to choose a support that’s strong enough to hold the weight of the raffia and that complements the overall aesthetic of your design. Consider the size and shape of your wall hanging when selecting your support.
How do I attach the raffia to the frame?
There are several ways to attach the raffia to the frame. One common method is to use a lark’s head knot. To do this, fold a strand of raffia in half, create a loop, and then pass the loop over the frame. Pull the ends of the raffia through the loop to secure it. You can also use a simple overhand knot or a macrame knot. Experiment with different knots to see which one you prefer. Make sure to space the knots evenly along the frame to create a balanced and visually appealing design.
Can I dye the raffia?
Yes, you can definitely dye the raffia to create custom colors and patterns. Natural raffia takes dye very well. You can use fabric dye, natural dyes (like tea or coffee), or even food coloring. Follow the instructions on the dye package carefully. It’s always a good idea to test the dye on a small piece of raffia first to ensure that you achieve the desired color. Remember to wear gloves and protect your work surface when dyeing raffia.
How do I care for my raffia wall hanging?
Raffia is a natural fiber, so it’s important to care for your wall hanging properly to ensure its longevity. Avoid exposing it to direct sunlight or excessive moisture, as this can cause the raffia to fade or become brittle. To clean your wall hanging, gently dust it with a soft brush or vacuum it with a brush attachment. If necessary, you can spot clean it with a damp cloth and mild soap. Avoid using harsh chemicals or detergents.
Can I add other embellishments to my raffia wall hanging?
Absolutely! Adding embellishments is a great way to personalize your raffia wall hanging and make it truly unique. Consider incorporating beads, feathers, shells, driftwood, macrame cord, or even dried flowers. You can attach these embellishments using glue, thread, or by weaving them directly into the raffia. Let your creativity guide you and experiment with different textures and colors.
What if I make a mistake?
Don’t worry, mistakes happen! The beauty of DIY projects is that they’re often forgiving. If you make a mistake while knotting or weaving the raffia, simply undo the knot and try again. If you accidentally cut a piece of raffia too short, you can always add another piece. Don’t be afraid to experiment and learn from your mistakes. The most important thing is to have fun and enjoy the process.
Where can I find inspiration for my raffia wall hanging?
There are countless sources of inspiration for your raffia wall hanging. Browse online platforms like Pinterest and Instagram for ideas. Look at nature for inspiration – the colors, textures, and patterns of the natural world can be a great source of inspiration. Visit craft fairs and art galleries to see what other artists are creating. And most importantly, trust your own instincts and let your creativity guide you.
Leave a Comment