

DIY Sofa Stain Removal: Ah, the dreaded sofa stain! We’ve all been there, haven’t we? That moment of panic when a rogue coffee cup tips, a mischievous pet leaves its mark, or a child’s artistic endeavors stray from paper to your beloved couch. Before you resign yourself to a life of strategically placed throw pillows or, worse, contemplate replacing your entire sofa, take a deep breath. You’ve come to the right place!
For generations, resourceful homeowners have relied on clever tricks and homemade solutions to tackle household mishaps. Think of your grandmother’s secret cleaning recipes, passed down through families like treasured heirlooms. These weren’t just about saving money; they were about resourcefulness, sustainability, and taking pride in maintaining a beautiful home. And let’s be honest, professional cleaning services can be expensive, and sometimes, you just need a quick fix now. That’s where our DIY sofa stain removal guide comes in.
In this article, I’m going to share some of my favorite and most effective DIY sofa stain removal methods. We’ll explore everything from tackling common spills like wine and coffee to dealing with more stubborn stains like ink and grease. I’ll walk you through each step with easy-to-follow instructions and readily available household ingredients. So, ditch the expensive chemicals and get ready to reclaim your stain-free sofa! Let’s get started and bring your sofa back to its former glory!
DIY Sofa Stain Removal: A Comprehensive Guide
Hey there! Spilled something on your beloved sofa? Don’t panic! We’ve all been there. Before you resign yourself to living with that unsightly stain or shelling out big bucks for professional cleaning, let’s try some DIY magic. I’m going to walk you through a comprehensive guide to tackling common sofa stains using everyday household items. Remember, acting fast is key! The sooner you address the stain, the easier it will be to remove.
Understanding Your Enemy: Identifying the Stain
First things first, we need to figure out what we’re dealing with. Different stains require different approaches. Is it a greasy food stain, a coffee spill, ink, or something else entirely? Knowing the culprit will help you choose the right cleaning method.
* Water-based stains: These include things like juice, coffee (without cream), tea, soda, and water.
* Oil-based stains: Think grease, butter, oil, makeup, and some food sauces.
* Protein-based stains: These are things like blood, milk, vomit, and egg.
* Tannin-based stains: Red wine, coffee, tea (stronger brews), and some fruit juices fall into this category.
* Ink stains: Pen ink, marker ink, and printer ink all require special attention.
The Golden Rule: Test in an Inconspicuous Area
Before you go all-in on stain removal, always, always, ALWAYS test your cleaning solution in a hidden spot. This could be on the back of the sofa, under a cushion, or anywhere that’s not easily visible. This will ensure that the solution doesn’t damage or discolor the fabric. Apply a small amount of the solution, let it sit for a few minutes, and then blot it with a clean cloth. Check for any adverse reactions before proceeding.
Gather Your Arsenal: Essential Cleaning Supplies
Here’s a list of the supplies you’ll likely need. Having these on hand will make the stain removal process much smoother:
* Clean white cloths or paper towels (avoid colored cloths, as the dye could transfer)
* Baking soda
* White vinegar
* Dish soap (mild, clear, and non-bleach)
* Rubbing alcohol (isopropyl alcohol)
* Hydrogen peroxide (3% solution)
* Spray bottle
* Soft-bristled brush (an old toothbrush works great)
* Vacuum cleaner with upholstery attachment
* Dry cleaning solvent (for solvent-safe fabrics only – check your sofa’s tag!)
* An iron (optional, for stubborn stains)
General Stain Removal Steps (Applicable to Most Stains)
These are the basic steps you’ll follow for most stains, with specific variations depending on the type of stain.
1. Act Fast: As mentioned earlier, the sooner you tackle the stain, the better.
2. Blot, Don’t Rub: Rubbing will only spread the stain and push it deeper into the fibers. Always blot gently with a clean cloth or paper towel.
3. Work from the Outside In: Start blotting from the outer edges of the stain and work your way towards the center. This will prevent the stain from spreading.
4. Apply Cleaning Solution Sparingly: Don’t saturate the fabric. Use just enough solution to dampen the stained area.
5. Blot Again: After applying the cleaning solution, blot the area again with a clean, dry cloth to absorb the solution and the stain.
6. Rinse (If Necessary): Some cleaning solutions may leave a residue. If necessary, rinse the area with a clean, damp cloth and then blot dry.
7. Dry Thoroughly: Allow the area to air dry completely. You can speed up the process with a fan or a hairdryer on a low, cool setting.
8. Vacuum: Once the area is dry, vacuum it to restore the fabric’s texture.
Specific Stain Removal Techniques
Now, let’s dive into specific stain removal techniques for different types of stains.
Water-Based Stains (Juice, Coffee, Tea, Soda, Water)
1. Blot Immediately: Blot up as much of the liquid as possible with a clean cloth or paper towel.
2. Mix a Solution: Combine 1 teaspoon of mild dish soap with 1 cup of lukewarm water.
3. Apply the Solution: Dip a clean cloth into the solution and gently blot the stained area.
4. Blot Dry: Blot the area with a clean, dry cloth.
5. Rinse (If Necessary): If the stain persists, or if you used a lot of soap, rinse the area with a clean, damp cloth and then blot dry.
6. Dry Thoroughly: Allow the area to air dry completely.
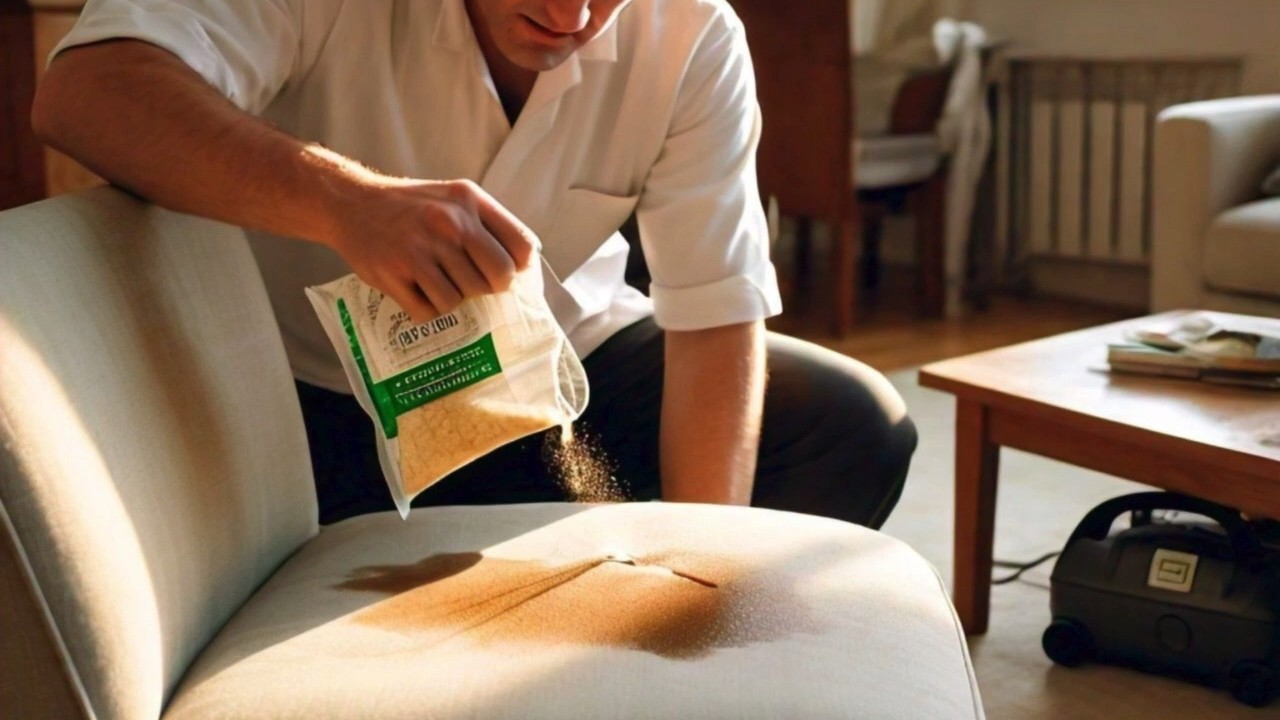
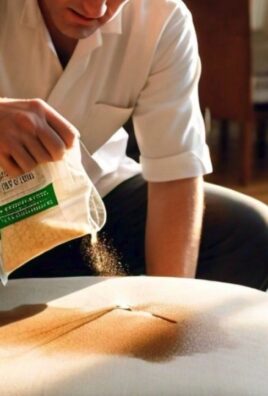
Oil-Based Stains (Grease, Butter, Oil, Makeup)
1. Blot Excess Oil: Use a clean cloth or paper towel to blot up as much of the excess oil as possible.
2. Apply Baking Soda: Generously sprinkle baking soda over the stained area. Baking soda is a great absorbent and will help draw out the oil.
3. Let it Sit: Allow the baking soda to sit for at least 30 minutes, or even overnight for stubborn stains.
4. Vacuum: Vacuum up the baking soda.
5. Mix a Solution: If the stain persists, mix 1 teaspoon of mild dish soap with 1 cup of lukewarm water.
6. Apply the Solution: Dip a clean cloth into the solution and gently blot the stained area.
7. Blot Dry: Blot the area with a clean, dry cloth.
8. Rinse (If Necessary): If the stain persists, or if you used a lot of soap, rinse the area with a clean, damp cloth and then blot dry.
9. Dry Thoroughly: Allow the area to air dry completely.
Protein-Based Stains (Blood, Milk, Vomit, Egg)
Important: Never use hot water on protein-based stains! Hot water will cause the protein to coagulate and set the stain.
1. Blot Immediately: Blot up as much of the stain as possible with a clean cloth or paper towel.
2. Mix a Solution: Combine 1 tablespoon of hydrogen peroxide (3% solution) with 1/2 cup of cold water. Always test this solution in an inconspicuous area first, as hydrogen peroxide can lighten some fabrics.
3. Apply the Solution: Dip a clean cloth into the solution and gently blot the stained area.
4. Blot Dry: Blot the area with a clean, dry cloth.
5. Rinse (If Necessary): Rinse the area with a clean, damp cloth and then blot dry.
6. Dry Thoroughly: Allow the area to air dry completely.
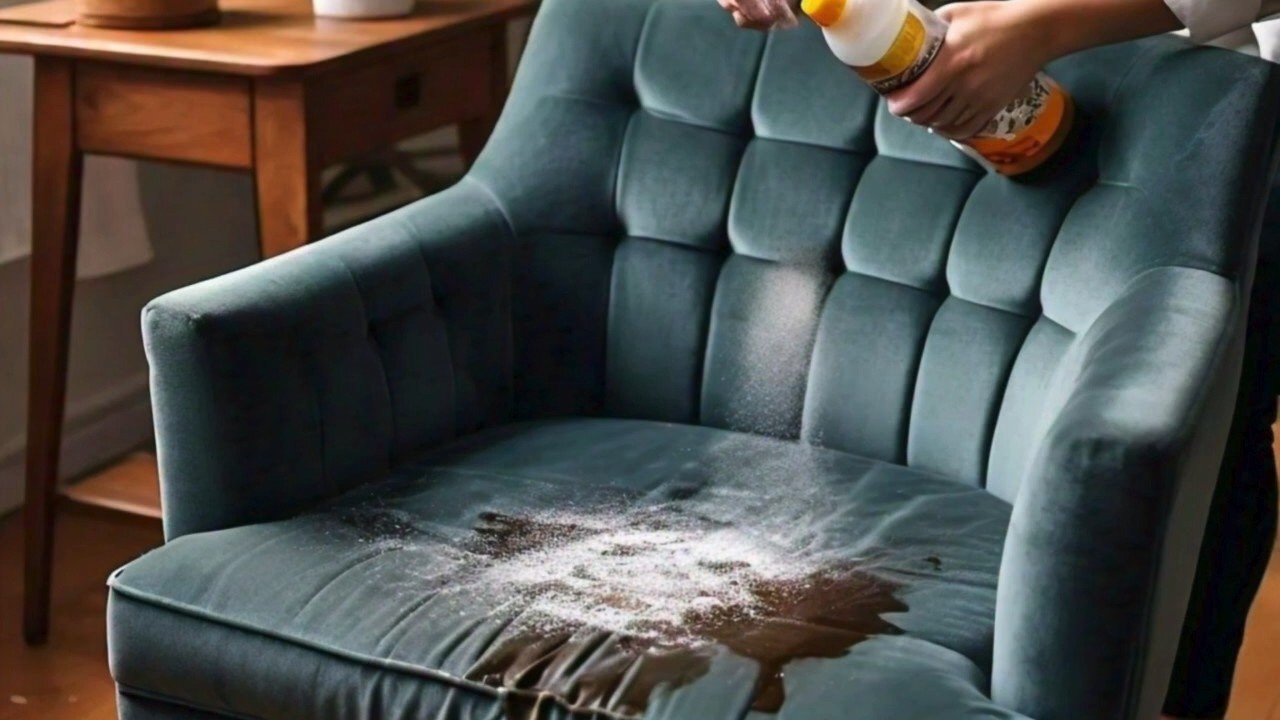
Tannin-Based Stains (Red Wine, Coffee, Tea)
1. Blot Immediately: Blot up as much of the liquid as possible with a clean cloth or paper towel.
2. Apply Salt (For Red Wine): If it’s a red wine stain, immediately cover the stain with a generous amount of salt. The salt will absorb the wine. Let it sit for at least 30 minutes, or until the salt is completely saturated.
3. Vacuum (If You Used Salt): Vacuum up the salt.
4. Mix a Solution: Combine 1 tablespoon of white vinegar with 2 cups of cold water.
5. Apply the Solution: Dip a clean cloth into the solution and gently blot the stained area.
6. Blot Dry: Blot the area with a clean, dry cloth.
7. Rinse (If Necessary): Rinse the area with a clean, damp cloth and then blot dry.
8. Dry Thoroughly: Allow the area to air dry completely.
Ink Stains (Pen Ink, Marker Ink)
Important: Ink stains can be tricky to remove. Act quickly and be patient.
1. Blot Immediately: Blot up as much of the ink as possible with a clean cloth or paper towel.
2. Apply Rubbing Alcohol: Dampen a clean cloth with rubbing alcohol (isopropyl alcohol).
3. Blot the Stain: Gently blot the ink stain with the alcohol-dampened cloth. You’ll likely see the ink transferring to the cloth.
4. Repeat: Continue blotting with a clean area of the cloth until no more ink transfers.
5. Mix a Solution: If the stain persists, mix 1 teaspoon of mild dish soap with 1 cup of lukewarm water.
6. Apply the Solution: Dip a clean cloth into the solution and gently blot the stained area.
7. Blot Dry: Blot the area with a clean,
Conclusion
So, there you have it! Mastering DIY sofa stain removal is not just about saving money; it’s about reclaiming your peace of mind and extending the life of your beloved furniture. No more panicking over spilled wine, muddy paw prints, or rogue coffee splashes. You now possess the knowledge and the tools to tackle those unsightly blemishes head-on, right in the comfort of your own home.
Why is this DIY approach a must-try? Because it’s effective, affordable, and empowering. Commercial stain removers often contain harsh chemicals that can damage your sofa’s fabric or pose health risks. Our methods, on the other hand, utilize readily available household ingredients, making them gentler on your furniture and safer for your family and pets. Plus, the satisfaction of successfully removing a stubborn stain with your own two hands is truly unparalleled.
But the beauty of DIY lies in its adaptability. Feel free to experiment with variations to suit your specific needs and the type of stain you’re dealing with. For instance, if you’re tackling a particularly greasy stain, a sprinkle of cornstarch or baking soda before applying the cleaning solution can work wonders. For delicate fabrics like silk or velvet, always test your chosen solution on an inconspicuous area first to ensure it doesn’t cause discoloration or damage. Consider using a soft-bristled brush instead of rubbing vigorously to avoid damaging the fibers.
And don’t forget the power of prevention! Regularly vacuuming your sofa can prevent dirt and debris from becoming embedded in the fabric, making stains less likely to occur in the first place. Consider investing in a sofa cover or throw blankets to protect your furniture from everyday wear and tear.
We wholeheartedly encourage you to give these DIY sofa stain removal techniques a try. You’ll be amazed at how effective they are and how much money you can save in the long run. But more importantly, we want to hear about your experiences! Share your success stories, your challenges, and any variations you’ve discovered in the comments below. Your insights could help other readers conquer their own sofa stain woes. Let’s build a community of stain-fighting experts, one DIY solution at a time! So go ahead, embrace the power of DIY and say goodbye to those unsightly sofa stains for good!
Frequently Asked Questions (FAQs)
What types of stains are these DIY methods most effective on?
These DIY sofa stain removal methods are generally effective on a wide range of common household stains, including food spills (coffee, wine, juice, sauces), pet stains (urine, vomit), dirt and mud, ink, and some types of grease. However, the effectiveness can vary depending on the age and severity of the stain, as well as the type of fabric. Fresh stains are always easier to remove than old, set-in stains. For particularly stubborn or unusual stains, professional cleaning may be required.
Are these DIY solutions safe for all types of sofa fabrics?
Not necessarily. It’s crucial to test any DIY cleaning solution on an inconspicuous area of your sofa before applying it to the entire stain. This will help you determine if the solution causes any discoloration, damage, or shrinkage to the fabric. Delicate fabrics like silk, velvet, and linen require extra caution. Avoid using harsh chemicals or abrasive scrubbing on these materials. If you’re unsure about the fabric type or the suitability of a particular cleaning solution, consult the manufacturer’s care instructions or seek professional cleaning advice.
How do I identify the type of fabric my sofa is made of?
Most sofas have a tag attached to them that provides information about the fabric composition and cleaning instructions. Look for a tag typically located under the cushions, on the back of the sofa, or along the bottom edge. The tag may contain codes or symbols that indicate the recommended cleaning methods (e.g., “W” for water-based cleaning, “S” for solvent-based cleaning, “WS” for both, “X” for professional cleaning only). If you can’t find a tag, try to identify the fabric based on its appearance and texture. Common sofa fabrics include cotton, linen, polyester, microfiber, velvet, and leather.
What if the stain is old and set-in?
Old, set-in stains can be more challenging to remove than fresh stains. However, don’t give up hope! You can try pre-treating the stain with a paste of baking soda and water or a solution of vinegar and water. Apply the paste or solution to the stain, let it sit for several hours or overnight, and then blot it away with a clean cloth. You may need to repeat this process several times. For particularly stubborn stains, consider using a commercial stain remover specifically designed for old stains, but always test it on an inconspicuous area first.
Can I use a steam cleaner to remove sofa stains?
Steam cleaners can be effective for removing some types of stains and sanitizing your sofa. However, they are not suitable for all fabrics. Avoid using steam cleaners on delicate fabrics like silk or velvet, as the heat and moisture can damage them. Always test the steam cleaner on an inconspicuous area first to ensure it doesn’t cause any discoloration or shrinkage. Follow the manufacturer’s instructions carefully and avoid over-wetting the fabric.
How often should I clean my sofa?
The frequency of cleaning depends on how often you use your sofa and whether you have pets or children. As a general rule, you should vacuum your sofa at least once a week to remove dirt and debris. Spot clean any spills or stains as soon as they occur. Deep clean your sofa every 6-12 months, or more frequently if needed.
What are some preventative measures I can take to protect my sofa from stains?
There are several things you can do to protect your sofa from stains:
* Use sofa covers or throw blankets to protect the fabric from everyday wear and tear.
* Avoid eating or drinking on the sofa.
* Train your pets to stay off the furniture.
* Vacuum your sofa regularly to remove dirt and debris.
* Apply a fabric protector spray to create a barrier against stains.
* Clean up spills immediately.
What if the DIY methods don’t work?
If the DIY methods are not effective in removing the stain, it may be time to call in a professional upholstery cleaner. Professional cleaners have specialized equipment and cleaning solutions that can tackle even the most stubborn stains. They can also assess the fabric type and recommend the best cleaning method to avoid damaging your sofa.
Is it better to use white vinegar or apple cider vinegar for stain removal?
White vinegar is generally preferred for stain removal due to its higher acidity and lack of color. Apple cider vinegar, while also effective, can sometimes leave a slight residue or discoloration, especially on light-colored fabrics. If you only have apple cider vinegar on hand, dilute it slightly more than you would white vinegar and test it on an inconspicuous area first.
How can I remove pet odors from my sofa?
Pet odors can be effectively neutralized with baking soda. Sprinkle a generous amount of baking soda over the entire sofa, focusing on areas where the odor is strongest. Let the baking soda sit for several hours or overnight to absorb the odors. Then, vacuum it up thoroughly. You can also use a commercial pet odor eliminator spray, but always test it on an inconspicuous area first.

Leave a Comment