

Dusting hacks and tips – sounds thrilling, right? Maybe not initially, but trust me, you’ll be hooked! Let’s be honest, nobody *loves* dusting. It’s one of those chores that feels like a never-ending battle against the inevitable. You spend an hour meticulously wiping down surfaces, only to find a fresh layer of dust settled by the next day. It’s frustrating! But what if I told you there were ways to make this chore faster, easier, and even…dare I say…enjoyable?
Throughout history, keeping our homes clean and dust-free has been a sign of prosperity and well-being. In many cultures, a clean home is considered a welcoming space for guests and a reflection of inner peace. While our ancestors may have used simpler methods like feather dusters and damp cloths, the underlying desire for a clean and healthy living environment remains the same.
That’s where these dusting hacks and tips come in. We’re not just talking about a quick wipe-down; we’re diving into clever strategies, DIY solutions, and time-saving techniques that will transform your dusting routine. Imagine spending less time battling dust bunnies and more time enjoying your sparkling clean home. This article is your guide to achieving just that. I’m going to share my favorite tried-and-true methods for tackling dust in every nook and cranny, from furniture and electronics to those hard-to-reach places. Get ready to say goodbye to dust-induced frustration and hello to a cleaner, healthier, and happier home!
DIY Dusting Hacks: A Comprehensive Guide to a Sparkling Home
Okay, let’s face it, dusting is nobody’s favorite chore. But a dust-free home is a happier, healthier home. I’m going to share all my tried-and-true dusting hacks that will make this task less daunting and more effective. Get ready to say goodbye to those pesky dust bunnies!
Understanding Dust and Where It Hides
Before we dive into the how-to, let’s quickly understand what we’re fighting. Dust isn’t just dirt; it’s a mix of dead skin cells, pet dander, pollen, textile fibers, and all sorts of other microscopic particles. This is why it’s so important to tackle it regularly.
Dust loves to settle on horizontal surfaces, but it also lurks in unexpected places. Think about:
* High places: Ceiling fans, light fixtures, and the tops of bookshelves.
* Upholstery: Couches, chairs, and curtains trap a surprising amount of dust.
* Electronics: TVs, computers, and stereos attract dust like magnets.
* Hard-to-reach areas: Behind furniture, under beds, and in corners.
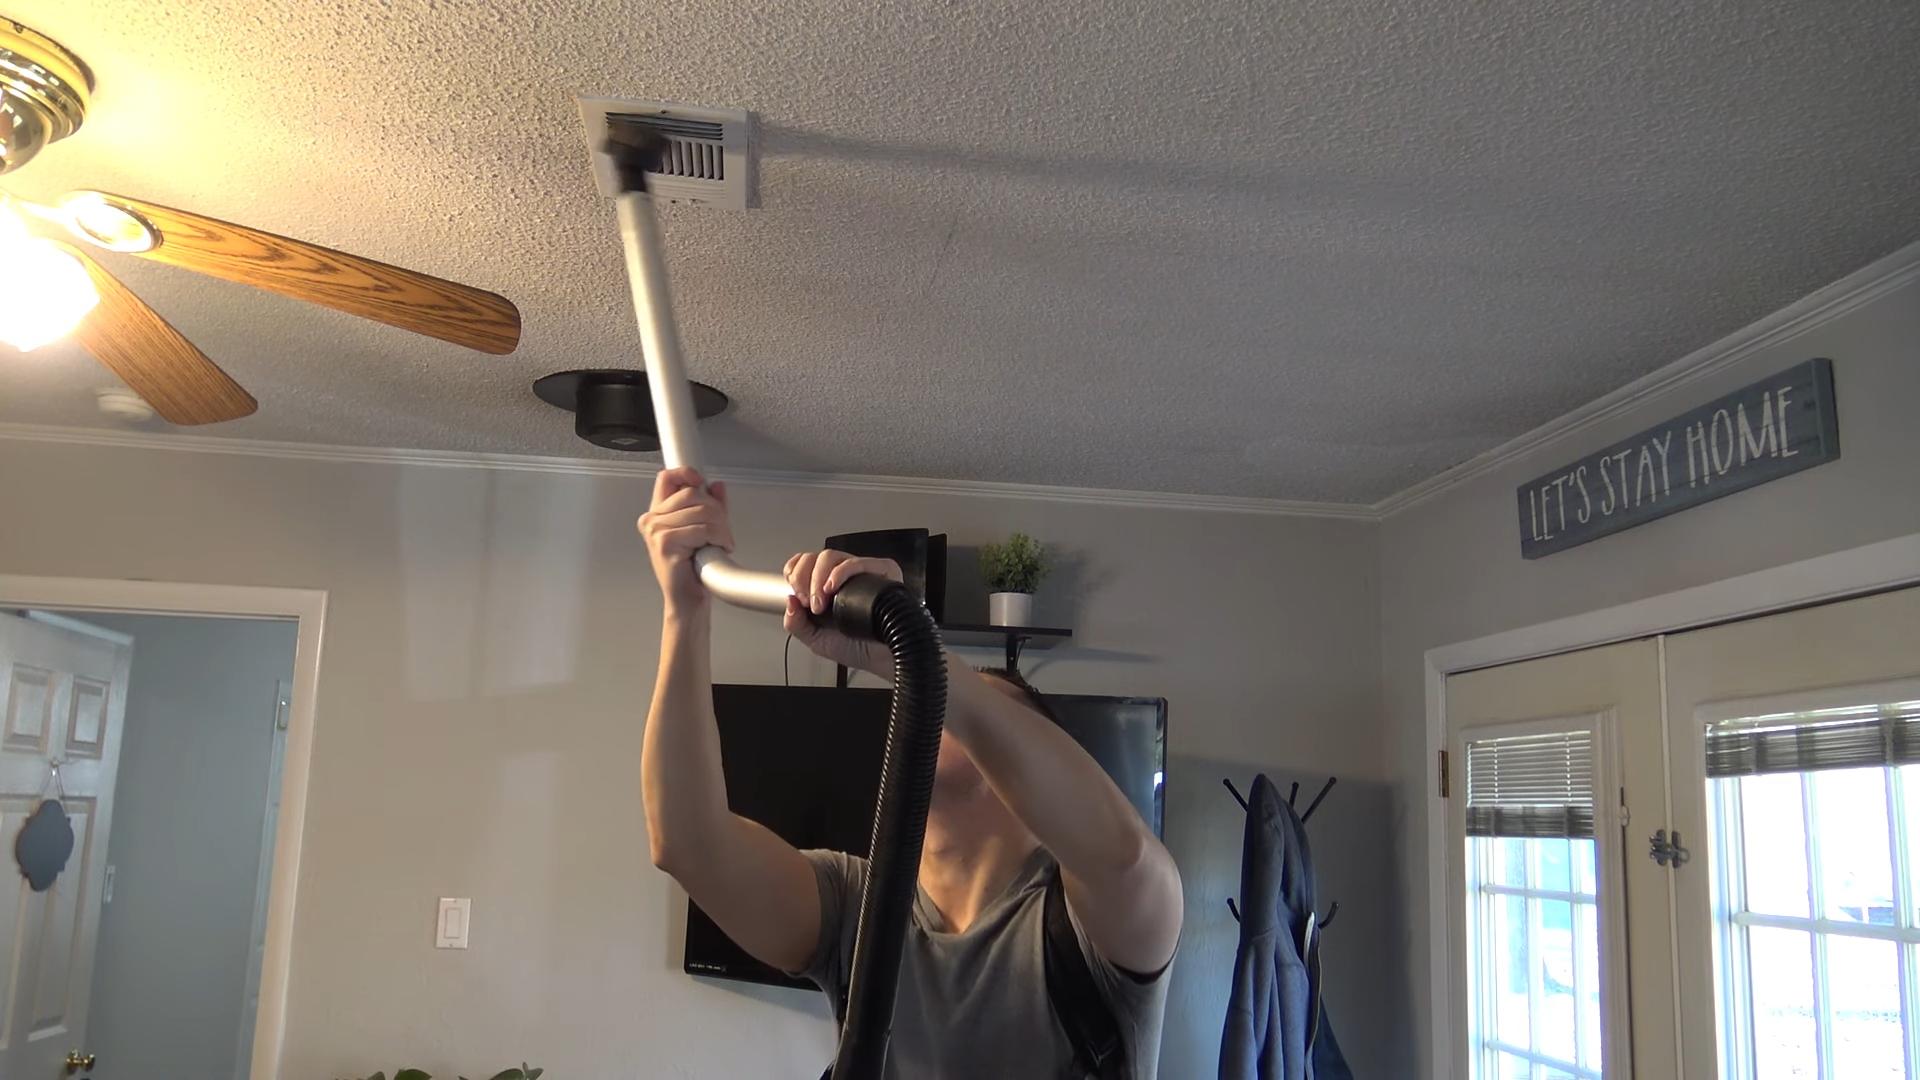
* Air vents: These circulate dust throughout your home.
Essential Dusting Tools and Supplies
Having the right tools makes all the difference. Here’s my go-to arsenal:
* Microfiber cloths: These are my absolute favorite! They trap dust effectively and are washable.
* Extendable duster: Perfect for reaching high places like ceiling fans and light fixtures.
* Vacuum cleaner with attachments: A must for upholstery, carpets, and hard-to-reach areas.
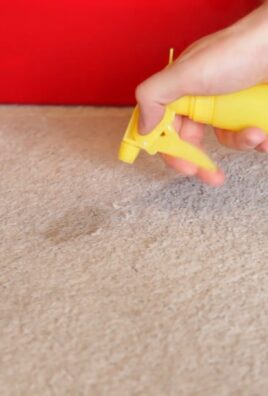
* Dusting spray: Choose a product that’s safe for your surfaces and helps repel dust.
* Old socks: Sounds weird, but they’re great for dusting blinds and baseboards.
* Paintbrushes: Small paintbrushes are ideal for getting into crevices and cleaning delicate items.
* Cotton swabs: Perfect for cleaning small, intricate areas.
* Spray bottle with water and vinegar: A natural and effective cleaning solution.
* Furniture polish: For wood furniture, to protect and shine.
General Dusting Tips for Maximum Efficiency
Before we get into specific areas, here are some general tips to keep in mind:
* Dust from top to bottom: Gravity is your friend! Start with high surfaces and work your way down.
* Dust frequently: Regular dusting prevents buildup and makes the job easier. Aim for once a week, or more often if you have pets or allergies.
* Ventilate your home: Open windows while dusting to allow dust to escape.
* Change your air filters regularly: This helps reduce the amount of dust circulating in your home.
* Wash bedding frequently: Bedding is a major dust collector. Wash sheets, pillowcases, and blankets weekly.
* Declutter: The less stuff you have, the less there is to dust!
Dusting Room by Room: Step-by-Step Guides
Now, let’s break down the dusting process room by room.
Living Room/Family Room
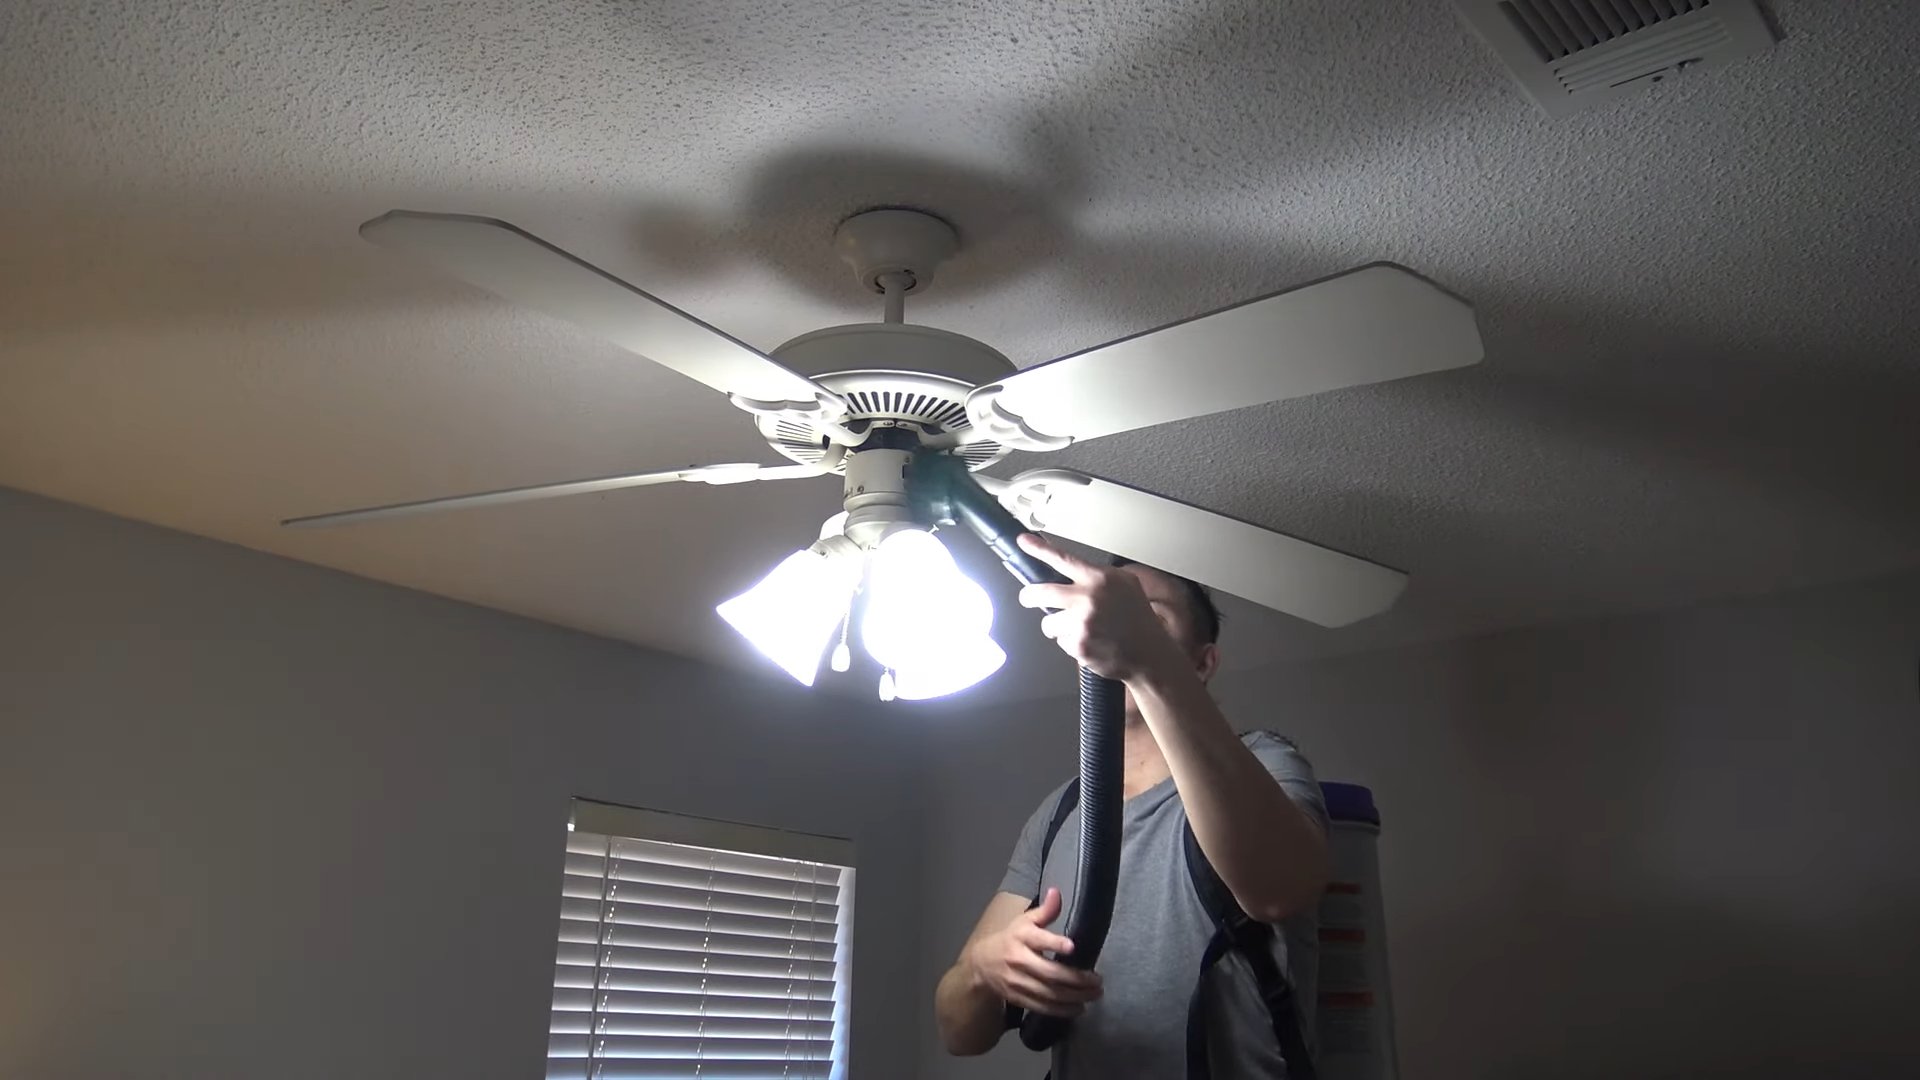
1. Ceiling Fan: Use an extendable duster to reach the blades. Make sure to dust both sides. You can also use a pillowcase to trap the dust as you wipe. Slide the pillowcase over each blade, then pull it off, trapping the dust inside.
2. Light Fixtures: Turn off the light and let the bulb cool. Use a microfiber cloth or duster to remove dust. For intricate fixtures, use a small paintbrush or cotton swabs.
3. Shelves and Bookcases: Remove items from the shelves and dust them individually. Use a microfiber cloth to wipe down the shelves. Don’t forget the tops and sides of the bookcase.
4. Electronics: Turn off and unplug electronics before dusting. Use a microfiber cloth to wipe down screens, keyboards, and other surfaces. Avoid using liquids directly on electronics. For hard-to-reach areas, use a can of compressed air.
5. Upholstery: Vacuum couches and chairs with an upholstery attachment. Pay attention to crevices and seams. For fabric upholstery, you can sprinkle baking soda on the surface, let it sit for 15-20 minutes, and then vacuum it up. This helps absorb odors and loosen dust.
6. Curtains and Blinds: Vacuum curtains with an upholstery attachment or use a lint roller. For blinds, use an old sock or a microfiber cloth to wipe down each slat. You can also use a blind cleaner tool.
7. Coffee Table and End Tables: Remove items from the tables and dust them with a microfiber cloth. Use furniture polish on wood surfaces.
8. Baseboards: Use a microfiber cloth or an old sock to wipe down baseboards. You can also use a vacuum cleaner with a brush attachment.
9. Rugs and Carpets: Vacuum regularly to remove dust and debris. Consider using a rug cleaner or shampooer periodically.
Bedroom
1. Ceiling Fan and Light Fixtures: Same as in the living room.
2. Dresser and Nightstands: Remove items from the surfaces and dust them with a microfiber cloth. Use furniture polish on wood surfaces.
3. Bed Frame: Dust the headboard, footboard, and side rails with a microfiber cloth.
4. Bedding: Wash sheets, pillowcases, and blankets weekly. Vacuum the mattress regularly. Consider using a mattress protector.
5. Closet: Dust shelves and hanging rods. Vacuum the floor.
6. Mirrors: Clean mirrors with a glass cleaner and a microfiber cloth.
7. Windowsills: Wipe down windowsills with a damp cloth.
Kitchen
1. Cabinets: Wipe down cabinet doors and drawers with a damp cloth. Pay attention to areas around handles and knobs.
2. Countertops: Wipe down countertops with a damp cloth and a mild cleaning solution.
3. Appliances: Wipe down the exterior of appliances with a damp cloth. Clean the stovetop and oven regularly.
4. Sink: Clean the sink with a sink cleaner.
5. Floor: Sweep or vacuum the floor regularly. Mop as needed.
6. Light Fixtures: Clean light fixtures above the sink and stove, as they tend to accumulate grease and dust.
Bathroom
1. Mirror: Clean the mirror with a glass cleaner and a microfiber cloth.
2. Sink and Countertop: Clean the sink and countertop with a bathroom cleaner.
3. Toilet: Clean the toilet with a toilet bowl cleaner and a disinfectant wipe.
4. Shower/Tub: Clean the shower or tub with a bathroom cleaner.
5. Floor: Sweep or vacuum the floor regularly. Mop as needed.
6. Ventilation Fan: Clean the ventilation fan to remove dust and lint.
Dusting Specific Items: A Deeper Dive
Let’s tackle some specific items that often get overlooked:
* Plants: Dust plant leaves with a damp cloth or sponge. This helps them absorb sunlight more efficiently.
* Picture Frames: Dust picture frames with a microfiber cloth. For glass-covered frames, use a glass cleaner.
* Decorative Items: Dust decorative items with a microfiber cloth or a small paintbrush.
* Books: Dust books with a microfiber cloth. You can also use a vacuum cleaner with a brush attachment.
* Computer Keyboard: Turn off the computer and use a can of compressed air to remove dust and debris from the keyboard. You can also use a cotton swab dipped in rubbing alcohol to clean between the keys.
* Remote Controls: Wipe down remote controls with a disinfectant wipe.
* Air Vents: Vacuum air vents with a brush attachment. You can also remove the vent covers and wash them with soap and water.
Homemade Dusting Solutions: Natural and Effective
If you prefer to avoid harsh chemicals, here are some homemade dusting solutions that work wonders:
* Water and Vinegar: Mix equal parts water and white vinegar in a spray bottle. This solution is great for cleaning hard surfaces.
* Olive Oil and Lemon Juice: Mix 1/4 cup olive oil with a few drops of lemon juice. This solution is great for polishing wood furniture.
* Baking Soda and Water: Make a paste of baking soda and water. This solution is great for cleaning stubborn stains.
Preventing Dust Buildup: Long-Term Strategies
While dusting is essential, preventing dust buildup in the first place can save you time and effort. Here are some strategies to consider:
* Use doormats: Place doormats at all entrances to trap dirt and debris before they enter your home.
* Take off your shoes: Encourage family members and guests to remove their
Conclusion
So, there you have it! Mastering these simple yet incredibly effective dusting hacks transforms a dreaded chore into a manageable, even satisfying, task. We’ve explored how to banish dust bunnies from the deepest corners, revitalize your furniture, and keep your home looking its absolute best with minimal effort. The beauty of these DIY dusting solutions lies not only in their effectiveness but also in their affordability and accessibility. You likely already have most, if not all, of the necessary ingredients and tools right in your pantry or cleaning closet.
Why is this a must-try? Because it’s more than just cleaning; it’s about creating a healthier, more comfortable living environment. Dust accumulation can trigger allergies, exacerbate respiratory issues, and generally contribute to a feeling of unease. By implementing these dusting hacks, you’re actively taking steps to improve your well-being and the well-being of your loved ones. Plus, let’s be honest, a dust-free home simply looks and feels better!
Consider these variations to personalize your dusting routine:
* **Essential Oil Infusion:** Add a few drops of your favorite essential oil (lavender, lemon, or eucalyptus are excellent choices) to your DIY dusting spray for a refreshing scent and added aromatherapy benefits.
* **Microfiber Magic:** Experiment with different types of microfiber cloths. Some are specifically designed for polishing, while others excel at trapping dust and dirt. Find the ones that work best for your surfaces.
* **Furniture Polish Boost:** For wooden furniture, consider adding a small amount of beeswax or furniture polish to your dusting solution for extra shine and protection. Always test in an inconspicuous area first.
* **Static-Busting Spray:** In dry climates, static cling can attract dust like a magnet. Create a simple anti-static spray by mixing water with a fabric softener sheet. Lightly mist surfaces to reduce static.
We wholeheartedly encourage you to try these **dusting hacks** and experience the difference they can make in your home. Don’t just take our word for it – put them to the test! We’re confident that you’ll be amazed by the results.
But the journey doesn’t end here. We want to hear from you! Share your experiences, tips, and variations in the comments below. Did you discover a particularly effective combination of ingredients? Did you adapt one of these hacks to suit a specific surface or cleaning challenge? Your insights could help other readers achieve even better results. Let’s create a community of dust-busting experts!
Remember, a clean home is a happy home, and with these simple dusting hacks, you’re well on your way to achieving a sparkling, healthy, and inviting living space. So, grab your supplies, roll up your sleeves, and get ready to say goodbye to dust bunnies for good!
Frequently Asked Questions (FAQs)
What are the most common types of dust and why is it important to remove them?
Dust is a complex mixture of various particles, including dead skin cells, pet dander, pollen, dust mites, mold spores, textile fibers, soil, and even pollutants from the air. Removing dust is crucial for several reasons. First and foremost, dust can trigger allergies and asthma symptoms, leading to sneezing, coughing, itchy eyes, and difficulty breathing. Secondly, dust can harbor harmful bacteria and viruses, increasing the risk of illness. Thirdly, dust can damage surfaces over time, especially delicate materials like wood and electronics. Finally, a dusty environment simply looks and feels unclean, impacting the overall comfort and aesthetics of your home.
How often should I be dusting my home?
The frequency of dusting depends on several factors, including the size of your home, the number of occupants (including pets), and your personal sensitivity to dust. As a general guideline, aim to dust high-traffic areas like living rooms and bedrooms at least once a week. Less frequently used areas can be dusted every two weeks. However, if you have pets or allergies, you may need to dust more frequently, perhaps even daily in certain areas. Pay close attention to surfaces that tend to accumulate dust quickly, such as shelves, furniture, and electronics.
What are the best tools and materials for dusting effectively?
The right tools can make a significant difference in your dusting efficiency. Microfiber cloths are highly recommended for their ability to trap dust and dirt without scratching surfaces. Feather dusters can be useful for light dusting, but they tend to spread dust around rather than removing it. Vacuum cleaners with HEPA filters are essential for removing dust from carpets, rugs, and upholstery. Other useful tools include:
* **Extendable Dusters:** For reaching high ceilings, fans, and other hard-to-reach areas.
* **Crevice Tools:** For cleaning narrow spaces like window tracks and baseboards.
* **Soft Brushes:** For dusting delicate items like lampshades and artwork.
* **Damp Cloths:** For wiping down surfaces after dusting to remove any remaining residue.
Are there any natural or DIY dusting solutions that are effective?
Yes, there are several effective natural and DIY dusting solutions that you can easily make at home. A simple mixture of water and white vinegar is a great all-purpose cleaner for most surfaces. You can also add a few drops of essential oil for a pleasant scent. Another popular DIY dusting solution is a mixture of olive oil, lemon juice, and water. This combination helps to polish wood furniture while removing dust. For dusting electronics, use a dry microfiber cloth or a can of compressed air. Avoid using harsh chemicals or abrasive cleaners, as they can damage surfaces.
How can I prevent dust from accumulating in my home?
Preventing dust accumulation is an ongoing process, but there are several steps you can take to minimize the amount of dust in your home.
* **Use Air Purifiers:** Air purifiers with HEPA filters can effectively remove dust and other allergens from the air.
* **Change Air Filters Regularly:** Replace the air filters in your HVAC system every 1-3 months to prevent dust from circulating.
* **Vacuum Regularly:** Vacuum carpets, rugs, and upholstery at least once a week to remove dust and pet dander.
* **Dust Regularly:** As mentioned earlier, regular dusting is essential for preventing dust buildup.
* **Wash Bedding Frequently:** Wash your bedding at least once a week in hot water to kill dust mites.
* **Control Humidity:** Maintain a humidity level between 30-50% to prevent mold growth and dust mite proliferation.
* **Use Doormats:** Place doormats at all entrances to trap dirt and dust before it enters your home.
* **Declutter:** Reduce clutter to minimize the number of surfaces where dust can accumulate.
What are some specific dusting tips for different surfaces, such as wood, electronics, and upholstery?
Different surfaces require different dusting techniques. For wood furniture, use a soft microfiber cloth and a wood-specific cleaner or polish. Always dust in the direction of the grain to avoid scratching the surface. For electronics, use a dry microfiber cloth or a can of compressed air to remove dust from screens, keyboards, and other components. Avoid using liquid cleaners on electronics, as they can cause damage. For upholstery, vacuum regularly with an upholstery attachment to remove dust and pet dander. You can also use a fabric refresher to eliminate odors and freshen up the fabric. Always test any cleaning solution in an inconspicuous area first to ensure that it doesn’t damage the surface.
How can I deal with dust mites in my home?
Dust mites are microscopic creatures that thrive in warm, humid environments and feed on dead skin cells. They are a common cause of allergies and asthma. To control dust mites in your home:
* **Wash Bedding Frequently:** Wash your bedding at least once a week in hot water (130°F or higher) to kill dust mites.
* **Use Dust Mite-Proof Covers:** Encase mattresses, pillows, and comforters in dust mite-proof covers.
* **Control Humidity:** Maintain a humidity level between 30-50% to create an unfavorable environment for dust mites.
* **Vacuum Regularly:** Vacuum carpets, rugs, and upholstery frequently to remove dust mites and their waste products.
* **Steam Clean:** Steam cleaning can effectively kill dust mites in carpets and upholstery.
* **Use a HEPA Filter:** Use a vacuum cleaner with a HEPA filter to trap dust mites and prevent them from being released back into the air.
What are the potential health risks associated with dust exposure?
Exposure to dust can pose several health risks, especially for individuals with allergies, asthma, or other respiratory conditions. Dust can trigger allergic reactions, leading to sneezing, coughing, itchy eyes, and a runny nose. It can also exacerbate asthma symptoms, causing wheezing, shortness of breath, and chest tightness. In addition, dust can harbor harmful bacteria and viruses, increasing the risk of respiratory infections. Long-term exposure to dust can also contribute to chronic respiratory problems. It’s important to take steps to minimize dust exposure in your home to protect your health.
How can I make my own dusting cloths?
Making your own dusting cloths is a cost-effective and eco-friendly alternative to buying disposable ones. You can repurpose old t-shirts, towels, or flannel fabrics by cutting them into squares or rectangles. Microfiber cloths are also a great option. To make your own dusting cloths even more effective, you can pre-treat them with a dusting solution. Simply spray the
Leave a Comment