

Easy cleaning habits can feel like a mythical creature, right? We all dream of a sparkling home without spending our entire weekend scrubbing. But what if I told you that achieving a consistently clean and tidy space is less about Herculean efforts and more about incorporating simple, manageable routines into your daily life?
For centuries, cultures around the world have understood the importance of cleanliness, not just for hygiene, but also for mental well-being. Think of the ancient Japanese art of *Oosouji*, a thorough year-end cleaning ritual believed to purify the home and prepare it for the new year. Or consider the simple act of tidying up after oneself, a practice ingrained in many societies as a sign of respect and responsibility. These traditions highlight the profound connection between our environment and our state of mind.
In today’s fast-paced world, finding time for extensive cleaning can feel impossible. That’s where these DIY cleaning tricks and hacks come in! I’m going to share some of my favorite, time-saving strategies that will transform your cleaning routine from a dreaded chore into a series of quick, easy wins. These easy cleaning habits will not only keep your home looking its best but also free up your precious time and energy for the things you truly enjoy. Get ready to say goodbye to weekend cleaning marathons and hello to a consistently fresh and inviting home!

DIY Cleaning Hacks: Making Your Life Easier, One Tip at a Time!
Okay, let’s be honest, cleaning isn’t exactly anyone’s favorite pastime. But a clean home is a happy home, right? So, I’ve compiled some of my absolute favorite DIY cleaning hacks that will save you time, money, and a whole lot of elbow grease. Get ready to transform your cleaning routine!
Tackling the Kitchen: Sparkling Clean in Minutes
The kitchen, the heart of the home, often bears the brunt of our daily activities. Let’s dive into some easy ways to keep it sparkling.
Cleaning the Microwave Like a Pro
Microwaves are notorious for splatters and spills. Here’s how to clean them without harsh chemicals:
1. Gather Your Supplies: You’ll need a microwave-safe bowl, white vinegar, water, and a clean sponge or cloth.
2. Vinegar Solution: Fill the bowl with equal parts white vinegar and water (about 1 cup of each).
3. Microwave Magic: Place the bowl in the microwave and heat on high for 5-7 minutes. The mixture should boil and create steam.
4. Steam Clean: Let the bowl sit in the microwave for another 5 minutes. This allows the steam to loosen the grime.
5. Wipe Away: Carefully remove the bowl (it will be hot!) and wipe down the inside of the microwave with your sponge or cloth. The splatters should come off easily. For stubborn spots, you might need a little extra scrubbing.
6. Final Touches: Remove the turntable and wash it separately with soap and water. Dry everything thoroughly before reassembling.
Degreasing Your Stovetop with Baking Soda
Grease buildup on the stovetop can be a real pain. But don’t worry, baking soda is here to save the day!
1. Gather Your Supplies: You’ll need baking soda, water, a sponge or cloth, and a spray bottle (optional).
2. Baking Soda Paste: Mix baking soda with a little water to form a thick paste.
3. Apply the Paste: Spread the paste generously over the greasy areas of your stovetop.
4. Let it Sit: Allow the paste to sit for at least 15-20 minutes. For really tough grease, you can let it sit for even longer.
5. Scrub and Wipe: Use a damp sponge or cloth to scrub away the grease and baking soda paste. You might need to apply a little pressure for stubborn spots.
6. Rinse and Dry: Rinse the stovetop thoroughly with clean water and dry with a clean cloth.
Freshening Up Your Dishwasher
A clean dishwasher means cleaner dishes! Here’s how to keep yours fresh and functioning properly:
1. Empty the Dishwasher: Make sure your dishwasher is completely empty.
2. Vinegar Power: Place a dishwasher-safe cup or bowl filled with 1 cup of white vinegar on the top rack of the dishwasher.
3. Run a Cycle: Run the dishwasher on a hot cycle. The vinegar will help to dissolve grease, food particles, and mineral buildup.
4. Baking Soda Boost: After the vinegar cycle, sprinkle 1 cup of baking soda on the bottom of the dishwasher.
5. Another Cycle: Run a short, hot cycle. The baking soda will help to deodorize and further clean the dishwasher.
6. Clean the Filter: Don’t forget to clean the dishwasher filter regularly! Remove the filter (usually located at the bottom of the dishwasher) and rinse it thoroughly under running water. Use a brush to remove any stubborn debris.
Bathroom Bliss: Sparkling Surfaces and Fresh Scents
The bathroom is another area that requires regular cleaning. Let’s make it a breeze!
Cleaning Showerheads with Vinegar
Hard water can cause mineral buildup on showerheads, reducing water pressure. Here’s how to fix it:
1. Gather Your Supplies: You’ll need a plastic bag (a Ziploc bag works well), white vinegar, a rubber band, and a toothbrush (optional).
2. Vinegar Soak: Fill the plastic bag with white vinegar.
3. Secure the Bag: Place the bag over the showerhead, ensuring that the showerhead is completely submerged in the vinegar. Secure the bag with a rubber band.
4. Soak Overnight: Let the showerhead soak in the vinegar overnight.
5. Remove and Rinse: Remove the bag and rinse the showerhead thoroughly with water.
6. Scrub Away: If there’s still some mineral buildup, use a toothbrush to gently scrub it away.
Cleaning Grout with Baking Soda and Vinegar
Grout can easily become stained and discolored. Here’s a powerful cleaning solution:
1. Gather Your Supplies: You’ll need baking soda, white vinegar, a spray bottle, a scrub brush (an old toothbrush works well), and water.
2. Baking Soda Paste: Mix baking soda with a little water to form a paste.
3. Apply the Paste: Apply the paste to the grout lines.
4. Vinegar Power: Fill a spray bottle with white vinegar and spray it onto the baking soda paste. The mixture will fizz.
5. Let it Sit: Let the mixture sit for 5-10 minutes.
6. Scrub and Rinse: Use a scrub brush to scrub the grout lines. Rinse thoroughly with water.
Unclogging Drains with Baking Soda and Vinegar
Clogged drains are a common problem. Here’s a natural and effective solution:
1. Gather Your Supplies: You’ll need baking soda, white vinegar, and hot water.
2. Baking Soda First: Pour about 1/2 cup of baking soda down the drain.
3. Vinegar Chaser: Follow with 1 cup of white vinegar. The mixture will fizz.
4. Let it Fizz: Let the mixture fizz for 30 minutes.
5. Hot Water Flush: Pour a pot of boiling water down the drain to flush away the clog.
6. Repeat if Necessary: If the drain is still clogged, repeat the process.
Living Room Love: Dust-Free and Fresh
The living room is where we relax and unwind. Let’s keep it clean and inviting.
Dusting Like a Pro
Dusting can feel like a never-ending task, but here are some tips to make it more effective:
1. Gather Your Supplies: You’ll need a microfiber cloth, a duster with an extendable handle, and a vacuum cleaner with a brush attachment.
2. Top to Bottom: Always dust from top to bottom. Start with ceiling fans, light fixtures, and high shelves.
3. Microfiber Magic: Use a microfiber cloth to wipe down surfaces. Microfiber cloths are great at trapping dust and preventing it from spreading.
4. Vacuum Power: Use the vacuum cleaner with a brush attachment to dust upholstery, curtains, and carpets.
5. Damp Cloth for Wood: For wooden furniture, use a slightly damp cloth to wipe away dust. Be sure to dry the furniture immediately to prevent water damage.
Freshening Up Carpets and Rugs with Baking Soda
Baking soda is a natural deodorizer and can help to freshen up carpets and rugs.
1. Gather Your Supplies: You’ll need baking soda and a vacuum cleaner.
2. Sprinkle Generously: Sprinkle baking soda generously over the carpet or rug.
3. Let it Sit: Let the baking soda sit for at least 30 minutes. For best results, let it sit overnight.
4. Vacuum Thoroughly: Vacuum the carpet or rug thoroughly to remove the baking soda.
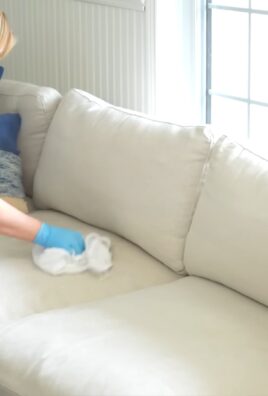
Cleaning Leather Furniture
Leather furniture requires special care. Here’s a gentle cleaning method:
1. Gather Your Supplies: You’ll need a soft cloth, mild soap (like dish soap), water, and leather conditioner.
2. Soap Solution: Mix a few drops of mild soap with water.
3. Damp Cloth: Dampen the soft cloth with the soap solution.
4. Wipe Gently: Gently wipe down the leather furniture with the damp cloth.
5. Dry Immediately: Dry the furniture immediately with a clean, dry cloth.
6. Condition the Leather: Apply a leather conditioner to keep the leather soft and supple. Follow the instructions on the leather conditioner.
Bonus Tip: DIY All-Purpose Cleaner
Want to ditch the harsh chemicals and make your own all-purpose cleaner? Here’s a simple recipe:
1. Gather Your Supplies: You’ll need a spray bottle, white vinegar, water, and essential oils (optional).
2. Mix the Solution:

Conclusion
So, there you have it! This simple yet incredibly effective DIY cleaning trick is a game-changer for anyone looking to streamline their cleaning routine and achieve sparkling results with minimal effort. We’ve shown you how to transform readily available household items into powerful cleaning agents, saving you money and reducing your reliance on harsh chemicals. This isn’t just about cleaning; it’s about creating a healthier and more sustainable home environment.
The beauty of this DIY approach lies in its adaptability. Feel free to experiment with different essential oils to customize the scent of your cleaning solutions. Lavender, lemon, tea tree, and eucalyptus are all excellent choices, each offering unique aromatherapy benefits while enhancing the cleaning power. For tougher stains, consider adding a bit of borax or washing soda to your mixture, but always remember to test on an inconspicuous area first. You can also adjust the ratios of ingredients to suit your specific needs and preferences. Perhaps you prefer a stronger vinegar scent for disinfecting, or maybe you want to dilute the solution further for delicate surfaces. The possibilities are endless!
Why is this DIY cleaning trick a must-try? Because it’s cost-effective, eco-friendly, and incredibly versatile. It empowers you to take control of your cleaning routine and create solutions that are tailored to your home and your lifestyle. You’ll be amazed at how much money you can save by ditching expensive store-bought cleaners and embracing the power of simple, natural ingredients. Plus, you’ll be contributing to a healthier planet by reducing your consumption of plastic packaging and harmful chemicals.
We understand that trying something new can sometimes feel daunting, but we promise this DIY cleaning trick is incredibly easy to implement. The steps are straightforward, the ingredients are readily available, and the results are truly remarkable. Imagine the satisfaction of knowing that you’re cleaning your home with safe, natural ingredients that are gentle on your family and the environment.
Don’t just take our word for it – give it a try! We’re confident that you’ll be amazed by the results. Once you’ve experienced the magic of this DIY cleaning trick, we encourage you to share your experience with us. Let us know what variations you tried, what scents you loved, and how it transformed your cleaning routine. Your feedback is invaluable and helps us to refine and improve our recommendations. Share your tips and tricks in the comments section below, and let’s create a community of DIY cleaning enthusiasts! We are eager to hear how these easy cleaning habits have changed your life.
FAQ
Q: What exactly is the “DIY cleaning trick” this article refers to?
A: The DIY cleaning trick discussed in this article involves creating your own cleaning solutions using readily available household ingredients like vinegar, baking soda, lemon juice, and essential oils. It’s a method of cleaning that avoids harsh chemicals and saves money. The specific recipes and applications will vary, but the core principle remains the same: using natural ingredients to achieve a clean and healthy home.
Q: Is vinegar safe to use on all surfaces?
A: While vinegar is a fantastic cleaning agent, it’s not suitable for all surfaces. Avoid using vinegar on natural stone surfaces like marble, granite, and limestone, as the acidity can etch and damage them. It’s also best to avoid using vinegar on waxed wood, as it can strip the wax finish. Always test vinegar on an inconspicuous area before applying it to a larger surface. For delicate surfaces, dilute the vinegar with water to reduce its acidity.
Q: Can I use any type of vinegar for cleaning?
A: White distilled vinegar is generally recommended for cleaning due to its high acidity and lack of color, which prevents staining. However, you can also use apple cider vinegar, although it may have a slightly less potent cleaning effect and could potentially leave a slight residue on some surfaces. Avoid using balsamic vinegar or other flavored vinegars, as they can stain surfaces.
Q: What essential oils are best for cleaning?
A: Several essential oils possess antibacterial, antiviral, and antifungal properties, making them excellent additions to DIY cleaning solutions. Some popular choices include:
* **Lemon:** A natural degreaser and disinfectant with a refreshing scent.
* **Tea Tree:** A powerful antiseptic and antifungal agent.
* **Lavender:** Known for its calming scent and antibacterial properties.
* **Eucalyptus:** A natural disinfectant with a refreshing, invigorating scent.
* **Peppermint:** A natural insect repellent and disinfectant with a cooling scent.
* **Orange:** Similar to lemon, a great degreaser and disinfectant.
When using essential oils, always dilute them properly with water or another carrier oil, and avoid direct contact with skin and eyes.
Q: How long will DIY cleaning solutions last?
A: DIY cleaning solutions generally have a shorter shelf life than commercially produced cleaners, as they don’t contain preservatives. Solutions made with vinegar and water can typically last for several months when stored in a cool, dark place. Solutions containing fresh ingredients like lemon juice may only last for a week or two. It’s always best to make smaller batches of DIY cleaning solutions and use them within a reasonable timeframe to ensure their effectiveness. If the solution changes color, develops an odor, or shows signs of mold growth, discard it immediately.
Q: Can I use baking soda and vinegar together for cleaning?
A: While baking soda and vinegar create a fizzing reaction that can help loosen dirt and grime, it’s generally not recommended to mix them directly in a closed container. The reaction produces carbon dioxide gas, which can build up pressure and potentially cause the container to explode. Instead, apply baking soda to the surface you want to clean, then spray it with vinegar. Allow the mixture to fizz for a few minutes, then wipe clean.
Q: Are DIY cleaning solutions safe for pets and children?
A: DIY cleaning solutions made with natural ingredients like vinegar, baking soda, and lemon juice are generally safer for pets and children than harsh chemical cleaners. However, it’s still important to exercise caution. Keep DIY cleaning solutions out of reach of children and pets, and avoid using essential oils around pets that are sensitive to strong scents. Always rinse surfaces thoroughly after cleaning to remove any residue.
Q: How can I make my DIY cleaning solutions more effective?
A: To enhance the effectiveness of your DIY cleaning solutions, consider the following tips:
* **Use hot water:** Hot water helps to dissolve dirt and grime more effectively.
* **Allow the solution to sit:** Give the cleaning solution a few minutes to penetrate the dirt and grime before wiping it away.
* **Use a scrub brush:** A scrub brush can help to loosen stubborn stains and dirt.
* **Rinse thoroughly:** Rinse surfaces thoroughly after cleaning to remove any residue.
* **Dry the surface:** Drying the surface after cleaning helps to prevent water spots and streaks.
Q: What are some other DIY cleaning recipes I can try?
A: Beyond the basic vinegar and baking soda solutions, here are a few other DIY cleaning recipes to explore:
* **All-Purpose Cleaner:** Mix equal parts water and white vinegar in a spray bottle. Add a few drops of your favorite essential oil for scent.
* **Glass Cleaner:** Mix 1/4 cup white vinegar, 1/2 teaspoon liquid dish soap, and 2 cups water in a spray bottle.
* **Toilet Bowl Cleaner:** Sprinkle baking soda into the toilet bowl, then pour in 1 cup of white vinegar. Let it fizz for 30 minutes, then scrub and flush.
* **Drain Cleaner:** Pour 1/2 cup baking soda down the drain, followed by 1 cup of white vinegar. Let it fizz for 30 minutes, then flush with hot water.
Remember to always research and understand the properties of each ingredient before using it in a DIY cleaning solution.
Q: What if I don’t have time to make my own cleaning solutions?
A: If you’re short on time, you can still incorporate some natural cleaning practices into your routine. For example, you can use lemon juice to clean cutting boards, baking soda to deodorize your refrigerator, or vinegar to remove hard water stains. Even small changes can make a big difference in reducing your reliance on harsh chemicals. And remember, even making a large batch of your favorite DIY cleaner on the weekend can save you time during the week.

Leave a Comment