

Easy home cleaning hacks – who doesn’t want them? Let’s be honest, cleaning isn’t usually anyone’s favorite pastime. We all dream of sparkling homes, but the reality of scrubbing, dusting, and vacuuming can feel overwhelming. But what if I told you that achieving a clean and tidy home doesn’t have to involve hours of back-breaking work or expensive cleaning products?
For centuries, people have been developing clever shortcuts and ingenious solutions to keep their homes clean. From ancient civilizations using natural ingredients like vinegar and baking soda to modern-day innovations, the quest for easy home cleaning hacks is a timeless one. Think about your grandmother’s secret cleaning recipes – often passed down through generations, these simple yet effective methods prove that you don’t need fancy gadgets to maintain a spotless living space.
In today’s busy world, time is a precious commodity. That’s why these DIY cleaning tricks are more valuable than ever. They allow you to reclaim your weekends, reduce stress, and create a healthier, more comfortable environment for yourself and your family. Plus, many of these hacks utilize items you already have in your pantry, saving you money and reducing your environmental impact. So, are you ready to discover some game-changing cleaning secrets? Let’s dive in and transform your cleaning routine from a chore into a breeze!

Easy Home Cleaning Hacks That Will Save You Time and Effort
Hey everyone! I’m always on the lookout for ways to make cleaning less of a chore. Let’s be honest, nobody *really* enjoys spending hours scrubbing, right? So, I’ve compiled some of my favorite DIY cleaning hacks that are not only super effective but also use ingredients you probably already have in your pantry. Get ready to say goodbye to stubborn stains and hello to a sparkling clean home!
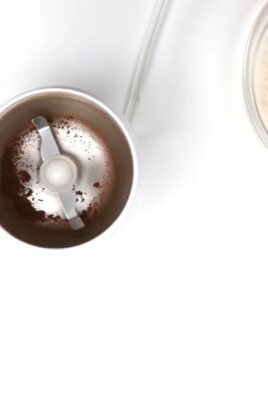
Cleaning Your Microwave with Lemon Power
Microwaves can get pretty gross, pretty quickly. Splatters, spills, and lingering odors can make them a real eyesore. But don’t worry, this lemon hack is a game-changer!
* The Problem: Baked-on food splatters and unpleasant smells.
* The Solution: Steam cleaning with lemon.
* What You’ll Need:
* 1 lemon
* Microwave-safe bowl
* Water
* Sponge or cloth
Step-by-Step Instructions:
1. Prepare the Lemon Solution: Cut the lemon in half. Squeeze the juice from both halves into the microwave-safe bowl. Then, place the lemon halves into the bowl as well.
2. Add Water: Fill the bowl with about 1 cup of water. The water should cover the lemon halves.
3. Microwave the Mixture: Place the bowl in the microwave and heat on high for 3-5 minutes. You want the water to boil and create steam.
4. Let it Steam: Once the timer goes off, don’t open the microwave immediately! Let the steam work its magic for another 5-10 minutes. This will loosen all the grime and make it much easier to wipe away.
5. Wipe it Clean: Carefully remove the bowl (it will be hot!). Use a sponge or cloth to wipe down the inside of the microwave. You’ll be amazed at how easily the splatters come off.
6. Final Touches: For any stubborn spots, you can dip your sponge or cloth into the lemon water and scrub a little harder. The lemon scent will also leave your microwave smelling fresh and clean!
Unclogging Drains with Baking Soda and Vinegar
A clogged drain is a major inconvenience. Before you reach for harsh chemical drain cleaners, try this natural and effective solution.
* The Problem: Slow or completely clogged drains.
* The Solution: A baking soda and vinegar volcano!
* What You’ll Need:
* 1 cup baking soda
* 2 cups white vinegar
* Hot water
Step-by-Step Instructions:
1. Pour in the Baking Soda: Carefully pour 1 cup of baking soda down the drain. Try to get as much of it into the drainpipe as possible.
2. Add the Vinegar: Next, slowly pour 2 cups of white vinegar down the drain. You’ll see a fizzing reaction – that’s the baking soda and vinegar working together to break down the clog.
3. Let it Fizz: Let the mixture fizz and bubble for at least 30 minutes, or even better, overnight. This gives the baking soda and vinegar enough time to dissolve the gunk.
4. Flush with Hot Water: After the waiting period, flush the drain with hot water for several minutes. The hot water will help to push the remaining debris down the drain.
5. Repeat if Necessary: If the drain is still slow, repeat the process. For particularly stubborn clogs, you might need to do this a few times.
Cleaning Grout with Baking Soda Paste
Dirty grout can make your entire bathroom or kitchen look dingy. This baking soda paste is a simple and effective way to brighten up your grout lines.
* The Problem: Stained and discolored grout.
* The Solution: A powerful baking soda paste.
* What You’ll Need:
* Baking soda
* Water
* Old toothbrush or grout brush
* Spray bottle (optional)
Step-by-Step Instructions:
1. Make the Paste: In a small bowl, mix baking soda with enough water to form a thick paste. You want it to be thick enough to stick to the grout lines.
2. Apply the Paste: Apply the baking soda paste to the grout lines. You can use your fingers, a spoon, or even a small spatula to spread it evenly.
3. Let it Sit: Allow the paste to sit on the grout for at least 15-20 minutes. This gives the baking soda time to penetrate the stains.
4. Scrub the Grout: Use an old toothbrush or a grout brush to scrub the grout lines. Apply some pressure and scrub back and forth to remove the dirt and grime.
5. Rinse Thoroughly: Rinse the grout lines with water. You can use a spray bottle or a damp sponge to remove the baking soda residue.
6. Dry and Admire: Dry the area with a clean towel. You’ll be amazed at how much brighter your grout looks!
Removing Hard Water Stains with Vinegar
Hard water stains can be a real pain, especially in bathrooms and kitchens. Vinegar is a natural acid that can dissolve these mineral deposits.
* The Problem: Stubborn hard water stains on faucets, showerheads, and tiles.
* The Solution: Vinegar soak and scrub.
* What You’ll Need:
* White vinegar
* Spray bottle or plastic bag
* Cloth or sponge
* Old toothbrush (for tight spots)
Step-by-Step Instructions:
1. Prepare the Vinegar: Pour white vinegar into a spray bottle or a plastic bag, depending on the item you’re cleaning.
2. Apply the Vinegar:
* For Faucets and Showerheads: Fill a plastic bag with vinegar and secure it around the faucet or showerhead with a rubber band. Make sure the affected area is completely submerged in the vinegar.
* For Tiles: Spray the vinegar directly onto the tiles.
3. Let it Soak: Allow the vinegar to soak for at least 30 minutes, or even longer for stubborn stains. Overnight soaking is often the most effective.
4. Scrub and Rinse: After soaking, remove the bag (if applicable) and scrub the affected area with a cloth or sponge. For tight spots, use an old toothbrush.
5. Rinse Thoroughly: Rinse the area thoroughly with water to remove any vinegar residue.
6. Dry and Polish: Dry the area with a clean towel. For extra shine, you can polish the surface with a microfiber cloth.
Freshening Your Mattress with Baking Soda
Mattresses can harbor dust mites, odors, and moisture. This baking soda trick will help to freshen and deodorize your mattress.
* The Problem: Stale odors and dust mites in your mattress.
* The Solution: Baking soda deodorizing and vacuuming.
* What You’ll Need:
* Baking soda
* Vacuum cleaner with upholstery attachment
* Essential oil (optional)
* Sieve or strainer (optional)
Step-by-Step Instructions:
1. Strip the Bed: Remove all bedding, including sheets, blankets, and pillows.
2. Sprinkle Baking Soda: Generously sprinkle baking soda over the entire surface of the mattress. If you want to add a pleasant scent, mix a few drops of your favorite essential oil (like lavender or eucalyptus) with the baking soda before sprinkling. A sieve or strainer can help distribute the baking soda evenly.
3. Let it Sit: Allow the baking soda to sit on the mattress for at least 30 minutes, or even better, for several hours. The longer it sits, the more effectively it will absorb odors and moisture.
4. Vacuum Thoroughly: Use the upholstery attachment of your vacuum cleaner to thoroughly vacuum the entire surface of the mattress. Make sure to get into all the nooks and crannies.
5. Flip and Repeat: Flip the mattress over and repeat the process on the other side.
6. Put the Bedding Back On: Once you’ve vacuumed both sides of the mattress, you can put your clean bedding back on. Enjoy your freshly cleaned and deodorized mattress!
Cleaning Blinds with Vinegar and a Sock
Cleaning blinds can be tedious, but this hack makes it much easier.
* The Problem: Dusty and dirty blinds.
* The Solution: Vinegar-soaked sock cleaning.
* What You’ll Need:
* White vinegar
* Old sock
* Bowl of warm water
Step-by-Step Instructions:
1. Prepare the Cleaning Solution:

Conclusion
So, there you have it! These easy home cleaning hacks are more than just shortcuts; they’re a pathway to a cleaner, healthier, and happier home. We’ve explored simple, effective ways to tackle common cleaning challenges using items you likely already have in your pantry. From banishing stubborn stains to revitalizing tired surfaces, these DIY solutions offer a refreshing alternative to harsh chemicals and expensive cleaning products.
The beauty of these hacks lies in their adaptability. Feel free to experiment with different essential oils in your vinegar solution for a customized scent. Try adding a bit of baking soda to your lemon juice paste for extra scrubbing power. The possibilities are endless, and the best part is, you’re in control of the ingredients and the process.
These aren’t just cleaning methods; they’re a way to reconnect with your home and take pride in its upkeep. Imagine the satisfaction of knowing you’ve created a sparkling clean space using natural, budget-friendly ingredients. Think of the peace of mind that comes with reducing your exposure to harmful chemicals. And consider the positive impact you’re making on the environment by choosing sustainable cleaning options.
Don’t just take our word for it – try these easy home cleaning hacks yourself! We’re confident that you’ll be amazed by the results. Start with one or two of the hacks that resonate with you and see how they transform your cleaning routine. Once you’ve experienced the magic of DIY cleaning, you’ll never look back.
We encourage you to share your experiences with us! Let us know which hacks worked best for you, any variations you tried, and any other cleaning tips you’ve discovered along the way. Your feedback is invaluable and helps us continue to provide you with the best possible cleaning advice. Share your before-and-after photos on social media using #EasyHomeCleaningHacks and inspire others to embrace the power of DIY cleaning. Let’s create a community of clean, green, and happy homes!
Remember, a clean home is a happy home, and with these easy home cleaning hacks, achieving a sparkling clean space has never been easier or more affordable. So, grab your supplies, roll up your sleeves, and get ready to transform your home into a haven of cleanliness and freshness. Happy cleaning!
Frequently Asked Questions (FAQ)
Are these easy home cleaning hacks safe for all surfaces?
While most of these hacks are generally safe for a variety of surfaces, it’s always a good idea to test them in an inconspicuous area first. This is especially important for delicate surfaces like marble, granite, or wood. For example, vinegar, while a fantastic cleaner, can etch marble if left on for too long. Similarly, abrasive cleaners like baking soda should be used with caution on easily scratched surfaces. Always read the labels of your surfaces and appliances and follow the manufacturer’s recommendations. When in doubt, dilute the cleaning solution or use a gentler alternative.
Can I use these hacks if I have allergies or sensitivities?
If you have allergies or sensitivities, it’s crucial to be mindful of the ingredients you’re using. Essential oils, for example, can trigger allergic reactions in some individuals. Always read the labels of any cleaning products or ingredients you’re using and choose hypoallergenic options whenever possible. Consider wearing gloves and a mask while cleaning to minimize exposure to potential allergens. If you experience any adverse reactions, discontinue use immediately and consult with a healthcare professional. You can also substitute ingredients with known safe alternatives. For instance, if you’re allergic to citrus, you can use white vinegar instead of lemon juice.
How often should I use these easy home cleaning hacks?
The frequency of using these hacks depends on your cleaning habits and the specific area you’re cleaning. For high-traffic areas like kitchens and bathrooms, you may need to clean more frequently. For less frequently used areas, you can clean less often. As a general rule, it’s best to clean up spills and messes as soon as they happen to prevent them from setting in. Regular cleaning, even if it’s just a quick wipe-down, can help prevent the buildup of dirt and grime and make your cleaning routine easier in the long run.
What are some other variations of these easy home cleaning hacks?
The possibilities are endless when it comes to DIY cleaning! Here are a few variations you can try:
* **For a natural air freshener:** Simmer a pot of water with citrus peels, cinnamon sticks, and cloves on the stovetop.
* **For a DIY furniture polish:** Mix equal parts olive oil and lemon juice and apply to wood furniture with a soft cloth.
* **For a natural drain cleaner:** Pour a cup of baking soda down the drain, followed by a cup of vinegar. Let it fizz for 30 minutes, then flush with hot water.
* **For a homemade laundry detergent:** Combine washing soda, borax, and grated castile soap.
Are these easy home cleaning hacks environmentally friendly?
Yes, one of the biggest advantages of these hacks is that they’re environmentally friendly. By using natural ingredients like vinegar, baking soda, and lemon juice, you’re reducing your reliance on harsh chemicals that can pollute the environment. These ingredients are also biodegradable, meaning they break down naturally without harming the ecosystem. Additionally, by making your own cleaning products, you’re reducing plastic waste from store-bought bottles.
What if a cleaning hack doesn’t work for me?
Not every cleaning hack works perfectly for everyone. Factors like water hardness, the type of surface you’re cleaning, and the severity of the stain can all affect the results. If a hack doesn’t work for you, don’t be discouraged! Try adjusting the recipe or method. For example, you might need to use a stronger concentration of vinegar or let the cleaning solution sit for a longer period of time. You can also try a different hack altogether. There are many different DIY cleaning solutions available, so keep experimenting until you find one that works for you.
Where can I find the ingredients for these easy home cleaning hacks?
Most of the ingredients for these hacks can be found at your local grocery store or supermarket. Common ingredients like vinegar, baking soda, lemon juice, and essential oils are readily available and relatively inexpensive. You may also be able to find some of these ingredients at health food stores or online retailers. When purchasing ingredients, look for high-quality options that are free from additives and artificial ingredients.
How do I store homemade cleaning solutions?
Store your homemade cleaning solutions in clean, airtight containers. Label the containers clearly with the name of the solution and the date it was made. Store the containers in a cool, dark place away from direct sunlight and heat. Some solutions, like those containing essential oils, may need to be stored in glass containers to prevent the oils from degrading the plastic. Always keep cleaning solutions out of reach of children and pets.
Can I mix different cleaning hacks together?
It’s generally not recommended to mix different cleaning hacks together, especially those containing bleach or ammonia. Mixing certain chemicals can create dangerous fumes that can be harmful to your health. Always use cleaning solutions separately and follow the instructions carefully. If you’re unsure about whether or not it’s safe to mix two cleaning solutions, err on the side of caution and avoid mixing them.
How can I get my kids involved in these easy home cleaning hacks?
Getting your kids involved in cleaning can be a fun and educational experience. Start by assigning them age-appropriate tasks, such as wiping down surfaces or dusting furniture. Make sure to use safe and non-toxic cleaning solutions. You can also turn cleaning into a game by setting a timer or playing music. Reward your kids for their efforts and praise them for a job well done. By making cleaning a positive experience, you can help your kids develop good habits and learn the importance of keeping their home clean and tidy.
Leave a Comment