

Effective cleaning hacks are the secret weapon every homeowner needs in their arsenal! Let’s face it, cleaning isn’t exactly anyone’s favorite pastime. But what if I told you there were simple, clever tricks that could transform your cleaning routine from a dreaded chore into a surprisingly satisfying experience?
For centuries, people have been devising ingenious ways to keep their homes sparkling. From ancient Egyptians using natron (a naturally occurring salt mixture) to clean their homes, to the Victorian era’s obsession with meticulous dusting and polishing, the quest for a clean and healthy living space is deeply ingrained in our history. These traditions have evolved into the modern effective cleaning hacks we use today, often passed down through generations.
Why do you need these DIY cleaning tricks? Because life is too short to spend hours scrubbing! These hacks are designed to save you time, money, and effort. They often utilize everyday household items you already have on hand, making them both eco-friendly and budget-friendly. Whether you’re battling stubborn stains, tackling grimy grout, or simply looking for ways to streamline your cleaning process, these DIY solutions will empower you to create a cleaner, healthier, and happier home with minimal fuss. I’m excited to share these game-changing tips with you!

DIY Cleaning Hacks That Will Save You Time and Money
Okay, let’s dive into some seriously effective cleaning hacks that I’ve personally tested and swear by. Forget spending a fortune on fancy cleaning products – these DIY solutions use ingredients you probably already have in your pantry!
Cleaning Your Microwave Like a Pro
Microwaves are notorious for splatters and stuck-on food. But fear not, I’ve got a super easy way to get yours sparkling clean in minutes.
What You’ll Need:
* 1 cup water
* 1 tablespoon white vinegar (or lemon juice)
* Microwave-safe bowl
* Clean sponge or cloth
Step-by-Step Instructions:
1. Combine Water and Vinegar: In your microwave-safe bowl, mix the water and vinegar (or lemon juice). The vinegar helps loosen grime, and the lemon juice adds a fresh scent.
2. Microwave the Mixture: Place the bowl in the microwave and heat on high for 5-7 minutes. You want the mixture to boil and create steam. This steam is key to loosening the gunk inside.
3. Let it Sit: Once the timer goes off, don’t open the microwave immediately! Let the bowl sit inside for another 3-5 minutes. This allows the steam to continue working its magic.
4. Wipe it Clean: Carefully remove the bowl (it will be hot!). Use your sponge or cloth to wipe down the inside of the microwave. You’ll be amazed at how easily the splatters come off. For stubborn spots, you might need a little extra elbow grease, but usually, it’s a breeze.
5. Clean the Turntable: Don’t forget to remove the turntable and wash it separately with soap and water. Dry it thoroughly before placing it back in the microwave.
De-Gunking Your Showerhead for Better Water Pressure
A clogged showerhead can seriously impact your shower experience. Mineral buildup is the usual culprit, but this simple hack will have your showerhead flowing freely again.
What You’ll Need:
* White vinegar
* Plastic bag (a sandwich bag works well)
* Rubber band or twist tie
* Old toothbrush (optional)
Step-by-Step Instructions:
1. Fill the Bag with Vinegar: Pour enough white vinegar into the plastic bag to completely submerge the showerhead.
2. Secure the Bag: Carefully position the bag over the showerhead, ensuring the showerhead is fully immersed in the vinegar. Use the rubber band or twist tie to secure the bag tightly around the shower arm.
3. Soak Overnight: Let the showerhead soak in the vinegar overnight (or for at least a few hours). This allows the vinegar to dissolve the mineral deposits.
4. Remove and Rinse: Remove the bag and discard the vinegar. Turn on the shower and let the water run for a few minutes to flush out any remaining debris.
5. Scrub (If Needed): If you still see some stubborn buildup, use an old toothbrush to gently scrub the showerhead nozzles.
6. Enjoy Your Improved Shower: That’s it! Your showerhead should now have much better water pressure.
Cleaning Your Grout Like a Pro
Dirty grout can make even the cleanest tiles look dingy. This baking soda paste is a fantastic and inexpensive way to brighten your grout lines.
What You’ll Need:
* Baking soda
* Water
* Old toothbrush or grout brush
* Spray bottle (optional)
* White vinegar (optional, for extra cleaning power)
Step-by-Step Instructions:
1. Make a Baking Soda Paste: In a small bowl, mix baking soda with just enough water to form a thick paste.
2. Apply the Paste: Using your fingers or a small spatula, apply the baking soda paste to the grout lines. Make sure to cover the entire area you want to clean.
3. Let it Sit: Allow the paste to sit on the grout for at least 10-15 minutes. This gives the baking soda time to loosen the dirt and grime.
4. Scrub the Grout: Use an old toothbrush or a grout brush to scrub the grout lines. Apply some pressure and scrub in a back-and-forth motion. You’ll start to see the dirt lifting away.
5. Rinse Thoroughly: Rinse the grout with clean water. You can use a spray bottle to make rinsing easier. Make sure to remove all traces of the baking soda paste.
6. Optional: Vinegar Boost: For extra cleaning power, you can spray the grout with white vinegar after scrubbing. The vinegar will react with any remaining baking soda, creating a fizzing action that helps to further loosen dirt. Let it fizz for a few minutes, then rinse again with clean water.
7. Dry and Admire: Dry the grout with a clean cloth. You’ll be amazed at how much brighter and cleaner your grout looks!
Unclogging Drains Without Harsh Chemicals
Chemical drain cleaners can be harsh and damaging to your pipes. This natural method is safer, more eco-friendly, and just as effective.
What You’ll Need:
* 1 cup baking soda
* 1 cup white vinegar
* Boiling water
Step-by-Step Instructions:
1. Pour in the Baking Soda: Pour one cup of baking soda down the drain. Try to get as much of it into the drain opening as possible.
2. Add the Vinegar: Immediately follow the baking soda with one cup of white vinegar.
3. Let it Fizz: The baking soda and vinegar will react, creating a fizzing action. Let this mixture fizz for about 30 minutes. This helps to break down the clog.
4. Flush with Boiling Water: After 30 minutes, carefully pour a pot of boiling water down the drain. The hot water will help to flush away the loosened debris.
5. Repeat if Necessary: If the drain is still clogged, repeat the process. For particularly stubborn clogs, you may need to repeat it a few times.
6. Prevention is Key: To prevent future clogs, avoid pouring grease down the drain and regularly flush your drains with hot water.
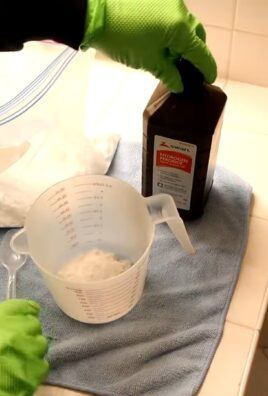
Making Your Own All-Purpose Cleaner
Why buy expensive all-purpose cleaners when you can easily make your own with just a few simple ingredients? This recipe is effective, affordable, and smells great!
What You’ll Need:
* Spray bottle
* 1/4 cup white vinegar
* 1 tablespoon baking soda
* Water
* 10-15 drops essential oil (optional, for fragrance – lemon, lavender, or tea tree are great choices)
Step-by-Step Instructions:
1. Combine Ingredients: In your spray bottle, combine the white vinegar, baking soda, and essential oil (if using).
2. Add Water: Slowly fill the rest of the spray bottle with water. Be careful when adding the water, as the baking soda and vinegar will react and create some fizzing.
3. Shake Well: Secure the spray bottle lid and shake well to combine all the ingredients.
4. Use as Needed: Spray the cleaner onto surfaces and wipe clean with a cloth or sponge. This cleaner is great for countertops, sinks, appliances, and more.
5. Test First: As with any cleaner, it’s always a good idea to test it on a small, inconspicuous area first to make sure it doesn’t damage the surface.
Cleaning Burnt Food from Pots and Pans
Burnt food in pots and pans is a common kitchen mishap. But don’t throw away your favorite cookware! This simple trick can help you salvage it.
What You’ll Need:
* Water
* Baking soda
* Dish soap
* Scrubbing sponge or pad
Step-by-Step Instructions:
1. Fill with Water and Baking Soda: Fill the burnt pot or pan with water and add a generous amount of baking soda (about 2-3 tablespoons).
2. Boil the Mixture: Bring the water and baking soda mixture to a boil on the stovetop.
3. Simmer for 10-15 Minutes: Let the mixture simmer for 10-15 minutes, stirring occasionally. This will help to loosen the burnt food.
4. Let it Cool: Remove the pot or pan from the heat and let it cool slightly.
5. Scrub Away: Pour out the water and baking soda mixture. Use a scrubbing sponge or pad to scrub away the remaining burnt food. You should find that it comes off much easier than before.
6. Wash as Usual: Wash the pot or pan with dish soap and water as usual.
7. For Stubborn Spots: If there are still some stubborn spots, you can try making a paste of baking soda

Conclusion
So, there you have it! This simple yet incredibly effective cleaning hack is more than just a quick fix; it’s a game-changer for anyone looking to maintain a sparkling clean home without breaking the bank or relying on harsh chemicals. We’ve shown you how to leverage readily available ingredients to create a powerful cleaning solution that tackles grime, eliminates odors, and leaves your surfaces gleaming.
Why is this DIY trick a must-try? Because it’s economical, eco-friendly, and, most importantly, it works! Store-bought cleaners often contain a cocktail of chemicals that can be harmful to your health and the environment. This homemade alternative allows you to control exactly what goes into your cleaning products, ensuring a safer and healthier living space for you and your family. Plus, let’s be honest, there’s a certain satisfaction that comes from creating something yourself, especially when it yields such impressive results.
But the beauty of this cleaning hack lies not only in its simplicity but also in its versatility. Feel free to experiment with different essential oils to customize the scent and add extra cleaning power. Lavender, tea tree, and lemon essential oils are all excellent choices, known for their antibacterial and antifungal properties. You can also adjust the ratios of ingredients to suit your specific cleaning needs. For tougher stains, try increasing the concentration of vinegar or adding a bit of baking soda for extra scrubbing power.
Consider these variations to tailor the cleaning solution to different areas of your home:
* For bathroom cleaning: Add a few drops of tea tree oil to combat mold and mildew.
* For kitchen cleaning: Use lemon essential oil for its degreasing properties and fresh scent.
* For floor cleaning: Dilute the solution with more water to avoid leaving a residue.
This effective cleaning hack isn’t just about saving money; it’s about embracing a more sustainable and conscious lifestyle. By reducing your reliance on commercially produced cleaners, you’re minimizing your environmental impact and creating a healthier home environment.
We’re confident that once you try this DIY cleaning trick, you’ll be amazed by the results. It’s a simple, effective, and affordable way to keep your home clean and fresh. So, ditch the harsh chemicals and embrace the power of natural cleaning!
Now, we encourage you to give this cleaning hack a try and see the difference for yourself. Don’t be afraid to experiment with different variations and find what works best for you. And most importantly, share your experience with us! We’d love to hear your tips, tricks, and success stories in the comments below. Let’s build a community of eco-conscious cleaners who are passionate about creating healthy and happy homes. What are you waiting for? Get cleaning!
Frequently Asked Questions (FAQ)
What exactly makes this cleaning hack so effective?
The effectiveness of this cleaning hack stems from the synergistic properties of its ingredients. Vinegar, a natural acid, is excellent at cutting through grease, dissolving mineral deposits, and killing bacteria. Baking soda acts as a mild abrasive, helping to scrub away stubborn stains and deodorize surfaces. Essential oils, besides adding a pleasant scent, often possess antibacterial, antifungal, and antiviral properties, further enhancing the cleaning power of the solution. The combination of these ingredients creates a powerful yet gentle cleaning agent that is safe for most surfaces.
Is this cleaning solution safe to use on all surfaces?
While this cleaning solution is generally safe for most surfaces, it’s always a good idea to test it in an inconspicuous area first, especially on delicate materials like marble, granite, or wood. The acidity of vinegar can potentially damage these surfaces over time. Avoid using it on waxed furniture or unsealed grout. For these surfaces, a milder solution of soap and water is recommended. When in doubt, consult the manufacturer’s instructions for your specific surface.
How long will the homemade cleaning solution last?
When stored in an airtight container, this homemade cleaning solution can last for several weeks. However, it’s best to use it within a month for optimal effectiveness. Over time, the essential oils may lose their potency, and the solution may become less effective. To ensure freshness, consider making smaller batches more frequently. Store the solution in a cool, dark place to prolong its shelf life.
Can I use different types of vinegar for this cleaning hack?
While white vinegar is the most commonly used type of vinegar for cleaning due to its high acidity and lack of color, you can experiment with other types of vinegar, such as apple cider vinegar. However, be aware that apple cider vinegar has a distinct smell that some people may find unpleasant. It also contains sediment that may leave a residue on surfaces. If you choose to use apple cider vinegar, be sure to strain it before using it in your cleaning solution.
What essential oils are best for cleaning, and what are their benefits?
Many essential oils possess antibacterial, antifungal, and antiviral properties that make them excellent additions to cleaning solutions. Some of the most popular and effective essential oils for cleaning include:
* Tea Tree Oil: Known for its powerful antibacterial and antifungal properties, making it ideal for cleaning bathrooms and combating mold and mildew.
* Lemon Oil: A natural degreaser with a fresh, uplifting scent. It’s great for cleaning kitchen surfaces and removing sticky residue.
* Lavender Oil: Possesses antibacterial and antiseptic properties and has a calming and relaxing scent. It’s a good choice for cleaning bedrooms and living areas.
* Eucalyptus Oil: Has antiseptic and antiviral properties and a refreshing scent. It’s effective for cleaning surfaces and disinfecting the air.
* Peppermint Oil: Has antibacterial and antifungal properties and a refreshing, invigorating scent. It can also help to repel insects.
When using essential oils, be sure to use them sparingly, as they are highly concentrated. A few drops are usually sufficient for a cleaning solution.
Can I use this cleaning solution to clean my windows and mirrors?
Yes, this cleaning solution can be used to clean windows and mirrors. However, it’s important to dilute it with more water to prevent streaks. A ratio of 1 part cleaning solution to 10 parts water is recommended. Use a microfiber cloth to wipe the surface clean and dry.
What if I don’t have essential oils? Can I still make this cleaning solution?
Yes, you can still make this cleaning solution without essential oils. The vinegar and baking soda will still provide effective cleaning power. The essential oils are primarily added for their scent and additional antibacterial properties. If you don’t have essential oils, you can add a few drops of lemon juice or orange peel to the solution for a fresh scent.
How do I dispose of the cleaning solution safely?
This cleaning solution is generally safe to dispose of down the drain. However, if you have a septic system, it’s best to avoid pouring large quantities of vinegar down the drain, as it can disrupt the balance of bacteria in the septic tank. In this case, it’s best to dispose of the solution in small amounts or dilute it with plenty of water.
What if I experience an allergic reaction to the cleaning solution?
If you experience an allergic reaction to the cleaning solution, such as skin irritation or respiratory problems, discontinue use immediately. Rinse the affected area with water and consult a doctor if symptoms persist. It’s always a good idea to test the solution on a small area of skin before using it extensively, especially if you have sensitive skin or known allergies.

Leave a Comment