

Fan Cleaning Tips: Are you tired of your fan spreading dust instead of cool air? I know I am! There’s nothing worse than turning on your fan on a hot day only to be greeted by a cloud of allergens. But don’t worry, you don’t need to suffer through another dusty summer. This article is packed with easy and effective DIY fan cleaning tricks that will have your fans sparkling and your air fresh in no time.
The humble fan has been a cooling companion for centuries, with early versions dating back to ancient civilizations like Egypt and Greece. While technology has evolved, the basic principle remains the same: moving air to create a refreshing breeze. However, with constant use, fans inevitably accumulate dust and grime, impacting their performance and potentially affecting your health.
That’s where these fan cleaning tips come in! I’m going to share my favorite DIY methods for cleaning all types of fans, from ceiling fans to box fans, without the need for harsh chemicals or complicated tools. These hacks will not only improve your fan’s efficiency and extend its lifespan but also create a healthier and more comfortable living environment for you and your family. So, let’s get started and say goodbye to dusty fans forever!
DIY Fan Cleaning: Breathe Easy with These Simple Hacks!
Okay, let’s be honest, cleaning fans is probably on everyone’s “least favorite chores” list. But dusty fans don’t just look bad; they circulate allergens and dust particles, making your indoor air quality suffer. So, let’s tackle this head-on with some easy DIY methods that will leave your fans sparkling and your lungs happy! I’m going to share my favorite tricks for cleaning different types of fans, from ceiling fans to box fans, without making a huge mess.
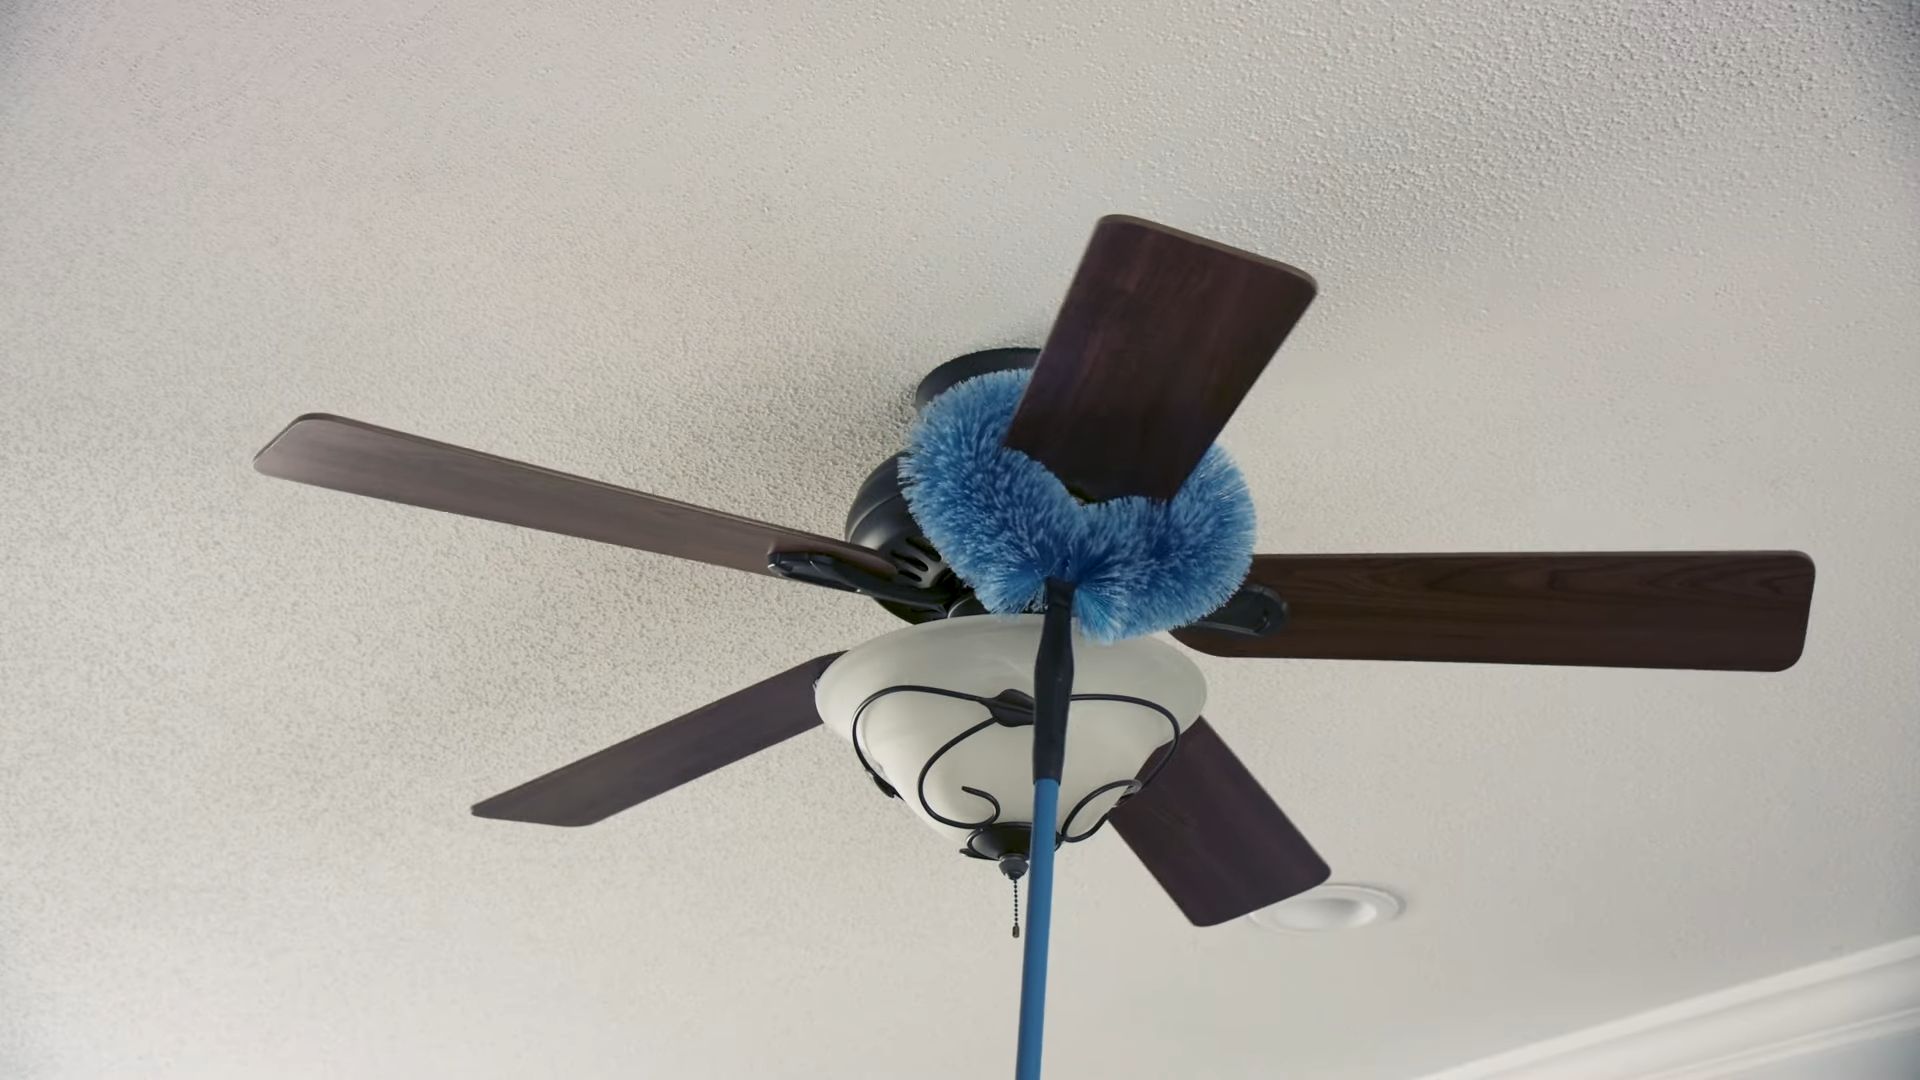
Cleaning Ceiling Fans: The No-Mess Method
This method is a game-changer because it minimizes dust falling all over your furniture. Trust me, you’ll thank me later!
What You’ll Need:
* Pillowcase (an old one you don’t mind getting dusty)
* Step stool or ladder
* All-purpose cleaner (optional, for stubborn grime)
* Microfiber cloth (for a final wipe-down)
Step-by-Step Instructions:
1. Prepare Your Workspace: First things first, cover any furniture directly beneath the fan with a drop cloth or old sheet. This will catch any stray dust that might escape the pillowcase. Safety first! Make sure your step stool or ladder is stable and secure before you climb.
2. Slip the Pillowcase Over a Blade: Carefully position the open end of the pillowcase over one of the fan blades, encasing the entire blade inside.
3. Wipe and Contain: Press the pillowcase firmly against the top and bottom of the blade. Slowly slide the pillowcase off the blade, trapping the dust inside. The pillowcase acts like a dust mitt, catching all the debris as you go.
4. Repeat for Each Blade: Repeat steps 2 and 3 for each fan blade. Turn the pillowcase inside out or use a fresh one if it gets too full of dust.
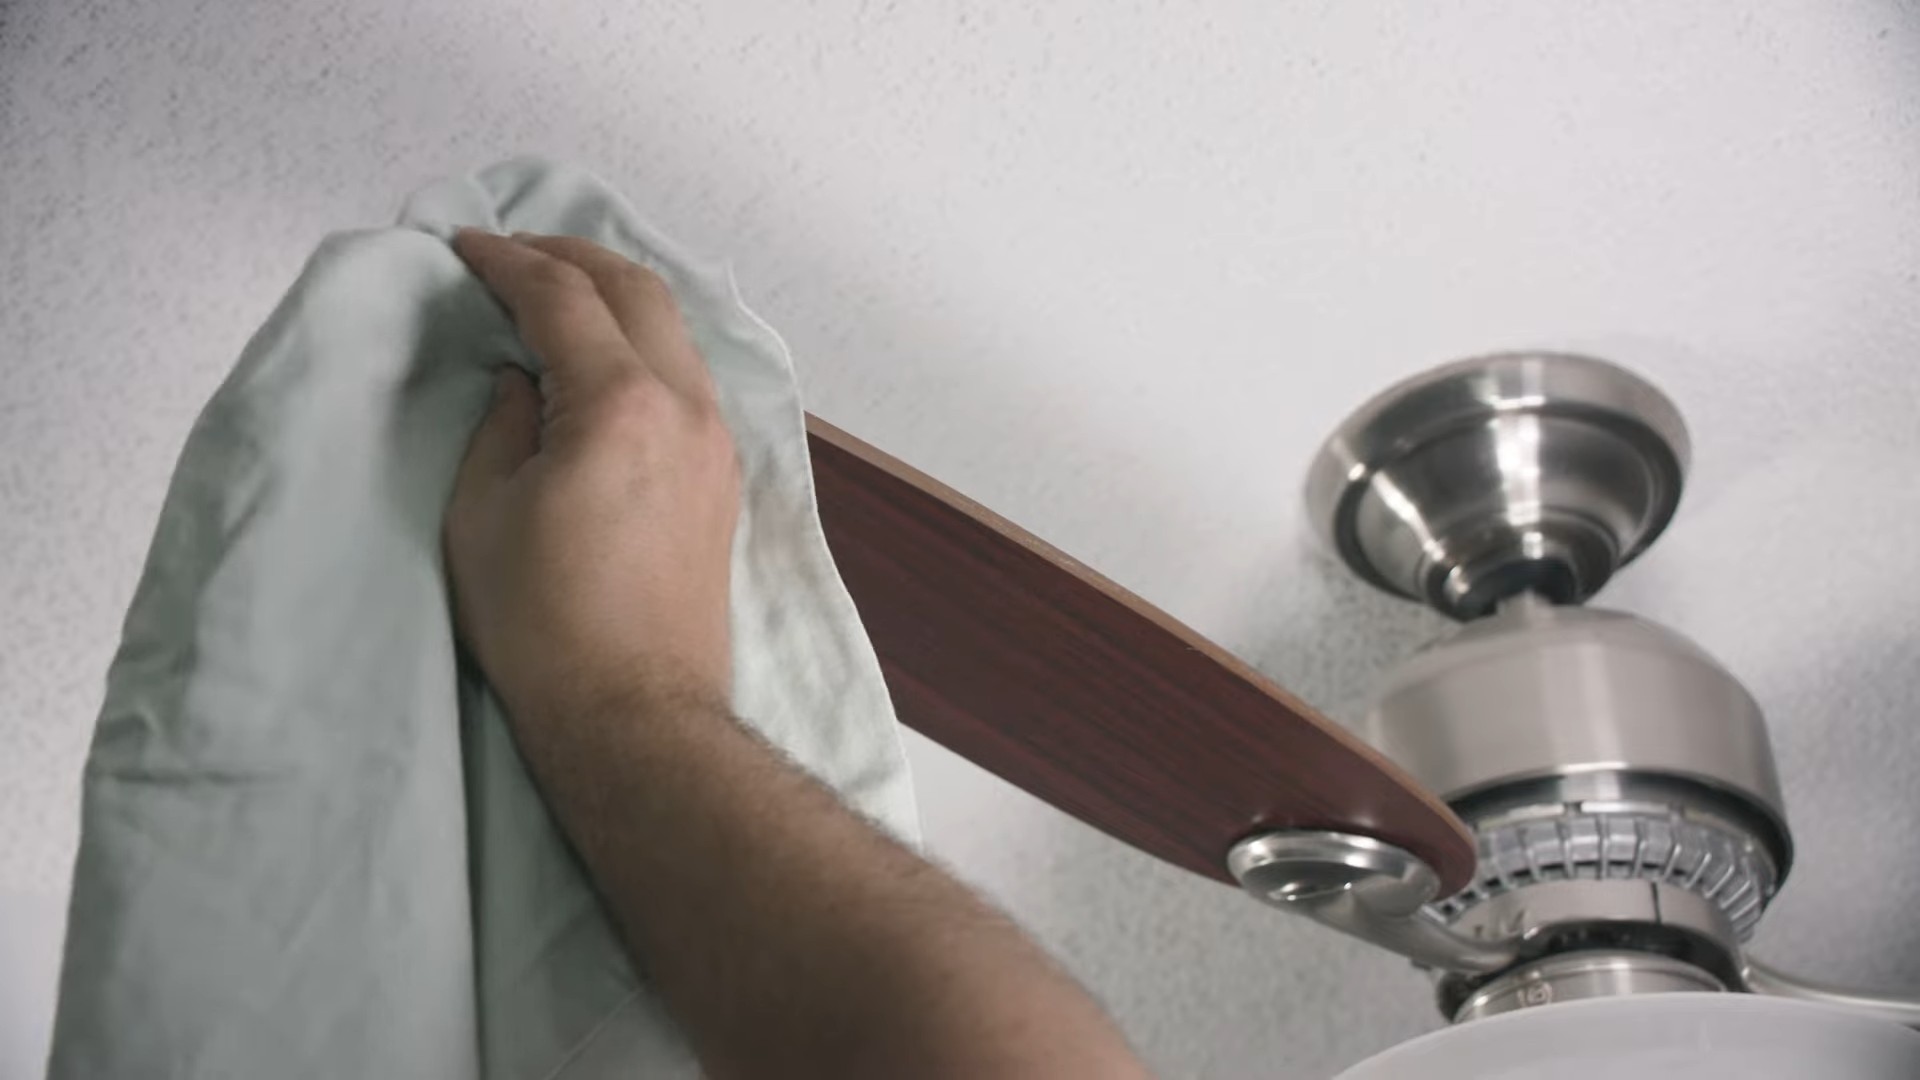
5. Clean the Fan Motor Housing: Now that the blades are clean, it’s time to tackle the motor housing. Use a damp microfiber cloth to wipe down the housing, removing any accumulated dust or grime. If there are stubborn spots, you can lightly spray the cloth with an all-purpose cleaner.
6. Final Wipe-Down: For a final touch, use a clean, dry microfiber cloth to wipe down all the blades and the motor housing. This will remove any remaining streaks or dust particles.
7. Wash the Pillowcase: Don’t forget to wash the pillowcase! Turn it inside out and wash it in your washing machine on a gentle cycle. This will prevent the dust from spreading to other items in your laundry.
Cleaning Box Fans and Window Fans: The Deep Clean
Box fans and window fans tend to accumulate a lot of dust and grime because they’re often used near windows. This method involves disassembling the fan for a thorough cleaning.
What You’ll Need:
* Screwdriver (usually a Phillips head)
* Vacuum cleaner with a brush attachment
* Dish soap
* Warm water
* Spray bottle
* Soft cloths or sponges
* Old toothbrush (for hard-to-reach areas)
* Dry towels
Step-by-Step Instructions:
1. Unplug the Fan: This is crucial for safety! Always unplug the fan before you start cleaning it.
2. Disassemble the Fan: Most box fans and window fans have a front and back grill that can be removed. Use a screwdriver to remove the screws holding the grills in place. Carefully detach the grills from the fan motor.
3. Vacuum the Grills and Blades: Use the brush attachment of your vacuum cleaner to remove as much dust as possible from the grills and fan blades. This will make the washing process much easier.
4. Wash the Grills: Fill a sink or tub with warm water and add a squirt of dish soap. Submerge the grills in the soapy water and scrub them with a soft cloth or sponge. Pay attention to any areas with stubborn grime. An old toothbrush can be helpful for cleaning hard-to-reach spots.
5. Wash the Fan Blades: If the fan blades are easily removable, you can wash them in the same soapy water as the grills. If they’re not removable, you can carefully wipe them down with a damp cloth or sponge. Be careful not to get the motor wet.
6. Rinse Thoroughly: Rinse all the parts with clean water to remove any soap residue.
7. Dry Completely: Use dry towels to thoroughly dry all the parts before reassembling the fan. Make sure everything is completely dry to prevent rust or electrical issues.
8. Reassemble the Fan: Once everything is dry, reattach the grills to the fan motor using the screws you removed earlier. Make sure the grills are securely fastened.
9. Test the Fan: Plug the fan back in and test it to make sure it’s working properly.
Cleaning Tower Fans: The Gentle Approach
Tower fans are a bit trickier to clean because they’re not easily disassembled. This method focuses on surface cleaning and using compressed air to remove dust from the interior.
What You’ll Need:
* Vacuum cleaner with a brush attachment
* Compressed air
* Damp microfiber cloth
* All-purpose cleaner (optional, for stubborn grime)
Step-by-Step Instructions:
1. Unplug the Fan: Safety first! Always unplug the fan before you start cleaning it.
2. Vacuum the Exterior: Use the brush attachment of your vacuum cleaner to remove dust from the exterior of the fan, including the vents and base.
3. Use Compressed Air: This is the key to cleaning the interior of a tower fan. Use compressed air to blow dust out of the vents. Hold the can of compressed air a few inches away from the vents and use short bursts of air. Work your way around the entire fan, making sure to get into all the crevices.
4. Wipe Down the Exterior: Use a damp microfiber cloth to wipe down the exterior of the fan, removing any remaining dust or grime. If there are stubborn spots, you can lightly spray the cloth with an all-purpose cleaner.
5. Clean the Base: Don’t forget to clean the base of the fan! Use a damp cloth to wipe down the base, removing any dust or dirt.
6. Let it Air Dry: Allow the fan to air dry completely before plugging it back in.
Preventative Measures: Keeping Your Fans Cleaner Longer
Cleaning your fans regularly is important, but there are also some things you can do to prevent them from getting too dusty in the first place.
* Dust Regularly: Dust your fans regularly, even if they don’t look particularly dirty. A quick wipe-down with a microfiber cloth every week or two can make a big difference.
* Use Air Purifiers: Air purifiers can help remove dust and allergens from the air, which can reduce the amount of dust that accumulates on your fans.
* Change Air Filters Regularly: If you have central air conditioning or heating, change your air filters regularly. This will help prevent dust and allergens from circulating through your home.
* Close Windows on Dusty Days: On windy or dusty days, close your windows to prevent dust from entering your home.
Extra Tips and Tricks:
* Vinegar Solution: For a natural cleaning solution, mix equal parts white vinegar and water in a spray bottle. This solution is great for removing grease and grime.
* Essential Oils: Add a few drops of your favorite essential oil to your cleaning solution for a fresh, clean scent. Lavender, lemon, and eucalyptus are all great options.
* Magic Erasers: Magic erasers can be helpful for removing stubborn stains or marks from your fan blades or housing.
* Safety First: Always unplug your fan before cleaning it. Never spray water directly onto the motor.
So there you have it! With these simple DIY methods, you can keep your fans clean and your air fresh. Happy cleaning!
Conclusion
So, there you have it! This simple, yet incredibly effective, DIY fan cleaning trick is a game-changer for anyone tired of battling dust and grime on their fans. Forget expensive cleaning solutions and hours of scrubbing. This method is not only budget-friendly, utilizing items you likely already have at home, but it’s also remarkably efficient, saving you precious time and energy.
Why is this a must-try? Because it delivers sparkling clean fans with minimal effort. Think about it: no more breathing in dust particles circulated by dirty fan blades, no more unsightly buildup detracting from the aesthetics of your home, and no more dreading the chore of fan cleaning. This method tackles all of those issues head-on, leaving you with a cleaner, healthier, and more comfortable living space.
But the beauty of this DIY fan cleaning solution lies not only in its simplicity but also in its adaptability. Feel free to experiment with variations to suit your specific needs and preferences. For instance, if you have particularly stubborn grime, consider adding a few drops of dish soap to your cleaning solution for extra degreasing power. Alternatively, for a more natural approach, you could substitute the vinegar with lemon juice, which offers a refreshing scent and natural cleaning properties. If you are sensitive to smells, you can add a few drops of your favorite essential oil to the cleaning solution. Lavender, eucalyptus, or tea tree oil not only add a pleasant fragrance but also possess antibacterial properties.
Remember to always unplug your fan before cleaning and to protect the surrounding area from drips.
This DIY fan cleaning method is a testament to the fact that sometimes the simplest solutions are the most effective. It’s a practical, cost-effective, and time-saving way to maintain a clean and healthy home environment. We are confident that once you try this method, you’ll never go back to traditional fan cleaning techniques.
We wholeheartedly encourage you to give this DIY fan cleaning trick a try. You’ll be amazed at how easy it is to achieve sparkling clean fans with minimal effort. And most importantly, we want to hear about your experience! Share your results, any variations you tried, and any tips you discovered in the comments below. Let’s create a community of clean fan enthusiasts and help each other maintain a dust-free and healthy home. Your feedback is invaluable and will help us refine and improve this method even further. So, grab your supplies, get cleaning, and let us know how it goes! We can’t wait to hear from you.
Frequently Asked Questions (FAQ)
Q: Is this DIY fan cleaning method safe for all types of fans?
A: Generally, yes, this method is safe for most types of fans, including ceiling fans, box fans, and stand fans. However, it’s always a good idea to exercise caution and test the cleaning solution on a small, inconspicuous area of the fan first, especially if you have a vintage or antique fan with delicate finishes. Avoid using abrasive cleaners or scrub brushes, as these can damage the fan’s surface. Also, ensure that the fan is completely dry before turning it back on. For fans with electronic components, be extra careful to avoid getting any liquid inside the motor housing.
Q: What if I don’t have vinegar? Can I use something else?
A: Yes, you can substitute vinegar with other cleaning agents. A good alternative is lemon juice, which has natural cleaning and deodorizing properties. You can use an equal amount of lemon juice in place of the vinegar. Another option is a mild solution of dish soap and water. However, be sure to rinse thoroughly with a clean, damp cloth to remove any soap residue. Avoid using harsh chemicals or bleach, as these can damage the fan’s finish and potentially release harmful fumes.
Q: How often should I clean my fans using this method?
A: The frequency of cleaning depends on several factors, including the environment in your home, the amount of dust and pollen in the air, and whether you have pets. As a general guideline, it’s recommended to clean your fans at least once a month, or more frequently if you notice a significant buildup of dust. During allergy season or if you have pets that shed a lot, you may need to clean your fans more often. Regular cleaning not only improves the air quality in your home but also helps to prolong the life of your fans.
Q: Can I use this method to clean the fan motor housing as well?
A: While this method is primarily designed for cleaning the fan blades, you can also use it to clean the exterior of the fan motor housing. However, it’s crucial to avoid getting any liquid inside the motor housing, as this can damage the electrical components. Use a slightly damp cloth to wipe down the exterior of the motor housing, and be sure to dry it thoroughly before turning the fan back on. For hard-to-reach areas, you can use a cotton swab or a soft brush to remove dust and debris.
Q: What if the dust is really caked on and difficult to remove?
A: For fans with stubborn, caked-on dust, you may need to pre-treat the blades before using the cleaning solution. You can do this by gently wiping the blades with a dry microfiber cloth to remove as much loose dust as possible. Then, apply a small amount of the cleaning solution directly to the affected areas and let it sit for a few minutes to loosen the grime. Use a soft brush or sponge to gently scrub the blades, and then wipe them clean with a damp cloth. You may need to repeat this process several times for heavily soiled fans.
Q: Is it necessary to use a pillowcase? Can I use something else?
A: The pillowcase method is highly recommended because it effectively traps the dust and prevents it from spreading around the room. However, if you don’t have a pillowcase, you can use a large cloth bag or even a plastic bag. The key is to create a barrier around the fan blade to catch the dust as you wipe it clean. You can also use a vacuum cleaner with a brush attachment to remove loose dust before wiping the blades with the cleaning solution.
Q: How do I prevent dust from accumulating on my fans so quickly?
A: There are several things you can do to minimize dust accumulation on your fans. Regularly dusting your home, especially surfaces near the fans, can help to reduce the amount of dust in the air. Using an air purifier can also help to remove dust and other particles from the air. Additionally, you can apply an anti-static spray to the fan blades after cleaning to help repel dust. Finally, consider using fan covers when the fans are not in use to protect them from dust and debris.


Leave a Comment