

Grapevine Propagation DIY: Unleash Your Inner Viticulturist!
Have you ever looked at a lush vineyard, overflowing with plump grapes, and thought, “I wish I could do that!”? Well, guess what? You absolutely can! This isn’t just about growing grapes; it’s about connecting with a tradition that stretches back millennia. From ancient Egypt to the sun-drenched hills of Tuscany, grapevines have been cultivated and cherished for their delicious fruit and the exquisite wine they produce. Now, you can bring a piece of that history into your own backyard with our easy-to-follow grapevine propagation DIY guide.
Why spend a fortune on new grapevines when you can easily create your own from existing plants? Not only is it incredibly rewarding to nurture a new vine from a simple cutting, but it’s also a fantastic way to save money and expand your garden. Plus, knowing you’ve propagated your own grapevine adds a special touch to every glass of homemade juice or wine you might eventually create. I’m going to show you how to master grapevine propagation DIY, even if you’ve never tried anything like this before. Get ready to get your hands dirty and watch your very own vineyard dreams take root!

DIY Grapevine Propagation: From Cutting to Vineyard (Almost!)
Okay, so you’ve tasted a truly amazing grape, maybe from a friend’s garden or a local vineyard, and you’re thinking, “I NEED that grape in my life!” Well, you’re in luck. Propagating grapevines from cuttings is totally doable, even for a beginner like me (when I started, anyway!). It takes a little patience, but the reward of growing your own grapes is so worth it. This guide will walk you through the whole process, step-by-step.
What You’ll Need
Before we dive in, let’s gather our supplies. Having everything ready beforehand will make the whole process smoother.
* Grapevine Cuttings: These are the stars of the show! You’ll want dormant, hardwood cuttings from a healthy grapevine. More on how to select these later.
* Sharp Pruning Shears or Knife: Clean cuts are crucial for successful rooting.
* Rooting Hormone (Optional but Recommended): This will significantly increase your chances of success. I prefer a powder form, but liquid works too.
* Potting Mix: A well-draining mix is essential. I like a blend of peat moss, perlite, and vermiculite. You can also buy a pre-made seed starting mix.
* Pots or Containers: Choose pots that are at least 6 inches deep to accommodate root growth.
* Watering Can or Spray Bottle: For gentle watering.
* Plastic Bags or Humidity Dome (Optional): To create a humid environment.
* Labels and a Permanent Marker: To keep track of your different grape varieties (trust me, you’ll want to!).
* Rubbing Alcohol or Bleach Solution: For sterilizing your tools.
Section 1: Taking the Cuttings
The timing of taking cuttings is super important. You want to do this during the dormant season, typically in late winter or early spring, before the buds start to swell. This is when the grapevine is storing energy and the cuttings have the best chance of rooting.
1. Identify a Healthy Grapevine: Look for a vine that is vigorous, disease-free, and produces the type of grapes you want. Ask the owner for permission before taking any cuttings, of course!
2. Select Hardwood Cuttings: Choose one-year-old wood, which is the growth from the previous season. This wood will be thicker and more mature than the newer growth. It should be about the thickness of a pencil. Avoid thin, weak, or diseased-looking canes.
3. Make the Cuts: Using your sterilized pruning shears or knife, make a cut about 1/4 inch below a node (the point where a leaf or bud grows). This is your bottom cut. Then, make another cut about 1/4 inch above a node, about 8-12 inches above the bottom cut. This is your top cut. The top cut should be slanted to help water run off and prevent rot.
4. Collect Multiple Cuttings: Take several cuttings from different parts of the vine to increase your chances of success. I usually aim for at least 10 cuttings.
5. Bundle and Label: Bundle the cuttings together with twine or rubber bands and label them with the grape variety and the date. This is crucial for keeping track of everything!
6. Store the Cuttings (If Necessary): If you’re not ready to plant the cuttings immediately, you can store them in a cool, humid place, like a refrigerator. Wrap them in damp paper towels and place them in a plastic bag. They can be stored this way for several weeks.
Section 2: Preparing the Cuttings for Rooting
Now that you have your cuttings, it’s time to get them ready for rooting. This involves preparing the ends and applying rooting hormone.
1. Rehydrate the Cuttings: If you’ve stored the cuttings, soak them in water for 24 hours before planting. This will help rehydrate them and give them a good start.
2. Prepare the Bottom End: Make a fresh cut at the bottom of the cutting, just below a node. You can also gently scrape the bark on the bottom inch of the cutting to encourage root formation.
3. Apply Rooting Hormone (Optional): Dip the bottom inch of the cutting into rooting hormone powder. Tap off any excess powder. If you’re using liquid rooting hormone, follow the instructions on the label. While optional, I’ve found that rooting hormone significantly increases the success rate, so I highly recommend it.
4. Prepare the Planting Pots: Fill your pots with the well-draining potting mix. Moisten the mix thoroughly before planting.
Section 3: Planting the Cuttings
This is where the magic happens! Planting the cuttings correctly is essential for successful rooting.
1. Make a Hole: Use a pencil or your finger to make a hole in the potting mix, deep enough to accommodate the bottom half of the cutting.
2. Plant the Cutting: Gently insert the cutting into the hole, making sure the bottom node is buried in the soil.
3. Firm the Soil: Gently firm the soil around the cutting to ensure good contact.
4. Water Gently: Water the cutting gently with a watering can or spray bottle. Avoid overwatering, as this can lead to rot.
5. Create a Humid Environment (Optional): Place a plastic bag over the pot or use a humidity dome to create a humid environment. This will help prevent the cutting from drying out. Make sure to vent the bag or dome occasionally to prevent mold growth.
Section 4: Caring for the Cuttings
Patience is key here! It can take several weeks or even months for the cuttings to root. Consistent care is essential during this time.
1. Provide Indirect Light: Place the pots in a location with bright, indirect light. Avoid direct sunlight, as this can scorch the cuttings.
2. Maintain Moisture: Keep the potting mix consistently moist, but not soggy. Water when the top inch of soil feels dry to the touch.
3. Monitor Humidity: If you’re using a plastic bag or humidity dome, monitor the humidity levels regularly. Vent the bag or dome occasionally to prevent mold growth.
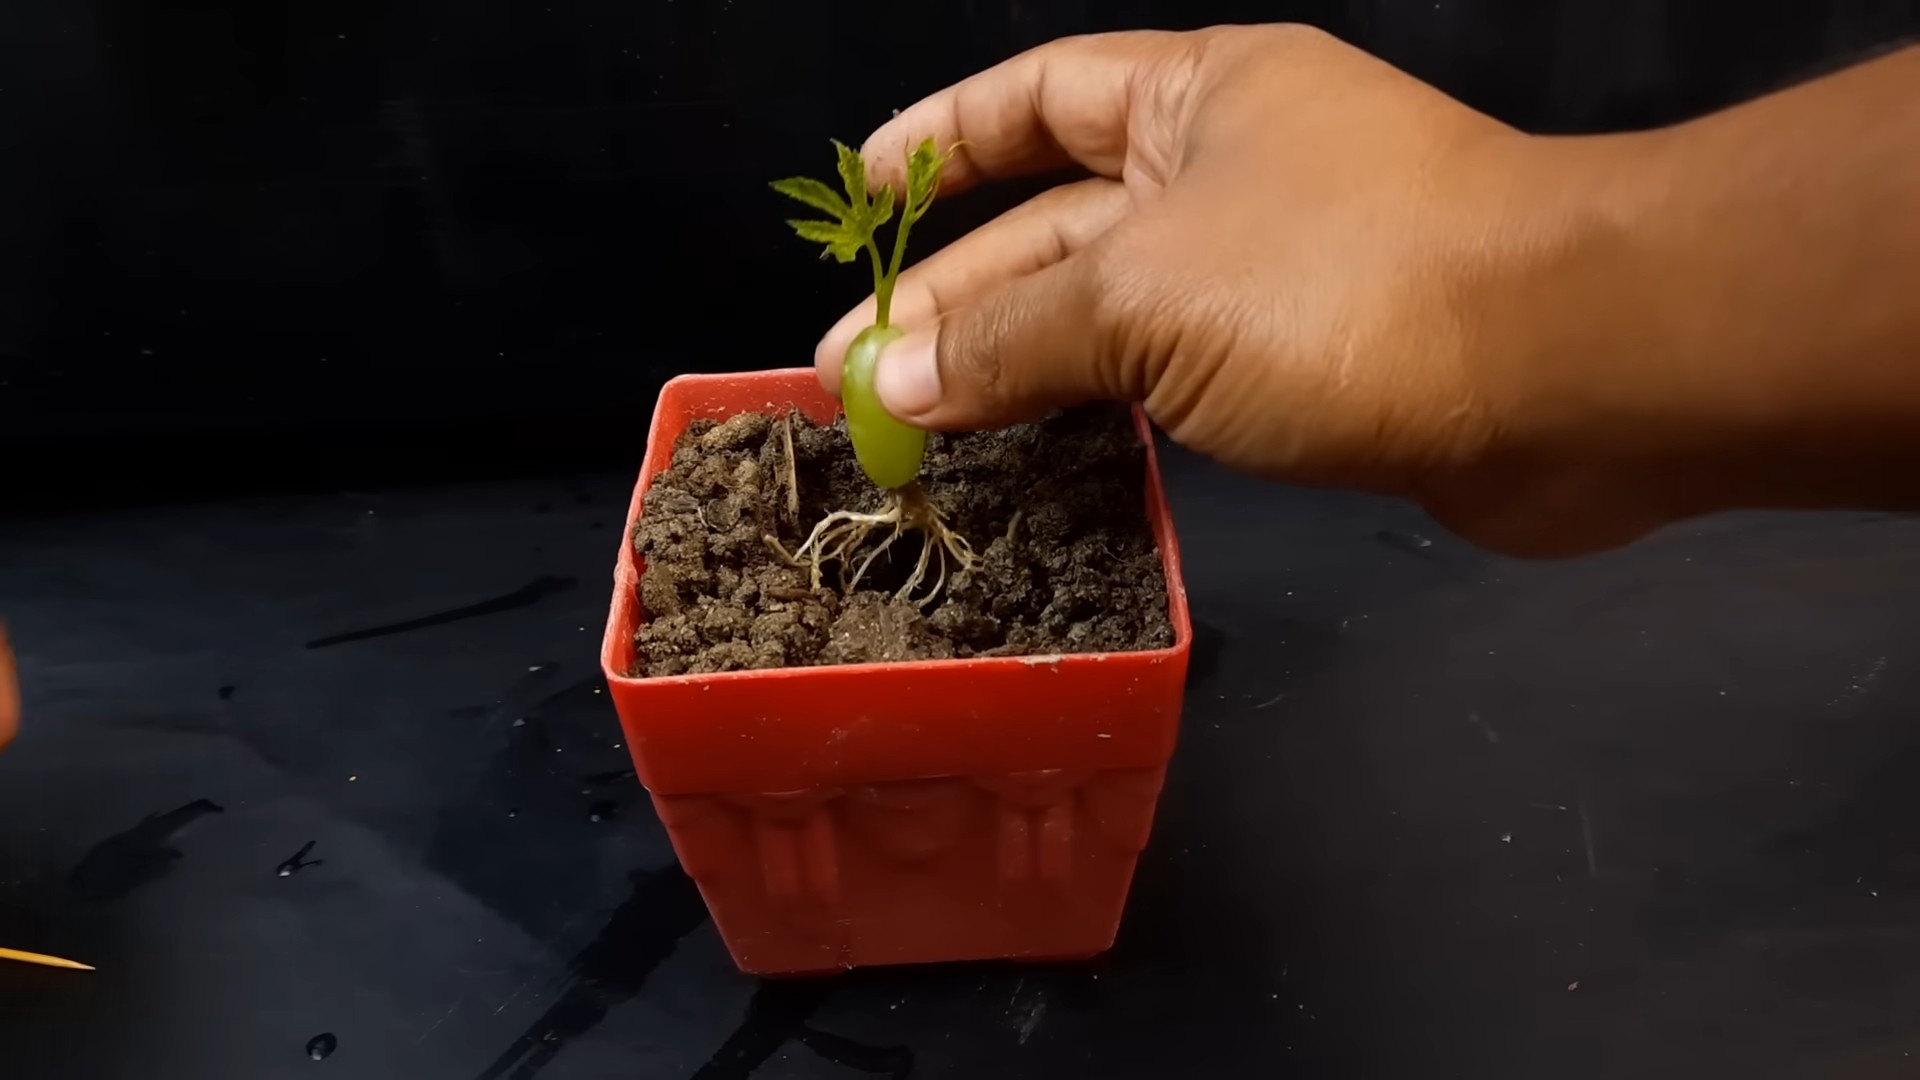
4. Check for Rooting: After a few weeks, gently tug on the cutting to check for resistance. If you feel resistance, it means roots have started to form. You can also gently dig around the base of the cutting to check for roots.
5. Remove Humidity Cover Gradually: Once the cuttings have rooted, gradually remove the plastic bag or humidity dome over a period of several days to acclimate the plants to lower humidity levels.
Section 5: Transplanting Your Rooted Grapevines
Congratulations! You’ve successfully rooted your grapevine cuttings. Now it’s time to transplant them into larger pots or directly into the ground.
1. Choose a Location: Select a sunny location with well-draining soil. Grapevines need at least 6-8 hours of sunlight per day.
2. Prepare the Soil: Amend the soil with compost or other organic matter to improve drainage and fertility.
3. Dig a Hole: Dig a hole that is slightly larger than the root ball of the grapevine.
4. Remove the Grapevine from the Pot: Gently remove the grapevine from its pot, being careful not to damage the roots.
5. Plant the Grapevine: Place the grapevine in the hole and backfill with soil. Firm the soil around the base of the plant.
6. Water Thoroughly: Water the grapevine thoroughly after planting.
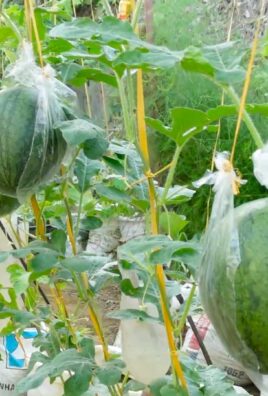
7. Provide Support: Grapevines need support to grow properly. Install a trellis or stake near the plant.
8. Mulch: Apply a layer of mulch around the base of the plant to help retain moisture and suppress weeds.
Section 6: Ongoing Care
Your grapevines will need ongoing care to thrive and produce delicious grapes.
1. Watering: Water regularly, especially during dry periods. Grapevines need about 1 inch of water per week.
2. Fertilizing: Fertilize in the spring with a balanced fertilizer. Follow the instructions on the fertilizer label.
3. Pruning: Pruning is essential for grape production. Prune your grapevines in late winter or early spring, before the buds start to swell. There are different pruning methods depending on the grape variety and the desired training system. Research the best pruning method for your grapevines.
4. Pest and Disease Control: Monitor your grapevines regularly for pests and diseases. Take action promptly to prevent problems from spreading.
5. Training: Train your grapevines to grow on a trellis or other support system. This will help improve air circulation and sunlight exposure.
Troubleshooting
Even with the best care, you might encounter some challenges along the way. Here
Conclusion
So, there you have it! Mastering grapevine propagation DIY isn’t just about saving money; it’s about connecting with the land, understanding the life cycle of your vines, and cultivating a deeper appreciation for the fruits (or wines!) they produce. This method, while requiring patience, offers a rewarding experience that mass-produced vines simply can’t replicate. Imagine the satisfaction of nurturing a vine from a simple cutting, knowing you played an integral role in its growth and eventual bounty.
This DIY approach allows for unparalleled control over the health and genetic lineage of your vineyard. You can select cuttings from your strongest, most disease-resistant, and best-producing vines, ensuring that future generations inherit those desirable traits. This is particularly valuable if you’re aiming for specific flavor profiles or characteristics in your grapes.
Beyond the practical benefits, propagating your own grapevines opens up a world of experimentation. Feel free to explore different rooting mediums – perhaps a blend of perlite and vermiculite, or even a well-draining potting mix amended with compost. Consider experimenting with different rooting hormones to see which yields the best results for your specific grape variety. You could even try propagating in water, although this method often requires more careful monitoring to prevent rot.
Another exciting variation is grafting. Once your propagated vines have established a strong root system, you can graft them onto different rootstocks known for their resistance to specific soil-borne diseases or pests. This allows you to combine the desirable fruit characteristics of one variety with the robust root system of another, creating a truly resilient and productive vine.
Don’t be intimidated by the process. While it may seem daunting at first, grapevine propagation DIY is surprisingly accessible with a little patience and attention to detail. The key is to provide the cuttings with the right environment – consistent moisture, adequate warmth, and protection from direct sunlight.
We wholeheartedly encourage you to give this DIY trick a try. It’s a fantastic way to expand your vineyard, preserve your favorite grape varieties, and deepen your connection with the natural world. And most importantly, don’t forget to share your experiences! We’d love to hear about your successes, challenges, and any variations you’ve discovered along the way. Post your photos, tips, and questions in the comments section below. Let’s build a community of grapevine propagation enthusiasts and learn from each other’s experiences. Happy growing!
Frequently Asked Questions (FAQ)
What is the best time of year to propagate grapevines?
The ideal time for grapevine propagation DIY using hardwood cuttings is late winter or early spring, before the buds begin to swell. This is when the vines are dormant and have stored up energy for the coming growing season. Taking cuttings at this time ensures that they have the best chance of rooting successfully. You can also propagate using softwood cuttings in the summer, but this method requires more attention to humidity and temperature control.
What type of grape cuttings should I use?
Use hardwood cuttings, which are sections of mature, dormant wood from the previous year’s growth. Choose cuttings that are pencil-thick and about 12-18 inches long. Avoid using very thin or very thick cuttings, as they may not root as easily. The cuttings should have at least three to four nodes (buds). Make sure the wood is healthy and free from any signs of disease or pests.
Do I need to use rooting hormone?
While not strictly necessary, using a rooting hormone can significantly increase the success rate of grapevine propagation DIY. Rooting hormones contain auxins, which are plant hormones that stimulate root development. Dip the base of the cutting in rooting hormone powder or liquid before planting it in the rooting medium. Follow the instructions on the rooting hormone product for the correct application method.
What is the best rooting medium for grape cuttings?
A well-draining rooting medium is essential for successful grapevine propagation. A mixture of perlite and vermiculite is a popular choice, as it provides good aeration and moisture retention. You can also use a well-draining potting mix amended with compost or sand. Avoid using heavy clay soils, as they can become waterlogged and lead to root rot.
How often should I water the grape cuttings?
Keep the rooting medium consistently moist, but not waterlogged. Water the cuttings whenever the top inch of the medium feels dry to the touch. Avoid overwatering, as this can lead to root rot. You can also use a humidity dome or plastic bag to create a humid environment around the cuttings, which will help to prevent them from drying out.
How long does it take for grape cuttings to root?
It typically takes several weeks to a few months for grape cuttings to root. The exact time will depend on the grape variety, the rooting medium, the temperature, and the humidity. You can check for root development by gently tugging on the cuttings. If they resist being pulled out of the medium, it means that they have started to root.
How do I care for the rooted grape cuttings?
Once the grape cuttings have rooted, gradually acclimate them to outdoor conditions before transplanting them into their permanent location. Start by placing them in a sheltered spot with indirect sunlight for a few hours each day, gradually increasing the amount of sunlight over a week or two. Water them regularly and fertilize them with a balanced fertilizer.
Can I propagate grapevines from seeds?
While it is possible to propagate grapevines from seeds, it is not the preferred method. Grapevines grown from seeds may not produce fruit that is true to the parent variety. This is because grapevines are often hybrids, and their seeds may not inherit the desired traits. Additionally, grapevines grown from seeds can take several years to produce fruit. Propagation from cuttings is a much faster and more reliable method for preserving the characteristics of a specific grape variety.
What are some common problems with grapevine propagation and how can I avoid them?
Some common problems include root rot (caused by overwatering), fungal diseases (caused by high humidity), and pest infestations. To avoid these problems, use a well-draining rooting medium, avoid overwatering, provide good air circulation, and monitor the cuttings regularly for signs of pests or diseases. You can also use a fungicide or insecticide if necessary.
How do I know if my grapevine propagation DIY was successful?
The best indication of success is the development of new growth. Once the cuttings have rooted and been transplanted, look for new leaves and shoots to emerge. This indicates that the vine is actively growing and has established a healthy root system. If the cuttings remain dormant or show signs of decline, it may indicate that the propagation was not successful.

Leave a Comment