

Grow Artichokes at Home? Absolutely! Imagine stepping into your backyard and harvesting your very own spiky treasures, ready to be steamed, grilled, or dipped in delicious aioli. It’s easier than you think, and this DIY guide will show you exactly how to make it happen, even if you’re a beginner gardener.
Artichokes, with their architectural beauty and delectable flavor, have a rich history. Originating in the Mediterranean, they were prized by the ancient Greeks and Romans, who considered them a delicacy and even attributed medicinal properties to them. Today, growing your own artichokes connects you to that history, bringing a touch of the Mediterranean to your own garden.
Why should you bother with this DIY project? Well, store-bought artichokes can be expensive and sometimes lack the freshness you crave. But more importantly, growing artichokes at home offers a unique sense of accomplishment and allows you to control exactly what goes into your food. Plus, they’re stunning plants that add a touch of drama to any garden. I’m excited to share these simple tricks and hacks that will help you cultivate these amazing plants successfully. Let’s get started!
Growing Artichokes: A DIY Guide to Edible Garden Glory
Okay, artichoke lovers, gather ’round! I’m going to walk you through the surprisingly simple process of growing your own artichokes at home. Forget those pricey grocery store globes – with a little patience and these instructions, you’ll be harvesting your own delicious artichokes in no time.
Choosing Your Artichoke Variety
First things first, let’s talk artichoke varieties. This is important because some are better suited to certain climates than others.
* ‘Green Globe’: This is the classic, most common variety. It’s reliable, produces large, flavorful artichokes, and is relatively easy to grow. I highly recommend this one for beginners.
* ‘Violetta’: If you’re looking for something a little different, ‘Violetta’ artichokes have a beautiful purple hue. They’re also known for their tender hearts.
* ‘Imperial Star’: This variety is a good choice for warmer climates. It produces smaller artichokes but does so earlier in the season.
* ‘Big Heart’: As the name suggests, this variety boasts a large, meaty heart with fewer prickly chokes.
Consider your local climate and growing conditions when making your choice. Check with your local nursery for recommendations on varieties that thrive in your area.
Preparing Your Artichoke Planting Site
Artichokes are hungry plants, so soil preparation is key. They need well-draining soil that’s rich in organic matter.
* Sunlight: Artichokes need at least 6-8 hours of direct sunlight per day. Choose a sunny spot in your garden.
* Soil: Artichokes prefer well-draining soil with a pH between 6.0 and 6.8. Amend your soil with compost or well-rotted manure to improve drainage and fertility.
* Space: Artichokes are large plants, so give them plenty of room to grow. Space plants at least 4 feet apart.
* Drainage: Artichokes hate soggy roots. Make sure your planting site has good drainage. If your soil is heavy clay, consider planting in raised beds.
Starting Artichokes from Seed (Optional, but Rewarding!)
While you can buy artichoke starts (small plants) from a nursery, starting them from seed is a fun and rewarding experience. It does require a bit more patience, though.
1. Start Seeds Indoors: Begin about 8-10 weeks before the last expected frost. Sow seeds 1/2 inch deep in seed-starting trays filled with a good quality seed-starting mix.
2. Provide Warmth and Light: Keep the soil consistently moist and provide warmth (around 70-75°F). A heat mat can be helpful. Once seedlings emerge, provide them with plenty of light. A grow light is ideal, but a sunny windowsill can also work.
3. Transplant Seedlings: Once the seedlings have developed several sets of true leaves and the danger of frost has passed, you can transplant them into larger pots. Harden them off by gradually exposing them to outdoor conditions for a week or two before planting them in the garden.
Planting Artichoke Starts or Seedlings
Whether you’re using starts from a nursery or seedlings you’ve grown yourself, the planting process is the same.
1. Dig a Hole: Dig a hole that’s twice as wide as the root ball and just as deep.
2. Amend the Soil: Mix some compost or well-rotted manure into the soil you removed from the hole.
3. Plant the Artichoke: Gently remove the artichoke from its container and loosen the roots. Place the artichoke in the hole, making sure the top of the root ball is level with the surrounding soil.
4. Backfill and Water: Backfill the hole with the amended soil, gently firming it around the plant. Water thoroughly.
5. Mulch: Apply a layer of mulch around the plant to help retain moisture and suppress weeds.
Caring for Your Artichoke Plants
Once your artichokes are planted, it’s time to provide them with the care they need to thrive.
* Watering: Artichokes need consistent moisture, especially during hot, dry weather. Water deeply whenever the top inch of soil feels dry.
* Fertilizing: Feed your artichokes regularly with a balanced fertilizer. I like to use a slow-release fertilizer in the spring and then supplement with liquid fertilizer every few weeks during the growing season.
* Weeding: Keep the area around your artichokes free of weeds. Weeds compete with artichokes for nutrients and water.
* Pest Control: Artichokes can be susceptible to pests like aphids and snails. Inspect your plants regularly and take action if you see any signs of infestation. Insecticidal soap or horticultural oil can be effective against aphids. Hand-picking snails is often the best approach.
* Pruning: After harvesting the main artichoke bud, you can encourage the plant to produce more side shoots by cutting back the stem. Remove any dead or damaged leaves throughout the growing season.
Overwintering Artichokes
Artichokes are perennials in mild climates (zones 7-10), meaning they can live for several years. In colder climates, you’ll need to take steps to protect them from frost.
* In Mild Climates: Simply cut back the foliage to a few inches above the ground in late fall. Apply a layer of mulch around the plant to protect the roots.
* In Cold Climates: Cut back the foliage and dig up the plant. Store it in a cool, dark, and dry place, such as a garage or basement. Keep the roots slightly moist. In the spring, replant the artichoke in the garden after the danger of frost has passed. Alternatively, you can heavily mulch the plant to try and protect it in the ground, but this is less reliable.
Harvesting Your Artichokes
This is the moment you’ve been waiting for! Knowing when to harvest your artichokes is crucial for getting the best flavor and texture.
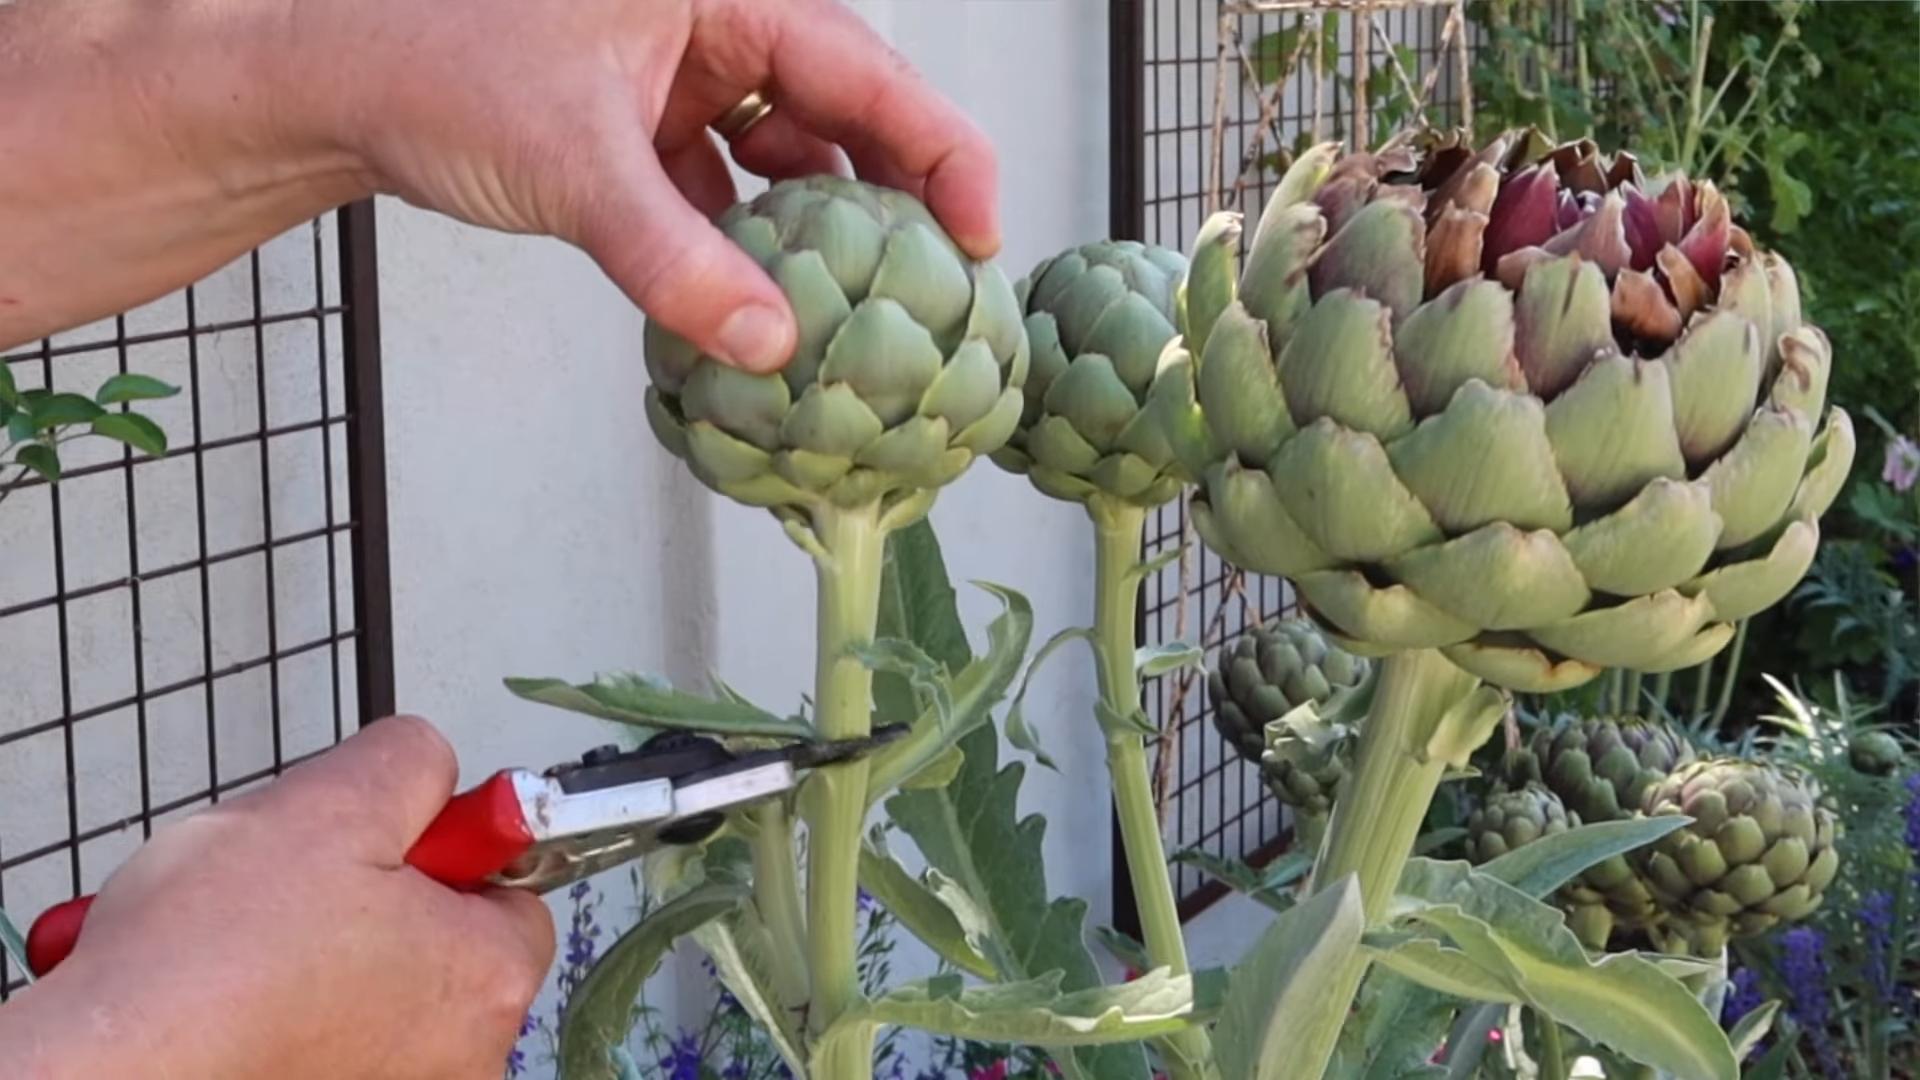
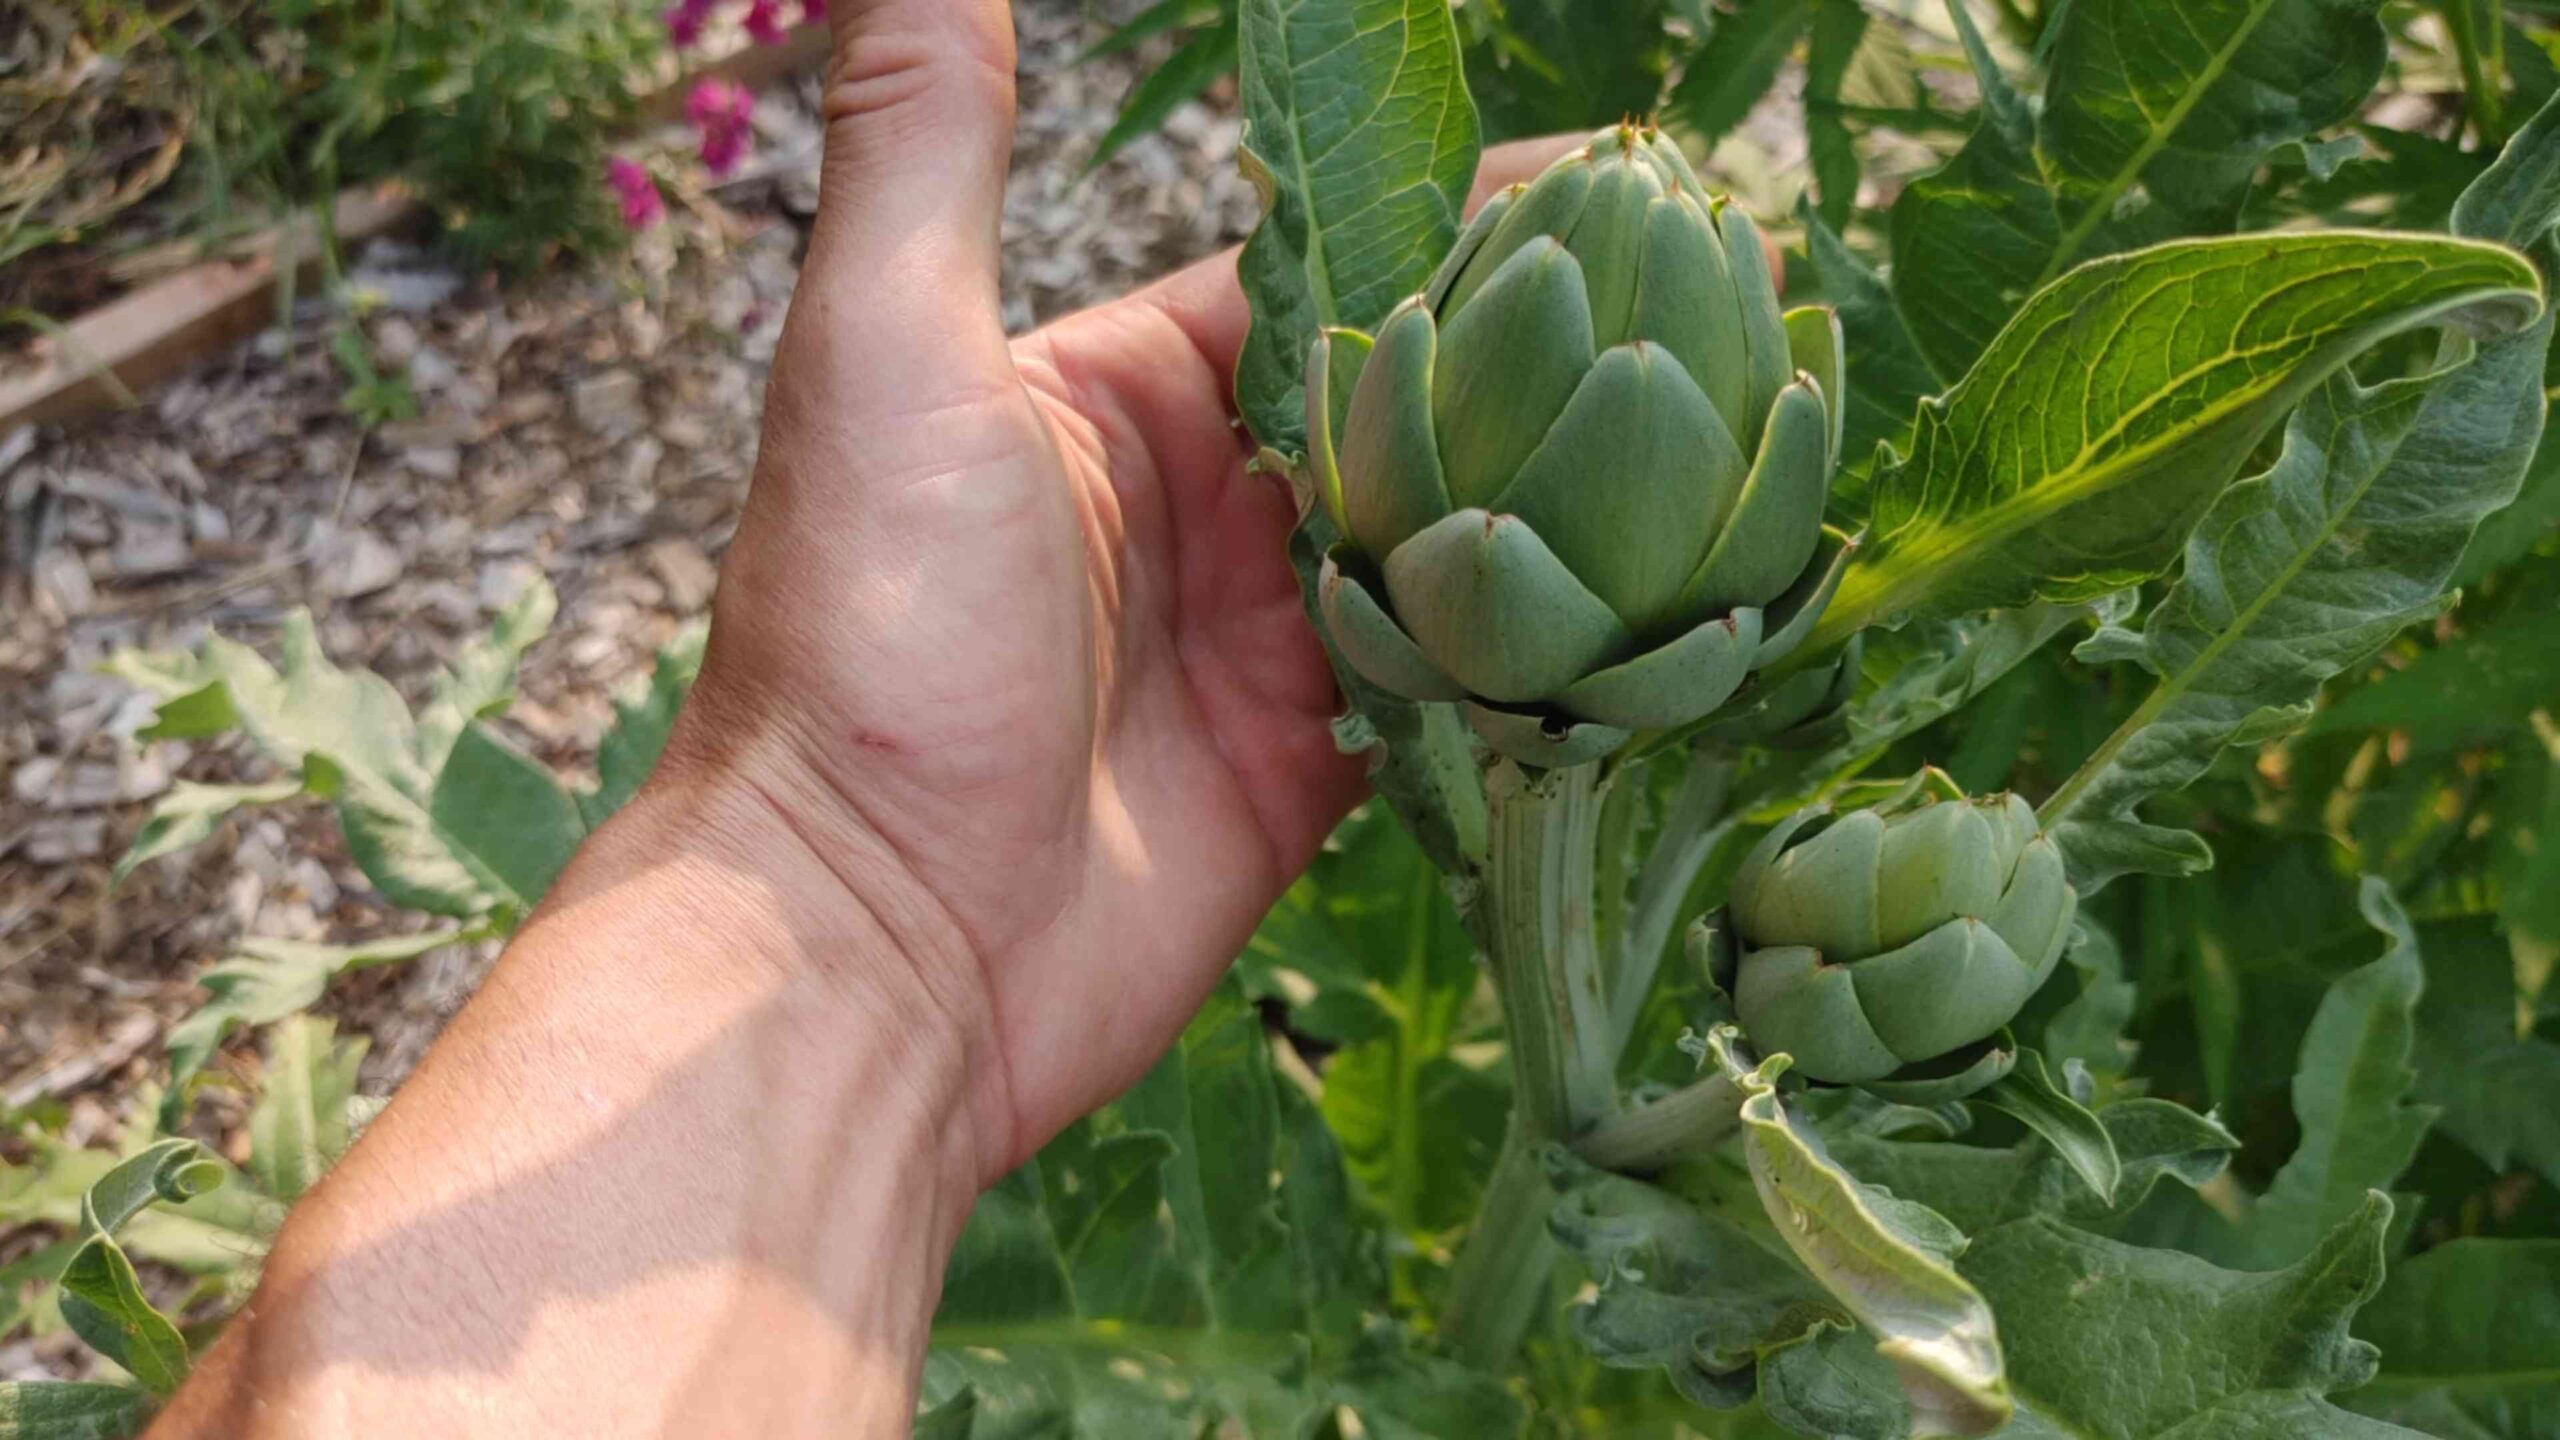
1. Timing: Harvest artichokes when the buds are still tight and firm, before the bracts (the leaves that make up the bud) begin to open. The size of the artichoke will vary depending on the variety, but generally, you should harvest when the main bud is about 3-4 inches in diameter.
2. Cutting: Use a sharp knife to cut the artichoke stem about 2-3 inches below the bud.
3. Side Shoots: After harvesting the main bud, the plant will produce smaller side shoots. These can also be harvested when they reach a suitable size.
Enjoying Your Homegrown Artichokes
Congratulations! You’ve successfully grown your own artichokes. Now it’s time to enjoy the fruits (or rather, the buds) of your labor.
* Steaming: Steaming is the most common way to cook artichokes. Simply steam them for about 20-30 minutes, or until the bracts are tender and can be easily pulled off.
* Boiling: You can also boil artichokes. Place them in a pot of boiling water and cook for about 20-40 minutes, or until tender.
* Grilling: Grilling artichokes adds a smoky flavor. Cut them in half, brush them with olive oil, and grill them over medium heat for about 10-15 minutes per side.
* Dipping Sauces: Serve your cooked artichokes with your favorite dipping sauce. Melted butter, garlic aioli, or a lemon-herb vinaigrette are all delicious options.
Troubleshooting Common Artichoke Problems
Even with the best care, you might encounter some problems while growing artichokes. Here are a few common issues and how to address them:
* Aphids: These tiny pests can suck the sap from artichoke leaves, causing them to become distorted and yellow. Spray with insecticidal soap or horticultural oil.
* Snails and Slugs: These pests can chew holes in artichoke leaves. Hand-pick them or use snail bait.
* Powdery Mildew: This fungal disease can cause a white, powdery coating on artichoke leaves. Improve air circulation and spray with a fungicide.
* Lack of Buds: If your artichoke plant isn’t producing buds, it could be due to a lack of sunlight, water, or nutrients. Make sure your plant is getting enough of all three. Also, artichokes sometimes need a period of cold dormancy to trigger bud production.
Propagating Artichokes
If you want to expand your artichoke patch, you can propagate them from offshoots, also known as “pups.”
1. Identify Offshoots: Look for small plants growing around the base of the main artichoke plant. These are offshoots.
2. Separate Offshoots: In the spring, carefully dig up the offshoots,
Conclusion
So, there you have it! Growing artichokes at home isn’t just a gardening project; it’s an adventure in flavor, a lesson in patience, and a rewarding experience that culminates in the delicious harvest of your very own spiky treasures. We’ve walked through the essential steps, from selecting the right variety and preparing your soil to nurturing your plants and protecting them from pests. Now, it’s time to put that knowledge into action.
Why is this DIY trick a must-try? Because store-bought artichokes simply can’t compare to the freshness and flavor of those you’ve grown yourself. Imagine the satisfaction of serving a plate of steamed artichokes, knowing that you nurtured them from tiny seedlings to mature, edible buds. Beyond the taste, growing artichokes at home is a sustainable practice, reducing your reliance on commercially grown produce and minimizing your carbon footprint. It’s also a fantastic way to connect with nature, learn about plant life cycles, and enjoy the therapeutic benefits of gardening.
Don’t be afraid to experiment with different varieties to find your favorite. Consider ‘Green Globe’ for its classic flavor and large size, or ‘Violetta’ for its beautiful purple hue and slightly sweeter taste. You can also try growing artichokes in containers if you have limited space, ensuring they receive plenty of sunlight and well-draining soil. Another variation to consider is companion planting. Artichokes thrive alongside certain herbs and vegetables, such as rosemary, thyme, and lettuce, which can help deter pests and improve soil health.
Growing artichokes at home is easier than you think! With a little planning and effort, you can enjoy a bountiful harvest of these delicious and nutritious vegetables. We encourage you to give it a try and discover the joys of homegrown artichokes.
But the journey doesn’t end here! We want to hear about your experiences. Did you encounter any challenges along the way? What varieties did you choose, and how did they perform? What are your favorite ways to prepare and enjoy your homegrown artichokes? Share your tips, tricks, and stories in the comments below. Let’s create a community of artichoke enthusiasts and learn from each other’s successes and failures. Your insights could inspire others to embark on their own artichoke-growing adventures.
Remember, gardening is a continuous learning process. There will be ups and downs, successes and setbacks. But with each season, you’ll gain valuable knowledge and experience that will make you a more confident and successful gardener. So, embrace the challenge, get your hands dirty, and enjoy the fruits (or rather, the buds) of your labor. Happy growing! And most importantly, enjoy the delicious reward of your very own, homegrown artichokes.
Frequently Asked Questions (FAQ)
Q: How long does it take to grow artichokes from seed?
A: Growing artichokes from seed can be a bit of a longer process compared to starting with transplants. Generally, it takes about 150 to 180 days from seed to harvest. This includes the time it takes for the seeds to germinate, the seedlings to develop, and the plants to mature and produce edible buds. To get a head start, it’s recommended to start the seeds indoors about 8-10 weeks before the last expected frost. This will give your plants a good head start and allow them to establish themselves before being transplanted outdoors. Keep in mind that artichokes are perennials in warmer climates (zones 7-10), so if you live in one of these zones, you can expect your plants to produce for several years. In colder climates, they are often grown as annuals.
Q: What kind of soil is best for growing artichokes?
A: Artichokes thrive in well-draining, fertile soil that is rich in organic matter. The ideal soil pH is between 6.0 and 7.0. Before planting, amend your soil with compost, aged manure, or other organic materials to improve its fertility and drainage. If your soil is heavy clay, consider adding sand or perlite to improve drainage. Artichokes are heavy feeders, so it’s also a good idea to incorporate a slow-release fertilizer into the soil at planting time. Regular soil testing can help you determine if your soil is lacking any essential nutrients.
Q: How often should I water my artichoke plants?
A: Artichokes need consistent moisture, especially during hot, dry weather. Water deeply and regularly, aiming to keep the soil consistently moist but not waterlogged. The frequency of watering will depend on your climate, soil type, and the size of your plants. As a general rule, water when the top inch of soil feels dry to the touch. During periods of drought, you may need to water more frequently. Mulching around your plants can help retain moisture in the soil and reduce the need for frequent watering. Avoid overhead watering, as this can increase the risk of fungal diseases.
Q: How do I protect my artichoke plants from pests and diseases?
A: Artichokes can be susceptible to a few common pests and diseases. Aphids, snails, and slugs are common pests that can damage the leaves and buds. Handpicking, using insecticidal soap, or applying diatomaceous earth can help control these pests. Artichoke plume moth is another pest that can burrow into the buds and cause damage. Regularly inspect your plants for signs of infestation and take action promptly. Fungal diseases, such as powdery mildew and botrytis blight, can also affect artichokes, especially in humid conditions. Ensure good air circulation around your plants, avoid overhead watering, and apply a fungicide if necessary. Crop rotation and choosing disease-resistant varieties can also help prevent disease problems.
Q: When is the best time to harvest artichokes?
A: The best time to harvest artichokes is when the buds are still tight and firm, but have reached their mature size. The size of the bud will vary depending on the variety, but generally, you should harvest when the bud is about 3-4 inches in diameter. The bracts (the outer leaves of the bud) should be tightly closed and not starting to open or spread apart. To harvest, use a sharp knife to cut the stem about 2-3 inches below the base of the bud. Harvest in the morning when the plants are cool and hydrated. Regular harvesting will encourage the plant to produce more buds.
Q: Can I grow artichokes in containers?
A: Yes, you can grow artichokes in containers, but you’ll need to choose a large container (at least 20 gallons) to accommodate their root system. Select a well-draining potting mix and ensure the container has drainage holes. Place the container in a sunny location that receives at least 6-8 hours of sunlight per day. Water regularly and fertilize every few weeks with a balanced fertilizer. Container-grown artichokes may need more frequent watering and fertilization than those grown in the ground. In colder climates, you can move the containers indoors during the winter to protect the plants from frost.
Q: How do I overwinter artichoke plants in cold climates?
A: In colder climates (zones 6 and below), artichokes are often grown as annuals because they are not reliably winter hardy. However, you can try to overwinter them by cutting back the foliage to about 6 inches above the ground after the first frost. Mulch heavily around the base of the plant with straw, leaves, or other organic materials to insulate the roots. You can also cover the plants with a burlap sack or a cold frame for added protection. In very cold climates, you may need to dig up the plants and store them in a cool, dark place, such as a garage or basement, until spring. Replant them outdoors after the last frost.
Q: Are artichoke leaves edible?
A: While the heart of the artichoke is the most prized part, the base of the bracts (the outer leaves) is also edible. To eat the bracts, pull them off the artichoke and dip the fleshy base in melted butter, aioli, or your favorite dipping sauce. Scrape the flesh off the bract with your teeth and discard the remaining fibrous part. The inner leaves are generally too tough to eat.
Q: What are the health benefits of eating artichokes?
A: Artichokes are a nutritious vegetable that is rich in fiber, vitamins, and minerals. They are a good source of vitamin C, vitamin K, folate, and potassium. Artichokes also contain antioxidants, which can help protect against cell damage. Studies have shown that artichokes may help lower cholesterol levels, improve liver function, and aid in digestion. They are also a low-calorie food, making them a healthy addition to any diet.


Leave a Comment