

Grow Chili Peppers like a pro, even if you think you have a “brown thumb”! Have you ever dreamed of adding a fiery kick to your meals with homegrown chili peppers, but felt intimidated by the process? I get it! Many people believe growing these spicy delights is only for seasoned gardeners, but I’m here to tell you that’s simply not true. This DIY guide will unlock the secrets to cultivating your own vibrant chili pepper plants, regardless of your experience level.
Chili peppers have a rich history, dating back thousands of years in the Americas. They were not only a staple food source but also held significant cultural and medicinal value. From ancient Aztec rituals to modern-day culinary creations, chili peppers have always played a vital role in human history. Now, you can be a part of that story by growing your own!
Why should you embark on this chili-growing adventure? Because fresh, homegrown chili peppers offer unparalleled flavor and satisfaction. Plus, you’ll know exactly where your food comes from and how it was grown. Imagine the joy of harvesting your own peppers and using them to create delicious salsas, sauces, and other culinary masterpieces. This DIY project is not just about growing plants; it’s about connecting with nature, enhancing your cooking, and adding a touch of spice to your life. So, let’s dive in and learn how to grow chili peppers successfully, with these simple and effective DIY tricks!
Growing Chili Peppers: From Seed to Spicy Harvest!
Hey there, fellow spice enthusiasts! Ever dreamt of having a constant supply of fiery chili peppers right at your fingertips? Well, you’ve come to the right place! I’m going to walk you through everything you need to know to successfully grow chili peppers, from starting seeds indoors to harvesting your very own spicy bounty. Get ready to turn up the heat in your garden and your kitchen!
Choosing Your Chili Pepper Varieties
Before we dive into the nitty-gritty, let’s talk about choosing the right chili peppers for you. The world of chili peppers is vast and varied, ranging from mild and sweet to face-meltingly hot. Consider your spice tolerance and what you plan to use the peppers for.
Here are a few popular options to get you started:
* **Bell Peppers:** (Capsicum annuum) Technically a chili pepper, but with zero heat! Great for stuffing, salads, and adding color to dishes.
* **Jalapeños:** (Capsicum annuum) A classic medium-heat pepper, perfect for nachos, salsas, and pickling.
* **Serranos:** (Capsicum annuum) A bit hotter than jalapeños, with a bright, grassy flavor. Excellent for salsas and hot sauces.
* **Cayenne Peppers:** (Capsicum annuum) A versatile hot pepper, often dried and ground into powder. Adds a kick to soups, stews, and sauces.
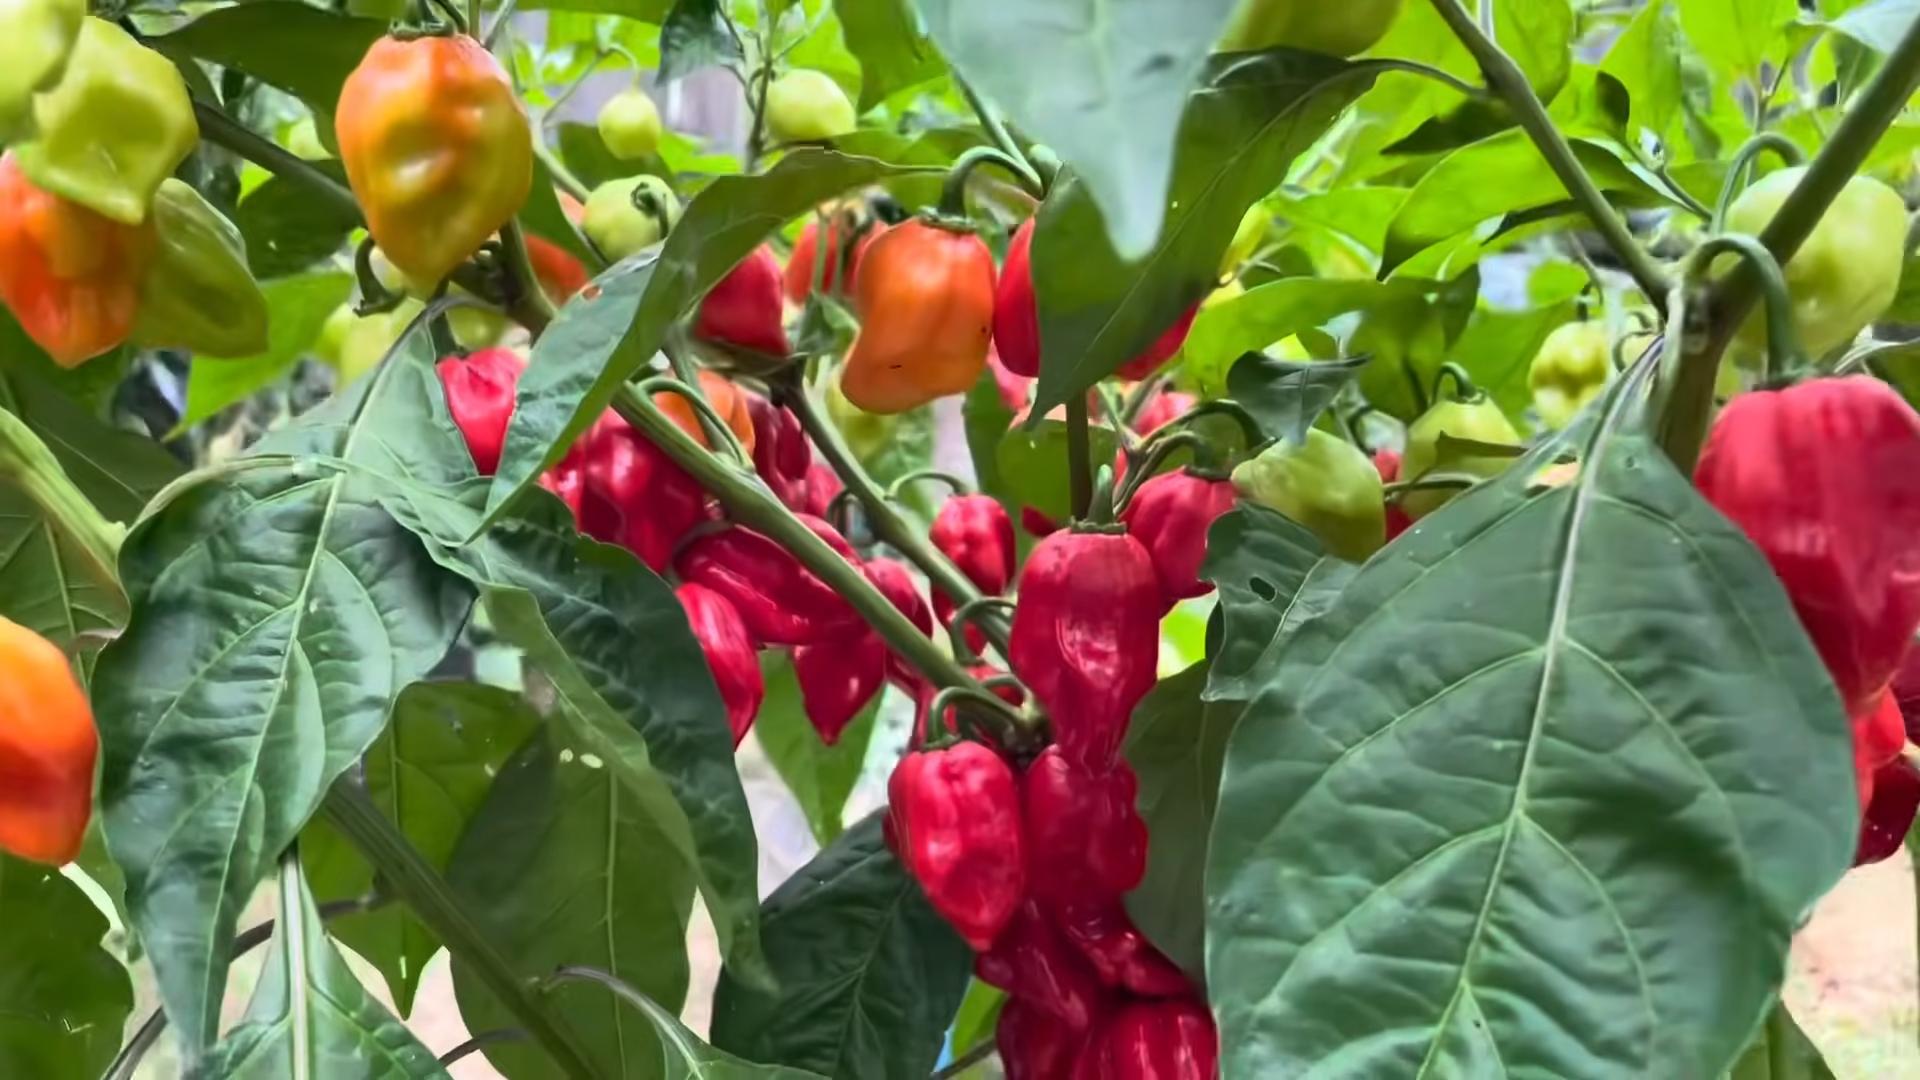
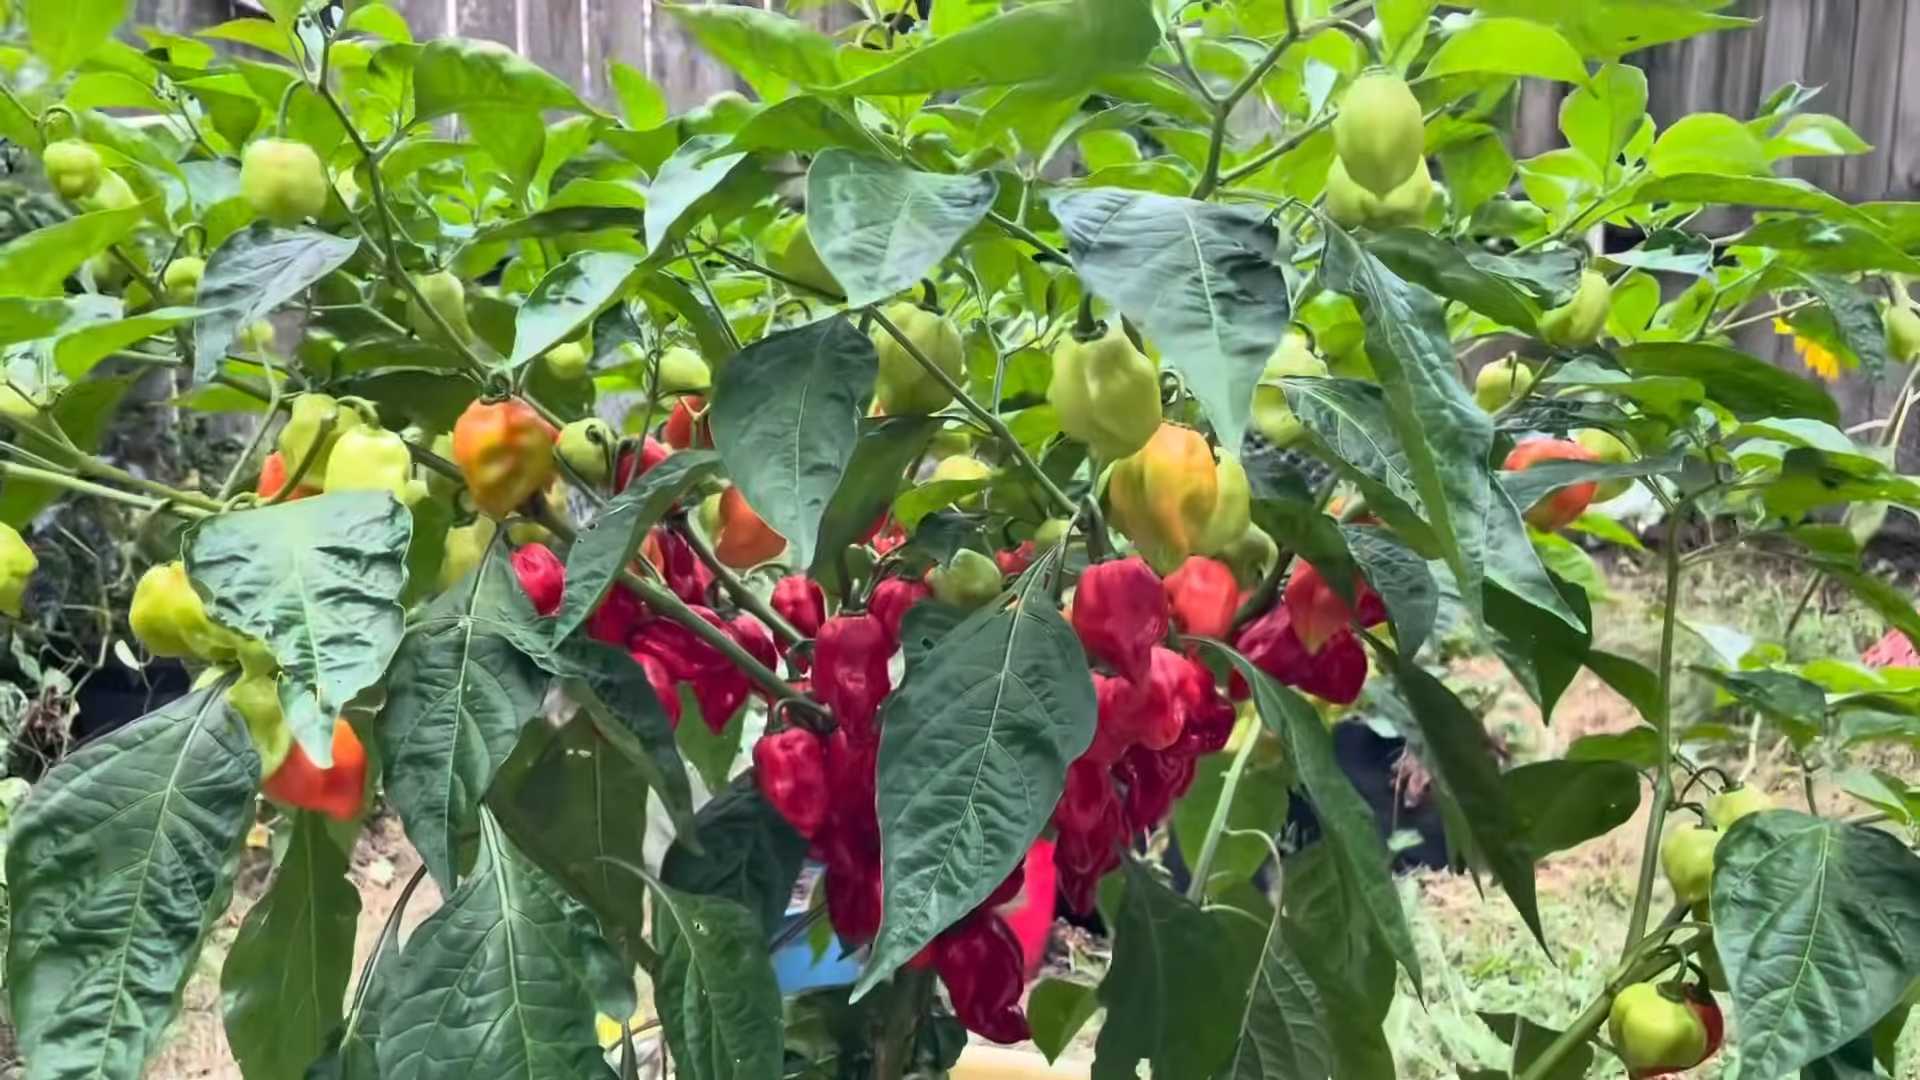
* **Habaneros:** (Capsicum chinense) Now we’re talking serious heat! Fruity and floral, but packing a punch. Use sparingly in salsas and hot sauces.
* **Ghost Peppers (Bhut Jolokia):** (Capsicum chinense) Extremely hot! Handle with care. Only for the truly adventurous chili lover.
* **Scotch Bonnets:** (Capsicum chinense) Similar heat level to habaneros, with a distinct fruity flavor. Popular in Caribbean cuisine.
Once you’ve chosen your varieties, it’s time to gather your supplies!
Materials You’ll Need
* **Chili pepper seeds:** Purchase from a reputable seed supplier.
* **Seed starting trays or small pots:** I prefer using seed starting trays with a humidity dome.
* **Seed starting mix:** A light, well-draining mix specifically formulated for seedlings.
* **Grow lights (optional but recommended):** Provide consistent light for strong seedling growth.
* **Heat mat (optional but recommended):** Helps to maintain optimal soil temperature for germination.
* **Watering can or spray bottle:** For gentle watering.
* **Larger pots (for transplanting):** Choose pots that are at least 5 gallons in size.
* **Potting mix:** A well-draining mix suitable for mature plants.
* **Fertilizer:** A balanced fertilizer for seedlings and a fertilizer high in phosphorus for flowering and fruiting.
* **Gardening gloves:** To protect your hands.
* **Trowel or small shovel:** For transplanting.
* **Stakes or cages (optional):** To support taller pepper plants.
Starting Your Chili Pepper Seeds Indoors
Chili peppers have a long growing season, so starting them indoors is essential, especially if you live in a cooler climate. I usually start my seeds about 8-10 weeks before the last expected frost.
Step 1: Preparing Your Seed Starting Trays
1. Moisten the seed starting mix with water until it’s damp but not soggy.
2. Fill the seed starting trays or small pots with the moistened mix.
3. Gently press the mix down to remove any air pockets.
Step 2: Sowing the Seeds
1. Make a small indentation (about 1/4 inch deep) in the center of each cell or pot.
2. Place 2-3 seeds in each indentation. This increases the chances of at least one seed germinating.
3. Cover the seeds with a thin layer of seed starting mix.
4. Gently water the trays or pots using a spray bottle to avoid disturbing the seeds.
Step 3: Creating the Ideal Germination Environment
1. Place the seed starting trays on a heat mat to maintain a soil temperature of around 80-85°F (27-29°C). This is crucial for successful germination.
2. Cover the trays with a humidity dome to create a moist environment.
3. Place the trays under grow lights, positioning the lights a few inches above the trays. If you don’t have grow lights, place the trays in a warm, sunny location.
4. Monitor the moisture level of the soil regularly and water as needed to keep it consistently damp.
Step 4: Germination and Seedling Care
1. Chili pepper seeds can take anywhere from 7 to 21 days to germinate, depending on the variety and temperature. Be patient!
2. Once the seedlings emerge, remove the humidity dome and continue to provide them with consistent light and moisture.
3. Thin the seedlings to one plant per cell or pot once they have developed their first true leaves (the leaves that appear after the initial seed leaves). Snip off the weaker seedlings at the soil line.
4. Fertilize the seedlings with a balanced liquid fertilizer diluted to half strength every 1-2 weeks.
Transplanting Your Chili Pepper Seedlings
Once the danger of frost has passed and the soil has warmed up, it’s time to transplant your chili pepper seedlings outdoors.
Step 1: Hardening Off the Seedlings
Before transplanting, you need to “harden off” the seedlings to acclimate them to outdoor conditions. This process gradually exposes them to sunlight, wind, and temperature fluctuations.
1. Start by placing the seedlings outdoors in a sheltered location for a few hours each day, gradually increasing the amount of time they spend outside over the course of a week or two.
2. Protect the seedlings from strong winds and direct sunlight during the hardening-off process.
Step 2: Preparing the Planting Site
1. Choose a sunny location that receives at least 6-8 hours of direct sunlight per day.
2. Prepare the soil by amending it with compost or other organic matter to improve drainage and fertility.
3. If you’re growing in containers, choose pots that are at least 5 gallons in size and fill them with a well-draining potting mix.
Step 3: Transplanting the Seedlings
1. Dig a hole that is slightly larger than the root ball of the seedling.
2. Gently remove the seedling from its cell or pot, being careful not to damage the roots.
3. Place the seedling in the hole and backfill with soil, gently firming it around the base of the plant.
4. Water the newly transplanted seedlings thoroughly.
5. Space the plants according to the mature size of the variety you are growing. Generally, allow 18-24 inches between plants.
Caring for Your Chili Pepper Plants
Now that your chili pepper plants are in the ground, it’s time to provide them with the care they need to thrive.
Watering
1. Water your chili pepper plants regularly, especially during hot, dry weather.
2. Water deeply and less frequently, allowing the soil to dry out slightly between waterings.
3. Avoid overhead watering, as this can promote fungal diseases.
Fertilizing
1. Fertilize your chili pepper plants every 2-3 weeks with a fertilizer high in phosphorus to encourage flowering and fruiting.
2. Follow the instructions on the fertilizer label carefully.
Pruning
1. Pruning is not essential for chili pepper plants, but it can help to improve air circulation and promote bushier growth.
2. Remove any dead or yellowing leaves.
3. Pinch off the tips of the branches to encourage branching.
Pest and Disease Control
1. Monitor your chili pepper plants regularly for pests and diseases.
2. Common pests include aphids, spider mites, and whiteflies.
3. Common diseases include fungal diseases such as powdery mildew and blossom end rot.
4. Use organic pest control methods such as insecticidal soap or neem oil to control pests.
5. Provide good air circulation and avoid overhead watering to prevent fungal diseases.
6. Blossom end rot is caused by a calcium deficiency. Ensure adequate calcium levels in the soil and water consistently.
Supporting Your Plants
1. Taller chili pepper varieties may need to be supported with stakes or cages to prevent them from falling over.
2. Insert the stakes or cages into the ground near the plants and tie the stems to the supports as needed.
Harvesting Your Chili Peppers
The moment you’ve been waiting for! Harvesting your own chili peppers is incredibly rewarding.
When to Harvest
1. Chili peppers are typically ready to harvest when they have reached their mature color and size.
2. The color will vary depending on the variety.
3. You can harvest chili peppers at any stage of
Conclusion
So, there you have it! Growing chili peppers at home, while it might seem daunting at first, is incredibly rewarding and surprisingly simple with this DIY trick. We’ve walked you through the process, highlighting the key steps to ensure your success. But why is this method a must-try? It’s about more than just saving money (though that’s a definite perk!). It’s about connecting with your food, understanding its journey from seed to table, and enjoying the unparalleled flavor of homegrown produce.
Think about it: store-bought chili peppers, while convenient, often lack the vibrant flavor and intense heat that comes from peppers nurtured in your own backyard. You control the growing conditions, ensuring optimal sunlight, water, and nutrients. You can choose the exact varieties you want, from mild jalapeños to scorching habaneros, tailoring your harvest to your specific tastes. And, perhaps most importantly, you know exactly what’s going into your food – no mystery chemicals or pesticides.
This DIY approach to growing chili peppers also empowers you to experiment. Consider these variations:
* Hydroponic Chili Peppers: For those with limited space or challenging soil conditions, hydroponics offers a fantastic alternative. You can grow chili peppers indoors, year-round, using a nutrient-rich water solution.
* Container Gardening: If you don’t have a garden, don’t worry! Chili peppers thrive in containers. Choose pots that are at least 5 gallons in size and ensure they have good drainage.
* Companion Planting: Enhance your chili pepper growth by planting them alongside beneficial companions like basil, carrots, or onions. These plants can deter pests and improve soil health.
* Different Varieties: Don’t limit yourself to just one type of chili pepper! Explore the vast world of chili peppers and experiment with different varieties to discover your favorites. From the sweet and fruity Scotch Bonnet to the fiery Ghost Pepper, there’s a chili pepper out there for everyone.
* Fermenting Your Harvest: Once you’ve harvested your bounty, consider fermenting some of your chili peppers to create delicious and complex hot sauces. Fermentation not only preserves your peppers but also enhances their flavor and adds beneficial probiotics.
Growing chili peppers is more than just a gardening project; it’s an adventure. It’s a chance to learn, to experiment, and to connect with nature. It’s a way to add a little spice to your life, both literally and figuratively.
We wholeheartedly encourage you to give this DIY trick a try. Don’t be afraid to get your hands dirty, to make mistakes, and to learn along the way. The satisfaction of harvesting your own chili peppers is truly unmatched.
And once you’ve experienced the joy of homegrown chili peppers, we want to hear about it! Share your experiences, your tips, and your photos with us in the comments below. Let’s create a community of chili pepper enthusiasts and inspire others to embark on this rewarding journey. What varieties did you grow? What challenges did you face? What delicious recipes did you create with your harvest? We can’t wait to hear your stories! Happy growing!
FAQ
Frequently Asked Questions About Growing Chili Peppers
Q: What is the best time of year to start growing chili peppers?
A: The best time to start growing chili peppers depends on your climate. In general, you should start your seeds indoors 6-8 weeks before the last expected frost. This allows the seedlings to develop a strong root system before being transplanted outdoors. If you live in a warmer climate with a longer growing season, you can start your seeds directly outdoors after the last frost. However, starting indoors is generally recommended for better control over the growing environment.
Q: What kind of soil is best for growing chili peppers?
A: Chili peppers thrive in well-draining, fertile soil with a slightly acidic pH (around 6.0-6.8). Amend your soil with compost or other organic matter to improve drainage and nutrient content. Avoid heavy clay soils, as they can retain too much water and lead to root rot. A good potting mix specifically formulated for vegetables is also a great option, especially for container gardening.
Q: How much sunlight do chili peppers need?
A: Chili peppers need at least 6-8 hours of direct sunlight per day to thrive. Choose a sunny location in your garden or on your patio where your plants will receive ample sunlight. If you’re growing indoors, supplement with grow lights if necessary. Insufficient sunlight can lead to leggy growth, reduced flowering, and smaller peppers.
Q: How often should I water my chili pepper plants?
A: Water your chili pepper plants regularly, especially during hot and dry weather. The soil should be consistently moist but not waterlogged. Overwatering can lead to root rot, while underwatering can stress the plants and reduce yields. Check the soil moisture regularly by sticking your finger about an inch into the soil. If it feels dry, it’s time to water.
Q: What are some common pests and diseases that affect chili peppers?
A: Common pests that affect chili peppers include aphids, spider mites, whiteflies, and pepper weevils. Diseases include blossom-end rot, fungal leaf spots, and viral diseases. Regularly inspect your plants for signs of pests or diseases. Use organic pest control methods, such as insecticidal soap or neem oil, to control pests. Ensure good air circulation to prevent fungal diseases. Blossom-end rot is often caused by calcium deficiency, so amend your soil with calcium if necessary.
Q: How do I know when my chili peppers are ripe?
A: The color of ripe chili peppers varies depending on the variety. Most chili peppers will turn from green to red, yellow, orange, or brown when ripe. The peppers should also feel firm and slightly waxy to the touch. You can also test the ripeness by tasting a small piece of the pepper. If it has the desired flavor and heat, it’s ready to harvest.
Q: How do I harvest chili peppers?
A: To harvest chili peppers, use a sharp knife or scissors to cut the pepper from the plant, leaving a small stem attached. Avoid pulling the peppers off, as this can damage the plant. Harvest your peppers regularly to encourage continued production.
Q: How can I store my harvested chili peppers?
A: There are several ways to store harvested chili peppers. You can dry them, freeze them, pickle them, or make hot sauce. Drying is a popular method for preserving chili peppers. Simply string the peppers together and hang them in a dry, well-ventilated area until they are completely dry. You can also freeze chili peppers whole or chopped. Pickling and hot sauce are great ways to preserve your harvest and add flavor to your meals.
Q: Can I grow chili peppers indoors?
A: Yes, you can grow chili peppers indoors, especially using the hydroponic method mentioned earlier. Provide them with plenty of light (either natural or artificial), well-draining soil, and regular watering. Choose compact varieties that are well-suited for container gardening.
Q: My chili pepper plants are flowering, but not producing any peppers. What could be the problem?
A: There are several reasons why your chili pepper plants might be flowering but not producing peppers. One common reason is lack of pollination. Chili peppers are self-pollinating, but they may need some help from wind or insects. You can hand-pollinate your plants by gently shaking the flowers or using a small paintbrush to transfer pollen from one flower to another. Other possible causes include extreme temperatures, insufficient sunlight, or nutrient deficiencies.
Q: How do I increase the heat of my chili peppers?
A: The heat of chili peppers is determined by genetics, but you can influence it to some extent through growing conditions. Stressing the plants slightly by withholding water or fertilizer can sometimes increase the heat. Also, allowing the peppers to fully ripen on the plant will generally result in hotter peppers. Remember that the placenta (the white membrane inside the pepper) contains the highest concentration of capsaicin, the compound that causes the heat.
Q: What are some good companion plants for chili peppers?
A: Good companion plants for chili peppers include basil, carrots, onions, garlic, tomatoes, and marigolds. Basil repels pests and improves the flavor of chili peppers. Carrots and onions deter nematodes. Garlic repels aphids and other pests. Tomatoes provide shade and support. Marigolds repel nematodes and other soil pests. Avoid planting chili peppers near fennel or brassicas (such as cabbage and broccoli), as they can inhibit growth.

Leave a Comment